Monday, December 30, 2019

Christmas Scrapbooking with the December Kit

Hello! Karla back today with two cute layouts using the awesome December 2019 Kit featuring the gorgeous Kaisercraft Starry Night collection. I love when the busyness of Christmas settles down and I can relax, get my photos out and enjoy scrapping all those wonderful pics and memories! For these two layouts I'm using some super adorable pics of my niece and nephew. We didn't get to see them in person over the holidays, but it was so nice to get photos and see cute videos of them opening their gifts. I love that the neutrals in this kit allow you to use any photos and add whatever colour you want! For my first layout I chose this sepia toned photo, which I knew would go perfectly with the pops of gold in the kit.


I started off by cutting a piece of the gold foiled poinsettia paper down to 10x10" and layering it on a piece of the black Bazzil cardstock included in the kit. I layered my photo (matted on white) on this black and gold bubbly paper. BTW, I can totally see using this for New Years too!


Next I glued down my matted photo and added a sentiment from the 12x12 sheet of sentiment cut aparts to the left of the layout. I cut one of the ephemera poinsettias included in the kit and added it to the top of the sentiment and then layered on one of the pretty round glass Curio embellishments to create a little cluster.


Next, I cut a tag and layered it above and below the photo and then cut apart a foiled gold ephemera swirl and added it to either side of the tag. The twine included in the kit was such a nice touch to add to the sweet bauble ornaments, and I added the rest of that poinsettia I cut near the top of the tag. 


I added the 'love' sticker from the Christmas Word Thickers add on package under the photo and used a gold marker to colour in the wooden tree from the package of wood flourishes in the kit.


I finished off this layout with a wooden 25 coloured with an ink pad and some shiny sequins from my stash along with some handwritten journaling to document my memories!


For the second layout I created I used the Starry Night Acrylic Stamp Set which is a coordinating add-on you can purchase in the shop. This is the first time I used Kaisercraft stamps and I was really impressed with the quality and how nicely they stamped! I wanted to focus on the bright outfits these two cuties were wearing, and I was really happy with how this turned out.


I started off by layering on two of the patterned branding strips on the top and bottom of a sheet of white Bazzil cardstock from the kit. I then added a strip of sweet gold foiled reindeer from the 12x12 paper full of cut apart border strips. I used a plate and pencil to create a round guide to start stamping my wreath on.


I stamped the evergreen bough stamp roughly around my circle using four different colours of green ink. It's not a perfect circle, but I was totally ok with that. This is handmade after all 😉 I honestly can't wait to use these stamps on some cards for next year too!


Next I used red ink to stamp just the berries from the holly stamp onto the wreath as well as stamp two trees directly on the cardstock. I did stamp on the side of the cardstock that was more smooth than textured and it worked beautifully! I created some basic paper layers with leftover scraps of my paper from the first layout and glued it to the center of the wreath. 


I decided I needed one more accent for my wreath so I grabbed some pink and red inks and simply rubbed them on some white cardstock. 


I stamped over the inked background with the poinsettia stamp and black ink creating a variegated look, which I love! I added some gold stone Nuvo drops to the center of the flower and tucked a banner in from the gold foiled ephemera pack. 


I used the Christmas Word Thickers add on pack, which you can pick up separately in the shop, again to add a title and glued on some sequins from my stash.


I added a wooden tree from the wood flourishes pack in the kit, coloured with a red ink pad, and the gold holly leaves and berries from the Christmas Thickers pack.


If you missed it, you can find the December 2019 Kit Reveal Post HERE with VIDEO where you can see all these beautiful elements close up!


Thanks so much for stopping by! Be sure to head over to the Scrap Shotz Store to check out this beautiful new KIT, and don't forget you can always find new goodies HERE. Hope you all have a very Happy New Years and I'll be back in January for more fun projects using this kit!


Saturday, December 28, 2019

Kaisercraft| Under the Gum Leaves Showcase PT.2

Hello!


Welcome back to the second half of my Kaisercraft Under the Gum Leaves projects, my youngest celebrates his birthday right after Christmas and can I be honest? I decided to use this line because it coordinates with Grandma's jacket perfectly! I have also used the Creative Scrapbooker Magazine December sketch:


I fussy cut the leaves from one of the patterned papers, these are the same leaves I used on all my tags in my previous post. The evergreen bough and floral die-cut are from the Under the Gum Leaves card stock die-cuts. The red accents are Wooden Flourishes which have been sprayed with Dylusions Ink Spray in Postbox Red and, once dry, coated with Sheer Shimmer Stix in Gold and adhered with liquid glue.

To create the title I applied embossing ink through the Altenew Feathered Leaves stencil, coated in Altenew translucent embossing powder** and then heat set. Letters are cut with the Altenew Bold Alpha die**.

This next layout documents a family day trip taken to the Royal Tyrell Museum or as we refer to it: the dinosaur museum.


This layout began with the fussy cut leaves from the "Gum" paper and was also inspired by the November CSM sketch:
After trimming the photos, papers and laying out everything on a sheet of Vicki Boutin foundations paper I felt like something was missing so I dug through my stash and pulled out an old 12x12 Prima stencil and sprayed the pattern with Hickory Smoke distress ink. I then added large patches of color with Ken Oliver Colour Burst powders and water.  After all was dry, I applied texture paste through the same stencil.


The final colour applied was Altenew Grapevine ink** over the texture paste. 


The layout is embellished with fussy cut leaves, flowers and die cuts and journaling handwritten on kraft card stock.

Here is a look at all the products available in this line in the store:


Thanks for stopping by and Happy Holidays!


Thursday, December 26, 2019

Product Showcase: Kaisercraft Under the Gum Leaves

Happy Holidays All!

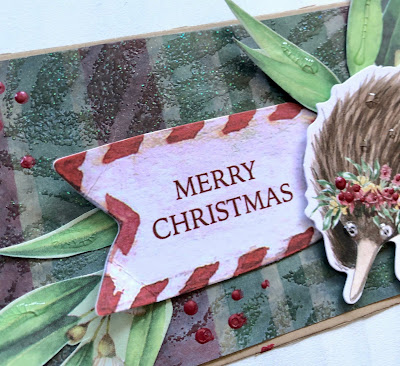
I hope you have been enjoying a wonderful holiday season, Rosie here to share a few projects using the Kaisercraft Under the Gum Leaves line. This is a unique Australian-themed holiday collection, in lovely muted Christmas greens and reds.


The card stock die-cuts contain a number of animals native to Australia so I figured a good way to make use of them was on Christmas gift tags.


I die cut tags from Kraft card stock and a Tim Holtz die from my stash. I then layered patterned paper, fussy cut leaves from one of the patterned papers, the die cut. The sentiment on this tag is from the sticker sheet.


I used the sticker letters to make this sentiment and added some Nuvo Crystal drops.


This sentiment is from the card stock die-cut pack. I added interest to this background by applying embossing ink through the Altenew Feathered Leaves stencil, then heat embossing with Altenew Translucent Pearl embossing powder.


Lastly, I lightly inked it with Black Soot Distress Oxide ink.


All the animal die cuts are adhered with foam adhesive to add dimension.


Autumn Red Nuvo Crystal Drops embellish the sentiment tag and bird die-cut.


I now have gift tags ready for next Christmas! I'll be back with more projects in a few days so stay tuned!

Thanks for stopping in :)


Wednesday, December 25, 2019

Monday, December 23, 2019

Starry Night Cards with the December Kit

Christmas is almost here so it's time to finish up those Christmas cards! The December kit is amazing! It is full of Kaisercraft - Starry Night products. So many fun embellishments from gold foil ephemera to twine to wood veneer. Let's take a look. I made 10 cards in the A2 size.

Card #1
I used a sketch from the October 2019 Page Maps collection. The Curio embellishments were the perfect fit. The papers are from the 6x6 paper pad. The paper pad has a bunch of punch out phrases and trimmings which came in very handy.

Card #2
I used a square punch to make the background from the 6x6 paper pad. The wood veneers fit into each sqaure and some gold paint topped them off. A piece of twine added a focal point.
Card #3
Twine, ephemera and some 6x6 papers.

Card #4
I fussy cut some gold foil flowers from a 6x6 paper. I used some ephemera to top it off. Those corner  pieces are actually the punch outs from one of the embellishments. I used some gold thread from my stash as well.
Card #5
Here I layered a bunch of 6x6 papers. The gold tag is so pretty and topped off with some twine and gold painted wood veneer. 
Card #6
Some more 6x6 papers, gold foil ephemera and twine. The gold dots are from the Thickers letter pack.
Card #7
I used some Stonehenge Bazzill cardstock and 6x6 papers. Wood veneer and gold thread finish it off. 
Card #8
This card uses some 6x6 papers and ephemera.
Card #9
This card uses Kraft Bazzill cardstock layered with 6x6 papers, ephemera and twine.

Card #10
My daughter really wanted to help with the cards so she helped with this one. She chose the papers. I suggested using a punch to back the tag in the center.

Thanks for taking a look! Have a wonderful holiday season! - Carolyn