Monday, September 26, 2022

49 and Market Vintage Artistry Serenity - 4 ways with 1 photo!


Hello! I have been working with 49 AndMarket - Vintage Artistry Serenity. Such a gorgeous collection! I challenged myself to create 4 different layouts for each of their scrapbooks with the same “back to school” photo with this line. I tried to create a different mood in each, with different colors, embellishments, and designs. (I have created links in the store to products I used. Go ahead and click on them!)


The first is for the oldest, who is in Grade 11. Along with the ephemera pieces for layering, I used the 12x12 Sentiment Rub-Ons for my title. I let the Tim Holtz Small Talk speak for me with journaling phrases. I used Distress Oxide in Gathered Twigs to help them blend with the rest of the layout.

For the second layout, I used Distress Oxide Gathered Twigs to stencil some depth in the background. This is another layout that I didn’t want to use feminine embellishments on, so I looked for something different. I found this ladder in the laser cut outs and imagined it symbolizing climbing to the top. Again the Sentiment Rub-Ons were used to create the title. The notebook where I put the journaling and the tag are both chipboard pieces and were inked along the edges with the Gathered Twigs.

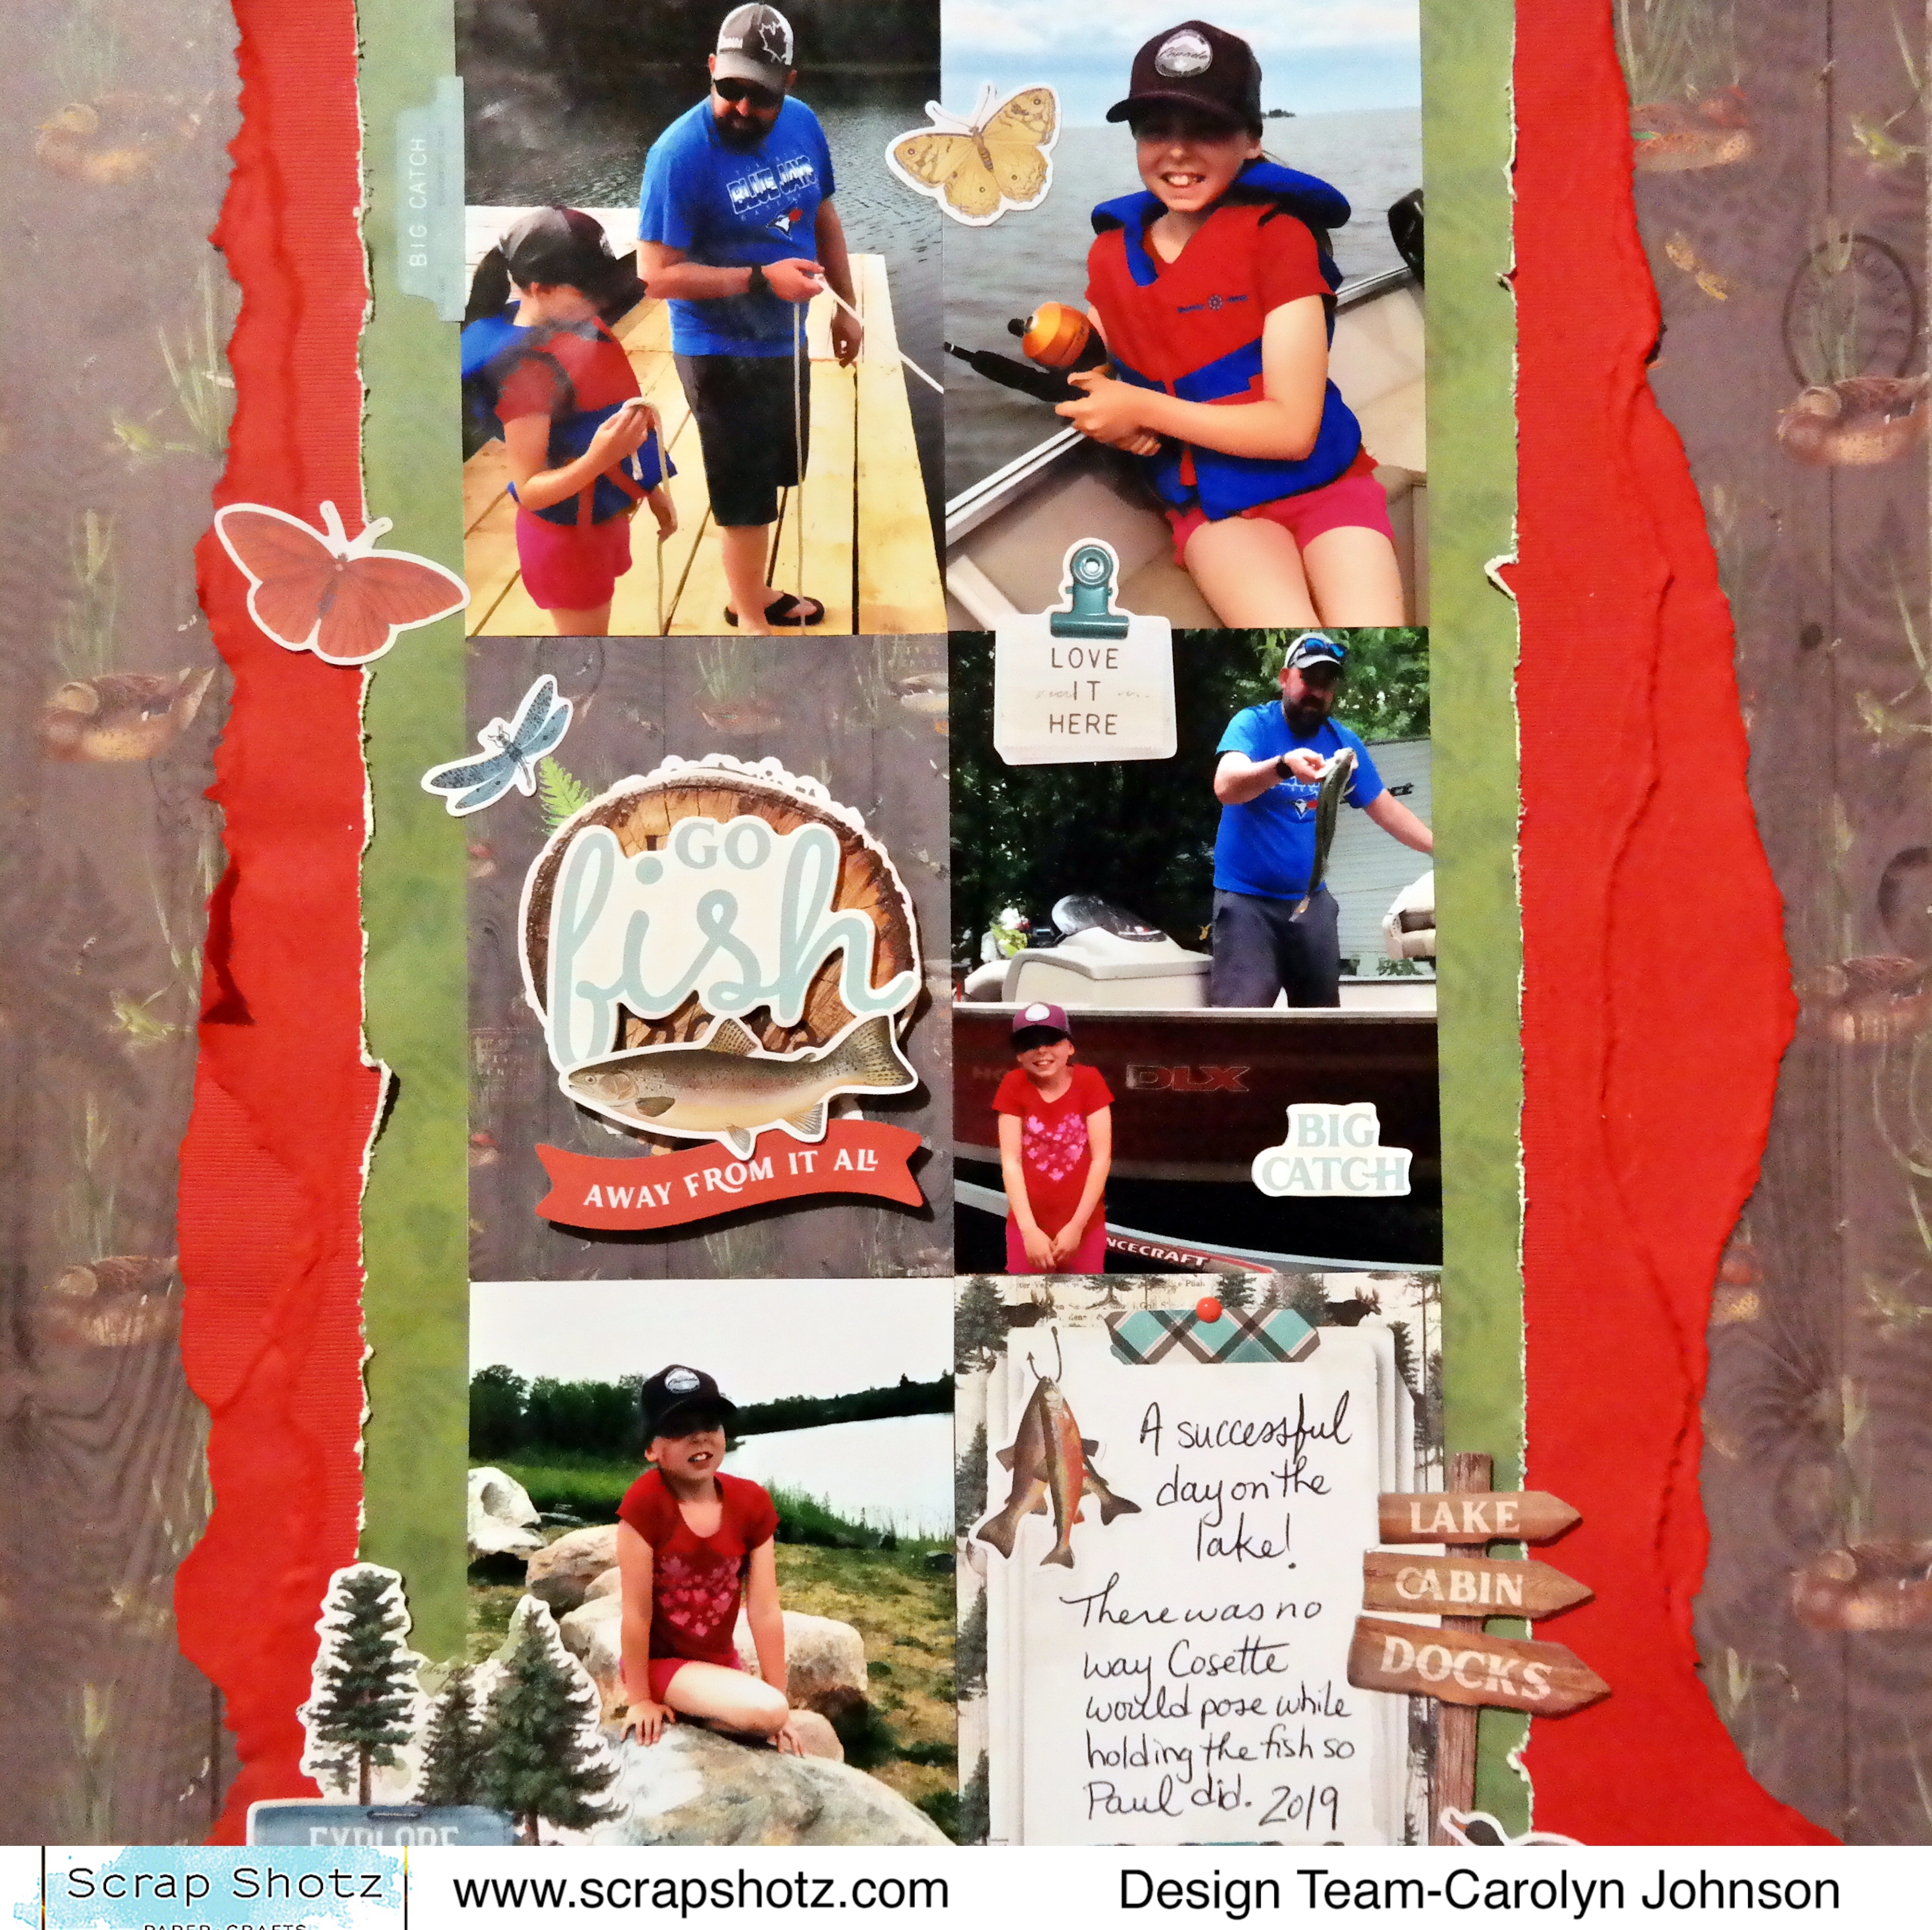
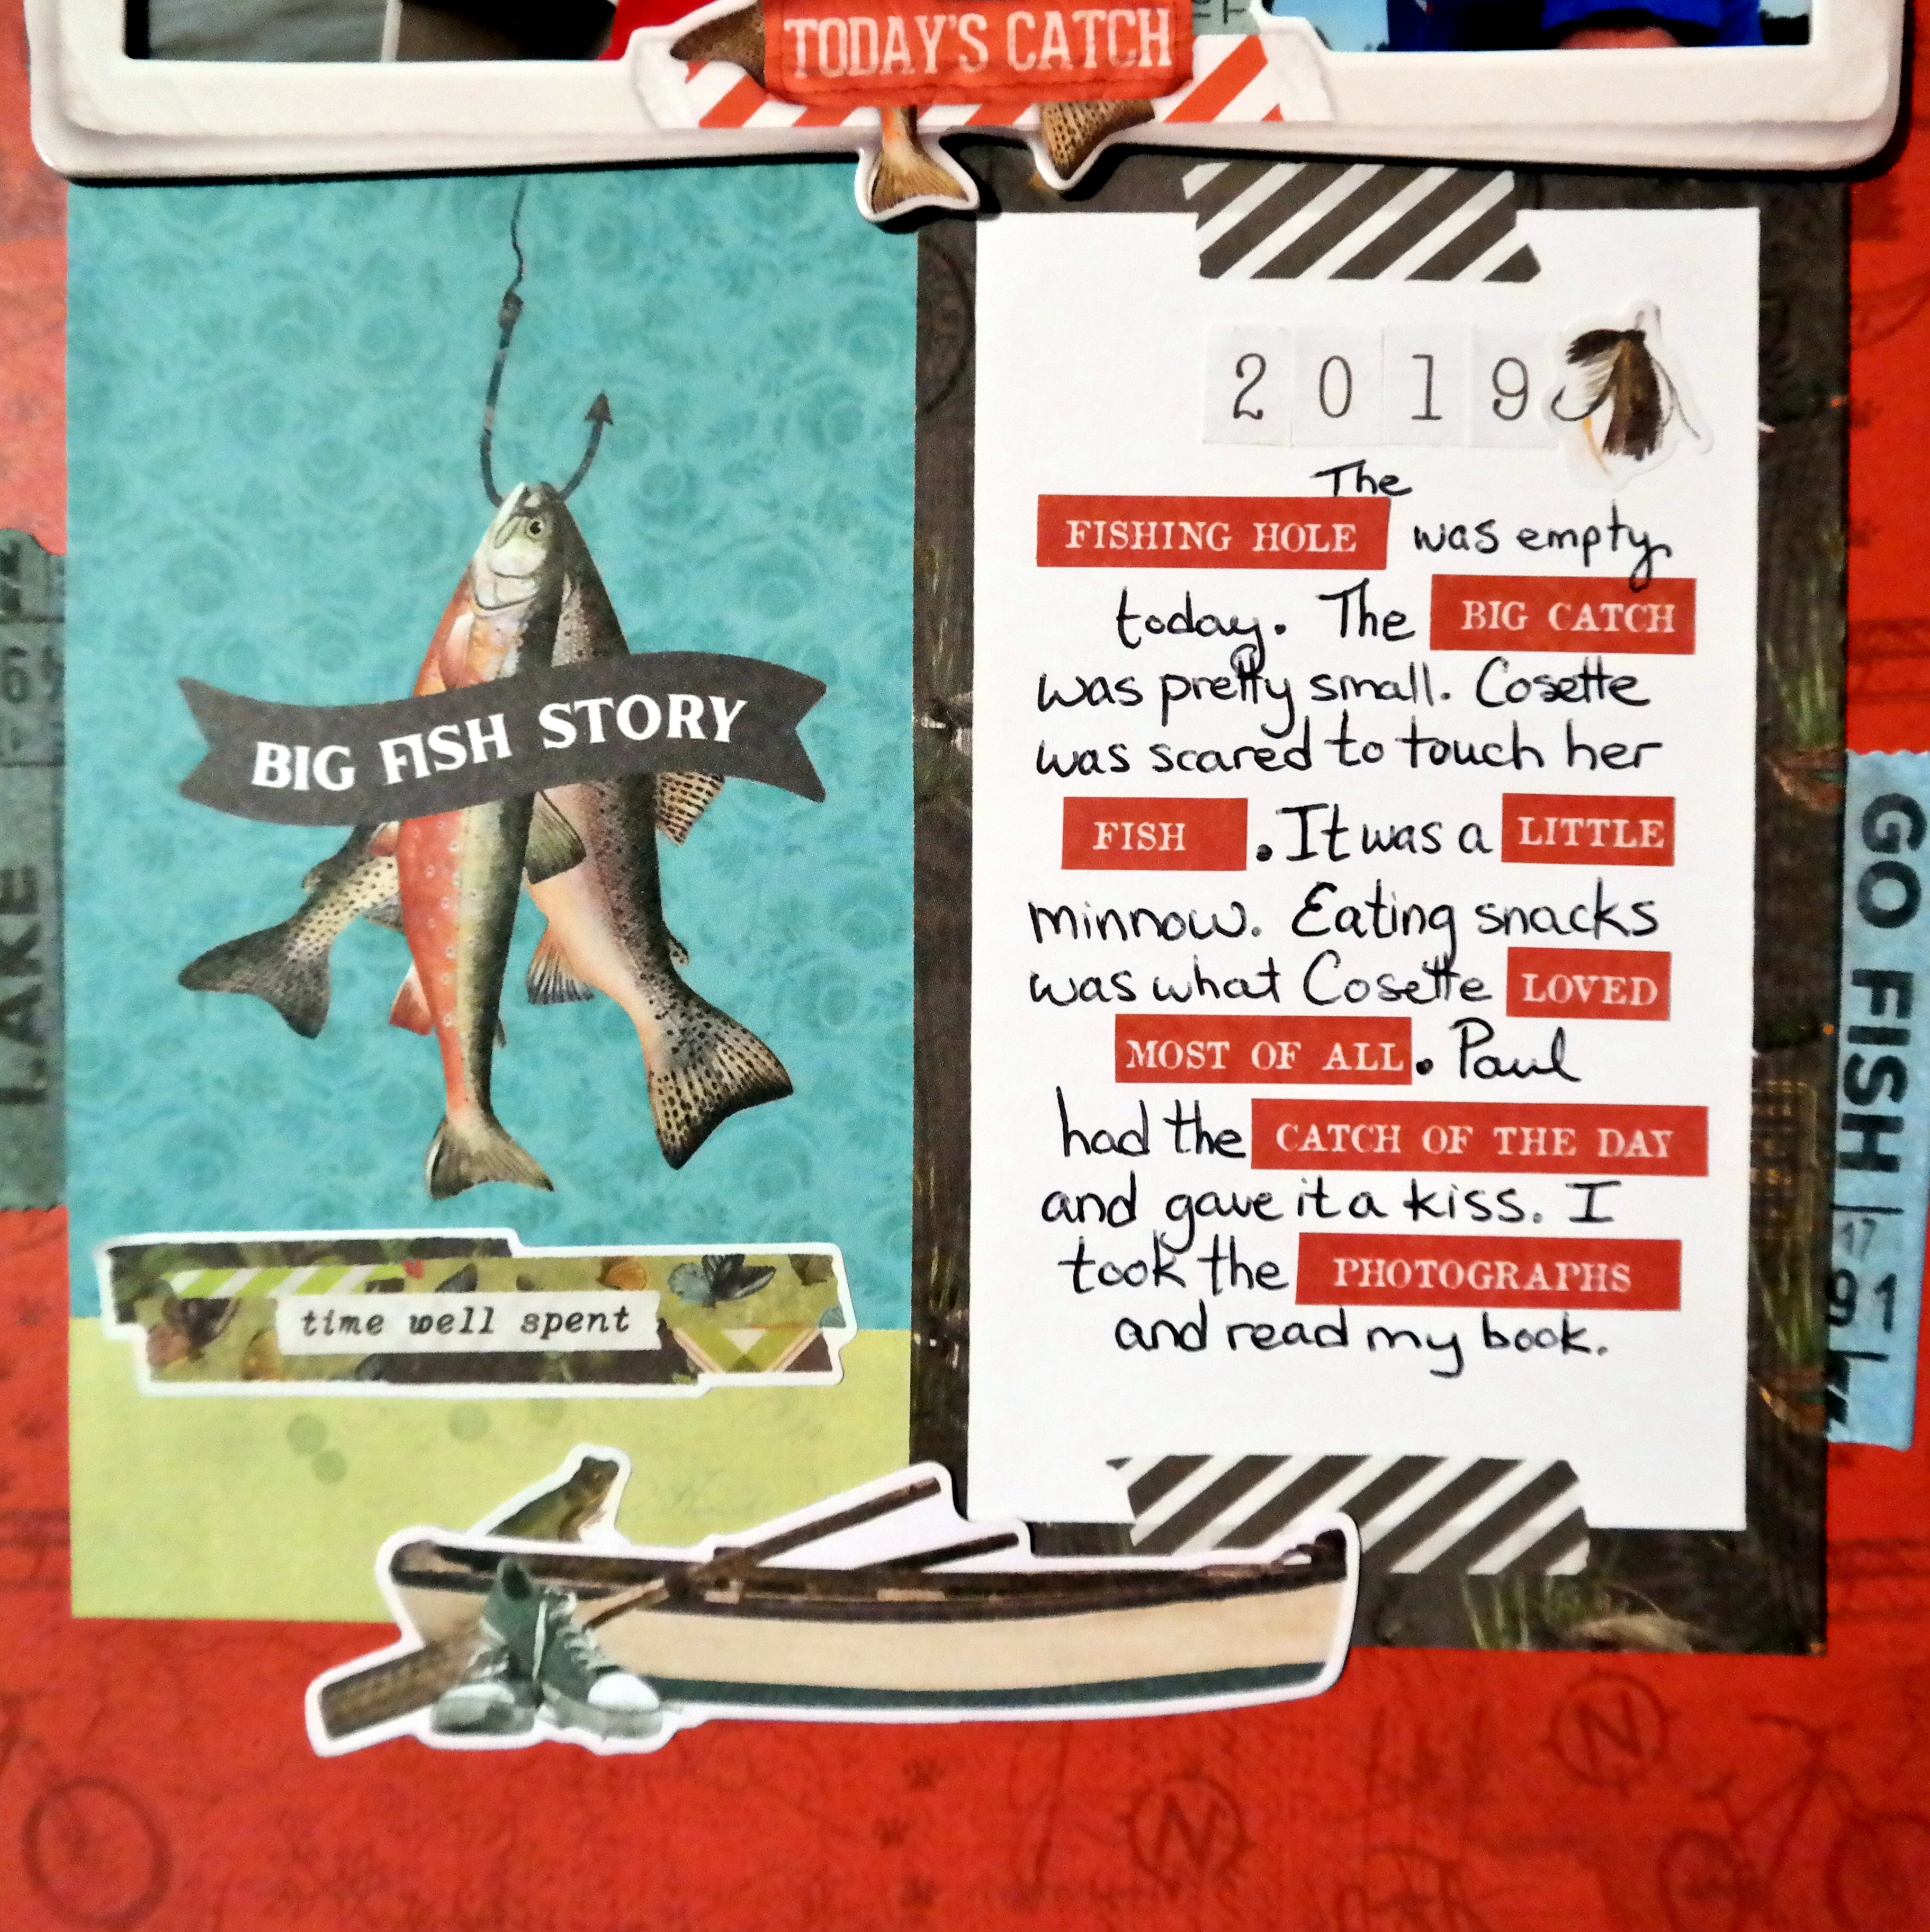
For the third layout, I used DistressOxide Uncharted Mariner to ink up my torn edges on the patterned paper. I rolled out the 2” newspaper washi tape onto my craft mat and colored it with the same distress oxide color before mounting it onto a black strip of cardstock. The tickets and leaves were treated with distress on the edges and then layered under my popped up photo.  The journaling block is from the ephemera pack and I inked up more sayings from the Tim Holtz Small Talk to add as well. I used another word from the Sentiments Rub-Ons and cut out “the” and “day” from other sentiments on the sheet to complete the title.

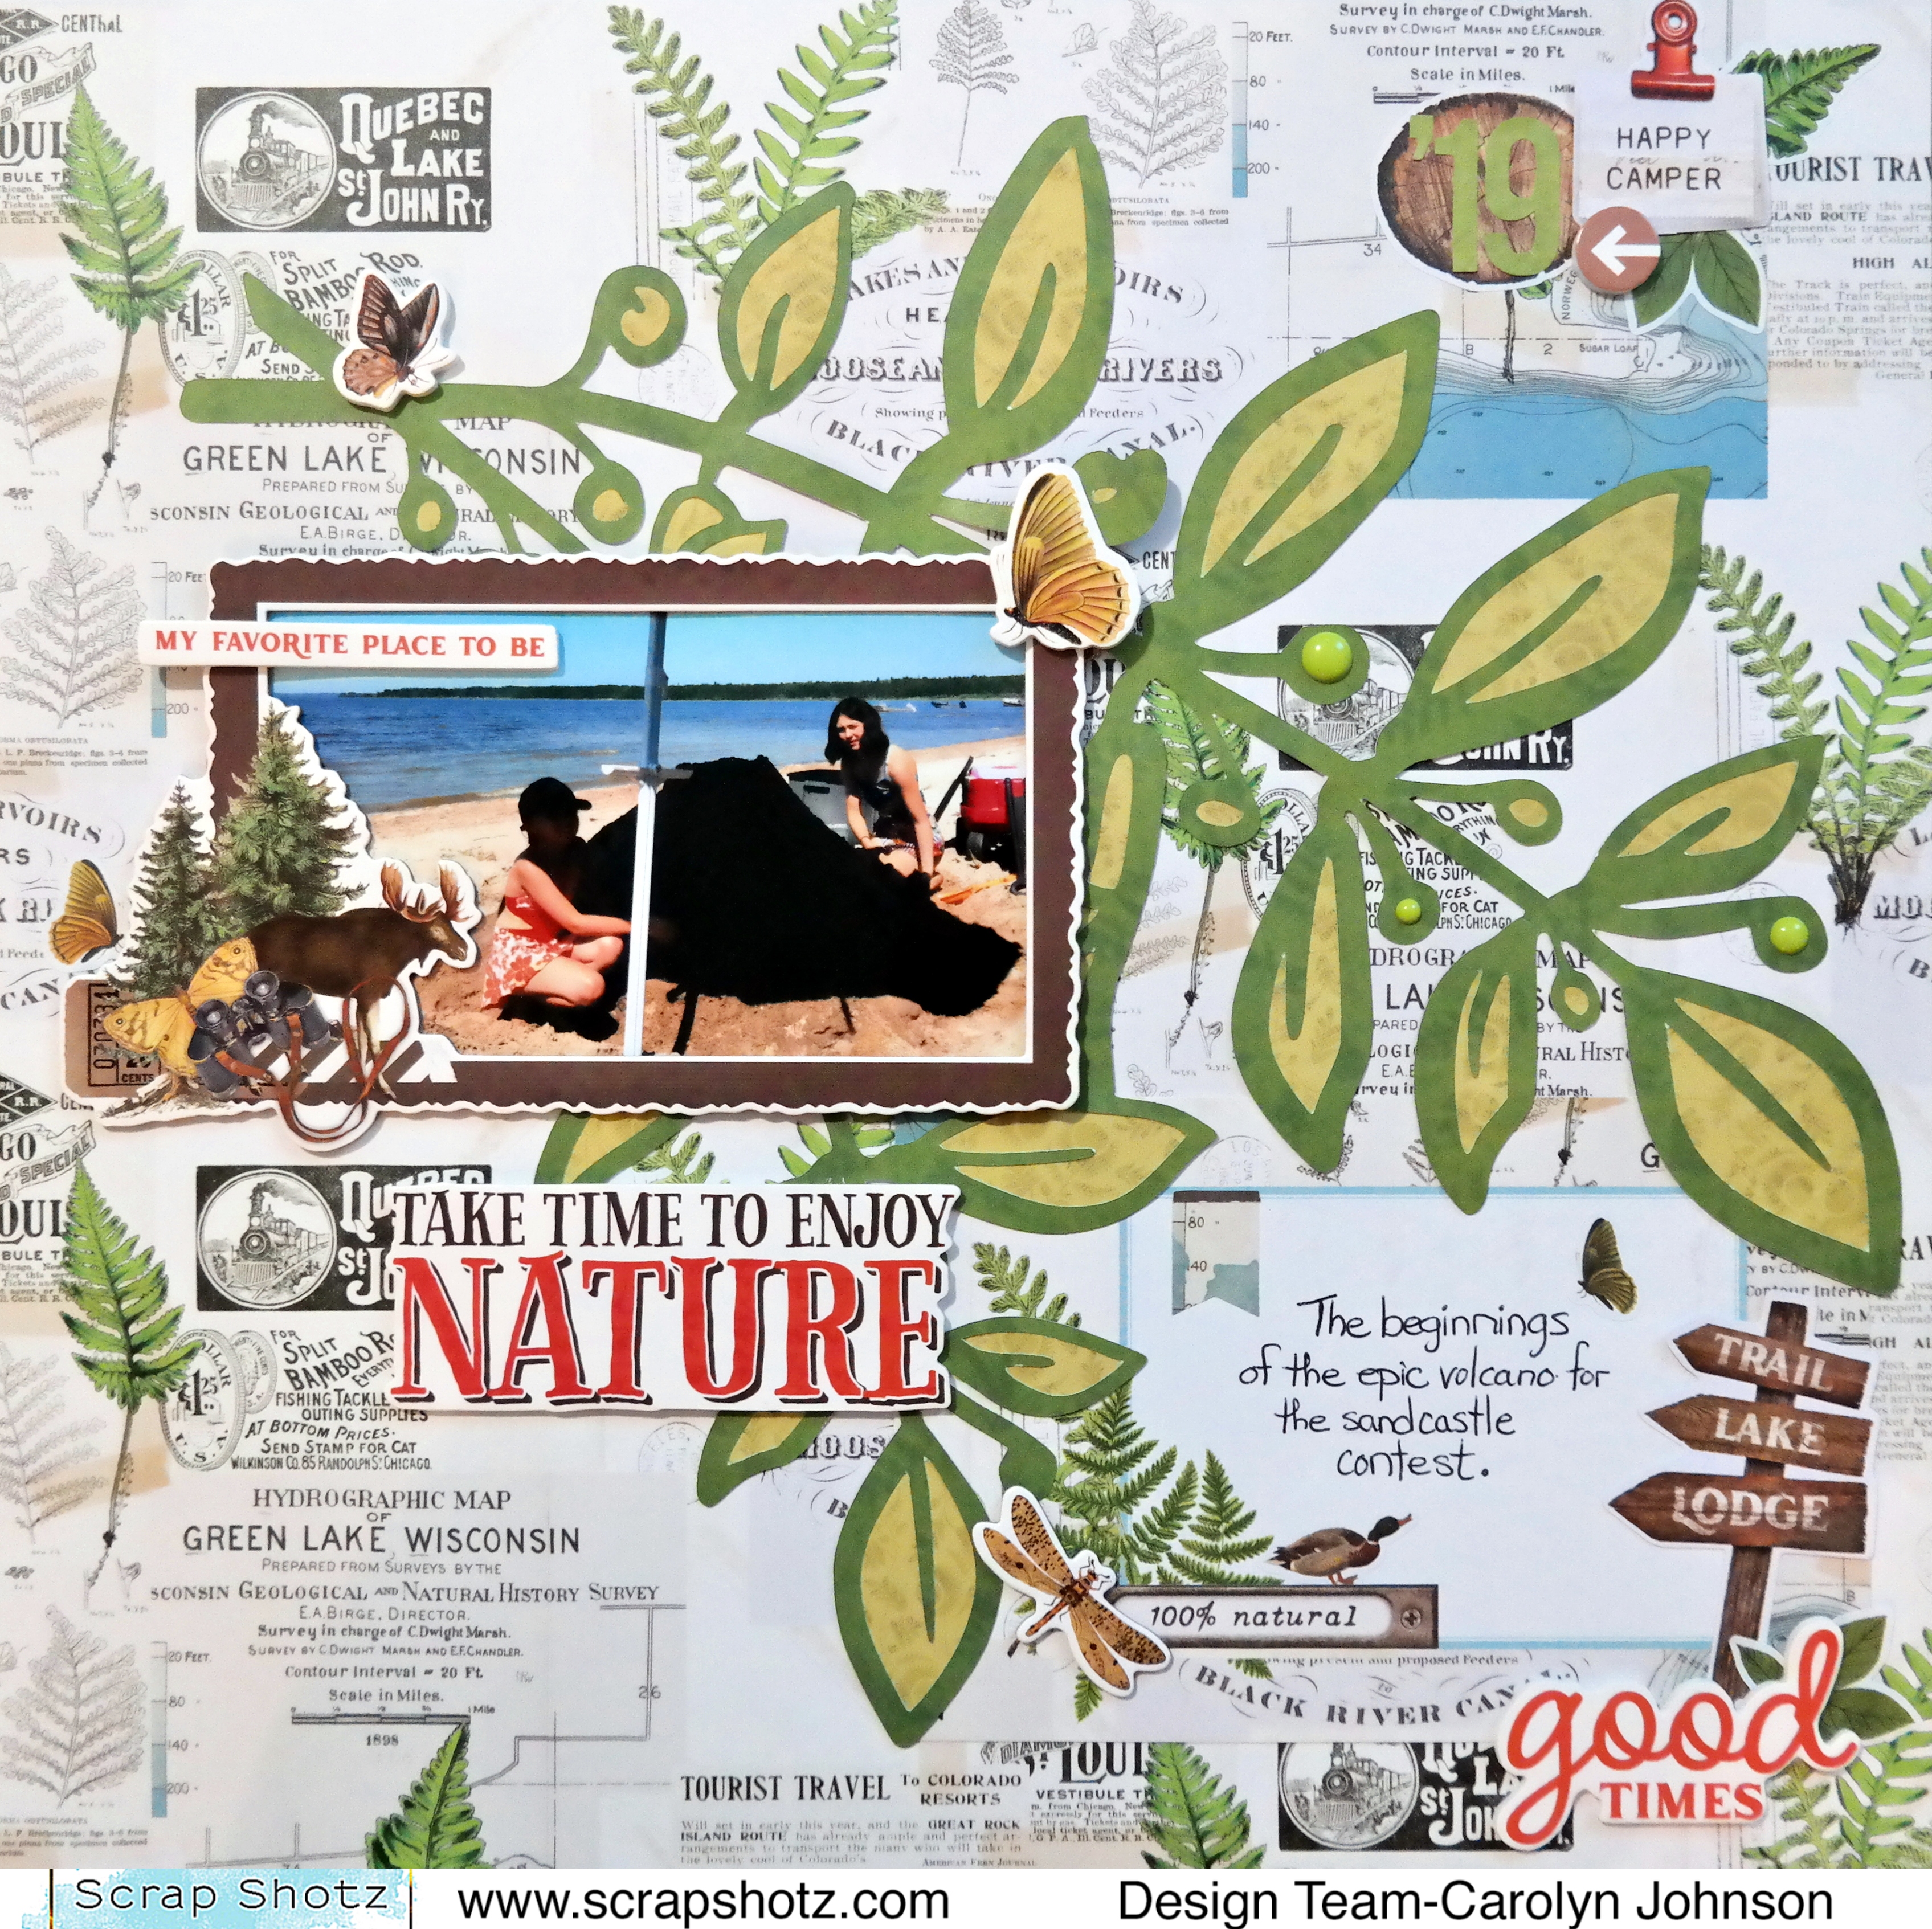
The last layout in this group is a little more feminine, but not overly so. My granddaughter is in Grade 4 and the flowers on this patterned paper suited the photo perfectly. I used my exacto knife to cut around the blooms and butterfly on the left of the photo so that I could tuck it behind them and used a laser cut bouquet of blooms for the right side. This time, I added foam Thickers to the sentiment rub-ons for the title and put my hand written journaling right on the background. I mounted this onto a shiny blue cardstock to give it a bit of shine, while the layouts for the boys were more muted.

As always, I finish up my crafting sessions with a few cards, and I will continue to use the 6x8 patterned paper pad for more. The quality and sturdiness of this paper is perfect for cardmaking.

For the first card, I covered a sheet of cardstock with 2 strips of the thick washi tape and mounted it on blue cardstock then popped it up on foam. A little piece of ribbon finished it off nicely.  The next card is a die cut panel and I used a small strip of the thick rose washi and a sentiment from the Pinkfresh Studio Foiled Sentiments ephemera pack. It’s so quick and easy to find a suitable saying in these packs! A few Studio Katia pearls and it was done.

The next cards were made with the 6x8 papers. One just needed a simple stamped sentiment and the other used another of the rub-on sentiments along with a die cut word and a bit of stamping.

The last card for this post is a shaker card, embellished with laser cut butterflies from the collection and a Pinkfresh Studio Stitched Scallop Circle die. The Happy Birthday sentiment die is from CreativeExpressions and is easy use!

As always, if you are interested in something that is no longer in stock in the store, just send Sandy an email and she will be happy to get it in for you.

Thanks for stopping by!


Thursday, September 22, 2022

September 2022 Scrapbooking Kit Inspiration Continued


Hello again! Here to share a couple more layouts I made using the September 2022 Scrapbooking Kit. The Kit features the Simple Stories, Simple Vintage Lakeside collection and coordinating Bazzill Basic Cardstock. - think camping, fishing, hiking, lakeside, outdoor adventures! Such fun.l 

Inspired by an Embellishment

I really like the chipboard stickers in the kit and wanted to use this ‘Go Jump in a Lake’ piece! I found this fun photo of my hubby and our friends - taken just before they did all just do that, jump in the lake. I used the shape of this chipboard peace to start my design. 

I ripped the Take New Trails  pattern paper in half to create a half page design. Then reached for some Picket Fence Studios, Paper Glaze in Black Peony and the Studio Light, Jenine’s Mindful Art Collection and added some of the circles in roughly a diamond shape in the middle of the page. Some on the white background and some on the pattern paper. I wanted to add a little more to the mixed media so also stamped ‘Happy Moments’ repeatedly from the Vicki Boutin, Let’s Wander stamp set with Paper Rose Studio, Premium Dye Ink in Intense Black. The final background touch was some black splatters  using slightly watered down Tonic Crystal Drops on Black Ebony

From there, I spent a bit of time roughing up the edges of the layout with my distress tool, adding some journal pen doodles to the outside edge of the page, and then tucking and adding embellishments. I knew I wanted to feature quite a bit of the embellishments below the photo so this Lakeside title was perfect for filling that space while also getting a great, bold title. 

Pick Just Two Colours 


For this layout I wanted to use the Love This Place (black and white diagonal stripe) and 4x6 Elements B side. I loved them both so knew I wanted to keep my design tight so I could show off both patterns quite a bit! I went with another half page design but diagonal this time. 

Before securing the photos or embellishment goodies, I first stamped ‘Heck Ya’ and ‘don’t quit’ both from Heidi Swapp and a circles texture stamp from my stash. I used Paper Rose Premium Dye Ink in Intense Black for all three for a nice crisp, rich look. 

From there, I had fun picking out all of the green and blue embellishments from the sticker sheets, chipboard, die cuts and chipboard stickers. I just love how it turned out and the arrow embellishments mixed with the enamel dots - the mix of textures is really fun! 

Are you playing with the September Scrapbook Kit? We would love to see what you create! Pop your layouts up in the Scrap Shotz Paper Crafting Facebook Group or tag us on Instagram! 

Take a peek at the first layouts I made with the kit and shared, visit September 2022 Scrapbook Kit Inspiration. You should also check our Carolyn’s fantastic projects, visit Simple Stories Simple Vintage Lakeside Layouts and More Simple Stories Simple Vintage Lakeside Layouts

Thanks for swinging by! 


Tuesday, September 20, 2022

More Simple Stories Simple Vintage Lakeside Layouts

I'm back again to give you even more inspiration with the September kit featuring the Simple Stories Simple Vintage Lakeside Collection. I'm pumped that I was able to scrap even more pictures from our lake time a few summers ago. It's so nice when the same collection can cover a lot of pictures that are all together in an album. 


For this layout, I decided to use a cut file I found in the Silhouette Store. I cut the dark green paper and then backed the leaves by hand with light green paper. I debated putting some white gesso behind the cut file but decided that I wanted more of the background to show through. 


I love the frames that came in the kit so I had to use another one. The journaling is on a cut-apart card that has the same background so it blends nicely. The embellishments are foam stickers, cardstock stickers, sticker book stickers, bits and pieces and enamel dots. 


This layout was pretty easy to make - just lining up the photos was the hardest part. I used the sticker book for the title. There are 3 sets of alphas in it. I layered a variety of cardstock, foam and sticker book stickers to embellish the pictures. The journaling is on a cut apart card that matches the background paper. 


Thanks for stopping by today! Have a scrappy day!

Sunday, September 18, 2022

September 2022 Scrapbook Kit Inspiration


Are you playing with this month’s Scrapbooking Kit?

The Kit features the Simple Stories, Simple Vintage Lakeside collection and coordinating Bazzill Basics Cardstock. The colours have an outdoor vibe with fantastic greens, blues and touches of brown and a rusty orange red. The theme is, well, lakeside of course but loads of other embellishment bits too for hiking, time outdoors anywhere, forest, arrows, etc. Really fun!

Banner Stickers for the Win 

My approach to a new kit is to pick a few of my most favorite things and use those first! Simple Stories has been including these fantastic banner sticker sheets in their collections lately and I find them such a fantastic jumping off point - so I reached for that first! 

I added a picture to each of the 3 little frames built into the banner sticker and then added pop-up foam tape behind. (My go to foam tape is 3L Scrapbook Adhesives - Crafty Foam Tape Roll. Lasts forever!) 

I decided to go with a ‘bottom of the page’ design for this one. I picked one the more subtle pattern papers from the collection - this one has ducks on it which have nothing to do with my hiking pictures but that’s ok my banner covered those up. I created an anchor for the banner using some Tim Holtz, Distress Inks in Shabby Shutters, Mowed Lawn and Peeled Paint with one of the stencils from Vicki Boutin’s Fernwood collection, a ‘The Good Life’ from the Simple Stories, Vintage Cottage stamp set.

From there I placed the banner down and spent some time tucking and adding in a few more embellishments to make. I added a little ripped paper feature at the top right of the page to give a little balance to the busy banner. 


Show off your Favourite Pattern 

Now that I have used my favourite embellishment from the kit, I am moving onto my favourite pattern paper. I am a sucker for plaids so it will be no surprise I picked this beauty from the kit! 

This is a very bold and busy pattern so I focused on keeping my design simple. I used one of the chipboard frames from the kit as my jumping off point and added two 2x3 photos of my nephew. I like off-setting the frame from the photos so the pattern behind shows through. 

Before adhering down the frame and photos, I created an anchor for all my goodies by stamping in roughly a diamond shape wider and taller than the space my photos will take. The stamp is a bunch on + symbols from Vicki Boutin’s Escape the Ordinary. I also added a few stamps to the bottom and top of the page. I finished off the black spatters using slightly watered down Tonic Crystal Drops on Black Ebony.


With the busy pattern I went with a contrasting colour for my embellishments and focused on that fantastic orange/red colour in the kit. I love how they pop off the page even with so much going on! I finished off the layout by adding a small feature at the bottom of the page for balance. 

I am off to keep creating with this fantastic kit - I am thinking of building a touch of mixed media into my next project. 

Thanks for stopping by! 


Friday, September 16, 2022

Simple Stories Simple Vintage Lakeside Layouts

 Hello everyone! I hope everyone enjoyed the summer. I sure did and what better kit for September than one to scrap all those photos! The September kit features the Simple Stories Simple Vintage Lakeside Collection. There is so much in this kit! The sticker book is a cool new product and add-on to work with. It just adds so many more options for embellishing.


My first layout used the September sketch from Creative Scrapbooker Magazine's sketchy Facebook group. It gets a lot of pictures on the page and if you don't have enough pictures, there are lots of cut apart cards in the kit to choose from. 

I used two cut apart cards along with my pictures. One of them didn't have a design that I liked so I used some foam stickers and cardstock stickers to create a title over top of the original picture. I tore some of the cardstock in the kit to create the borders and just distressed the green border paper so the project didn't get too messy. I used a few stickers from the sticker book to finish off the layout.


My second layout I used one of the frames that came with the kit. I love premade frames! The border is from one of the papers in the kit and lots of the embellishments are in the bits and pieces pack. I clustered things in groups of three to make visual triangles. The enamel dots helped to add some variety in the size of embellishments. 


I tried to do something a little different with the journaling. I used some words from the sticker book amongst my journaling. A challenge but I think it worked!


Thanks for stopping by and have fun with your September kits!