Monday, February 27, 2023

January Kit- Simple Stories Vintage Winter Woods Layouts!

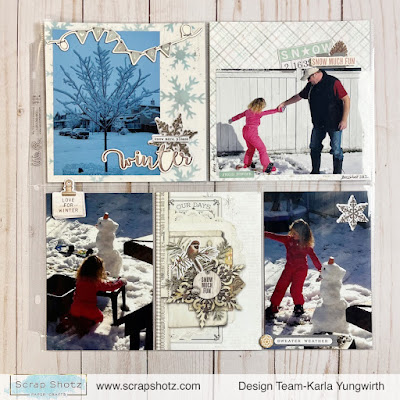
Hello friends! Karla back today with 2 layouts and a pocket page created with the January Kit featuring Simple Stories Simple Vintage Winter Woods. We no longer have month to month subscriptions, but there will continue to be kits for purchase as they become available. The Winter Woods Collection is so beautiful, and can also be purchased piece by piece in the shop!! 

I found some photos of my daughter playing in the backyard 10 years ago! It's amazing how quick the time flies!! The winter theme of this collection was of course perfect to document her adventures on this day!

I used pretty papers from the kit and used the frame to add one of the photos to. I layered stickers, chipboard and ephemera to make clusters around the page. 


The foam sticker sheet is perfect for titles and I cut some of the cut apart journaling pieces down to create tags for the top right corner. I used the February Creative Scrapbooker Sketchy Challenge to inspire this layout.


I added in the Winter Woods Basic Paper Pack and the Sticker Book and some twine from my stash. 


I love the journaling cut apart page! I wrote in some journaling and added some stickers.


For the pocket page, I had a few left over photos from this day that I felt would fit nicely together in a pocket page. 

I stencilled some pretty snowflakes on the Basics Paper with the Winter Woods Stencil using Distress Oxide Ink and added the pretty chipboard banner and word.

One of the cut apart 4x6 cards was perfect to add to a pocket as I didn't need much more in the way of journaling for this page. I embellished with some stickers to finish it off!

Thanks so much for stopping by! Be sure to check out the January Kit and/or the Winter Woods Collection in the shop, and have a wonderful week ahead!!

Monday, February 20, 2023

Mixed Media Card Inspiration!

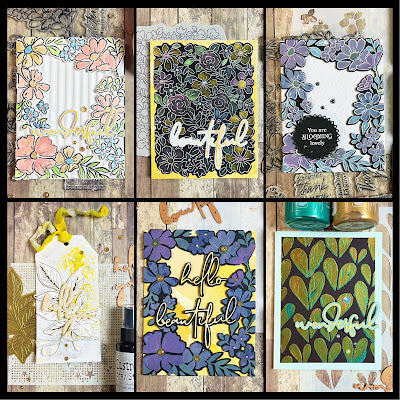
Hello friends! Karla back today to share some cards I put together over the weekend using various pieces created in the Scrap Shotz Thursday Live Demo's over the last few weeks! That's the fun thing about playing with your supplies... you have panels and stamped images and diecut pieces that you can then put together to create pretty projects!! I added in the pretty Ink Drop Sunset 6x6 papers and Yana's Wonderful Script Sentiments Dies by Spellbinders!


For this first card, I used Nuvo Embellishment Mousse to paint the pretty Pinkfresh Floral Border Stamp! It is so shimmery and worked great alongside the Vicki Boutin Cosmic Watercolor Set! I popped the frame up over a Spellbinders 3D embossing folder background.

Check out the video HERE to see lots of other ways to use the pretty Nuvo Embellishment Mousse!


I layered the Script Sentiments Dies cut with the Sunset paper over  shimmery Tonic Pearlescent Cardstock and added Pinkfresh Gold Glitter Drops to embellish! 


I was left with a tag base after demoing the lovely Lost Shadow Distress in this demo HERE. It is such a beautiful, soft grey, perfect to add a shadow of colour and wonderful to mix in with other colours. Definitely a must-have! I sprayed through the AALL & Create Lotza Stars Stencil for a soft grey background using the Lost Shadow Spray Stain and then added a bright pop of yellow using Harvest Moon Distress Mica Stain, which has a lovely sparkle! I even sprayed my seam binding ribbon to match! 


I added a foiled Pinkfresh Detail Leaf diecut - you can check out all the fun ways we used the new Pinkfresh collection in this video HERE - and layered on those beautiful Spellbinders diecut words!


Last week we had fun playing with the New and exciting Vicki Boutin Black Foundations Paper!! You can check out that video HERE! For this card I used the Pinkfresh Floral Border Stencil and Distress Oxides, which look gorgeous over the black paper. I love that the stencils can be used alone or with the stamps, and the border die is so detailed! I used the Ink Drop Sunset 6x6 paper as a base for the frame and added a hello beautiful Sentiment


I accented the flowers with the Pinkfresh Gold Glitter Drops and Nuvo Lemon Twist Dream Drops.


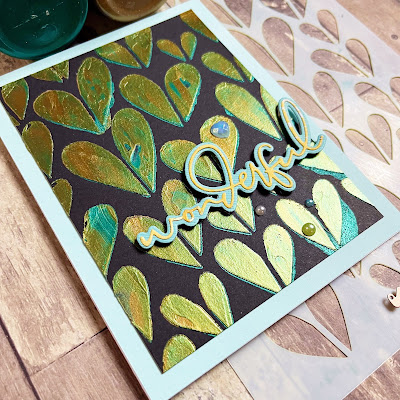
Of course, Lunar Paste looks amazing on a black background, and because the Black Foundations Paper is heavy weight, and perfect for mixed media, it works beautifully for this technique! I used Gold Rush and Tropical Tango Paste through a Vicki Boutin Print Shop Stencil, mixing them for a pretty patina'd look. Be sure to check out the video to see how easy it is to create this effect!


I added some Lucy's Cards Gems to this card for just a little more bling!


Here, I heat embossed the Pinkfresh Mixed Blooms Rubber Stamp with Ranger White Embossing Powder and painted it in with the Vicki Boutin Cosmic Watercolor Set, which look amazing on black as well as white paper!


I used the Ink Drop paper as a base and embellished with Dream Drops.


For this last card I again stenciled the Pinkfresh Floral Border with Distress Oxides, but this time I stamped over top with the coordinating Floral Border Stamp using Hero Arts Unicorn White Pigment ink to add in the sketchy details! 


I used the white ink again to stamp the sentiment - I love how many pretty sentiments are included with the Floral Border stamp set and added a few Lucy's Cards Gems to finish it off! 


You check out more fun ways we used the new Black Foundations Paper in the Thursday Demo HERE or click to watch below!


Thanks so much for stopping by! Be sure to watch this week's Live Demo on the Scrap Shotz Facebook Page, and have a happy, crafty week!


Friday, February 10, 2023

Altenew Craft-A-Flower: Water Lily Layering Dies & Artists' Gouache!

 Hello Crafty Friends!

Rosie here to share a few projects using the awesome Altenew Craft-A-Flower: Water Lily Layering Dies!


Altenew produces amazing die sets and they've added a new element that makes it foolproof to put together. If you look close at the image above you can see each layer of the die set individually and you'll notice a small keyhole shape and arrow. 

You just line up each layer with the keyhole and arrow and you have perfect placement for every layer!


The main die cut has 9 layers but it's super quick to put together! I die cut all the pieces in white card stock and added colour with the Altenew-Artists' Gouache Strolling Through New York set

The dark background behind the flowers is watercolour paper painted with Prussian Blue from the Altenew gouache set. It's then layered over a white card front embossed with the Altenew Ribbon Waves 3D Embossing Folder . The sentiment is a die from the die set and has also been cut from paper painted with the Prussian Blue paint.


This next card was hard to photograph as I used mirror card stock for the background.


Again I painted pieces of watercolour card stock with Prussian Blue, Ultraviolet, Lavender, Primary Yellow, Lagoon Green and Baby Pink Artists' Gouache. I mixed Primary Yellow and Ruby Red to create the orange colour for the flower centre. After letting the pieces I die cut the layers and then adhered them together liquid adhesive.

I die cut a piece of dark blue/purple paper from the Memory Box-6x6 Ocean Blue Paper Pad with the Altenew Diamond Frame Cover Die and glued that over the Gold Mirror cardstock.

The sentiment, from the Altenew Doodle Bouquet Stamp Set, is stamped with clear embossing ink over Artists' Gouache and heat embossed with gold embossing powder.

This final card was lots of fun to make! I've never used gouache paint before so this card is inspired by this video by Jenny Colacicco one of Altenew's designers.


I plan to do a lot more experimenting with this new to me medium but I love the vibrancy of colour on this panel. I painted Altenew A2 Watercolour with the gouache in rainbow colours, thinning the paint down a little with water and then set aside to dry.

Craft-A-Flower: Water Lily sentiments and Altenew Leafy Garland Die are cut 2x each from white card stock and then once from gold foil cardstock and adhered with liquid glue.

I finished off by embellishing with a few Altenew Satin Gold Sequins.

Thanks for stopping by and Happy Crafting!