Monday, November 29, 2021

Simple Stories Make It Merry Layouts Part 2

It's Carolyn back today with some more Christmas inspiration using the Simple Stories "Make It Merry" Collection. 


For this layout I used the October sketch from the Creative Scrapbooker Magazine Sketchy Facebook Group made by Kerry Engel. 
I was really drawn to the big title because there are so many amazing title foam stickers to choose from. It was really easy to make. I backed the photos with solid colours and added some of the paper with the stripes to the center photo. I used a variety of ephemera, puffy stickers and cardstock stickers. I also used a pen to extend the string on the ornaments and some Liquid Pearls to add dimension to the tree. 


My second layout was inspired by the wrapping paper in the pictures. I tried to use strips of paper and ribbon to mimic a floor covered in wrapping. I used my sewing machine to add some texture. I layered ephemera in clusters and added some Liquid Pearls again. 


I hope we all get to have some in person Christmases this year! Make sure to pick-up this collection to scrap all those wonderful pictures. 

Thursday, November 25, 2021

Simple Stories Make It Merry Layouts Part 1

 Hello everyone! It's been awhile - so much so I last posted summer layouts and now it's Christmas! This month I got to work with the Simple Stories "Make It Merry" Collection. It is so awesome. I love the colours and the good mix of background, embellishment and patterned papers. 


Let's start with my favourite layout. I used the November sketch in the Creative Scrapbooker Magazine Facebook Sketchy Group
I like how the boxes are tilted and not a perfect 3x3 grid that I would normally use. I had a screenshot of our Christmas morning which was printed on a 4x6 photo. When I cut each family picture apart they fit well in individual boxes. I used a white pen to doodle around the picture to add more interest and contrast. The embellishments are a variety of ephemera, cardstock, puffy and foam stickers. 


I was also able to cut out the letters I needed from one of the papers and use them on the foam stickers to make the title I wanted. 


For this layout I didn't cut the pictures apart so I could show how we were actually all online. I found a font I liked and used my Silhouette to cut out the numbers. I used the offset tool to make the outline for the numbers. The rest of the layout uses embellishments as listed above but also quite a few from the Simple Pages Page Pieces. It's a set of embellishments that could all be used to make a couple pages. I used them to build 2 visual triangles on the page. I made three clusters of similar size embellishments for each triangle. 


Thanks for stopping by! Happy scrapping!

Tuesday, November 23, 2021

Welcome Winter


Time to document your winter memories! Have you had a chance to play with the October Scrapbook Kit? The kit features the Carta Bella, Welcome Winter collection and it’s a beauty! So many blue tones, snowflakes and plaid touches - perfect for winter. 

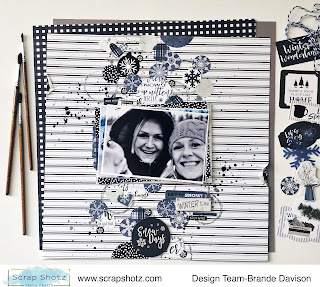
Snowflakes and Circles


For my first layout I played with circles! I started with this great striped pattern from the collection and using an empty paper towel roll and some blue/grey crackle texture paste from my stash created some messy circles down the centre of the page. 

Then I used a circle punch and the 2x2 cut apart pattern paper in the kit to make a bunch of circles featuring different snowflakes from the collection. I grabbed any of the circle embellish (die cuts, chipboard and stickers) and created a cascade of circles with my photo in the middle. 

A few black splatters, a few more splatters in the same crackle texture paste with some water added, a few punched hearts from pattern paper and a small rip and some staples on the left and right of the page finished it all off. 

Embrace the ‘Country’ Look 


For my next layout I wanted to showcase this awesome selfie of my parents! I love that it was taken at Christmas and you can see the heaps of white snow in the front yard behind them as we are all inside, cozy and warm. Perfect winter memory. 

I started with this simple plaid pattern from the kit. Then pulled a 12x12 chicken wire stencil from my stash (love the ‘country’ look for this farm house photo) and added it to the page using a crackle texture paste in blue/grey from my stash. I used that same texture paste with some water to create splatters, and added a few in white acrylic paint too. Using some Tim Holtz, Distress Oxide in Weather Wood I also added some snowflakes using the collection stamps.

Then I used a bunch of patterns to anchor my photo and just had fun layering a whole bunch of chipboard, sticker and die cut titles to the right of the photo. I was excited to tuck one of the plastic snowflakes from the kit in there too. A couple of punched hearts in the amazing silver glitter paper in the kit stapled to the top left of the photo finished it off! 

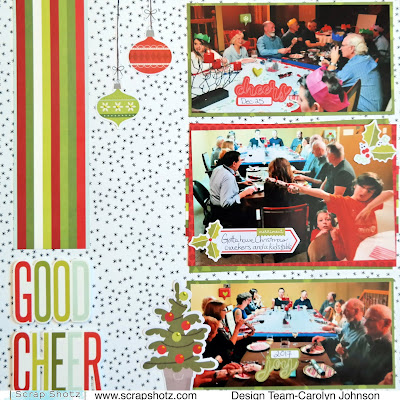
Think Left and Right 


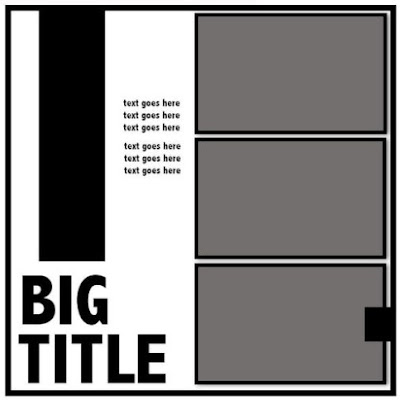
For this layout I featured 4 photos. Instead of a horizontal layout (my go to) I decided to try the photos down the left of the page. 

I started with a Bazzill Basics Cardstock, Raven (black) from the shop as my base and added some bricks using a Peartree Cutfiles Stencil from my stash and Tim Holtz, Distress Oxide in Weather Wood for some pattern. A few splatters in the Distress Oxide and white acrylic paint finished off the mixed media design.  

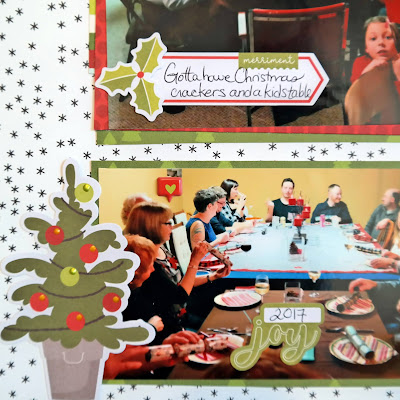
Then I created a cascade of photos on the left, backing each photo with a couple of the pattern papers from the kit. To balance the page and create a title, I added a bunch of embellishments to the right. 

In a couple of spots I also added the flag die cuts in the collection - a great way to feature some of the twine included in the kit with a few simple staples.

All the Plaids 


Inspired by the little tree embellishments in the collection and in love with all the plaid pattern paper, I reached for this Christmas Tree cutfile from Peartree Cutfiles. I used a different plaid pattern paper from the collection for each tree and the glitter paper in the kit for the stars. 

I popped up the cutfile on the wood grain pattern, after adding some background splatters in white and black, then had some fun adding my photos, a title from the chipboard set and stars from the kit and my stash. The little feature at the top and bottom of the page are the edges cut off one of the die cuts in the collection. I thought it was a neat touch! 

If you are not a kit member or just looking to add more of this collection to your scrappy stash, lots of goodies left in the shop. Check out Carta Bella, Welcome Winter.


Saturday, November 20, 2021

Documenting Autumn Memories


If you working on scrapping your fall memories before the winter and Christmas memories start rolling in, reach for your September Scrapbooking Kit. This kit is all about the ‘Welcome Autumn’ collection by Carta Bella. All the oranges and pumpkins and fantastic fall sentiments make this collection really fun to play with. 

Torn Edges

For my first layout with the kit I reached my my three most favourite patterns from the collection. I ripped the edge of each a little more than the last to create a design where all three patterns could do the work. The white of the ripped eyes breaks up the patterns nicely. I generally would not pair so many busy patterns together but this kit is so well designed it’s easy to mix all the things. 

I printed a 4x6 photo in black and white, popped it up on some foam adhesive and more pattern paper (yup!) then just tucked and layered all the embellishments that made me happy. 

Circles

For my second layout, I was all about circles! First, I used a circle punch to cut out circles of all the fall things from the 2x2 cut apart pattern paper. Then I grabbed up all the circles embellishments from the chipboard and stickers and just stated creating a cascade of fall circle fun. Some black and white splatters in acrylic paint behind the circles brought a bit of the grunge I love. 

I picked a 4x6 photo of me and a couple of my sisters and backed it in a number of the kit pattern paper and some foam tape. A couple of phrase stickers from the kit and a few embellishments finished off this layout. 

Make it Three 


I had a lot of fun with this third layout! I found 3 patterns that were fun together from the kit. Then cut each at an angle to make up the full 12x12 layout like a puzzle. The pieces a little smaller than needed so I could leave a small slice of white space to break up the patterns a bit. 

My next move was to create the ‘Fall’ title on the bottom right. I really wanted to use those sticker alphas and the red truck. Together they made a cute little cluster. I found these sweet little photos of our pup and picked some matching embellishments for the centre of the page and voila! 

White Space 


For my final layout I went minimalist. I used a piece of Bazzill Basics Cardstock in Avalanche (white) from the shop and a bit of stencil to create an anchor for my photos. Then it was all about tucking embellishments and some fussy cut leaves from one of the patterns. Some splatters and the enamel dots from the kit finished it off. 

I have had a lot of fun with this kit and still have so much to play with. If you have a September kit - dig in! If you are not a kit member but looking for some fall goodies, there are still some Carta Bella, Welcome Autumn in the shop.