Saturday, March 30, 2024

49 and Market - Wherever

Hello, hello! Have you been on a big trip lately? How about a road trip near or far? Maybe a local adventure with the kiddos? If yes, the 49 and Market - Wherever collection in the Scrap Shotz shop is for you! So many opportunities to use the collection for memory keeping. 

I received the 49 and Market - Wherever 12x12 Collection Pack, Chipboard Set, Ephemera Bits, Laser Cut Elements and Rub-on Transfers 6x12 Ride in my Scrap Shotz happy mail the other day and have been in my scrappy space creating since. 
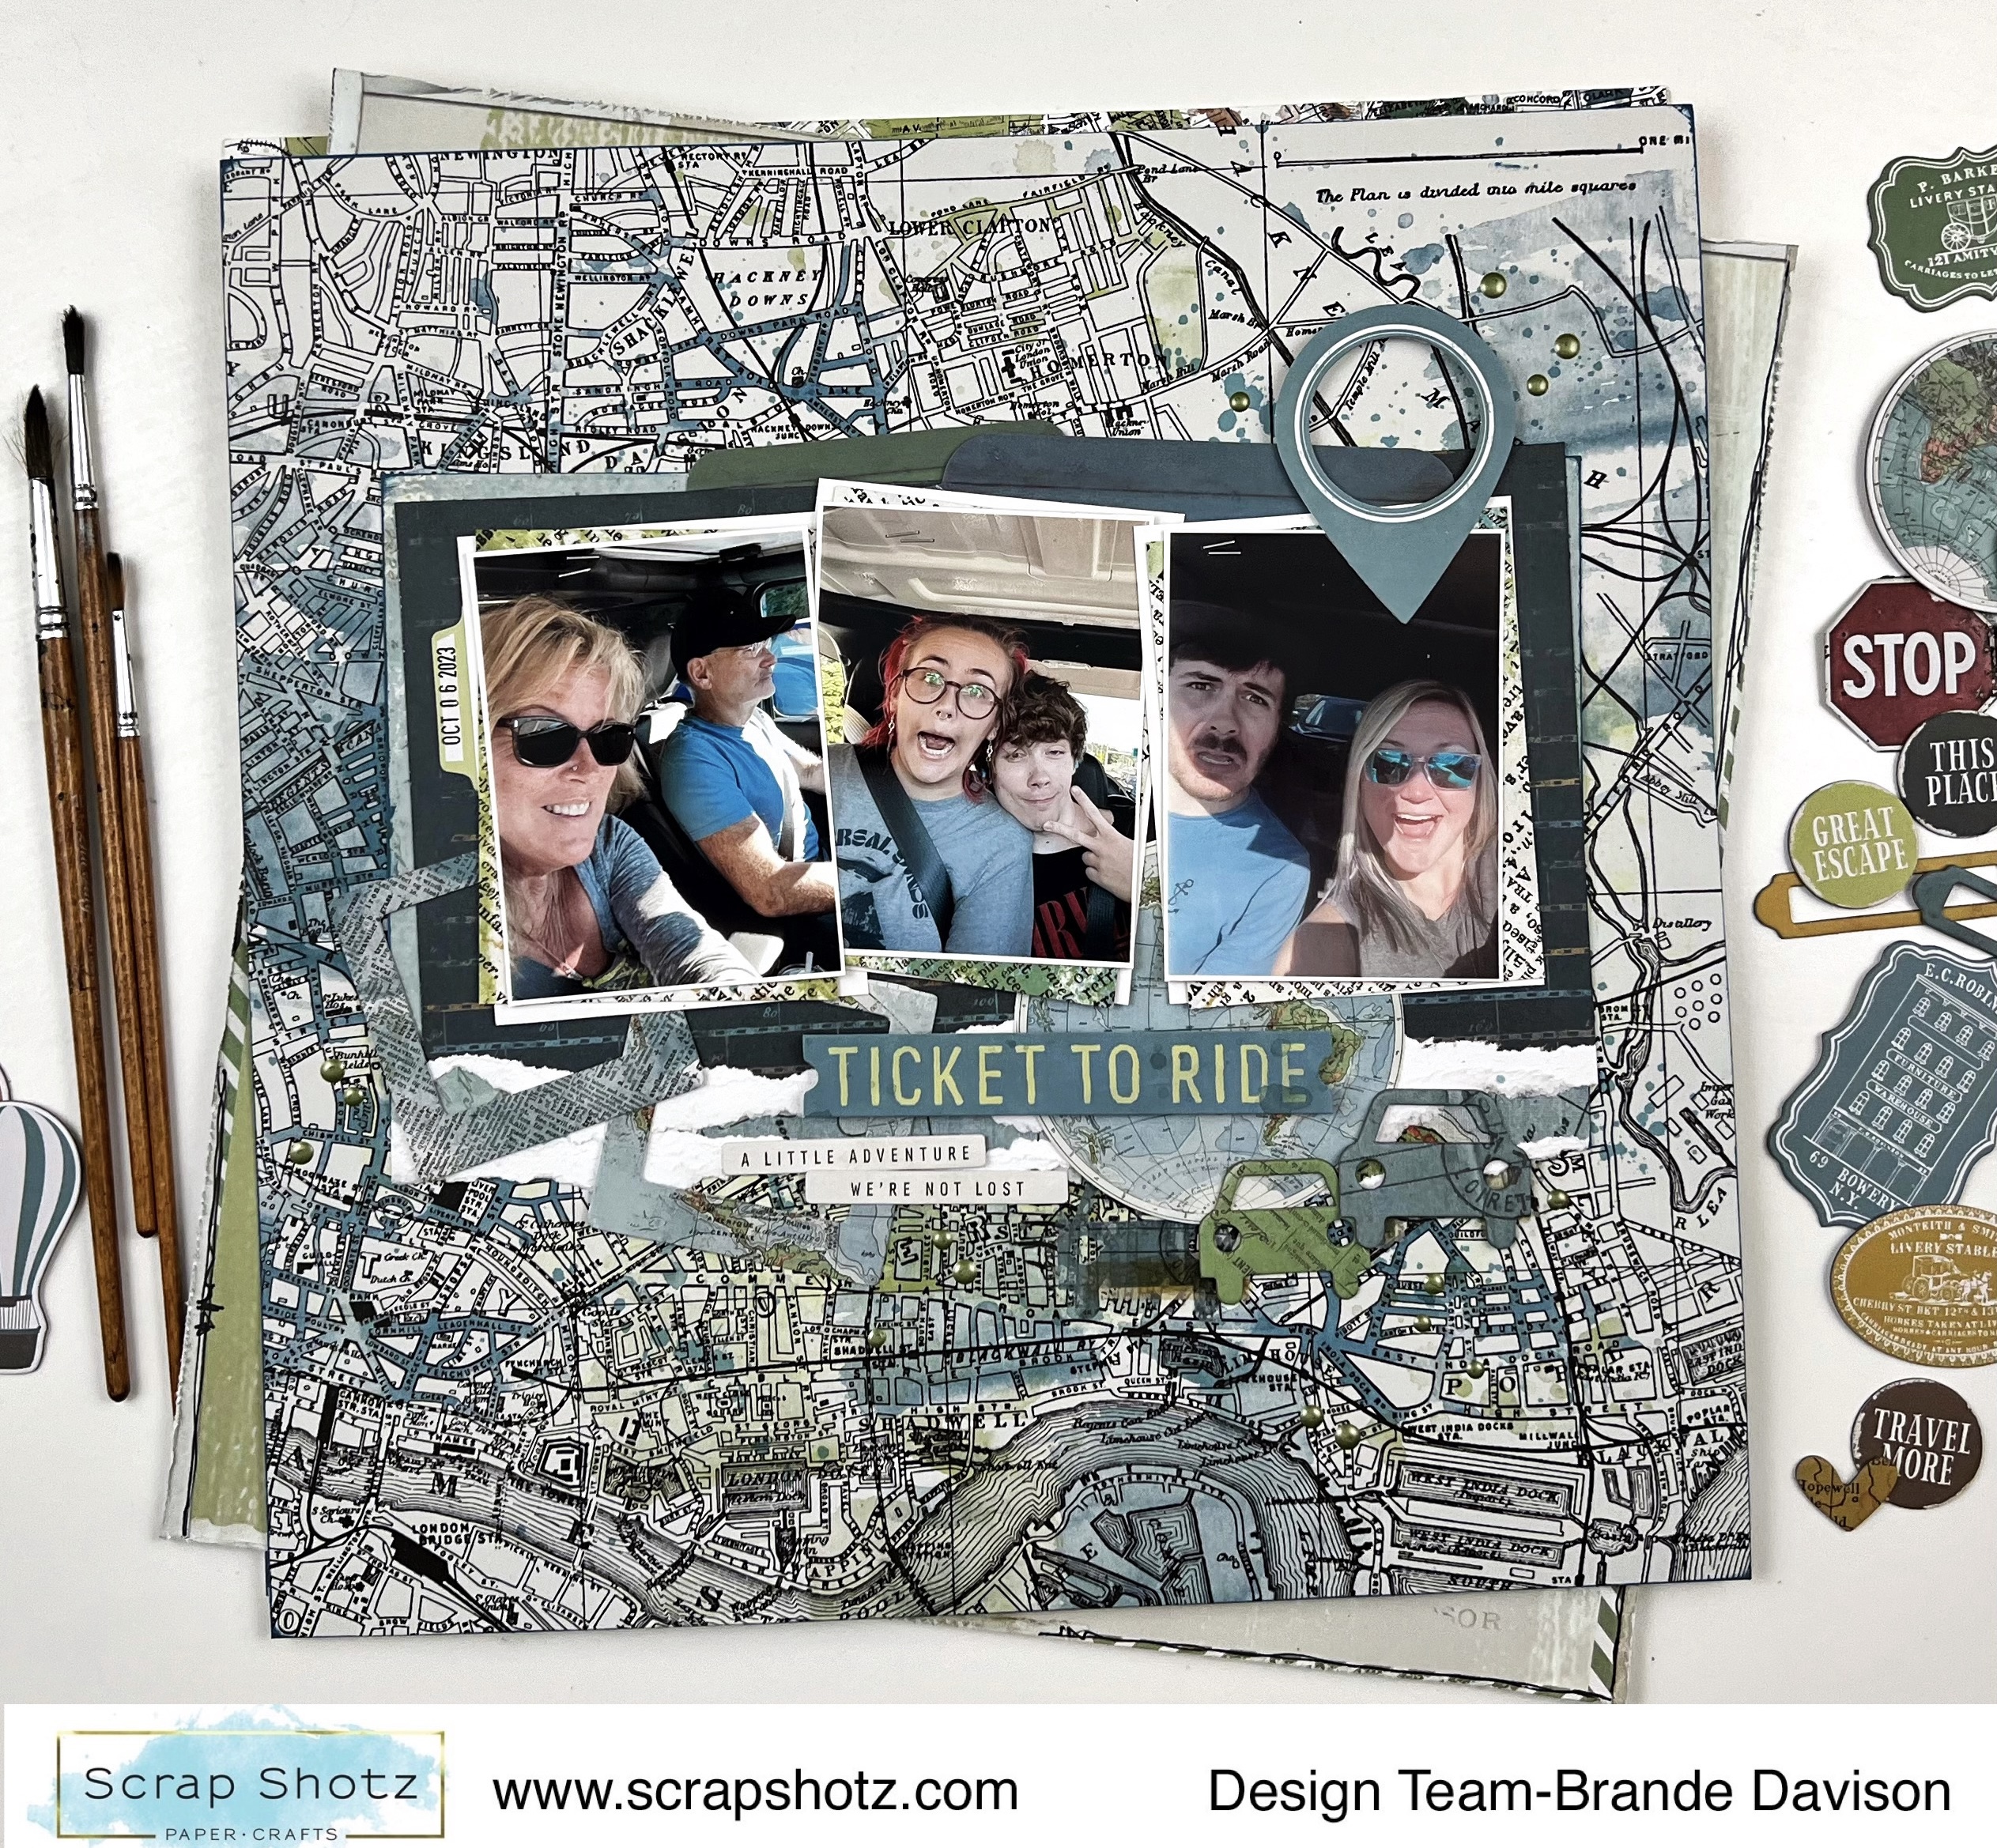
Peek A Boo 

For my first layout, I used a folded design to peek a boo the amazing Rub-on Transfers in the background. 

I took a 12x12 pattern and folded it back at an angle. Then cut off the excess of the folded over section at the same angle as the fold to show off both the folded and background pattern. For this one, I wanted a different pattern on the fold so also adhered another pattern on top of the fold for the colour combo I was looking for. 

Before adhering my folded paper combo down onto the white cardstock, I used a bunch of the Wherever Rub-on Transfers to create a messy pattern down the middle of the page so it looked like it was peeking out behind the fold. These Rub-ons are such high quality you can over lap them to make a really great look. I also added some black splatters using watered down Tonic - Nuvo Crystal Drops, Black Ebony and a paint brush, and a few with some Ranger Ink - Distress Oxide, Dried Marigold

Once the background splatters dried, I adhered my folded pattern paper down on the right to create that peek a boo with the Rub-ons. From there, I added my photos down the fold (after adding a pattern layer or two behind each). Then it was all about tucking embellishments from the Wherever Chipboard, Ephemera and Laser Cut Elements.  


Large Photo Feature 

For my second layout I reached for this large 8x8 photo of standing stones in Scotland we had the chance to see on our hike of the Arran Coastal Way. When you experience something this amazing you make it the focal point of your layout!  

I started with the 12x12 pattern paper called Trek as my background - adding  some black splatters using watered down Tonic - Nuvo Crystal Drops, Black Ebony and a paint brush, and some repeated Vicki Boutin stamps with Paper Rose Studio Premium Dye Ink, Intense Black above and below where the photo would sit. 

Then, I added a couple of patterns behind the photo to bring some dimension and contrast. I used a Wherever Rub-on Transfers to add the title ‘love this place’ directly on the photo (a little nerve racking but totally worth it - the rub-ons transfer adhered beautifully!) 


With such a large photo and a great pattern background, I didn’t have to do anything more but add a few embellishments. I added a cluster of florals and leaves to the top left and bottom right of the photo using a combo of the Chipboard, Ephemera and Laser Cut Elements. A couple of the chipboard circles worked for a title. 

Monochromatic 

The next layout I worked on was all about the blues with a touch of green in the collection. The colour scheme was inspired by the background paper called Outlook - love that city map pattern! 


First, I prepped the Outlook pattern with some watered down Ranger Ink - Distress Oxide, Bundled Sage applied with an Inky Roller focusing the colour in the upper middle of the page as an anchor my photo cluster. I added a few splatters in the ink as well. 

Once that dried, I added my photo cluster on top of a  bunch of the blue patterns in the collection - letting some of that green ink I added show around the edges. 

Then I riffled through the Chipboards, Ephemera and Laser Cut Elements to find the blue and a few green ones to tuck around my photos. I loved the little cars so added those on the right (we are on a road trip!) and thought the little photo frames tucked to the left were cute too.


Such fun with this collection! I am off the play some more - should be able to share some more Wherever layouts in a couple days! 

If you are playing with these goodies too - we would love to see! Pop up a photo on the Facebook Scrap Shotz Paper Crafting Group.  


Monday, March 25, 2024

Back To Basics Facebook Live: Diecutting


Are you looking to add Diecutting to your cardmaking repertoire? In the latest installement of the Back To Basics Facebook Live Series Rosie shares everything you need to know for diecutting. From the tools and accessories you need, to all the techniques, tips and tricks you can use to add diecuts to your next card. 


Click the video above to watch the Live on replay, or head over the the Scrap Shotz Facebook Page to find the whole series! Join us every Thursday for this really fun series designed for new and experienced cardmakers alike. Is there a specific topic you'd like to see covered? Let us know!!! Thanks for stopping by :)

Monday, March 18, 2024

Simple Stories Simple Vintage Spring Garden

 Hello everyone!

I have two layouts for you today using the Simple Stories "Simple Vintage Spring Garden" Collection. I managed to use some Easter pictures as there are bunnies and eggs on some of the papers!


I began this layout with one of the premade chipboard frames. I selected a title from the foam sticker pack and propped it up with some extra foam adhesive on the back. The cut file is free on the Scrapbooks and Cards Today blog. I cut the white outline first and then erased the outline of one bunny so I was left with just the inside. I copied and pasted those two pieces 16 times and then cut out the blue paper. This was so much easier than trying to back the white frame! I suppose I could've cut the blue sheet as one piece and laid the white outline on top but I didn't want to risk the paper tearing while cutting. I had some trouble with the white paper because it wasn't thick enough. I used blade level 4, force 33 and speed 4 with overcut. It worked really nicely on the blue paper because it came off as one piece but I was able to pop each piece out without any tearing. 


The tags are found on a cut apart paper in the paper pack. I used some chipboard stickers and a cardstock sticker to embellish the tag. 


The finishing touches were a chipboard bunny over a bits and pieces flower and enamel dots on the frame and bunny bows. 


The second layout uses this really pretty background paper from the kit. The scallop is a sticker on the cardstock sticker page in the kit. 


The pictures are matted with pieces from the manufacturer strips on several papers. 


I also cut apart some tags to matte the bottom right photo and the journaling card. I fussy cut the flowers and used lots of bits and pieces, foam stickers and cardstock stickers to embellish the page. The doily and the embroidery thread were the only pieces from my stash.


That's all for now. I'll be back again in a few weeks with a two-page spread.
Have a great day!

Friday, March 15, 2024

Back to Basics Facebook Live Series: Stencils!


 Karla was Live this week on the Scrap Shotz Facebook Page for the Back To Basics Series! Back to Basics is a series for new and experienced cardmakers that takes you through all of the tools and techniques you need to create beautiful, unique, custom cards. 


This week Karla went through everything you need to know about stencils with tips on how to use them to make beautiful custom cards. Click the video above to watch the full Live on replay, or head over to the Facebook Page to find the whole series. The Back to Basics series is Live every Thursday at 1pm, and we'd love to see you there.

Monday, March 11, 2024

Back To Basics Live Series: Embossing


I hope you were all able to catch Rosie's Live on Thursday where she took us through everything we need to know about Embossing! From Heat Embossing to Dry Embossing and everyting in between, this is a really great live to check out. 


There are so many great tips and tricks in this Live! You can watch the replay above, or head over the the Scrap Shotz Facebook Page to watch the replay and find all the other Lives in the Back To Basics Series. The Back To Basics Facebook Lives happen every Thursday and are a great resource for both new and veteran card makers and papercrafters, we'd love to have you join us. If there is a topic you'd like us to cover, please let us know. See you Thursday :) 

Saturday, March 2, 2024

Back to Basics Facebook Live Series: Stamping and Small Tools

 There are two more installments and the Back To Basics Facebook Live Series for you to check out! Click the videos here to watch them, or pop over to the Scrap Shotz Facebook Page to catch the whole series on replay.

In Rosie's class, she takes you through everything you need to know about Stamping Blocks and Positioners, which can truly help to elevate your stamping game to the next level. 


Next, join Karla as she reviews all those small tools you see people using in their cardmaker! Which ones do you really need, and how do you use them? Karla has those answers for you :) Click HERE for the Live Replay!!!

Be sure to join the Back to Basics Facebook Lives every Thursday at 1pm MST for more cardmaking tips and tricks. Whether you are a beginner, or an avid cardmaker, you are sure to find inspiration! Is there something you would like to see covered in one of the Live's? We'd love to hear from you. Please share your requests with us so we can make sure to cover everything you want to know about creating beautiful cards and papercrafting.
See you next Thursday :)