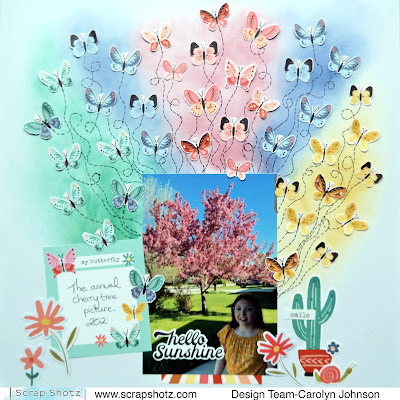
Wow, it is July already! It is so nice to be scrapping again. I'm excited to show you the Simple Stories Boho Sunshine Collection. It is cute and playful and perfect for scrapping pictures of my 11-year-old.
Friday, June 30, 2023
Simple Stories Boho Sunshine Layouts and a Card
Friday, June 9, 2023
Alex Syberia Designs...Fabulous Florals!
Hello!
Rosie back again with more Alex Syberia Designs projects, this time, featuring florals!
This large bloom from the Hello Lovely stamp set is the perfect size to fill an A2 card front. I stamped this on Altenew watercolour paper with clear embossing ink and then heat set with Altenew Rose Gold Crisp Embossing Powder.
It's coloured with Distress Watercolour Pencils and I added some extra details/shading with Prismacolor Pencils. The panel is die cut with the Stampendous Deckle Cutting dies (this is not in the store but can be special ordered) and the sentiment is also heat embossed with Rose Gold embossing powder. A few Studio Katia Iridescent Bubbles finish off this card.
Life Is Good is another gorgeous floral stamp from this designer.
I used the ink smooshing technique to create the background with Altenew Just Green, Lagoon, Maple Yellow and Galactic Stream Crisp Dye inks, then run through my Big Shot with the Honey Bee Rainbow A2 Pierced Cover Plate.
The large floral image from Life Is Good was stamped on copic friendly cardstock, coloured with Copic markers, fussy cut and popped up on the background with foam adhesive tape. I treated the black card stock with the Taylored Expressions-Anti Static Powder Tool which is one of the best anti-static tools on the market in my opinion, then stamped the sentiment in clear embossing ink, coated with white embossing powder and set with heat tool.
Now let's take a look at one of the stand alone die sets from Alex Syberia Designs, Fantasy Flowers! If you were at the Great Canadian Scrapbook Carnival in Edmonton you may have created one of these cards in one of the Scrap Shotz Make & Takes.
These layers are super easy to layer and I die cut the layers from Memory Box 6x6 Ocean Blue Paper Pad which contains 4 each of 12 shades so it's perfect to use for these types of layering dies!
The background is created with Simon Hurley Tropical Tango Lunar Paste and the Alex Syberia Pureland Fan stencil. After adhering the layers together I've embellished the stamens with a gel pen from the Sakura-Gelly Roll Classic Pen Set.
Sentiment is from the Pinkfresh Studio Sentiments 5 pack of 43 sentiments which has multiple birthday, thank you and encouragement (just to name a few) sentiments in gold or silver foil. A few Pinkfresh Studio Silver Matte Pearls complete this card.
I made this second version of the card with yellow blooms using Memory Box Sunny Orange 6x6 paper to die cut blooms and Studio Katia Gold Sparkle Crystals.
I have one more card created with the Petit Periwinkles Stand alone Die Set but I can't find it to photograph so make sure you're following use on Instagram as I'll post it there when I locate it!
Thanks for stopping in!
Tuesday, June 6, 2023
Alex Syberia Designs! Cute Critters!
Hello Scrap Shotz Friends!
Rosie here, sharing a few projects with a brand new to us product line, Alex Syberia Designs!
You'll find cute critters, lovely florals, stand alone die sets and hot foil plates in this product line!
Check out the entire line the store HERE!
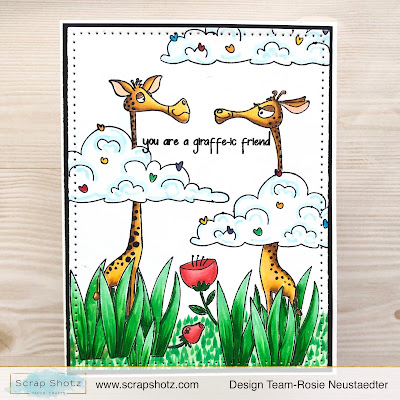
First up, Giraffe-ic stamps and dies...
I've done a bunch of masking and stamping to create this fun scene for these cute giraffe friends and then coloured with Copic markers.
You like giraffes but you LOVE birds? Let's check out these feathery friends, Paradise Birds!
These fine friends are Copic coloured and visting on a background created with Lunar Pastes and the Pureland Fan stencil from Alex Syberia. The sentiment is from the Life is Good stamp set.
I used the Altenew Stampwheel to stamp this wreath of palm fronds and to also stamp a mirror image of the toucan bird that I've Copic coloured so this couple could face each other as they celebrate their anniversary!
I stamped, coloured and die cut these images from Paradise birds and created a shaker thank you card. I applied Clear Skies Lunar Paste through the Simon Hurley 6x6 Tiny Circles stencil and adhered the images with liquid adhesive as well as foam adhesive to pop some of them up.
The background shines with the combo Shooting Star Lunar Paste and the AS Pureland Fan stencil. These images are all Copic coloured as well as die cut with the coordinating Paradise Birds dies.
I'll be back later to share some of the fabulous florals from Alex Syberia Designs!
Thanks for stopping by!


