Thursday, February 29, 2024

49 and Market Vintage Artistry - more Moonlit Garden


Hello! I am back to share more layouts featuring The 49 and Market - Vintage Artistry, Moonlit Garden. This collection is such a joy to work with! I am playing with the 12x12 Collection Pack,   Filmstrip FramesChipboard BitsPostage Washi Tape, and Ephemera Bits

Keep it Simple

I loved the daisies in the collection and thought they would be perfect to showcase this oh-so-cute photo on my niece! 

For this layout, I kept it simple! I started with the daisy inspired pattern paper background and layered on the light brown filmstrips on the centre. I added my photo (first backed on a number of the coordinating collection papers) on top at centre stage. 


From there, I added a number of phrase inspired embellishments to the top and right side of the photo. I also tucked in a strip of the postage stamps on each side of the photo too. To finish it off, I tucked in the chipboard and ephemera daisies to the left and right of the photo. 


A little butterfly by the photo and a couple of hearts above finished off the layout!  

Filmstrips 

Loving the filmstrip anchor from my last layout I kept going on that theme.

I started with white cardstock and used Ranger Ink, Distress Ink in Stormy Sky and Weathered Wood through a Vicki Boutin stencil and some splattered in those same colours on the page to created a messy, simple mixed media anchor. I also added a little water to some Tonic - Nuvo Crystal Drops in Bottle Green and splattered those across the page for a bit of grunge. 


From there, I layered on a few of the film strips lengthwise down the page - just left of centre. I backed my 2 photos 4x3 and in 1x2 with papers from the collection. I used staples to adhere the layers together as a little extra texture. Once those were cascaded down the film strip, I tucked in a few embellishments and phrases from the chipboard and ephemera, including those adorable butterflies, in and around the photos. 


Before finishing the layout, I created a small 3x4 Flip Flap Pocket for my title as a place to add my journalling and some more photos too. 


Oh one more touch. I cut a very small slice of each of the edges of the white cardstock so I could show another one of the pattern papers as a frame all around the layout. 

Grid of Circles 

I was feeling  the need to doodle and make a bit of a mixed media mess on this one! 

I grabbed one of the pattern backgrounds from the collection and using a circle shape from my scraproom and a black journalling pen I messily traced it a bunch of times in a 3x3 grid pattern. To make the circles a little more messy, as I traced I moved the circle shape just slightly and scribbled a little over the lines and around it too. 

After that I reached for a couple of stencils from my stash - one Vicki Boutin and Tim Holtz. I used the Tim Holtz stencil  with some Crafter’s Workshop, Stencil Butter in black and the other with Ranger Ink, Distress Ink in Stormy Sky and Weathered Wood here and there on the page.

From there I printed my photo in 4x6 and backed it with a bunch of the pattern papers and various collection embellishments to sit centre stage of the grid. Then printed and cut a few more photos to sit in each of the circles on the page, leaving a couple circles empty to anchor some embellishments around the page and for my title! 


Just loving this collection! So pretty and so versatile. If you are playing with Moonlit Garden, we would love to see. Join us over on Facebook and pop a photo up on the Scrap Shotz Paper Crafting Group. 


Tuesday, February 27, 2024

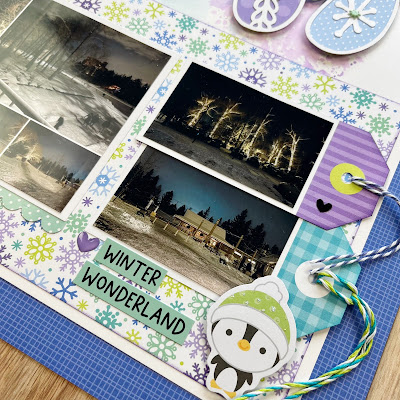
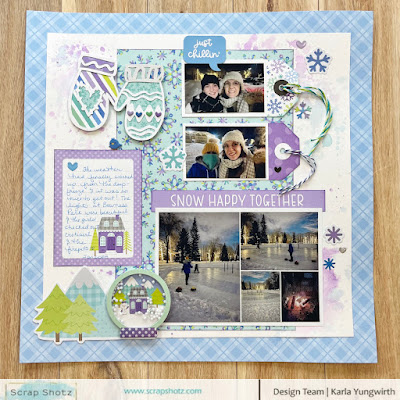
Scrapbooking with the Doodlebug Design Snow Much Fun Collection!

Hello friends, Karla here today with two fun and frosty layouts using the fabulous Doodlebug Design Snow Much Fun collection! I love the blues and purples in this line and there are so many fantastic pieces to embellish with! I was excited to get out my photos from a recent trip to a local park!

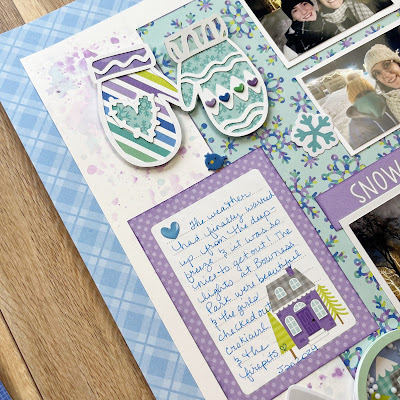
I used my Cricut to diecut the title and mittens and then used the Petite Prints and 12x12 Collection Pack to back the cut files with. 

I smooshed Villainous Potion and Broken China Distress Oxide Inks onto a Waffle Flower Stencil Mat and after spritzing with water, used some plastic packaging to pick up the colour and add it to my white cardstock background. 

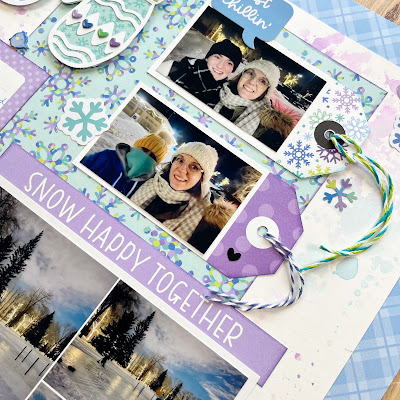
I added puffy stickers and stickers from the 12x12 sticker sheet (also included in the Collection Pack).

The cut apart tag sheet was perfect for layering on smaller photos to add to my page. 

On the second page I again used the Petite Prints for a border and then a pretty snowflake pattern on the white cardstock. 


I used one of the journaling cards from the cut apart sheet and added some cute heart stickers.


I added some of the sentiment and snowflake stickers to decorate the page.


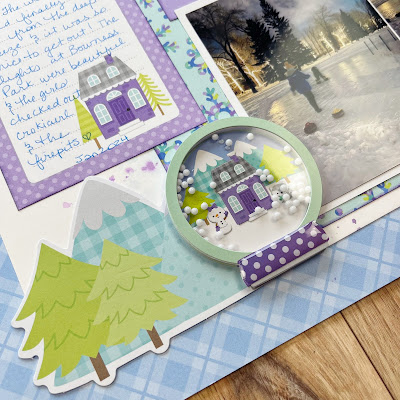
The adorable Winter Wonderland Shaker Pop was perfect to decorate the page, layered on some cute Bits & Pieces ephemera!


Be sure to head over to the shop to check out Doodlebug Design Snow Much Fun collection

Monday, February 26, 2024

49 and Market Vintage Artistry Moonlit Garden

The 49 and Market - Vintage Artistry, Moonlit Garden is on my scrapppy desk these days thanks to Scrap Shotz happy mail and I am loving it!

The beautifully muted tones of this collection and the diversity of the embellishments make this set so easy to use for all kinds of memories. I used it for pics of my niece, an eve at the beer garden, and even hiking so far!  

Today, I am sharing layouts I made using the 12x12 Collection Pack,   Filmstrip FramesChipboard BitsPostage Washi Tape, and Ephemera Bits. There a few items from my stash too amongst these new goodies. 


Monochromatic Inspired 


For my first layout, I was drawn to the green in the collection so leaned into a monochromatic design. 

To add a touch more green to the background and an anchor for my photo, I squeezed some Tonic - Nuvo Crystal Drops in Bottle Green  across the page and used a spatula to spread it out in a messy square. Once that dried, I added some texture to the page with a Vicki Boutin stencil and black The Crafter’s Workshop - Stencil Butter. A few splatters in black finished it off the background.  

From there, I grabbed a few of the Filmstrips and laid those across the green square I made. I dropped my 4x6 photo down in the middle backed with a few collection papers on foam dots. I then reached for all the green leaves (from the embellishments or fussy cut) and added those in and around the filmstrips and photo - I added a few 49 and Market rub on leaves from my stash too.  


To finish off the layout, I added in a few more of the embellishments here and there - including the title family. I love how the different phrases and words across the matching packs nestle into one another. 


Double Page Layout for the Win


I love a double page layout - the impact they have when flipping through memories in an album is amazing and this collection deserved that kind of impact! I went with a grid pattern of small 2x3 photos centre of the spread and then used full size 4x6 photos with a bunch of embellishments as layout book ends. 

To start, I cut down that light pattern paper in the centre and added some journal pen stitching, some touches of stencil using Distress Ink Weather Wood, a few rub ons from my stash of 49 and Market, some Picket Fence Studios stamps and finally black splatters. I backed each of the photos with a coordinating pattern paper before adhering them down. I added a strip of another pattern (with black journalling pen stitches on the outside) to each outside edge for a little more texture. 

Next, I worked on the background. I started by rubbing the edges of that fantastic black/white pattern in Distress Ink, Bundled Sage and Distress Oxide, Crushed Olive. I added a few patterns behind my feature 4x6 photos before adhering them down to each side of the grid. 


Then it was all about adding embellishments! I added a circle cascade, some film strips and frames to each side for balance. Then a few more touches, including the title ‘Dreamer’ on the left and the tickets tucked into the grid photos from the Ephemera Bits pack. I used one of the chipboard frames right in the photo to showcase my sister hiking through a trail turned very long puddle in the Scottish rain! 


I will be back to share more soon - so many possibilities with this amazing collection! I am reaching for cute toddler photos and, of course, more hiking photos next! 


49 and Market Grove Collection Part 2

 Hello everyone. Get ready to get green! I have two more layouts today with the 49 and Market - Grove Collection. It's good to be green.


The first layout uses one piece of paper. It is cut in half and then that half was cut in half again. The company tag at the bottom of another two papers had the green band on the back and I used them to cover the seams. 


I decided to stamp some words and leaves on the page to for some contrast and interest. 


 The frame packacetate leaves and butterflies and envelope bits pack were what made the embellishments easy to use. The rub-ons are hard to find because they blend so well.


The second layout used a few different papers layered for the background and then lots of frames. I fussy cut the main leaves and butterflies and then layered acetate and rub-on ones underneath. The Thickers are from Simple Stories from a previous kit. I decided to stitch a little bit to match the fake stitching on the frames and ended up wrapping two of the frames in thread. 


This picture shows one of the rub-ons, stamping, fussy cutting and paint splatter.


This picture shows some of the stitching and fussy cutting.

That's all for now. Stop by the shop and check out this collection while it is still in stock!

Have a scrappy day!

Saturday, February 17, 2024

Back To Basics Facebook Live with Karla - Paper!

Did you catch Karla this week with our Back To Basics Facebook Live Series? This week's focus was PAPER! What types of paper should you use? How should you store your paper? Techniques that work with different types of paper! Everything you need to know to get started on your Cardmaking journey, or enhance what you already know. Click the link above or the video below to catch the replay!!!


 Find all of the supplies Karla used in the Scrap Shotz Store. And visit the Scrap Shotz Facebook Page every Thursday at 1pm for a new Live in the Back to Basics series. Is there a topic you haven't seen covered yet? Comment below to let us know, visit the Facebook Page or Community Group: Scrap Shotz Paper Crafting Group to leave your suggestions and questions there. Please feel free to share your creations and what you're learning there as well, we'd love to see it :) 
Set your weekly remind so you don't miss any of this series, and see you next Thursday :) 

Monday, February 12, 2024

49 and Market Color Swatch Grove Layouts

 Hello everyone! Are you in the mood for some green layouts? If so, I have two just for you. This is my first time using 49 and Market and it did not disappoint. The papers are thicker than any I've ever used which makes for a really strong base. I also loved the rub-ons. It is not something I've used a lot in the past, but it sure makes adding splatters precise and less messy. They also transferred very easily and they look like they are printed on the paper. 


The collection is called 'Colour Swatch - Grove'. The first layout I used the premade frames for my photos. Then I used some acetate leaves and butterflies to decorate the page. 


The pocket is in the envelope bits pack. Finally, some of those subtle details are rub-ons. It's hard to tell which ones!


The foam letters are from a previous Simple Stories kit.


The second layout uses all the same supplies as the first. The journaling tags can be found in the envelope bits package. It is much easier to see the elements up close. 


The acetate you can see the outline of the plastic around the leaves. But the two butterflies and the splatter between them are all rub-ons and look like they are part of the background paper. 


Those leaves below the butterfly are a rub-on and the leaves on the right are part of the patterned paper. Can't even tell the difference! I also couldn't help spattering some white paint around the page. 

That's all for now but I'll be back in two weeks with more Grove Collection layouts.


Saturday, February 10, 2024

Back To Basics Facebook Live with Rosie - Inks!

 Hello, Jenn here to share this week's Scrap Shotz Back To Basics Facebook Live series. This week Rosie shared all the tips and tricks you need to know to use your INK! 


Grab a drink, and a snack, and enjoy this Live class, perfect for beginners and experts alike. And be sure to check the entire series for everything you need to know to start your cardmaking and paper crafting journey, or spark creative inspiration to take your crafting to the next level.

See you next Thursday with the next installement Live on the Scrap Shotz Facebook Page at 1pm MST. And here on Friday with the replay!!!

Happy Scrapping :)
Jenn 

Thursday, February 8, 2024

Traveler's Notebook Layout with 49 and Market

 Hello, Jenn here to share a Traveler's Notebook layout. I've been inspired by Scrap Shotz challenge for the month of February to get an unfinished project FINISHED! I know I'm not alone in having a pile of half finished projects that need some attention so I think this challenge is the perfect push to pick one and get it done. The first project I've chosen is my May 2019 Traveler's Notebook, which only has a few pages left to finish, one of which just happened to be a picture of my peach lemonade from Starbucks, the perfect match for the 49 and Market Color Swatch Peach Collection that I got from Scrap Shotz! Here is what I did:


All month long I have been playing with the sketch that I created for February so I thought it would be fun to try shrinking it down to a Traveler's Notebook size for this layout. I threw in a few of my favourite techniques, as well, to ingnite some creative sparks and complete the rest of the notebook. To start I used some watered down Abandoned Coral Distress Ink to create splatters on my background. While that dried, I chose the cover paper from the Peach collection, which has a small sample of each paper pattern on it. I really love using this paper in every collection to stretch my collection. I tore strips of paper from this sheet so there would be multiple patters on each strip, for my horizontal and vertical layers. This gave me a lot of colour for my layers without having to sacrifice a small strip torn off of multiple pieces of paper. The torn edges also give a lot of texture and interest without too much dimension. 


I layed down in strips in layers, similar to the sketch, and then added an envelope and tag from the Peach Envelope Bits pack, and some leaves and butterflies from the Peach Acetate Leaves pack. I also had a piece of a cutfile that I used as a stencil for an earlier layout in the Traveler's notebook and thought might make a nice embellishment so I cut it apart to fit it around my little picture. The finishing touches were a few sequins from the SpiegelMom Scraps Peach Fizz sequins mix and a sketchy border around the layout using a peach marker.


I always enjoy creating fun little layouts that come together quick and easy. I like to stick to my comfort zone to get started with finishing a project that I haven't touched for a little while, and then I can slowly build up my creative confidence with go-to techniques. For me, those include using a sketch to inspire design, using scraps, paper tearing, splatters, sequins, and sketchy borders. I try to keep it simple and use a limited amount of supplies, like a single collection. After creating this layout, I went on to finish three more and completed this project, WOOHOO!!! Please check out my Youtube Channel for a more detailed list of all of the unfinished projects I am working on this year, as well as the process video for this layout and a flip-through of the finished Traveler's Notebook. To find all of the supplies I used, click the links that are highlighted, or head to the Scrap Shotz store to see all of the beautiful 49 and Market products now available.

Thanks so much for popping by, Happy Scrapping :)
Jenn


Sunday, February 4, 2024

Back To Basics: Facebook Live Series!

Have you been following along with our new Back To Basics series?!! We want to help you start making cards if you’re not sure where to start- or if you’re a seasoned cardmaker this will be an awesome weekly refresher and a great excuse to get out your supplies and share what you’ve made each week in our Scrap Shotz Paper Crafting Group! You can find us live weekly on our Facebook Page at 1 pm MT on Thursdays!


On week 1 we shared an overview of the series and talked about what is in a basic card kit and reviewed Adhesives!! Feel free to share your favs and let us know if there are topics you’d love to know more about! Watch the Facebook Live video HERE or click the link below!


Week two of our Back to Basics series and we talked trimmers, scissors and using your 12x12 scrapbook supplies to make cards! Watch the Facebook Live Video HERE or click the link below!

Back To Basics Week 3: Craft Mats and Scoring Boards - Watch the Facebook Live Video HERE or click link below!


Set your reminder to find us live weekly on our Facebook Page at 1 pm MT on Thursdays!