Showing posts with label scrapbook. Show all posts

Tuesday, October 22, 2024

49 and Market Rust and Revs


Do you have some of the 49 & Market, Rust and Revs goodies on your scrappy desk from the Scrap Shotz shop? I do and am loving it - such a great collection to document workshop, race car, mechanic shop, home renovations and more. 

Here are a few of my layouts so far. 

Inspired by a Die Cut


As I flipped through the Laser Cut Outs I immediately loved this old timey truck and was so excited to have the perfect jumping off point to document a photo of my grandpa’s old truck. I have so many memories of his truck - including riding in the back down the gravel road in the country [ It was a different time! Pre-seat belts and sun screen ;) ]

I started with the wood grain 12x12 pattern and added some white splatters (by adding a little water to a dollop of white acrylic paint and a cheap paint brush to flick the paint onto the page). Then I printed my photo in black and white at 4x6 and backed it with a few layers of the coordinating pattern papers.

After dropping those down, I had added my truck die cut and then just flipped through the Laser Die Cuts and Die Cute Elements to tuck and layer them all around the photo. A few Rub Ons on the top left and lower right finished off the page. 


 Come on! Isn’t that truck adorable?

Embrace the Pattern Paper 

The 12x12 papers with the collection include a combination of full patterns, like wood grain or plaid, and a number of what I would call pre-designed pages. Pages that have a combination of patterns, some images of the die cuts and generally look like the start of a layout - a great jumping off point. 

The squares of journalling lines and map patterns on the polka dot background here are the pattern paper - not me. I used this area to anchor my photo and all the embellishments. 


I added some additional pattern papers behind my photo for some texture and depth, and the frame die cut to draw the eye. From there, I piled on the Laser Cut and Die Cut Elements behind, beside and in front of the photo. I wanted it to look like a busy, messy mechanic shop so just kept layering on the goodies! 

Think Outside the Box 


When I see grungy plaid pattern, I think home renovations. While this collection might be more about mechanic things it works for so many other memories. We bought a fixer upper a few years ago so there are a lot of home renovations and any excuse to get photos of these memories on a layout works for me! 

I find for home renovation the photos are not great but the story is - it’s fun to look back and remember what that wall or room looked like. So I went with a number of small 2x3 photos to show the progress of turning an outer wall into a new entry for the mom-in-law suite. I used a frame die cut to highlight my favourite photo of the bunch. 


The die cuts include a bunch of old timey window frames - how perfect - so I used those as embellishments by cascading a few messily down the page behind my highlighted photo. A bunch of the cogs in the Laser Cut Outs and Die Cuts and some word phrases finished off the embellishing around the photos. 


I finished off the page with some Rub Ons clusters on the bottom and top of the page and black splatters (same approach here as the white splatters, a little water with some black acrylic paint and flicked on the page with a paint brush). 

If you are playing with the Rust and Revs we would love to see! Join us over on the Scrap Shotz Facebook Group and post up your creations so we can swoon! 


Thursday, February 29, 2024

49 and Market Vintage Artistry - more Moonlit Garden


Hello! I am back to share more layouts featuring The 49 and Market - Vintage Artistry, Moonlit Garden. This collection is such a joy to work with! I am playing with the 12x12 Collection Pack,   Filmstrip FramesChipboard BitsPostage Washi Tape, and Ephemera Bits

Keep it Simple

I loved the daisies in the collection and thought they would be perfect to showcase this oh-so-cute photo on my niece! 

For this layout, I kept it simple! I started with the daisy inspired pattern paper background and layered on the light brown filmstrips on the centre. I added my photo (first backed on a number of the coordinating collection papers) on top at centre stage. 


From there, I added a number of phrase inspired embellishments to the top and right side of the photo. I also tucked in a strip of the postage stamps on each side of the photo too. To finish it off, I tucked in the chipboard and ephemera daisies to the left and right of the photo. 


A little butterfly by the photo and a couple of hearts above finished off the layout!  

Filmstrips 

Loving the filmstrip anchor from my last layout I kept going on that theme.

I started with white cardstock and used Ranger Ink, Distress Ink in Stormy Sky and Weathered Wood through a Vicki Boutin stencil and some splattered in those same colours on the page to created a messy, simple mixed media anchor. I also added a little water to some Tonic - Nuvo Crystal Drops in Bottle Green and splattered those across the page for a bit of grunge. 


From there, I layered on a few of the film strips lengthwise down the page - just left of centre. I backed my 2 photos 4x3 and in 1x2 with papers from the collection. I used staples to adhere the layers together as a little extra texture. Once those were cascaded down the film strip, I tucked in a few embellishments and phrases from the chipboard and ephemera, including those adorable butterflies, in and around the photos. 


Before finishing the layout, I created a small 3x4 Flip Flap Pocket for my title as a place to add my journalling and some more photos too. 


Oh one more touch. I cut a very small slice of each of the edges of the white cardstock so I could show another one of the pattern papers as a frame all around the layout. 

Grid of Circles 

I was feeling  the need to doodle and make a bit of a mixed media mess on this one! 

I grabbed one of the pattern backgrounds from the collection and using a circle shape from my scraproom and a black journalling pen I messily traced it a bunch of times in a 3x3 grid pattern. To make the circles a little more messy, as I traced I moved the circle shape just slightly and scribbled a little over the lines and around it too. 

After that I reached for a couple of stencils from my stash - one Vicki Boutin and Tim Holtz. I used the Tim Holtz stencil  with some Crafter’s Workshop, Stencil Butter in black and the other with Ranger Ink, Distress Ink in Stormy Sky and Weathered Wood here and there on the page.

From there I printed my photo in 4x6 and backed it with a bunch of the pattern papers and various collection embellishments to sit centre stage of the grid. Then printed and cut a few more photos to sit in each of the circles on the page, leaving a couple circles empty to anchor some embellishments around the page and for my title! 


Just loving this collection! So pretty and so versatile. If you are playing with Moonlit Garden, we would love to see. Join us over on Facebook and pop a photo up on the Scrap Shotz Paper Crafting Group. 


Saturday, May 7, 2022

Simple Stories, Simple Vintage Indigo Garden Kit

The Simple Stories, Simple Vintage Indigo Garden collection was the star of our March 2022 Scrap Shotz Scrapbooking Kit. An absolutely beautiful collection with lots of florals, great sentiments, hearts, and so many pretty butterflies. 

I am playing with the simple Stories, Simple Vintage Indigo Collection Kit, Chipboard Stickers, Bits & Pieces Die Cuts, Decorative Brads, Foam Stickers and coordinating Bazzill Basics Cardstock in pink, mint and yellow. Aka the Kit! 


All My Favourite Patterns 

For my first layout I set aside all my favorite patterns from the kit and got to work! I used a large circle (almost the size of a 12x12 paper) and used it to trace and cut out a few different sized wedges from each pattern then used those to roughly create a circle in the middle of the layout. Before adhering the pieces down, I traced the outside of each messily with a black journal pen and distressed the edges. I also used some Tonic Crystal Drops in Ebony Black to add black splatters to the paper wedges and the background pattern. 

(Splatters How To? Squish out some Nuvo of any colour, add a few spritz of water, mix it up with a paintbrush and flick it onto your layout - the bigger the brush and more dramatic the flicks, the more bold your splatters will be!)  


From there I backed my photo with a bunch of the collection patterns and had a lot of fun tucking and layering all kinds of embellishments. I focused on the Bloom & Grow title and florals behind the photo and from then just found other favourite things. So many amazing embellishments in this kit! 

I felt like the layout was missing something though. So used a Vicki Boutin botanical stamp on that dark grey pattern paper and fussy cut them out before tucking them in around the floral embellishments. I like the added contrast! 

Celebrate Indigo

For my next layout, I focused on the indigo bits! There are not too many collections that feature indigo and anything close to purple. So I was pretty excited that this one has pops of indigo - a deep purple with a touch of navy that after playing a little was a lot to found a combo of Tim Holtz, Distress Ink in Blueprint Sketch and Wild Plum to match. 

I started with white cardstock and using a Vicki Boutin stencil add some random stencil spots using the Tim Holtz colour combo. I used the same colours to add some splatters and, of course, a few black splatters too. 

Then I cut the black and white pattern in 4x6 so I could use a 2x3 photo and use the other half as an anchors for some of the floral embellishments. I added a few other patterns behind as well so they would peek out. And, you guessed it, from them I just tucked and layered goodies from  all the embellisments.


I added some black and white twine to the tags and really like the added texture. I was drawn to the green ‘Hello’ in the Foam Stickers so used that as my title and it inspired the added touches of green around the layout. I think it was a great finishing touch! 


Cascading Circles 

If you have seen any other posts form me .. you may know I love, love, love circles and a cascading design like this one is a go to. Such a great way to use way too many embellishments (is that a thing?) and show off lots of the pattern papers too. 

I picked a dark pattern paper for the background on this one, and prepped it with a Vicki Boutin stencil and splatters in Tim Holtz, Distress Ink in Spun Sugar. Then I found all the circle and large heart embellishments in the kit, cut a few more circles from the pattern papers (focusing on the black and white stripe) and made a circle mess down the page. 


No real method to my madness other than just evenly distributing the different patterns and textures throughout. I finished the layout off by dropping this 4x4 photo on the middle, adding the title from the foam stickers and finally the decorative brads.  

Inspired by An Embellishment

There are these cute little tags in the kit embellishments - a little sentiment with a clip - that sparked this page design. I had an idea of a clothesline look with my photos and all kinds of goodies hanging from it. Well, I may have embellished so much you cant see much of the twine - but I still love it. 

I prepped the cardstock with a bit of Tim Holtz, Distress Ink in Black Soot and a Vicki Boutin stencil, a few splatters in the same colour and some white acrylic paint splatters too. I had some yellow texture rub-ons in my stash that matched the kit’s yellow, so added a few bits here and there too.

Once the background was prepped, I adhered a loopy black and white twine across the middle of the page and added ALL those little tags I could find in the plain, chipboard and foam stickers. Then I just went crazy adding all the things - photos and florals and butterflies and more. 


I finished it off by creating a little mirrored cluster at the bottom of the page to balance how ‘heavy’ I made the middle of the layout. I also cut a little bit off 3 sides of the background so I could peek-a-boo one of the pattern papers around the sides.

If you are playing with this collection in the March Scrapbooking Kit, grabbed some from the shop or about to grab some cause now you love the collection as much as I do … we would love to see what you create. Tag us on social media or join the Scrap Shotz Paper Crafting and post your project! 

Thanks for reading and happy crafting! 


Monday, February 7, 2022

Simple Stories, More Good Stuff


Hello, I am here today to wax poetic (again) about the Simple Stories, Good Life! Scrap Shotz sent me this collection to play with this month and I am loving it! You can check out my first 2 layouts here

Now, let’s show you a few more … 

Wood grain for the Win


For this layout I wanted to bring in a dark background to contrast the bright colours of the collection. So reached for a dark wood grain pattern paper from my stash. Wood grain is essentially a neutral and should go with anything in your stash. When you are struggling to match (which is my biggest struggle) - reach for wood grain. 

I prepped the wood grain by stamping some little hearts in Tim Holtz Distress Inks in Picked Rasberry and Mustard Seed then outlined each with a white pen, and added some white acrylic paint splatters. The hearts I made were my attempt at mimicking those in the collection. 

From there I focused on the cut apart 3x4 cards in the collection and bits & pieces embellishments. I cut a few big pattern paper rectangles to back my 3x4 card grid design, then focused on the grid. Matting each photo with a few layers and letting the 4th spot of the grid act as a title spot. 


I finished off the layout with these super cute photos of my niece (which I printed with a muted filter so they didn’t clash too much with the collection colours), and tucked and added embellishments and enamel dots all about.

Add Some Black to Make it All Match 


For my next layout I wanted to document a fun, fancy donut shop adventure with me and a couple siblings - all of us donut addicts. I was keen to include the Boca Grande logo I cut from the donut box but it looked too dark with the bright Good Stuff colours. So I added some more black to the collection goodies to make it all matchy-matchy! 


I started with this great circle pattern paper and using a washi tape roll and a glue bottle bottom as a stencil, used a black journaling pen to add black circles just off centre on many of the circles in the pattern. Drawing around each a few times and not perfectly. Then I used my favourite Picket Fence Studios, Paper Glaze in Black Peony and a Vicki Boutin stencil to add those cute starbursts in and around the circles and some splatters. I also messily drew lines around the outer edge of the pattern and backed it on black card stock. 

From there it was just a matter of finding all the foodie inspired bits & pieces from the collection and tucking them around the Boca Grande and my photos. I fussy cut the saying from one of the cut apart cards in the kit to use as my title. 

Let the Collection Inspire Your Design 

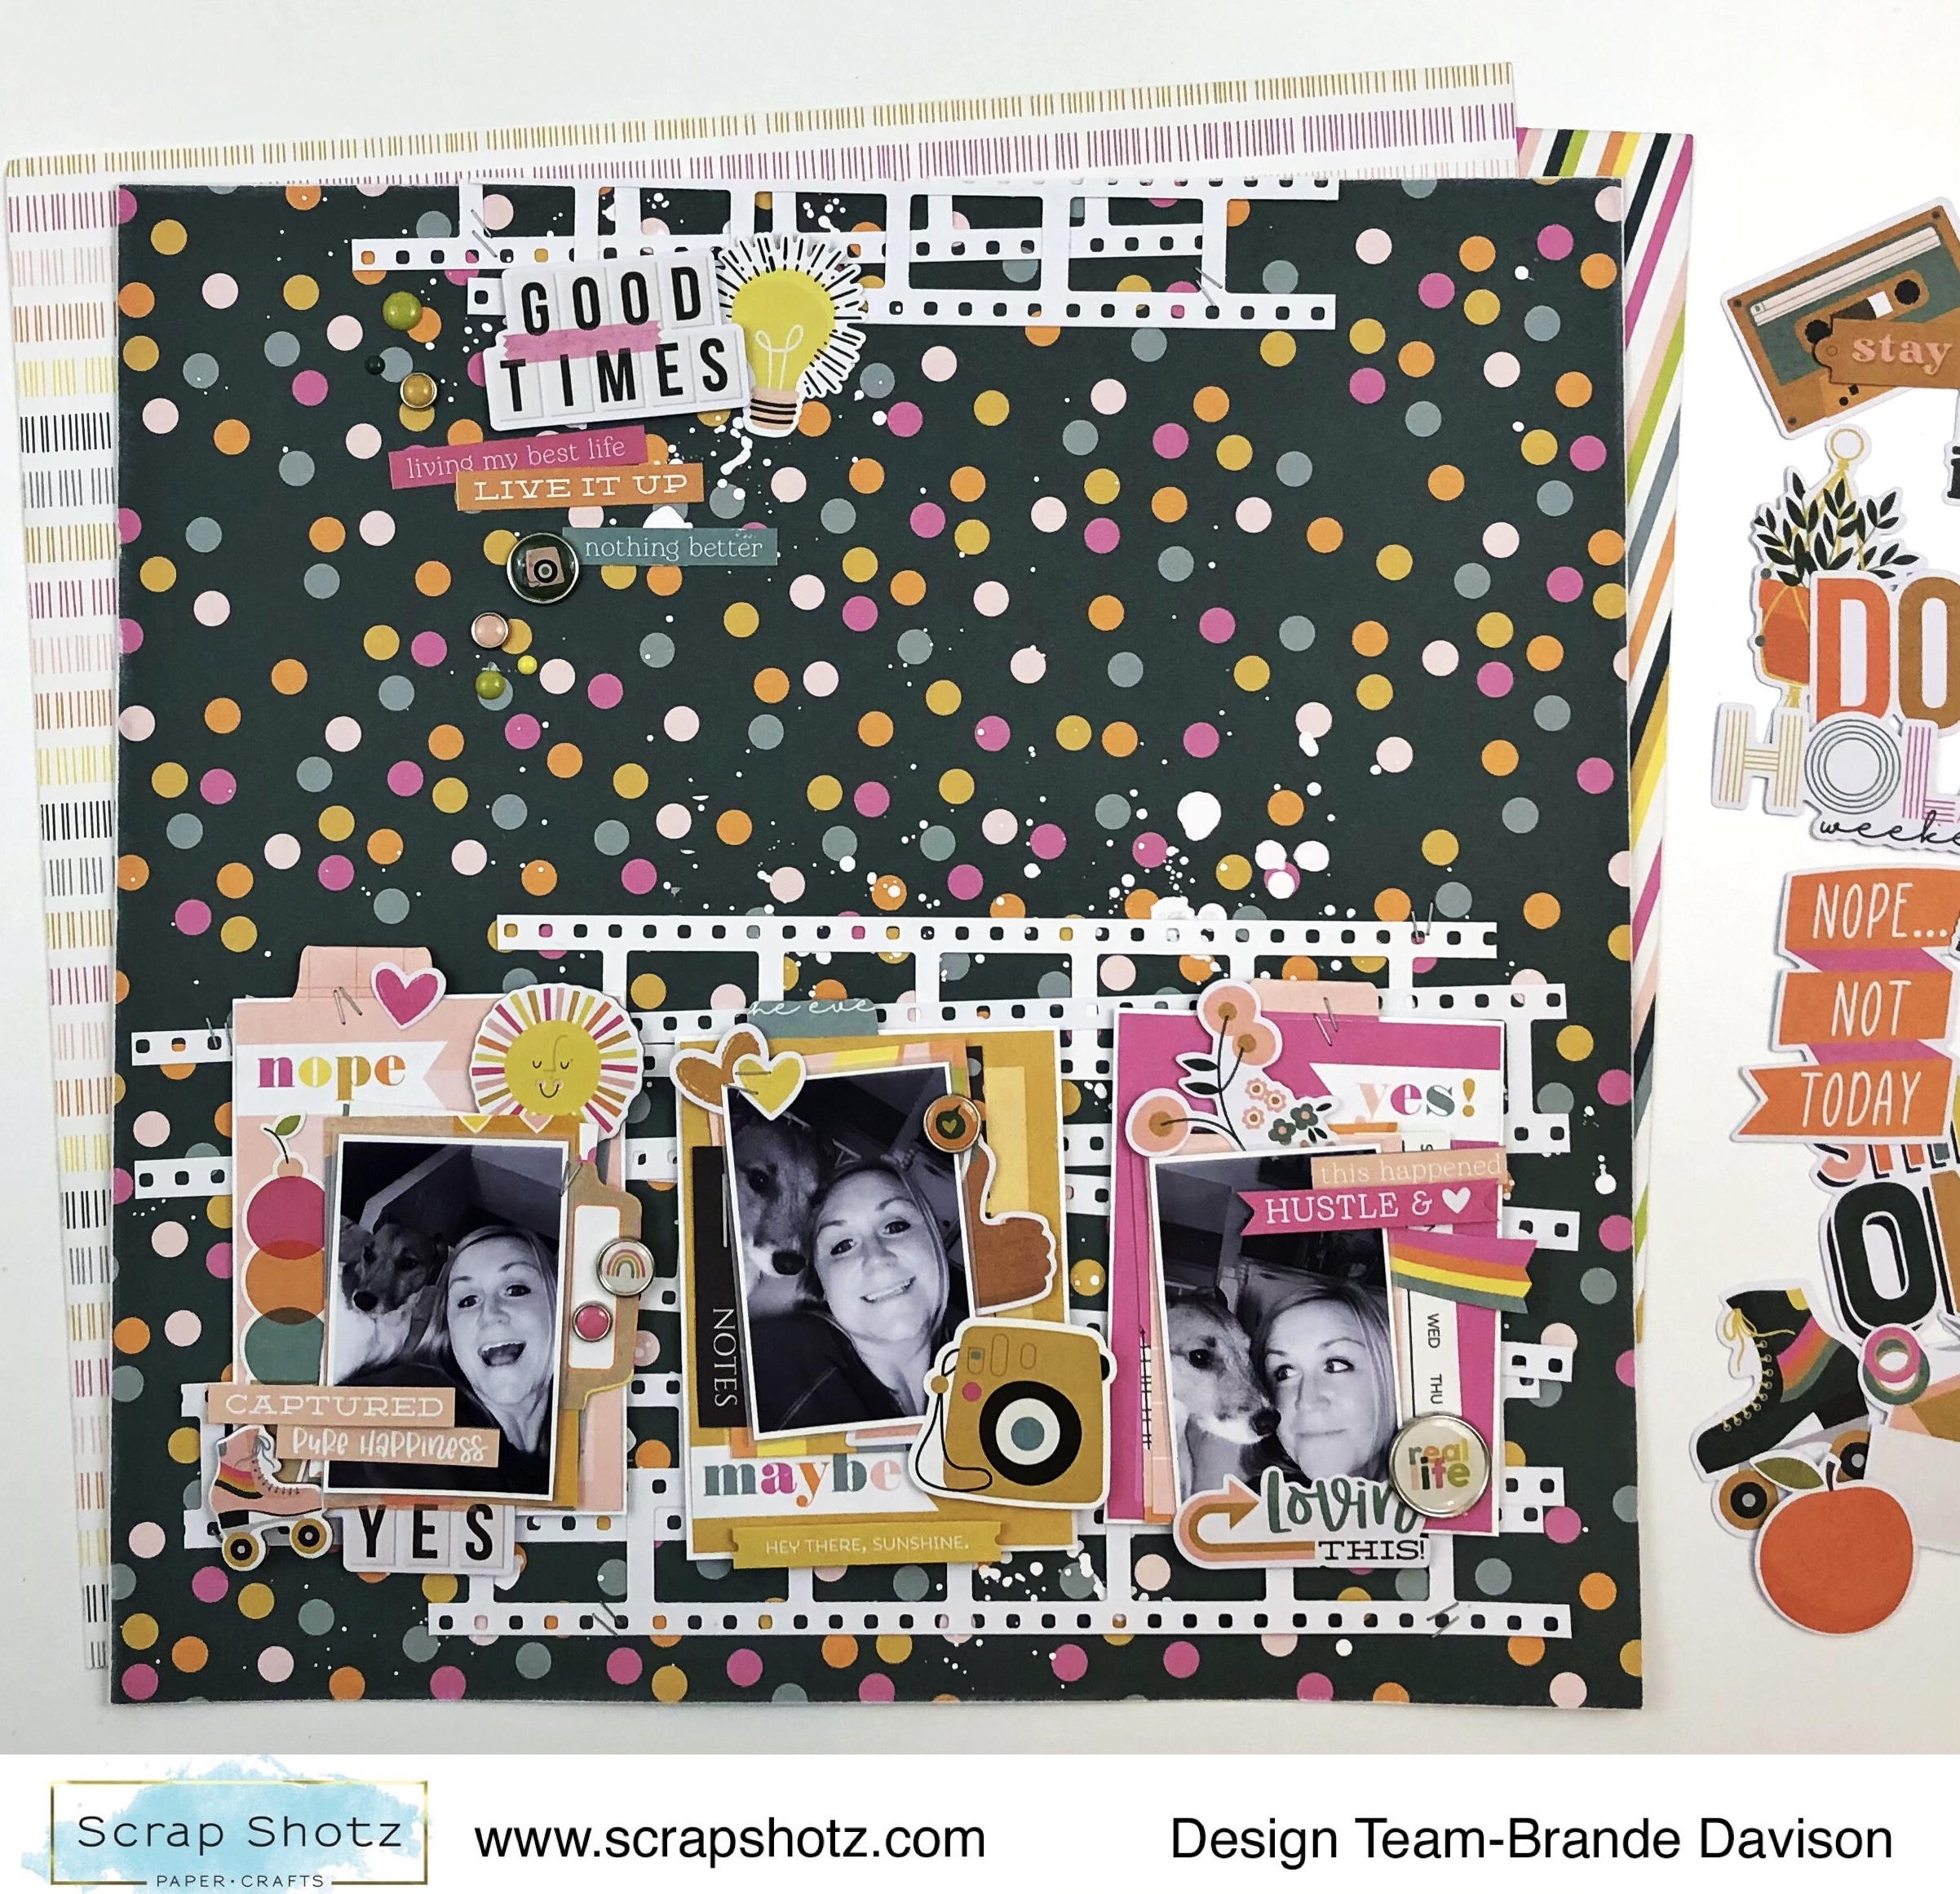
For my last layout, I let the Collection inspire me - from photo choice, to story and all the way to design. One of the pattern papers featured these 3x4 cut apart a cards that had the titles: Nope, Maybe, and Yes. The titles reminded me of attempting to take a selfie with our dog and the pictures went for bad to worse. Ha! 

I used each 3x4 card as an anchor and then matched a bunch of stickers, bits & pieces, and brads to the colour of the journal card. It was really fun to focus on the colour instead of how much sense the embellishments made - my fav is that thumbs up in the middle, yellow pile. So fun! 
I did add some white splatters to the background and punched out a bunch of these film strips in white to create a break between the busy polka dot pattern and my photos. Then added a few film strips to the top and some more embellishments to balance the page. 

I had such fun with this collection and love that it was so perfect for just the everyday fun stuff. There are still Simple Stories, Good Life in the Scrap Shotz shop!
 

Saturday, November 20, 2021

Documenting Autumn Memories


If you working on scrapping your fall memories before the winter and Christmas memories start rolling in, reach for your September Scrapbooking Kit. This kit is all about the ‘Welcome Autumn’ collection by Carta Bella. All the oranges and pumpkins and fantastic fall sentiments make this collection really fun to play with. 

Torn Edges

For my first layout with the kit I reached my my three most favourite patterns from the collection. I ripped the edge of each a little more than the last to create a design where all three patterns could do the work. The white of the ripped eyes breaks up the patterns nicely. I generally would not pair so many busy patterns together but this kit is so well designed it’s easy to mix all the things. 

I printed a 4x6 photo in black and white, popped it up on some foam adhesive and more pattern paper (yup!) then just tucked and layered all the embellishments that made me happy. 

Circles

For my second layout, I was all about circles! First, I used a circle punch to cut out circles of all the fall things from the 2x2 cut apart pattern paper. Then I grabbed up all the circles embellishments from the chipboard and stickers and just stated creating a cascade of fall circle fun. Some black and white splatters in acrylic paint behind the circles brought a bit of the grunge I love. 

I picked a 4x6 photo of me and a couple of my sisters and backed it in a number of the kit pattern paper and some foam tape. A couple of phrase stickers from the kit and a few embellishments finished off this layout. 

Make it Three 


I had a lot of fun with this third layout! I found 3 patterns that were fun together from the kit. Then cut each at an angle to make up the full 12x12 layout like a puzzle. The pieces a little smaller than needed so I could leave a small slice of white space to break up the patterns a bit. 

My next move was to create the ‘Fall’ title on the bottom right. I really wanted to use those sticker alphas and the red truck. Together they made a cute little cluster. I found these sweet little photos of our pup and picked some matching embellishments for the centre of the page and voila! 

White Space 


For my final layout I went minimalist. I used a piece of Bazzill Basics Cardstock in Avalanche (white) from the shop and a bit of stencil to create an anchor for my photos. Then it was all about tucking embellishments and some fussy cut leaves from one of the patterns. Some splatters and the enamel dots from the kit finished it off. 

I have had a lot of fun with this kit and still have so much to play with. If you have a September kit - dig in! If you are not a kit member but looking for some fall goodies, there are still some Carta Bella, Welcome Autumn in the shop. 


Saturday, October 23, 2021

Family Fun

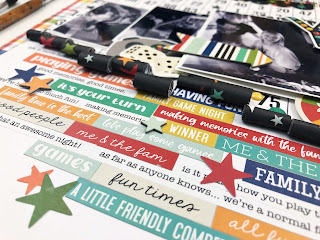
Does your family play a lot a games and do a lot of puzzles? Mine sure does! 

Anytime we are together - no matter if we are in the dining room or a table at the pub - there is some sort of game and most definitely a selfie of us playing. We do this so much, I have a whole bunch of photos waiting to be scrapped. 

Simple Stories, Family Fun collection I picked up from the Scrap Shotz shop to the rescue. This collection has everything you need to scrap games and puzzle nights. From board game pieces to video game sticker or arcade and bowling and mini golf die cuts and more. So much fun! 

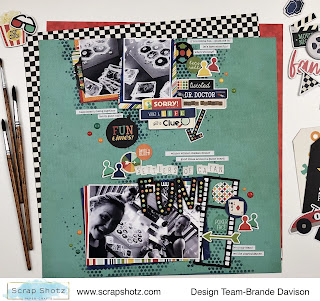
Sorry, not Sorry


For my first layout I grabbed this awesome teal pattern paper called Your Turn from the collection as my background. I used some Tim Holtz Distress Ink in Chipped Sapphire with a Peartree Cutfiles Stencil to give the layout a touch of mixed media. I liked that the stencil looks a little like the Connect 4 Game. Remember that game? 


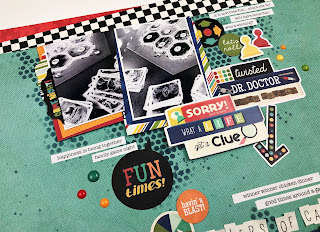
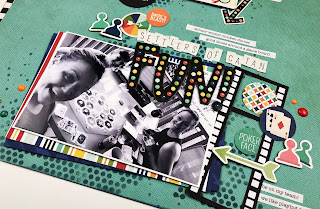
From there I created a top and bottom of the page cluster - focusing on layering all the things behind a 4x6 photo of us playing Settlers of Catan (such a great game!) on the bottom of the page and then a couple of smaller photos of the game on the table at the top of the page. I tied it together with an arrow and the title in the empty space between. 

This collection is full of game board related stickers, die cuts and clipboards - so easy to create fun, themed clusters! 

All the Words 


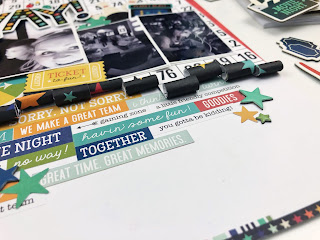
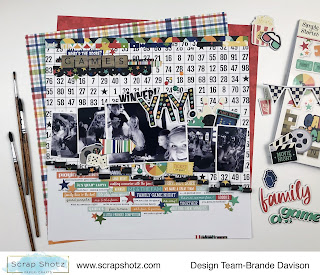
For my second layout I wanted to try two techniques. Using the word and phrase stickers from the Collection Kit sticker sheet and sticker book, and I wanted to try the paper rolling touch I have noticed on Instagram lately. Done! 

I started with the pattern paper called Good Times. I cut along the lines of the number rows from bottom to about halfway up the page. Then using the end of a skinny paintbrush rolled each of the strips up - making sure the rolls were at different heights on the page. I used a little tape to keep them in place. 

Then I secured that on white cardstock and then created a grid of word and phrase stickers on the bottom half. Making sure the design started right below the rolls of paper and not worrying about covering the whole white space. Where the stickers didn’t quite line up, I added a chipboard, sticker or die cut star to hide the oops. 


From there all of my focus was on the paper rolls. I added my photo and just tucked and clustered a bunch of die cuts, stickers, and chipboard to create a nice little mess of fun! I love using a large photo to draw the eye and then a bunch of small photos to add more details. 

Triangles for the Win

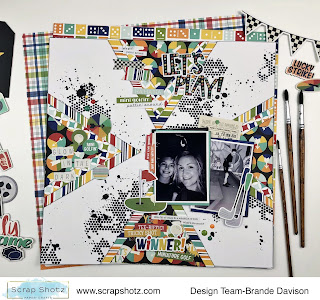
For my final layout I was inspired by a throw back Let’s Get Sketchy sketch - 4 triangles on each edge of the page to draw the eye to the centre where the photo sits. I thought the border of triangles would be a great anchor for loads of goodies! Sure was! 


To start, I grabbed some white cardstock and used that same Peartree Cutfiles stencil and my most favourite mixed media paste, Picket Fence Paper Glaze in Black Pansy, to add a little black texture to the background here and there. 

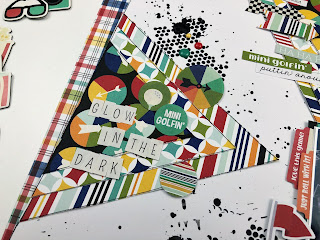
Then I created 4 triangles using 3 layers of the pattern paper each. I adhered these on the middle edge of each side of the page creating a focus point in the centre - where I placed my photos! From there it was all about adding in all the mini-golf related die cuts, chipboard and stickers. So many to choose from! 


I really cannot believe how much fun it was creating these layouts - the collection is so easy to play with and it was great to relive these awesome family moments. 

If you play Quirkle or Uno, master the 1000+ pieces puzzles or have fun at arcades or go-carts or mini-golf … you just might need the Simple Stories, Family Fun collection. Lots of goodies still in the shop ;)