Thursday, December 31, 2009
Happy New Year
Monday, December 28, 2009
Spotted in the Gallery!
Friday, December 25, 2009
Merry Christmas
The 12 Days of Christmas - Day 12
Please let me know what you think!
Thursday, December 24, 2009
The 12 Days of Christmas - Day 11
"I've had this little take-out box sitting in my stash for a few years now, wondering what to do with it. Well, I'm giving my sister-in-law a piece of custom made jewelry for Christmas this year and wanted a cute, unique way to wrap it...and I remembered this little box. It literally took me 10 minutes to alter the box I had sitting on my desk using papers I had sitting on my desk from the December kit and a few other things. Instead of wrapping a box in wrapping paper, this year, why not use your supplies toquickly alter one? You'll be using up some of your stash and creating a one-of-a-kind package for someone special!"
I am sure you'll agree with me that this is so adorable! Please let Heather know too!
Tuesday, December 22, 2009
The 12 Days of Christmas - Day 10
Do you spend a lot of time packaging up home made goodies to give as gifts during the holiday season? I do, because chocolates, almond bark and other goodies make wonderful little hostess gifts. This cute little project will package up your goodies beautifully and show off your hard work at the same time.
This pillow box is made out of acetate and is so simple to make. Start by getting a pillow box template. You can google this and find a number of templates in various sizes so choose one that will suit your individual needs.
Print the template on printer paper. Lay your acetate over the printed template and use a sharpie-type marker to trace the template onto the acetate. Cut the template out and use a tool such as a stylus to “score” the lines that need scoring (your template should explain this.)
I used a circle cutter or strong hole punch to cut half a circle out of one end flap on each side to facilitate easier opening. Adhere sticky strip or other very strong adhesive to the tabbed portion of the template and adhere (I like to put my sticky strip on the outside of the tab and adhere it to the other side so that the tab is now on the inside of the box. Fill your box with goodies and add ribbons and embellies as desired. Here I’ve used some snowflake ribbon and a chipboard snowflake which I painted white and then added dazzling diamonds glitter on top while the paint was still wet. I then added a labeler sticker and a glitter alpha from December’s kit.
I think it looks stunning Denise...and you can give me a gift any time! What do you guys think??? Please leave Denise a comment.
The 12 Days of Christmas - Day 9
Make a sweet impression with your desserts this holiday season by adorning squares, cookies or cupcakes with adorable toppers! Simply search your scrapbook supplies for paper scraps, get out your holiday themed punches or diecutters and combine with a toothpick to create quick and easy toppers!
Please let Amber know how darn sweet these cupcakes are in the comments section!
Monday, December 21, 2009
Spotted in the Gallery!
Friday, December 18, 2009
Fabulous Friday - Inspiration
"With the Christmas season upon us, inspiration is literally everywhere right now. It's definitely a delight for the senses. You can find inspiration in the wrapping paper and cards, advertisments, decorations, tableware, beautifully wrapped gifts, clothing, Christmas lights and even baking. Everywhere I turn, I see beautiful color combinations, amazing text work, cute images, and definitely BLING! The only thing that seems to be missing right now is some time. It is the busiest season of the year and time is at a premium for most people. However, even if I can't find the time to scrapbook right now, I can take pieces of that inspiration and make something homemade for someone else.
I couldn't resist taking this adorable tag off of a set of Joe pajamas that I gave away this year. Isn't it cute?! I couldn't resist using it on a card, adding a little bling, some rub-ons and a popping it up for some dimension.
How about you? Are you feeling overwhelmed with inspiration right now but you don't have any time? Still need some Christmas cards/tags/gifts to give away? How about taking some of that inspiration and creating something on your to-do list? Consider it a challenge, if you will ;-)
I think you will agree with me that this card is fabulous! Please let Heather know too!
Thursday, December 17, 2009
The 12 Days of Christmas - Day 8
Here are the instructions:
1. Cut patterned paper (PP) to 5 1/2" x 5 1/4"
2. Position the 5 1/2" side of the PP in front of you as the base. Make the following marks-
* On the 5 1/4" side, mark the mid-point, approximately 2 5/8" from the edge
* Draw intersecting lines through the mid-point to the closest point along the base
* Cut the sides to create a a hexagon - you will be making 6 cuts.
3. Now cut 3 squares measuring 3"x3". Cut each squares on the diagonal to create 2 triangles for a total of 6 triangles.
4. Cut 2 pieces of white cardstock (CS) 6" x 5 3/4" For each piece of white CS,
* Position the 6" side as your base, measure 1 3/8" in from the corner
* Mark the mid-point on the 5 3/4" side, approximately 2 7/8"
* On each side, draw six lines intersecting lines through the mid point to its closest point along
the base
* Cut along the lines to create a hexagon - you will be cutting 6 times.
6. Now cut 6 squares measuring 3 1/2" x 3 1/2". Again, cut each square on the diagonal to
create 2 triangles. There will be a total of 12 triangles.
7. Glue the PP hexagon to one of the white cardstock hexagons. Make sure the PP is centered inside the cardstock hexagon.
8. Glue one PP triangle to one cardstock triangle. Make sure the PP is within the CS triangle. Repeat 6 times.
9. Now create holes for the binding:
* Place the hexagon without PP on the table first
* Place the hexagon with the PP on top. Have the PP facing up
* Place one triangle with PP face down on one of the hexagon sides
* Place one triangle without PP on top of other triangle
* Line up all 4 pieces of paper along the side to be cut and punch binding holes
* Repeat 5 times for each side of the hexagon
10. Bind all 6 triangles to the hexagon
11. For each triangle put a piece of foam tape at the points between the CS triangle and the PP triangle to add dimension. Repeat 5 times.
12. Punch a hole in the top. Add ribbon to hang and decorate as desired.
Thank you Wendy for sharing this beautiful project! Please let Wendy know too!
Wednesday, December 16, 2009
The 12 Days of Christmas - Day 7
Cardstock (CS)
Patterned Paper
Glue dots
Bone folder or scoring blade
Embellishemnts
First cut your CS to 4" X 7" and score at 3.5"
Cut your pp to 4.5" X 8" and score at 3.75"
Next cut two slits in your folded CS at 1.5" and 2.5", about 3/8" deep
Fold the flap over both sides to make a good crease, and then open up the CS and "pop out" the part you cut out.
Adhere the CS to the inside of the pp. I find it easiest to adhere one side and then fold the card shut to make sure it will fit correctly.
I think you'll agree with me that this is an adorable project! Do let Jess know what you think too in our comments section!
Tuesday, December 15, 2009
The 12 Days of Christmas - Day 6
**Feel free to mix up the colours to suit your project.***
To construct the easel card,
1. Cut one piece of green cardstock 5” x 10”
2. Score at 5” and 2.5”
3. Cut a red piece of cardstock 5” x 5”
4. Cut a piece of patterned paper for the front – 4 ½ “ x 4 ½ “
5. Cut a piece of patterned paper for the inside – 4 ¾ “ x 4 ¾”
To assemble the easel card,
1. Position the green cardstock in front of you with the 5” edge along the bottom.
2. Bring the 2.5” fold towards you.
3. Then bring the 5” fold towards you. This will make a long base with a triangular fold on top.
5. Glue the 4 ½” x 4 1/2 “ piece of pattern paper on top of the red piece of cardstock.
6. Embellish how you wish – I used a magnolia stamp and a nestabilities scalloped circle with a journaling spot from the December kit to stamp the Merry Christmas.
7. Take the finished front and attach to the smallest fold – the 2 ½” edge, ensuring that both bottom edges are flush to each other. Glue only this front fold of your base to the bottom half of your front piece.
8. Glue remaining patterned paper piece onto the green to create your base, or inside of card.
9. Attach a button with a glue dot about center so that when you stand up your easel card, it will not slide forward.
10. This card can easily fold flat for mailing!!!
Here is the finished card! Isn't it beautiful???
Don't forget to tell Wendy how much you love her card in the comments section! Oh did I happen to mention that the blog winner for last week is.....
Tammy (aka tampatha)??? Please contact Sandy or myself to make arrangements to claim your prize! Congratulations!
Monday, December 14, 2009
Spotted in the Gallery!
Let's see what you've done with the December kit! Link me to your "fancy" creations... I'd love to see them!
Friday, December 11, 2009
Fabulous Friday - Chromotherapy Challenge
"Can you believe that it is just 2 weeks before Christmas???? My challenge is to create a Christmas Card or layout with red and blue as your main colours...and to add bling -- so red, blue and bling!!
I created this card with paper from December’s kit and used my copics to colour the magnolia stamp.
This second photo to show how I added dimension.
I cut the pattern paper to 5 ¼ x 5 ¼ inches and cut out the middle using my spellbinder die and cricut. Then, out of that center piece, I used the die, 2 sizes smaller to create the inlay on the card. I used foam tape to attach the square to the red background."
Please show us what you create and leave Wendy some lovin' in the Comments section!
Thursday, December 10, 2009
The 12 Days of Christmas - Day 5
It's a glittered chipboard monogram! It is a beautiful way to personalize a gift.
You now have a gorgeous, glittery addition to your regular gift wrap in only a few minutes!
I think you will agree with me that this is a fabulous project! Please let Amber know too!
Wednesday, December 9, 2009
Blog Winners
For the week of November 23, the winner is.....(drumroll please)
Stephanie - Congratulations! Here is your prize Stephanie...
And for the week of November 30, the winner is...(drumroll please)
Lorraine - Congratulations! Here is a picture of your prize Lorraine...
The 12 Days of Christmas - Day 4
Today's 12 Days of Christmas inspiration is from Denise. Her daughters like to help Denise make these ornaments. They are in charge of colouring and Denise gets the snowman inside the glass ball. Actually it really isn’t that hard, which is good because “we” are making a bunch for a craft sale this weekend at their school.
Here are the instructions-
Use a circle cutter to cut a piece of transparency slightly smaller than the diameter of your ornament.
Use staz-on ink to stamp your choice of seasonal stamps – an image or sentiment, both work well.
Use sharpies (or other similar permanent markers) to colour on the back of the transparency. This allows you to colour over the black lines on the back but still look good from the front.
Punch a tiny hole in the top of the transparency and run fishing line or light thread through the hole and leave about 6 inch tails. You may add “snow” to your ornament at this point, if you wish.
Now roll the transparency from side to side tight enough that you can fit the tube in the opening of your ornament. HOLD ONTO THE THREAD! If you don’t you will never get the transparency out again! Once the tube is inside it will open up to show your image. Manipulate your thread tails to better place the image. Place the cap back on the ornament and tie your thread to it to secure the image.
Add a pretty bow and hang the ornament on your tree.
Here is Denise's ornament - isn't it adorable????
(Denise used a white paint pen from Princess Auto to colour the snowman. Not just a store for men!)
Please let Denise know how much you love her ornament in the comments section!
Tuesday, December 8, 2009
The 12 Days of Christmas - Day 3
I have always wanted to make Caramel corn and this is just perfect - thank you very much Jess!
How about you? Do you like Caramel Corn?
Monday, December 7, 2009
How long have you been scrapbooking? How did you start?
I started scrapbooking way back in 2000 after I was introduced to this wonderful hobby by my sister. I didn’t really have a lot of time to scrapbook as I worked a very demanding full time job and I did a lot more buying of supplies to use in my scrapbooks than actually creating them (although don’t we all? lol) and gave it up completely in 2004 when my oldest son was born. I then came back to scrapbooking again in 2008 and haven’t looked back ever since.
What inspires you?
This is a tough question because I really want to say “everything!” Colors, patterns, textures, magazine ads, commercials, songs … you name it and it has probably inspired me in some way. When it comes to actually sitting down and creating a layout my biggest inspiration is usually the pictures I am using and the story I want to tell. Those two elements help direct the “feel” of my layout and everything else falls into place from there.
When do you do the majority of your scrapbooking?
Most of my scrapbooking is done at night after my two boys are in bed but I have to say now that my oldest is in kindergarten and my youngest is in preschool I’ve been able to sneak in a few hours in the mornings here and there and I LOVE it!
Do you prefer single or double page layouts? What type of cards do you enjoy making?
If you would have asked me this question a few months ago I would have said I am a singles only type of gal. But very recently (thanks to Val’s Got Sketch? Doubles class) I have learned to love doubles and have actually made a few double pagers – willingly – all on my own! LOL
Believe it or not I used to really struggle with cards and their design. Maybe because I didn’t have the photos and story leading the way. But I was given the advice to just think of a card as a tiny scrapbook layout and that has helped tremendously. Now I can’t stop making them! And for this mom of two boys it is a GREAT way to use all of those pretty pink and girly papers and embellishments that I insist on buying. J
What sizes do you primarily scrap?
I primarily scrap 12x12 but I definitely have my fair share of 8.5x11 layouts in my collection as well. I don’t like to feel restricted by a given size so if I think a layout will work better in one size than another I go for it!
How would you describe your style?
Eek! This is always such a hard question for me to answer since my “style” sometimes depends on the photos I’m scrapping or the papers I’m using. I’ll tell you what I love – I love clean lines, bright colors, and fun patterns. I love lots of texture and dimension on my layouts with “just the right amount” of embellishments. I also love to sew on my scrapbook pages either with my sewing machine or by hand.
How do you organize your albums?
Very simply – by year. I like to skip around when I scrapbook so the easiest way for me to get my layouts in an album is to categorize them up by year. Easy peasy.
If you had not discovered scrapbooking, what would your passion be?
Well I love to garden and I also love photography so if I had more free time (i.e., time not spent scrapbooking) it would be devoted to those two hobbies.
What do you love about your scrap space? What would you like to change?
My scrap space is the bonus room off of my master bedroom. I have to say I am pretty lucky to have a room of my own and love what I’ve been able to do with it in terms of my work island, storage, etc. There’s also a great big picture window at the far end of the room that lets in some great natural light. What would I change? Well a girl can always use a bigger space for more stuff, right?
Do you have something scrap related whenever you go?
I do carry a point and shoot camera in my purse with me wherever I go since you just never know when the perfect scrapworthy moment will happen.
Do you keep a journal?
I don’t keep a journal. I used to a long time ago but not anymore.
Do you scrap alone, with friends or at a crop?
I mostly scrap alone. Occasionally a few friends will come over to scrap or we’ll head to a crop but honestly it’s hard to coordinate schedules since we all have little ones at home to care for.
How did you meet Valerie and become involved in Got Sketch?
I actually met Valerie through Got Sketch! I took the first Got Sketch? class (Got Sketch 101) that was offered by Val and Janna (Wilson) in the spring of 2008 and we just became friends throughout the course of the class. Val had asked me to contribute to the Got Sketch? blog the summer after Got Sketch 101 ended and somehow we started chatting about me helping out a bit more with the blog, classes, etc. and it all kinda fell into place from there.
Can you tell us what you love best about Got Sketch?
The sketches! Easy enough answer right? LOL Seriously though, Val’s sketches are just wonderful. Lots of details so you’re not left scratching your head wondering what is supposed to go where but easily adaptable to any style, photos, or theme.
Can you share some tips on how to photograph your layout or card? Do you recommend using a flash?
I definitely suggest that you avoid using a flash if you can. Unless you have an external flash that you can direct away from your project you will probably always get some kind of glare on your photos or color distortion otherwise. My best advice is to find a spot in your house (or outside for that matter) with lots of great indirect (again to avoid glare) sunlight. I simply lay my layout flat on a nice big piece of white foam board and stand over top of it and shoot directly down onto my project. I line up my project with the hash marks in my camera to guarantee I’m shooting straight on and not on an angle. I will then do a bit of tweaking (straightening, cropping, color correcting if needed) in Photoshop. If I am shooting cards or another type of project I will set up two pieces of foam board (one as the base and one as the background) and shoot that way. You want to know where the best light in my house is? My master bathroom (we have a skylight and two really large windows over the tub area) so you’ll often find me setting up my foam boards to shoot cards on the toilet – no joke! LOL
Can you give tips on how to edit photos of layouts and/or cards?
I use a Mac so I download all of my photos into iPhoto and do a quick initial edit – straightening and cropping. I then open my image in Photoshop and will often correct the exposure, adjust colors (sometimes shooting with no flash in natural light will give a blue tinge to my projects), sharpening, as well as save my images for the web (smaller file size).
How do you select contributors?
First and foremost we look for contributors whose style we think will translate well using one of Valerie’s sketches. We like to see a good use of photos as well as general design principles. We really encourage our Got Sketch? followers to drop us an email with a link to their online gallery, blog (if you have one), preference (12x12, 8.5x11, or cards). We are always on the lookout for more contributors.
What is the format of the Got Sketch classes?
All of our Got Sketch? classes are hosted by ning - an online website. Once students register and are approved for a class they will then be able to sign into the site and view all of the class content (as it is revealed), participate in the forum, post in our gallery, and connect with both teachers and other students. Class content is also available in pdf format so that it may be saved to your computer (or printed out) for future reference.
Can anyone post to the Got Sketch gallery?
Absolutely! We love to see how others interpret Valerie’s sketches so post away!
Can layouts based on Got Sketch sketches be submitted for publication? How should Got Sketch be referenced?
Per the terms of the Got Sketch? blog Valerie’s sketches are for personal use only and may not be used as reference for publication submissions, contest entries, design team projects, class projects, or other similar purposes. Permission is also required before taking any images from the Got Sketch? blog to post elsewhere (such as your own personal blog, forums, etc). Proper credit for their use in galleries, forums, and blogs is appreciated. These terms vary for Got Sketch? contributors.
What is one scrappy goal that you would like to achieve in 2010?
Honestly, 2009 has been such an amazing year for me in the “scrapbooking world” so to speak. I’ve been able to accomplish so many goals and dreams such as getting my work published in many of my favorite scrapbook magazines and joining some incredible design teams. I guess my goal for 2010 is just to keep that momentum going!
Here is one of Lynn's favourite layouts - I think you will agree with me that it is beautiful! Thank you so much Lynn for your time!
Please leave Lynn some love in the comments section :-)
Spotted in the Gallery!

I'd love to see your Halloween layouts this week! Get them uploaded and link me!
Friday, December 4, 2009
Fabulous Friday - Sketch Challenge
Please leave Amber a comment about her sketch challenge and an extra link for me when you complete the challenge!
Thursday, December 3, 2009
On the Second Day of Christmas....
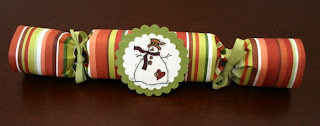
“If you’re anything like me you enjoy the traditions of the holiday season. One tradition I grew up with and have carried over into my own family is that of Christmas Crackers at the Christmas Dinner table. It is a non-negotiable staple, and we all have to wear our goofy paper crowns while we dig into our turkey and trimmings. I thought it would be fun to make some Christmas Crackers from scratch. It’s a super easy craft and great for using up some scraps. All you need is a toilet paper roll, some snaps (I got mine at Michael’s) and some paper and ribbon. You’ll also need something fun to put inside, like coins, key chains, hair barrettes, small toys (cars), candy, lotto ticket, etc.
To begin, you’ll need a toilet paper roll and a sheet of patterned paper (PP) - thinner is easier.
Depending on the size of your snaps and how big you want your crackers to be, you’ll have to adjust your sizes accordingly. My snaps were 10” long so I wrapped my toilet paper roll in a 11"x7” piece of PP.
Next trick is to place the snap in the center of the cracker roll so it’s running from end to end. Tie a ribbon around one end of the cracker, just past the border of the cardboard roll on the inside.
Now comes time to fill it, place whatever fun trinket you’ve decided on in the roll and then tie the remaining end closed with more ribbon. Voila! You have a Christmas Cracker! These are also fun for New Year’s parties. Enjoy and have a wonderful holiday season.”
Here is Jen's beautiful Christmas cracker!
I know what I'll be making this weekend; what about you?
Don't forget to link me up to your finished projects for an extra ballot:-)
The 12 Days of Christmas
Let's start the 12 Days of Christmas inspiration with my Day 1 project - simple, elegant placecards to adorn your table.
Are you inspired??? Please leave me a comment. Last week's blog winner will be announced tomorrow!
Wednesday, December 2, 2009
The 12 Days of Christmas - Day 9
Make a sweet impression with your desserts this holiday season by adorning squares, cookies or cupcakes with adorable toppers!
Simply search your scrapbook supplies for paper scraps, get out your holiday themed punches or diecutters and combine with a toothpick to create quick and easy toppers!
Please let Amber know just how darn cute these cupcake toppers are!
Tuesday, December 1, 2009
December Reveal
Look at this sweet project by Amber ...
Monday, November 30, 2009
Spotted in the Gallery!
Be sure to upload your own altered projects to share with us! We love to see them!


Friday, November 27, 2009
It's Anything BUT...a Fabulous Friday!!
Here is what Heather had to say..."As soon as I saw this little Making Memories tin in the November kit, I knew it would hold a mini-album perfectly. My mother-in-law has been nudging me for a little album of photos of my son so I created this for her as a Christmas present. The only problem now is that I kinda want to keep it for myself.:-)"
Here is the embellished tin.
And the front of the mini album...
And..........just look at this adorable mini album!
Thank you Heather!
Don't forget to let Heather know that you too love this project by leaving me a comment! I am drawing for yet another sahweeeeet prize this week! ;-)
And so the Countdown Begins!
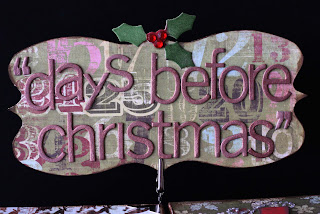
Here are my countdown blocks.
The blocks are from Making Memories; they are called Photo Cubes. (Sandy did carry these and if you are interested, send her a quick email.) Other supplies are as follows: My Minds' Eye (pattern paper); Daisy Bucket (chipboard plaque); unknown source (alphas, pattern paper scraps from previous Scrap Shotz kits, various accents); Tattered Angels glimmer mist; Close To My Heart and Kaisercraft (gems); American Crafts (silver photo corners); Basic Grey (alphas on plaque); Fancy Pants (chipboard holly).
Here is a close-up of the plaque.
The chipboard alphas are from Basic Grey - Periphery line and have been liberally sprayed with glimmer mist!
And a close-up of the countdown blocks.
The number sequence on the blocks are 0 to 5 for the first block and 0, 1, 2, 6, 7, 8 for the second block. Choose a 6 that can be flipped to look like a 9.
I hope I have inspired you to get into the Christmas spirit! If you make a set of countdown blocks, please link me up!


