Wednesday, May 27, 2020

Simple Stories - Birthday Blast Cards

Well I had a lot of fun with this! The Simple Stories Birthday Blast line is perfect for birthday cards. So many options!!! I used the 6x8 paper pad, the sticker book, ephemera and the brads to create these cards and I have enough to go on creating for so many more! I added a bit of cardstock, stickles, foam strips and some die cut shapes from my stash. If you have any questions, please just ask!
For this one I drew the strings on the sticker balloons, added some brads and popped up a couple of the gifts. I punched the top corners of the card for interest.
Beautiful stripes from the 6x8 pad! This sentiment is from the ephemera pack. The brads kick it up a notch. Simple and so pretty.
The brad tag is from the line and the sentiment is from the sticker book. I mounted both on cardstock and added a few sequins for sparkle. If you cut the 6x8 paper in half you can get patterned paper for 2 A2 cards with a 1/8" outside border.
The ephemera pack and stickers have a lot of silver foil in them. This card really shines! I added a few little stars from my stash.
This paper says "Celebration!" I just added a bit of glitter pen on the popped up sentiment.
Thisrainbow card is perfect. I did add some stickle highlights to both ephemera pieces, just because!
I painted stickles on the balloons and added a few tiny iridescent stars. I use a little dollar store paint brush to add stickles this way. These stars are meant to be inside shaker cards, but they are a sweet highlight as an alternative to sequins.
Simple die cut frame, a bit of twine and foam dots to pop the sentiment and image. DONE!
This is another die cut frame with silver ephemera. ❤
I cut this frame out of the patterned paper and put the robot on foam dots. He is feeling festive with his sticker party hat!
For this one, I put the sticker on dark cardstock then fussy cut around it. The edge of the outside cardstock mat got a stickle treatment.
More stickles on the outside of this panel, with a sticker sentiment and a trio of brads to complete the card. 

Thanks for looking at my cards. I know that there are so many possibilities with this line! I haven't even started with the more feminine line, Magical Birthday. All of this is in the Scrapshotz online store right now!

FYI, there is also two card kits in the store using these lines. Fabulous cards and so easy! Check them out here for Birthday Blast and here for Magical Birthday!

Stay safe and well!


Monday, May 25, 2020

Add One More Colour for a Little Pop

This month I am playing with the bright and fun goodies of the 
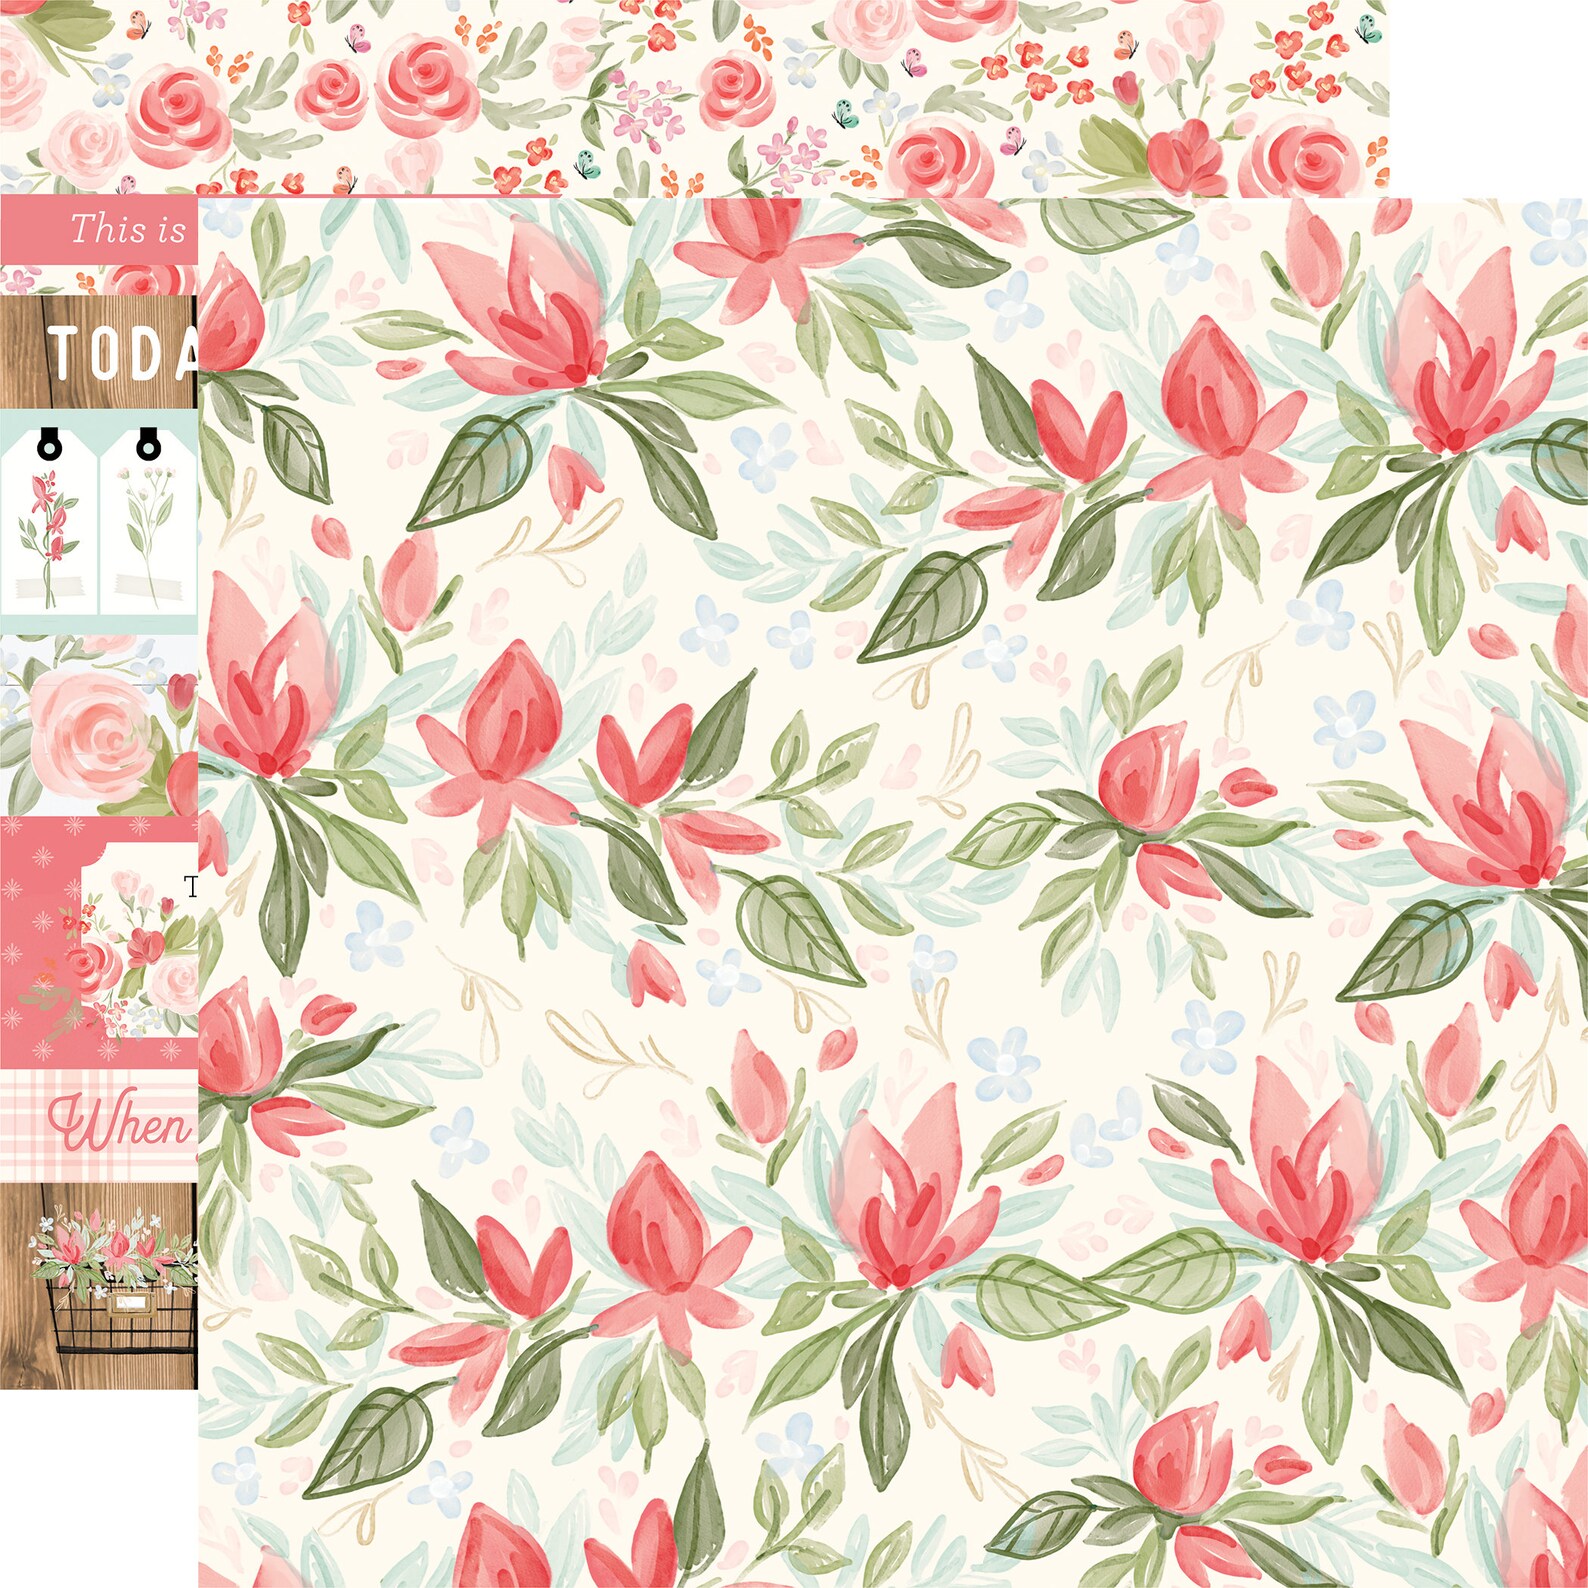
Simple Stories, Summer Farmhouse  - think reds, yellows, dark blue denim, florals, and backyard BBQs for this collection!

When I say this collection is bright, I mean BRIGHT - beautiful, bold, primary colours. Everything you want in a summertime collection and then some. 

Full disclosure ... this is when the rebel in me comes out. When I get something really feminine, I want to see if I can make a super boy page OR when I get something really bright, I want to see if I can create a soft page. Well that second one is what I embarked on with this layout.

I started my rebellious journey with a piece of Vicki Boutin, Foundations Paper some Vicki Boutin Crayons, and, yes you guessed it, one of 
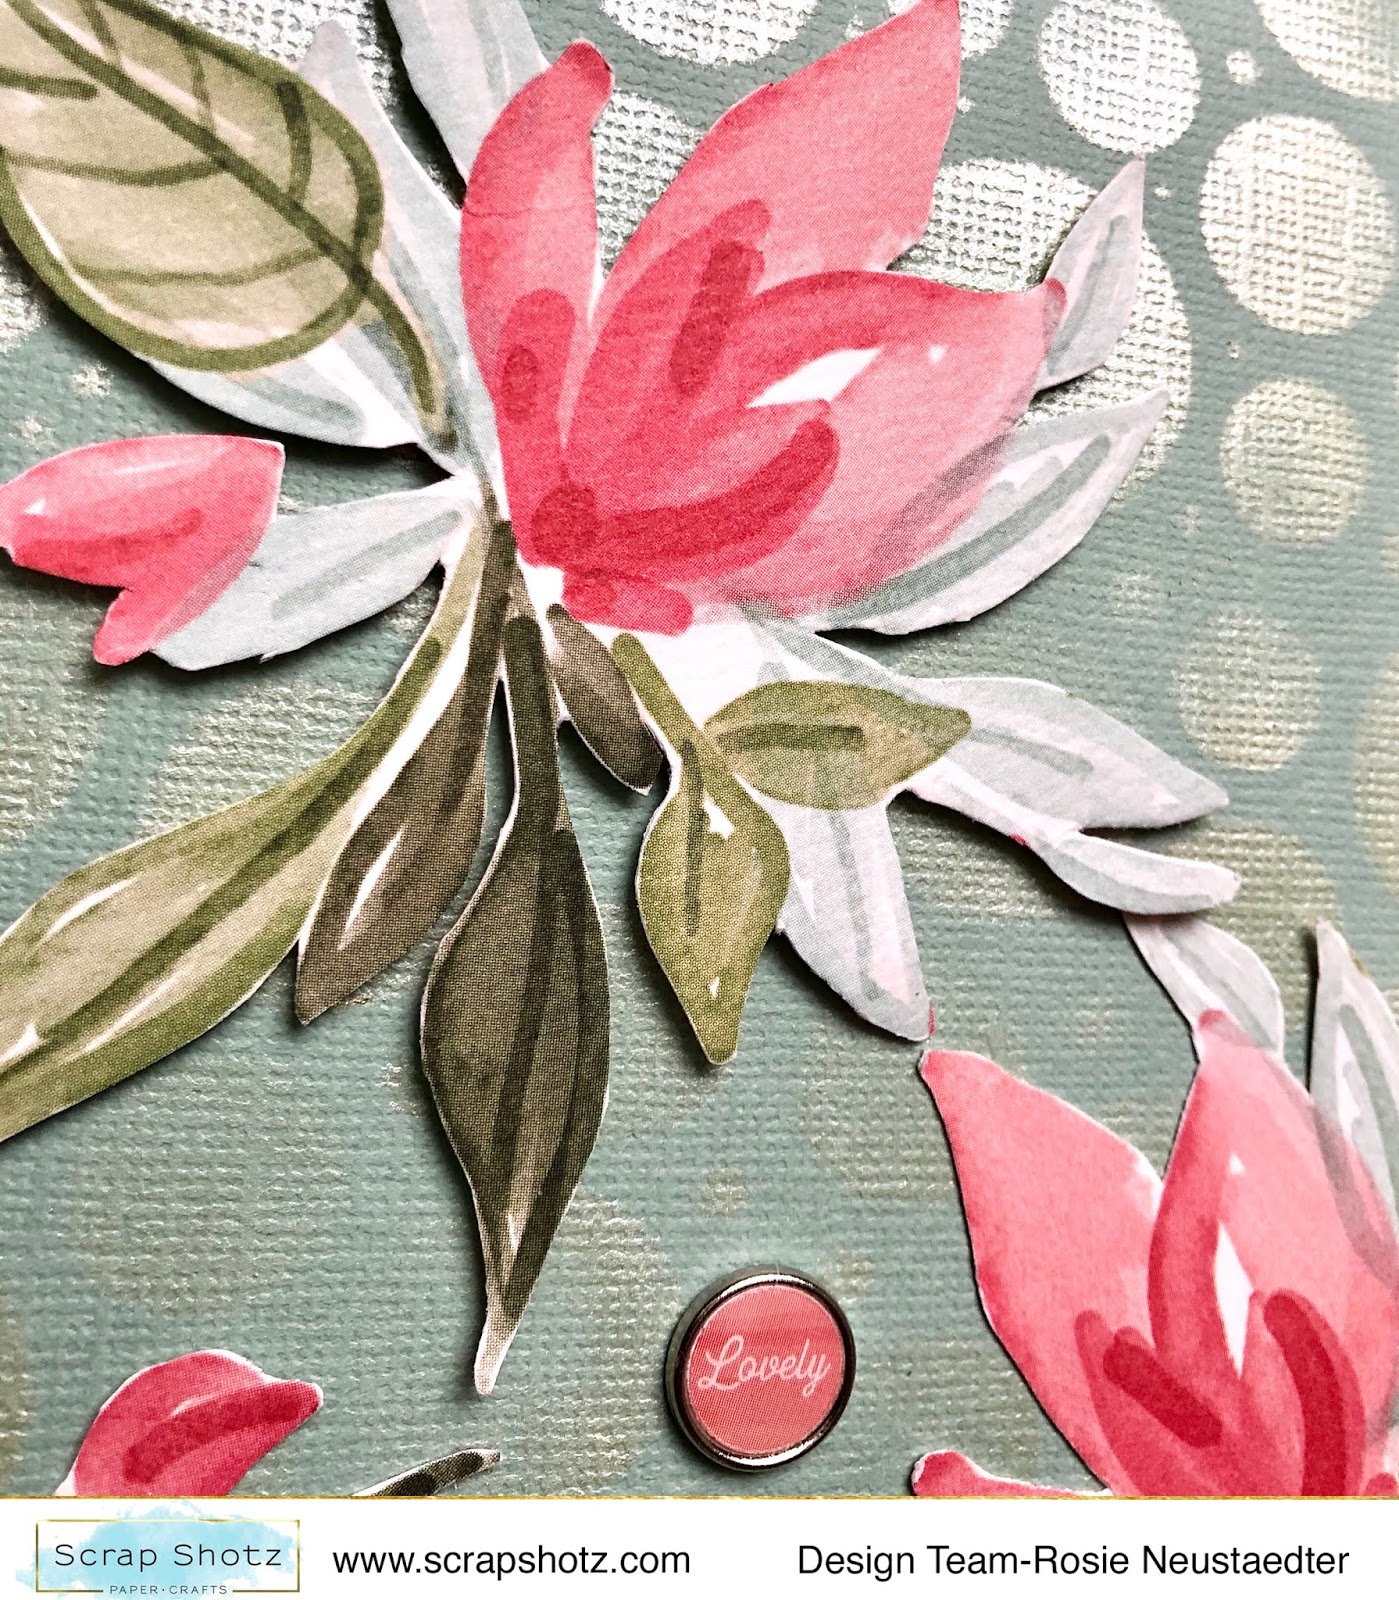
Vicki Boutin's stencils. (All from the Scrap Shotz shop which I know are hard to keep in stock - so grab em when you can! I think some of the warm tones Crayons are in stock - these are the ones I used here.) I used the stencil to create just some soft pink and peach designs on about a third of the page, just enough to bring some slight colour and a little touch of design to the white space.


Simply colour with one of the crayons on a mat or piece of plastic, spray one spray of water on the end of the brush, rub the brush over the colour you roughly put down on that plastic, and then in small circles rub it through the stencil on the page. Magic!

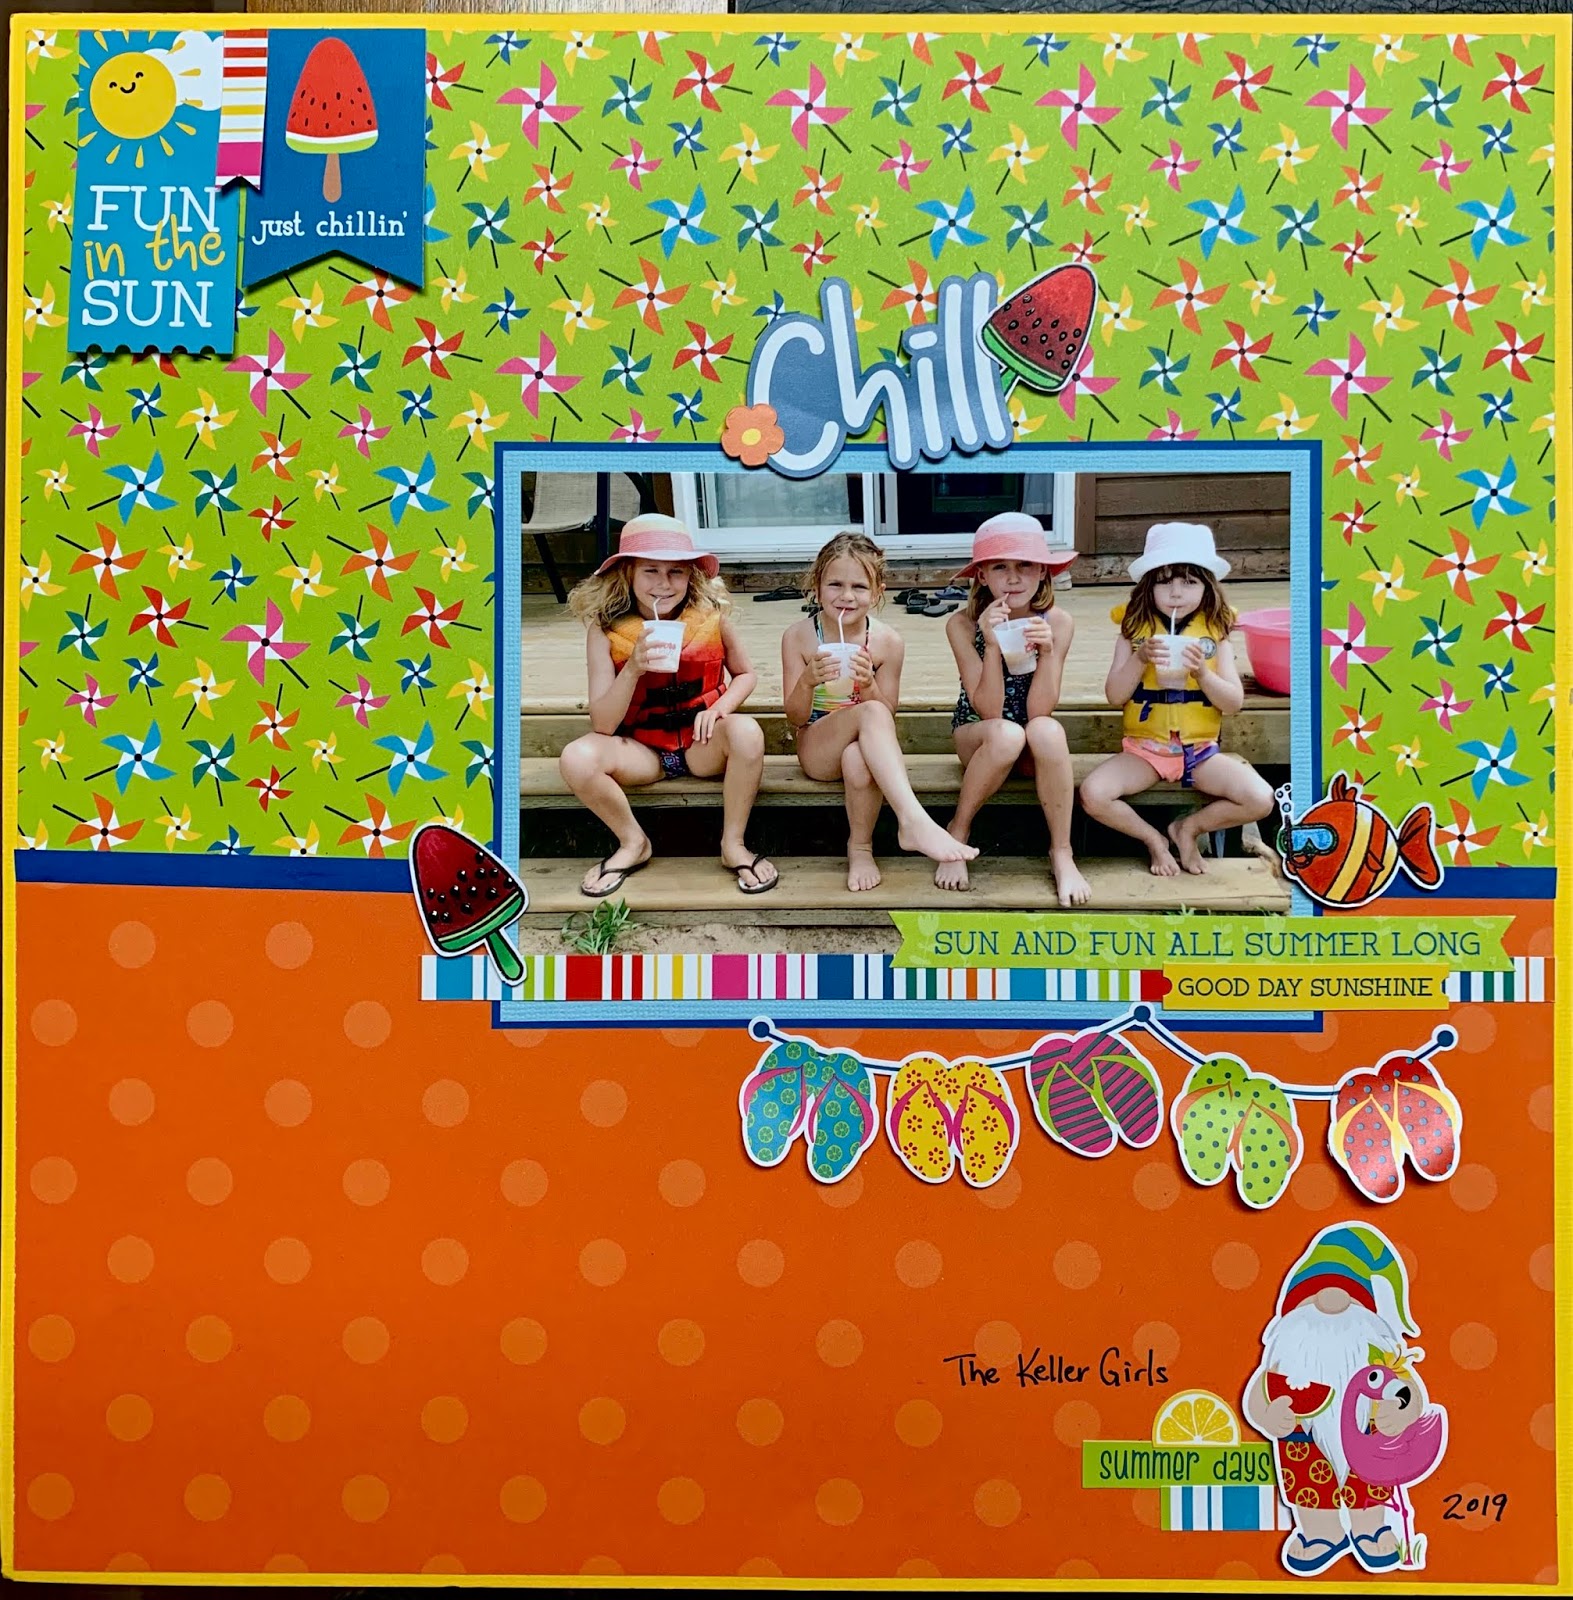
From there, I cut a massive lemon out of one of the yellow pattern paper in the collection. I found this lemon in the Silhouette, Design Store. Why a lemon you ask? I wanted to use the soft-toned lemons in the stickers, chipboard and die cuts from the collection to support my rebellion, and I needed a layout to document this photo of me and my bestie and the daily Lemon Radlers we drank on Spain and Portugal Camino!

With the lemon, my photos, and all of the soft-toned embellishments from the collection al adhered down, I liked it - it was soft and not awful .. but I didn't love it.


Well this is when you text a photo to your sister and ask her "what's bugging me about this?" and she says MORE RED!  Do not tell her I told you this .. she was right!

I went through all the collection goodies and added all of the red bits, a few more blue phrases too, a couple of white phrases too and then pulled some red enamel dots from my stash to finish it off. (You can buy the actual matching Simple Stories, Summer Farmhouse enamel dots in the store.)


So much for my soft-toned rebellion!

For additional inspiration or to see more of the Summer Farmhouse collection, check out the Facebook Live unboxing and process video I did on Sunday morning over on the Scrap Shotz Facebook group.

Thanks for stopping by - if you are using this collection, give us a @scrapshotz or #scrapshotz tag on social media so we can see!


Friday, May 22, 2020

Dive Into Summer - Part 2

Hello again! Carolyn back again with another Echo Park - Dive Into Summer layout. I really had fun putting this layout together.

I used the Creative Scrapbooker Magazine May sketch from the Facebook group. Here it is:
Ok, let's talk about that background, shall we? All you incredible card makers are always blending inks so I thought I would pull out my stash and have at 'er. I blended a yellow and orange for the sun and a blue above the waves. Why don't I do this more often? It was so easy and made the background exactly how I envisioned. I originally had a piece of cardstock in the back but it just didn't look right. Moral of the story - try something new or that you haven't tried in awhile!

I began the layout drawing waves and cutting them out. I realize now I should've probably added a third curly wave for balance but who's counting, right? I used two different papers so the different waves would stand out. I also distressed the edges so they pop a little off the page. I used a frame behind this little cluster in the picture. 

For the title, I cut a half circle from white paper and blended the inks to make a sun. Distressed the edges again. Some of the flags, tags and die cuts are from the ephemera pack and frames and tags pack. I used some foam dots to bring out the summer sticker. The brads are stick-ons and are my favourite part of this collection. (And there are still some in stock in the store - seriously, you won't regret picking these up). The final touch was some Heidi Swapp Colour Shine splattered on the page.

That's all for me today. I hope you have a lovely, scrappy weekend!


Wednesday, May 20, 2020

Dive Into Summer - Part 1

Hello! Carolyn here with two Echo Park - Dive Into Summer layouts. This is a really fun collection. I love how Echo Park has a variety of plain and pattern papers as well as cut apart cards. The theme here is water. Think beach and pool. So for my first layout I pulled out the pictures of my daughter entering the annual sand castle building competition at the lake last summer. She worked so hard on this and even made her volcano explode and played dramatic music for the presentation. It was such a great day!
I layered a whole bunch of papers for this layout. I often find it hard to use the really busy pattern papers but I couldn't pass up a whole paper of sand castles! The yellow paper is Bazzill cardstock - Desert Marigold. The center title is from a cut apart card in the paper kit. The rest of the layout is all sorts of different embellishments - chipboard beach arrow sticker, puffy sticker shells and sand castle, ephemera and tags, cardstock stickers from the paper kit and brads. I love those brads. The best part is they are adhesive and don't have the metal clips on the back. Here is a close-up of those brads.
My second layout you may have seen at our online crop. I hosted a summer/school challenge and this was my sample layout. It is using the same kit so I thought I would share it in case you missed it. Plus it was so fun to make. It's not everyday I get to design a bikini.
I got the idea because there is a paper with a bunch of bathing suits on it plus I'm in love with this flower paper and wanted to use as much of it as possible. I drew the bikini on a piece of scrap paper and then cut it out and traced it onto the flower paper. Those brads really worked well on the bathing suit. Then it was a matter of decorating with puffy stickers, cardstock stickers and ephemera.

Thanks for stopping by! Hope everyone is able to get in the water soon - it is really warming up where I live.


Monday, May 18, 2020

Photoplay - Tulla & Norbert's Excellent Adventure Pt.2

Hi everyone! How's your May long weekend going? It's been a strange one with the current events. I have been busy in my craft room, playing with this fun Photoplay collection from Scrapshotz.com
This layout uses a lot of ephemera and stickers from the kit, along with some brads and ribbon from my stash. I love brads! This simple photo is so reminiscent of summer days at the lake. The best of memories.
The next layout was based on the Creative Scrapbooker's May Sketchy Challenge. Here is what it looks like.
I look forward to using their sketch every month. Sometimes it's just what I need to create something different than my usual style.

I moved a few things around to suit my photos, but kept the general idea of the sketch. I matted some of the stickers on white cardstock, which makes a sticker into more of an embellishment. 😎
I hadn't worked with Picket Fences Paper Glaze before. It is so creamy and lovely to work with! It comes in a lot of beautiful colors and are available at Scrapshotz. I will do more with it in the coming days, but started off with a simple background for my gnome Happy Birthday card. I also made some simple cards using the ephemera and stickers. These are such fun images in such happy colors!
The Polaroid frame is a Mama Elephant die, and the dots are Nuvo Glossy Crystal Drops in Caribbean Ocean. I love these drops. Perfect embellishments and they are available in so many colors and textures! Here's a link to find the assortment at Scrapshotz.
Thanks for stopping by. Be sure to have a look at this collection for all your summer photos!

Stay safe and well.


Friday, May 15, 2020

Tulla & Norbert's Excellent Adventure - Photoplay


Hello! I've been dreaming of sunshine and summer days, working with the Photoplay "Tulla *& Norbert's Excellent Adventure" collection by Becky Moore. Such bright, fun colors and of course, the sweet gnomes that are both trendy and timeless, wearing flip flops and swimming trunks. Really, how can you resist?

My first layout has a typical summer photo on it. Girls in sun hats drinking cool drinks. I used lots of stickers, including the title and flip flop banner, as well as pieces of the cardstock ephemera. I stamped and colored the watermelon and fish images, then used some Nuvo drops on the watermelon treats for dimension. Lots of foam squares give layers of texture to the layout.

This layout had water photos, but they were really dark and I thought that I needed to tone down the bright colors to suit them. To do that, I matted all of my layers on black cardstock.

The center photo was popped up for interest. The surfboard was stamped, colored and covered with Glossy Accents for shine. To make "summer" stand out from the patterned paper, it was mounted on black cardstock too. Even with all the black on it, this layout still screams summer fun!


I'll be back next week with another layout from this collection and a couple of summer cards. Have a great long weekend! Stay safe and well!


Thursday, May 14, 2020

April Kit Pt.3: Home Sweet Home, Crafty Helper and More

Hello Friends!

I hope you've been enjoying all the Creative Team inspiration! 

Rosie back to share my final kit projects using the April kit, this is another Mother's Day layout I made with the kit, this one with myself and almost all my kids, lol...hard to have them all in the same room at the same time once they get jobs.


The centre of this layout was created during this Vicki Boutin FB live, with Distress Oxide Inks and the Altenew Painted Butterfly stamp and die set. The butterflies are also heat embossed with gold embossing powder. I stamped butterflies in with the same Oxide inks used for the "blown butterflies" and  die cut them with the matching die.


I cut the paper down and matted it on black card stock, the photo itself was also matted on black card stock and layered over plaid patterned paper from the kit which was back with Kraft and then black card stock. Kit chipboard, stickers, a brad and sparkly confetti embellish the layout.


I used one of my new purchases, embossing glaze, on this next project:


It was fun to document my son helping me stitch on a layout a couple of years ago.

I applied embossing ink with an embossing dauber to the edges of the library drawer, text patterned paper and the title and sub-title die cuts.


I then applied Walnut Stain Distress Embossing Glaze  and set with a heat tool.


I love the extra interest it gives along the edges.

Now for a few more cards :)


So easy to combine patterns when using a paper line, everything coordinates very easily as you can see from the card on the top. 

The bottom card has a patterned paper base matted on card stock and I used a combination of the chipboard, die cut and sticker hoops, the "hangers" are hand drawn with a black marker and the sentiment is from the Taylored Expressions Simple Strips Background Set. This is a great set, it stamps 18 varied sentiments that you die cut with the matching die. I stamped, die cut and then keep them in a ziplock bag and pull one out when I need one!


A little shine is added with PPP confetti, you can use anything shiny from your stash :).

When I saw this paper I decided I wanted to fussy cut some blooms:


Once the fussy cutting was done I cut a piece of card stock into a 4 1/4" x 5 1/2" notecard. 
Next, I taped it to the Nicole Wright Designs Circlet Stencil and applied Mother of PearlNuvo Embellishment Mousse through the stencil.


I then arranged the fussy cut blooms to my satisfaction, adhered the larger with foam adhesive and the other two with liquid adhesive. A kit brad and enamel dots complete the card accents.


Thanks again for stopping in and please share your Scrap Shotz kit projects on the Scrap Shotz FB page or in the Scrap Shotz Paper Crafting Friends Facebook Group OR @scrapshotz, #scrapshotzkitmembers on Instagram.

Happy Crafting!