
Today I would like to share with you how to recreate my Carnival Make and Take: a Shadow Box Photo Card. Here is the front of the card.


Before I start, let me extend my thanks to everyone who came to the Twoonie Make and Take bar; all monies raised were donated to charity - Thank You! And a Big BIG thank you to everyone who kindly waited in line. I was overwhelmed by your response. As well let me extend my apologies who waited so patiently but I unfortunately ran out of supplies and time! I tried hard to put through 5-7 people at the make and take table at a time.

Now let me divulge the instructions for the card:
Prepare the card base:
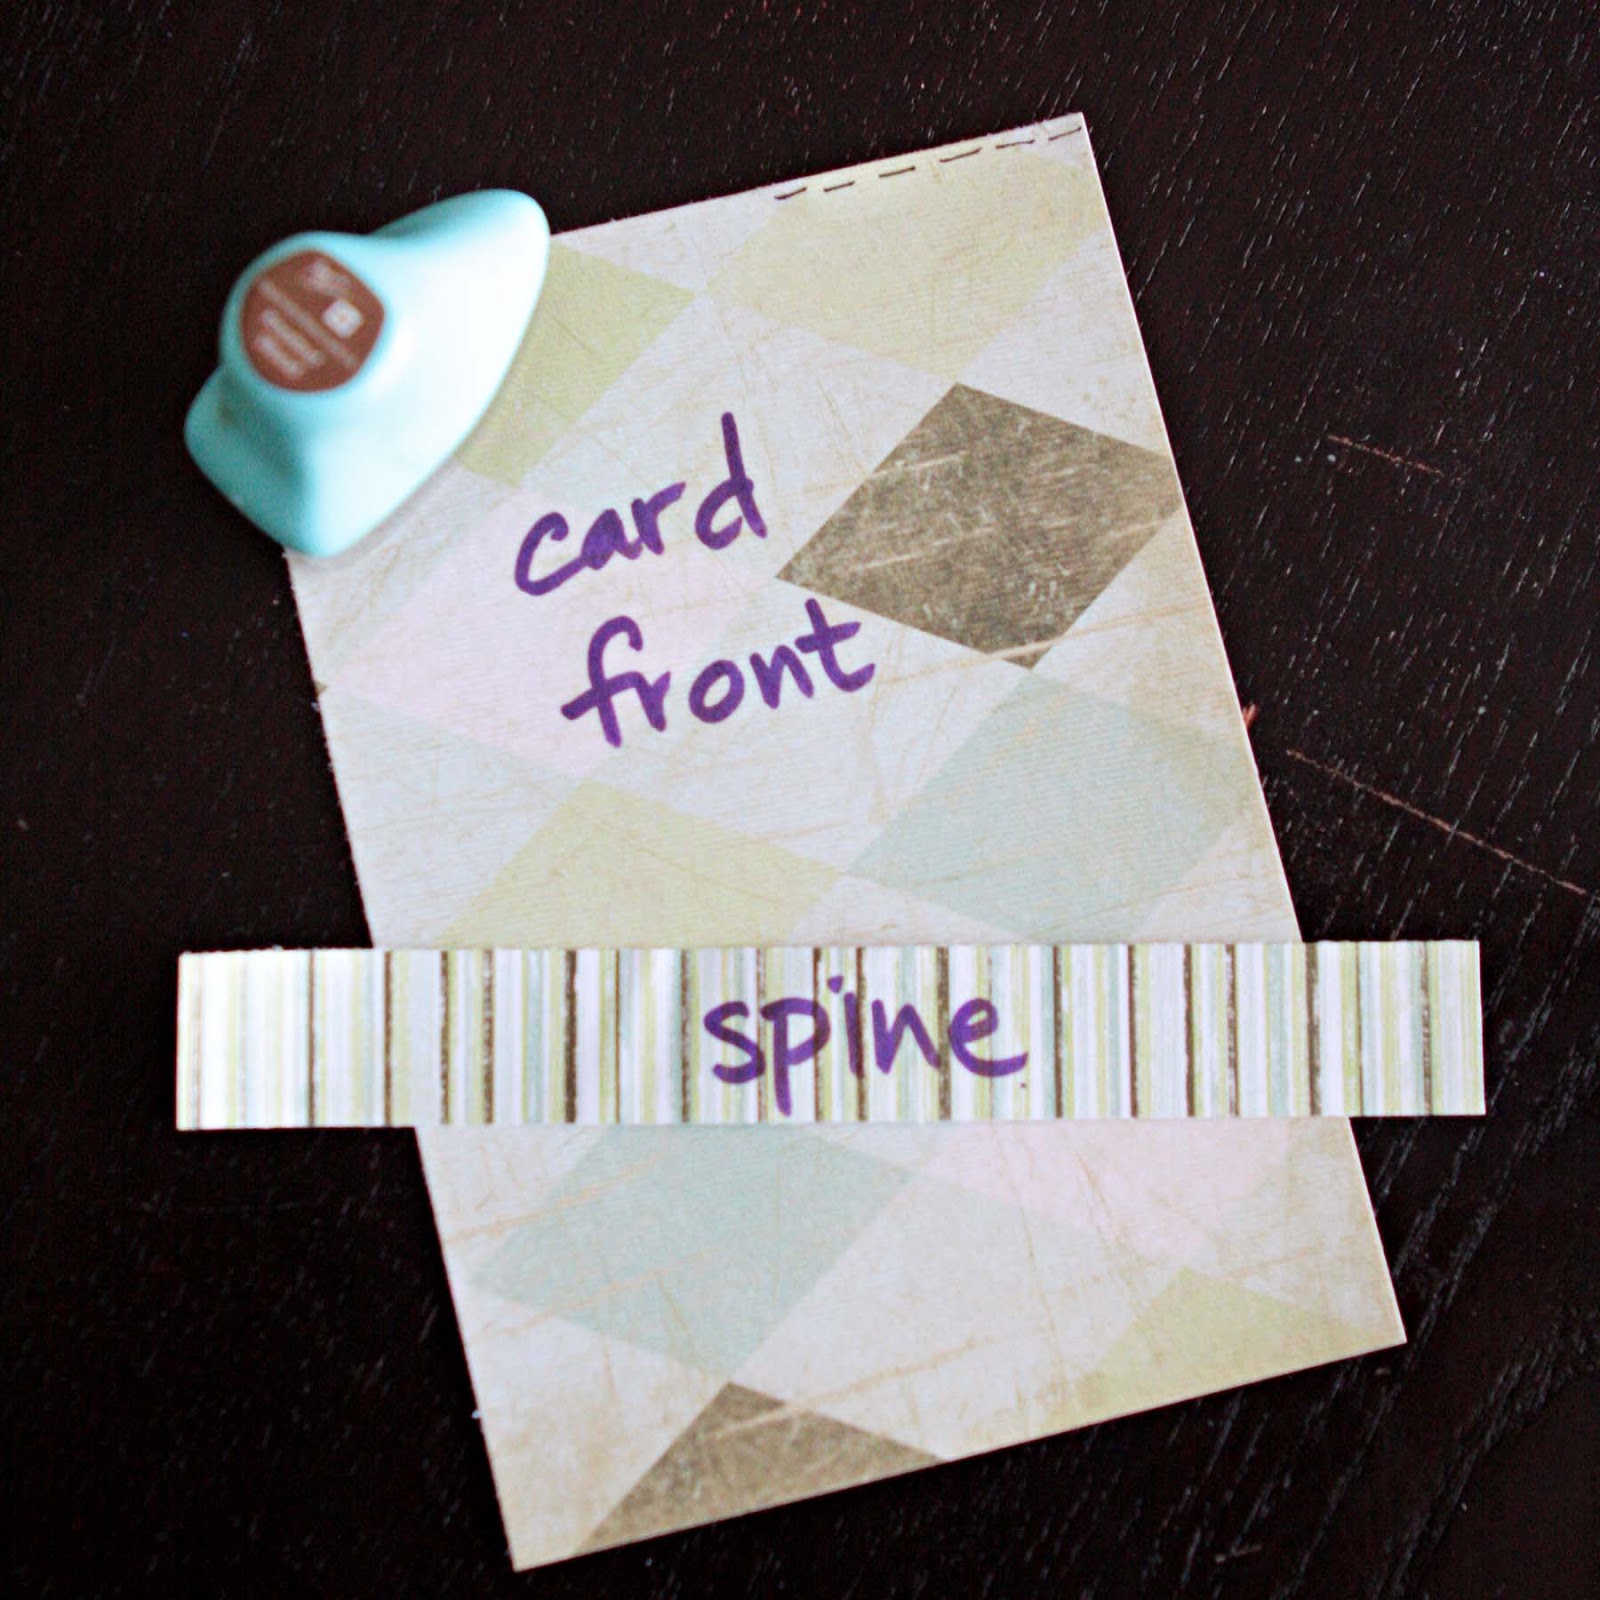
First, cut a 6"x12" piece of sturdy cardstock (ie. Bazzill works wonderfully); this is the card base.
Score the cardstock at 4", 5" and 9" with your Scor-Pal or Scor-Buddy; this leaves a 3" overhang which folds over into a pocket to house your Christmas newsletter or a special note to the recipient. Refer to the image below.

Cut the matching pattern paper pieces:
Cut a 0.75" x 5.75" piece of pattern paper. Using a light hand, apply liquid chalk using the adorable Prima coloured liquid chalks and set aside.
Cut a 4"x6" coordinating piece of pattern paper for the card front. Using a light hand, apply liquid chalk using the Prima coloured liquid chalks and set aside.
Prepare the glittered image:
Next transfer the positive Elizabeth Craft Design sticker onto a sized piece of Sookwang tape. What works the best for me is to gently roll the entire sticker sheet until the positive edge of the sticker image pops up. Using a pair of tweezers, I slowly peel pack the positive sticker image. As I am right handed, the tweezer - positive sticker image combo is held in my right hand and my left index finger is "supporting" not holding the bottom of the sticker. I move the sticker over top of the Sookwang tape, gently remove my left supporting index finger and release my tweezers. The positive sticker image then flutters gently onto the tape - no bubbles, no wrinkles and for me, no tears!
As you can see from the image below, the positive images have been removed from the sticker sheet. On the Sookwang tape is the positive image of 2 snowmen.

Then apply the Glitter Ritz. This is glitter is micro ultra fine and is different from that of the ultra fine glitter offered by other manufacturers. It's properties allow you to colour the glitter with copics, stain it with Clearsnap Smooch and/or Ranger alcohol inks or draw on its surface with a Copics multi-liner pen.
Using your finger, burnish the glitter into the adhesive to (1) enhance and encourage the glitter sparkle and (2) reinforce the adhesive to the glitter. Then return the excess glitter to its container. A little goes a very long way. I did not even use 1/2 of a container after spending 2 days at the Carnival for the make and take and booth demonstrations!

Fussy cut the image and decorate as desired. I used the Clearsnap Smooch for the snowman's nose, coloured mitten with a Copics pen, coloured the broom fronds with a Copics Spica pen and covered the buttons and broomstick with Claudine Hellmuth acrylic paint. All items can be found in the Scrap Shotz store.
(There will be a subsequent tutorial detailing how to transfer the negative sticker image - yes, you can double the use of your stickers!)
Create the Christmas Trees:
Using Dee's Distinctively Dies, cut 2 sets of Christmas trees.
If desired, apply a very thin bead of glue (I used the Tsukineko Essential Glue Pad) along the bottom edge of the tree parts and dip into the Glitter Ritz to create the appearance of snow on the tree.
Assemble the tree parts from largest to smallest. In my sample, there are 2 different sized trees; this is done by using either less or more of the die cut tree pieces.
Using the Copics multi-liner pen, draw a dotted line around the tree pieces to create the illusion of stitching. The "stitching" adds a real charm to the images.
Set trees aside. Below is a close-up of the trees.

Die Cut the Sentiment:
Using the Whimsy stamp and matching die, stamp your sentiment onto a piece of coordinating cardstock. I used Memento ink because I am in serious love with the even ink on the image and the juiciness of the ink pad despite frequent use.
Then use the matching Whimsy die to cut the sentiment. Please note that the Whimsy Stamp and Die set has a unique and very accurate cutting system. This will be explained in a subsequent blog post/tutorial as the focus of this post is to recreate the Carnival Make and Take.

Set aside the stamped and now die cut sentiment.
Punch and Glitter the Background Clouds:
There is such versatility in the Sookwang adhesive and Glitter Ritz - here I layered white cardstock on top of the Sookwang tape. Then I used my Fiskars cloud punch and punched 2 cloud shapes.
Remove the tape backing, apply and burnish the Glitter Ritz to the cloud.
Similar to the die cut Christmas trees, use the Copics multi-liner pen to "stitch" around the cloud.

Set aside the glittered cloud shapes.
Die cut the photo frames:
Using 2 Spellbinders Labels17 dies, die cut 2 frames for the inserted photo. Please note that a subsequent blog post will be show how to die cut the frames using 2 or more dies to keep the focus on the creation of the Carnival Make and Take.
Set aside the 2 frames.
Assemble the Shadow Box Photo Card:
Adhere the cut and inked pattern pieces to the spine and front of the card.
Then glue the top and bottom edges of the 3" overhang to create a pocket.
Now adhere the trees, staggering one in front of the other. My sample has the smaller tree raised using pop dots.
Add the glittered and decorated snowman; again, I used pop dots on the snowman.
Adhere the die cut sentiment.
Adhere the glittered and "stitched" clouds.
Then layer the photo frames, with one frame pop dotted on top of the bottom frame.
Adhere 3 sides of the photo frame to the inside of the card. Trim and insert your photo.
Lastly, using the Claudine Hellmuth acrylic paint, add ornament (ie. balls) to the tree, buttons on the snowman and the broom stick. Let dry thoroughly; it takes between 10 and 15 minutes to dry.
Voila! You are finished!


