Tuesday, January 31, 2023

Altenew Doodle Bouquet Stamp and Die

 Hello Scrap Shotz Friends!

Rosie here to share some fun card projects using the Altenew Doodle Bouquet stamp and die set

This is a large 6x8 stamp set and the image will fill an A2 card front or, if you like creating 5"x7" cards, it's perfect for that size!

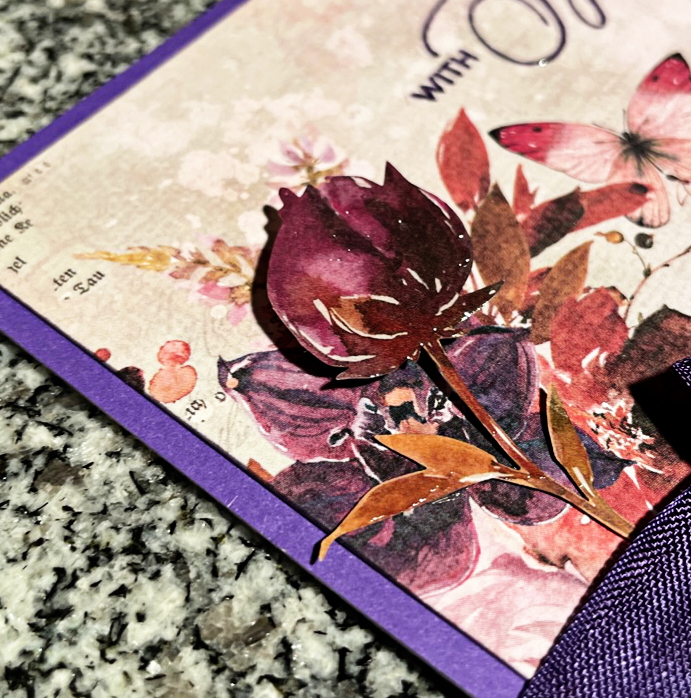
There are two single blooms in this set and I stamped them in a light colour of ink and then coloured with Copic markers for a no line colouring look. I inked one side of the Altenew Gem Pattern 3D Embossing Folder with Altenew Antique Gold Pigment ink and then embossed a white card front. The blooms are cut with the coordinating die and layered over leaves die cut with the Pinkfresh Studios Curvy Leaves Die.


This set has 6 great sentiments which pair well with the size of the image. I embellished with a few Altenew Satin Gold Sequins.

I picked up the new Altenew Artist's Goauche Strolling Through New York paints and decided to try them out with my Gel Press Plate. I'll be doing a video with these paints and will share more about them soon!

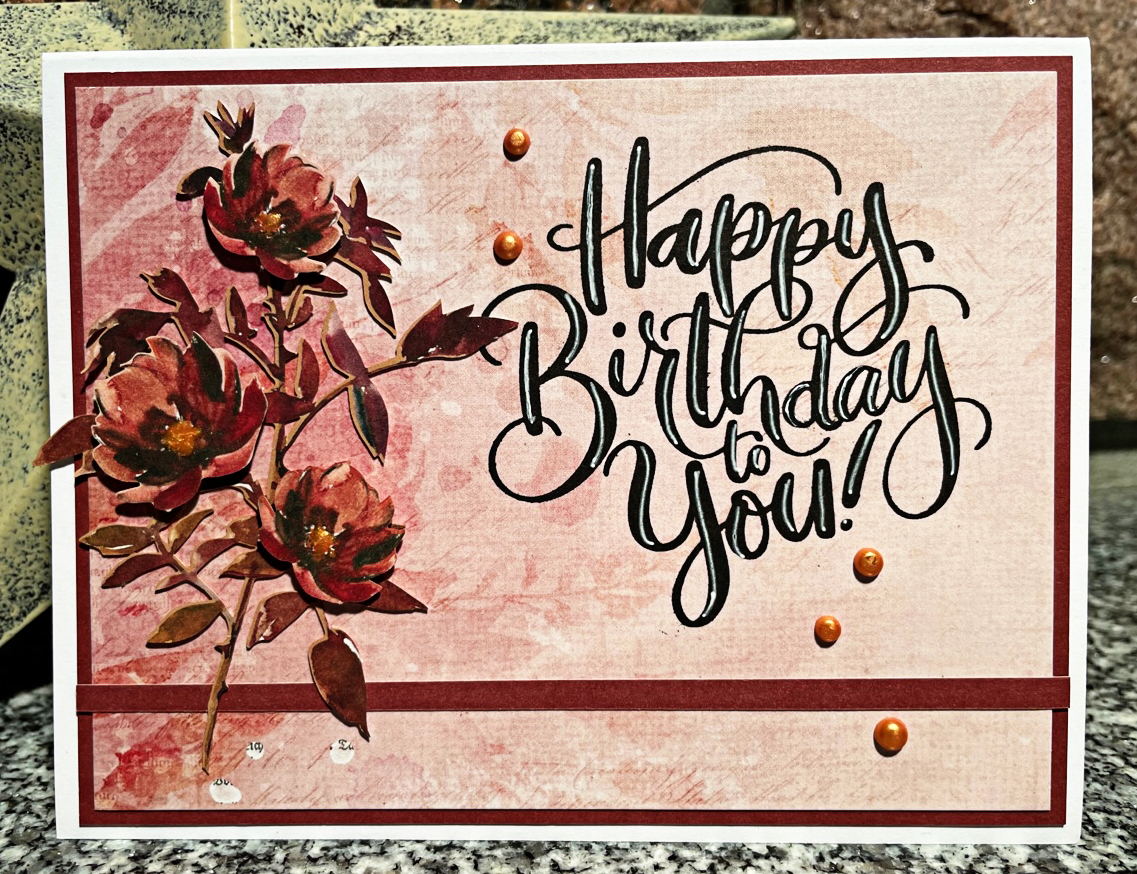
The large bouquet image is stamped and heat embossed with Altenew Pure White Crisp Embossing Powder on watercolour card stock. I placed my gel press plate in my Misti stamping tool, applied Coral Red and Baby Pink gouache randomly, added a little Altenew Warm Sunshine watercolour brush marker, blended with a brayer and "stamped" the plate over the embossed card stock I also placed in my stamping tool. This results in a 'negative' image left on the plate as the embossed lines resist the ink on the plate. 

What does that mean exactly? Well, you can stamp the remaining ink on the gel plate onto white card stock creating another gel press background. Here are a few examples I created:

Again, I'll be sharing this in a video coming soon so you can see this technique in action!

Back to the card...I kept it simple to show off the background, trimming and matting on black cardstock and then using a simple die cut sentiment from the Altenew Versatile Greetings Die Set.


Here's a mini slim card I created, this time combining Altenew Sunkissed ink and Coral Red gouache on the gel press plate.

Again I kept it simple and just embellished with a few Altenew Satin gold sequins.

The gel press plate background in this card didn't quite turn out how I wanted so I layered Spellbinders Brushed Gold card stock die cut with the Altenew Diamond Frame Cover die over top.

I again used leaves cut with that Pinkfresh Studios Curvy Leaves die with the small blooms from the stamp set. This time I embellished with a few Altenew Satin White Sequins and popped up the sentiment from the stamp set with foam adhesive.

This is a great stamp if you enjoy colouring and I coloured this with Copic markers and then added shading with coloured pencils. I finished it off with some white gel pen details.

I stamped the image along the top and bottom of the card front leaving an area in between to stamp the sentiment.

I hope you've enjoyed taking a look at what's possible with the stamp set. 

Thanks for stopping by!

Thursday, January 26, 2023

49 and Market - Plum Grove Layouts

 Hello everyone! I have a couple of layouts from the 49 and Market Plum Grove collection. This line is absolutely stunning. I have said it's almost too pretty to cut, but I've gone and done it! (A little, at least!)

This layout was quick to put together, using a few of the laser cuts, die cuts, tags and die cut words. The laser cuts are gorgeous and the cutting is very precise and doesn't leave a white border that you get with the normal die cuts. 

This is a totally different color pallette from the same line. I dug out the greens for this June layout. Again, the laser cut branches are an awesome embellishment. Check out the fine branches on the bottom left. They would have been impossible to cut out like that! I used black Thickers from my stash for the title and as well as the Doodlebug Alphabet Soup Alphas in Limeade. There are so many colors of these letters and you get a lot of them in a package. I used some chipboard, phrase die cuts and tickets as well as a postcard for my journaling. Looking now at the finished product, I'm pretty happy with the balance and texture interest in this layout, documenting a special day for a special girl! 

My apologies for the crooked photo. I can hardly wait for longer days so that I can get better photos to share! Lol!  

Make sure you check out the 49 and Market lines in the store. There are more coming every week!  I'm sure you're going to see a lot more cards, layouts and projects made with these gorgeous elements. Share yours in the Scrapshotz Paper Crafting group - we would love to see them!

Thanks for stopping by!


Thursday, January 19, 2023

49 and Market - Plum Grove - Cards

Hello! Lorraine with you today, sharing some cards made with this amazing line from 49 and Market. The line was the December kit from Scrapshotz, and this weekend I picked up some of the additional elements of the line and created cards.


I love the colors of this and the paper quality is nothing short of amazing! With this card I matted and embellished with purple, bringing out the rich colors of the patterned paper in the 6x8 Paper Collection. I stamped the sentiment with Distress Ink directly on the background and embossed over top of it with clear embossing powder. The only embellishment is a bloom from the Laser Cut Outs. The quality of paper and the intricate designs in the cut outs are so easy to work with. 

I was able to put foam under the bloom and then cover it with glossy accents to bring it out even more. I love the subtle depth that the bloom gives the card. 

This card uses another sheet of the heavy cardstock in the 6x8 pack, as well as a bloom from the laser cut outs. 

Changing up the color but using the same simple ideas with the laser cuts, I kept these blooms just raised a small amount by rolling up glue dots to put under them.

The depth is really subtle and the blooms fit perfectly with the patterns of the background.

Changing the mood slightly, I created a one layer encouragement card, using a Pinkfresh Foiled Sentiment. I love having these on hand. Just a few drops of Metallic Silver Lining Nuvo Crystal Drops and some metallic thread, and my card is done!

I popped up this cut out with a thinner foam square. Copper Penny Nuvo Drops were used for the embellishments and the sentiment is from Simple Strips from Taylored Expressions.


And finally, I created this simple Happy Birthday card using a stamp from Studio Katia, layered laser cuts and more Copper Penny Nuvo Drops. I felt that the black sentiment was too harsh for the mood of the card, so I doodled a bit of white pen on top of it to soften it a bit. Again, putting a little Glossy Accents on the blooms made them shine and pop over the leaves. The stripe is a piece of cardstock cut off of the background that grounds the design.

Check out the wonderful 49 and Market Plum Grove items in the store. They won't disappoint!!!


Wednesday, January 18, 2023

Thanksgiving with 49 and Market Plum Grove Collection!

Hello friends! Karla back today with two more layouts using the December Kit featuring the beautiful 49 & Market Plum Grove Collection! You can either grab the Kit in the shop or you can pick up the Plum Grove Collection piece by piece. The Kit includes the full collection paper pack, full ephemera pack, full chipboard word set, 1/3 of the tag package and 2 sheets of the rub on package, plus 6 matching cardstock!

This collection can be used for so many events, but does have a fall vibe so I thought that I’d play on it and use my Thanksgiving pics! I used the January Creative Scrapbooker Sketch and added two photos of our meal. I love the chipboard words in the set and found two that matched the theme perfectly! I added a title using Thickers from my stash and added some stenciling with coordinating Distress Oxide Ink  

I added some rubons and ephemera and wrote out my journaling at the bottom of the page. I’m thinking we should have Thanksgiving much more often! 

For my second layout I used photos of our family and guests at the table as well as a little treat bag created to tuck a sweet treat in! 

I added elements from the cut apart sheet in the paper pack and layered lots of the ephemera on this beautiful background paper! 


I diecut the ‘&’ sign using the Elizabeth Crafts Library Pocket Filler Cards Die Set and added it to my title. 


Thanks so much for stopping by! If you're playing with this kit or collection, we would love to see what you're making in the Scrap Shotz Papercrafting Facebook Group! I’ll also be on the Scrap Shotz Facebook page this Thursday at 1 pm Live to share new Pinkfresh goodies! Have a very happy,crafty week friends! 


Monday, January 16, 2023

49 & Market Layouts with the Plum Grove Collection!

Hello friends! Karla here today with a double page layout using the December Kit featuring the beautiful 49 & Market Plum Grove Collection! You can either grab the Kit in the shop or you can pick up the Plum Grove Collection piece by piece. The Kit includes the full collection paper pack, full ephemera pack, full chipboard word set, and 1/3 of the tag package and 2 sheets of the rub on package, plus 6 matching cardstock!


This collection has a bit of a fall vibe, but can be used for so many occasions! Since my anniversary is in September I thought this would be a wonderful kit to use with these photos! For my first layout I cut two of the papers and layered them together to make a 12x12 page, using the branding strips as decorative elements at the top and middle of the page.


I used lots of the elements from the kit to create layers and an area for my journaling, including adding the beautiful rub-ons! 


I cut the pretty floral elements from the cut apart page included in the 12x12 papers and added a photo to the pretty frame from the ephemera pack.


For the second page I again combined two papers, this time with a vertical attachment. 


I matted the photos and created little clusters of elements, using my tiny attacher stapler to connect some of the items.


The ephemera and chipboard words are awesome to create fun titles and I felt like Happy Life fit perfectly! I added a couple tickets to the top and some chipboard hearts!


Thanks so much for stopping by! If you're playing with this kit or collection, we would love to see what you're making in the Scrap Shotz Papercrafting Facebook Group! I'll be back on Wednesday with another peek at more you can do with this kit, so be sure to check back!!


Sunday, January 8, 2023

November Kit Catch Up, Garden Shoppe by Paige Taylor Evans


Happy new year everyone! Cold and rainy days here in West Coast Canada has me reaching for the brightest kits in my stash … well hello November Kit featuring Paige Taylor Evans, Garden Shoppe! All the colours of the rainbow, fun patterns, cute embellishments and more.

I decided to pair all my November kit layouts with a cutfile from Peartree Cutfiles. I cut the files in Bazzill Basics Paper, Avalanche and love how the bright white makes the colours of the kit pop even more! 

Hot Air Balloons 

I started this layout by backing the Peartree Cutfile A Sky Full of Balloons with a bunch of different papers from the Kit - a chance to showcase all the great patterns. I backed the clouds with Lawn Fawn Pearlescent Vellum. I popped it all up on foam dots and put it on this fun minimalist polka dot pattern. 

From there I added a couple of photos to the right, backed with a few layers of pattern paper and some embellishments. The pattern balloons were doing so much design work there wasn’t any pressure to add too much. I added a few phrases on the top left, a strip of pattern on the top and bottom, and a few little bees here and there. 

Hello You 


For my next layout, I reached for the farm inspired elements in the Kit and the Peartree Cutfiles Hello You file. I had these photos from a petting zoo where the animals were pressing their faces out of the fence looking for treats and the Hello You seemed a perfect title. 

I really liked the green plaid pattern for this one. I ripped it in half and paired it with the coordinating Bazzill Basics Paper in the Kit in that great mustard colour. I backed the ‘You’ in the cutfile with the dark floral pattern paper from the Kit then popped the title up on the green plaid. I first added a few splatters to the paper with some watered down Ebony Black Nuvo Crystal Drops


Before I added my photos to the cardstock along the broom of the page I stamped ‘photo op’ over and over using Star On in Black. The animals looked like there were trying to get in the photo so seemed fitting! I finished off with some embellishments here and there. 

Florals for the Win


For this layout, I was inspired by all the leaves in the Kit so grabbed this awesome pattern and reached for a Vicki Boutin Color Study Hello and Vicki Boutin Sweet Rush Sunshine stamp set. I stamped a cascade of flowers and leaves down the left side balanced with a couple on the right. I used the same floral stamp and some fussy cutting scissors to make matching embellishments. 


I cut a bunch of the Peartree Cutfiles Leafy Outlines so I could pair a couple of these with the leaves from the Kit with each of the floral embellishments. Before adhering things down, I added some Ebony Black splatters using watered down Nuvo Crystal Drops

I added two 2x3 photos of our pup walking in the leaves - was feeling the autumn vibes on this one - and a bunch of the gold puffy hearts peeking around the flowers. 

Tag us on Instagram or drop your creations in our Scrap Shotz Paper Crafting Group on Facebook so we can ohh and ahh.