Monday, October 31, 2022

Carta Bella Welcome Fall Layouts

 Hello everyone! I'm so excited to show you the Carta Bella "Welcome Fall" collection! I love how there are so many basic pattern papers to choose from. It's so easy to build a layout without it looking too crazy.


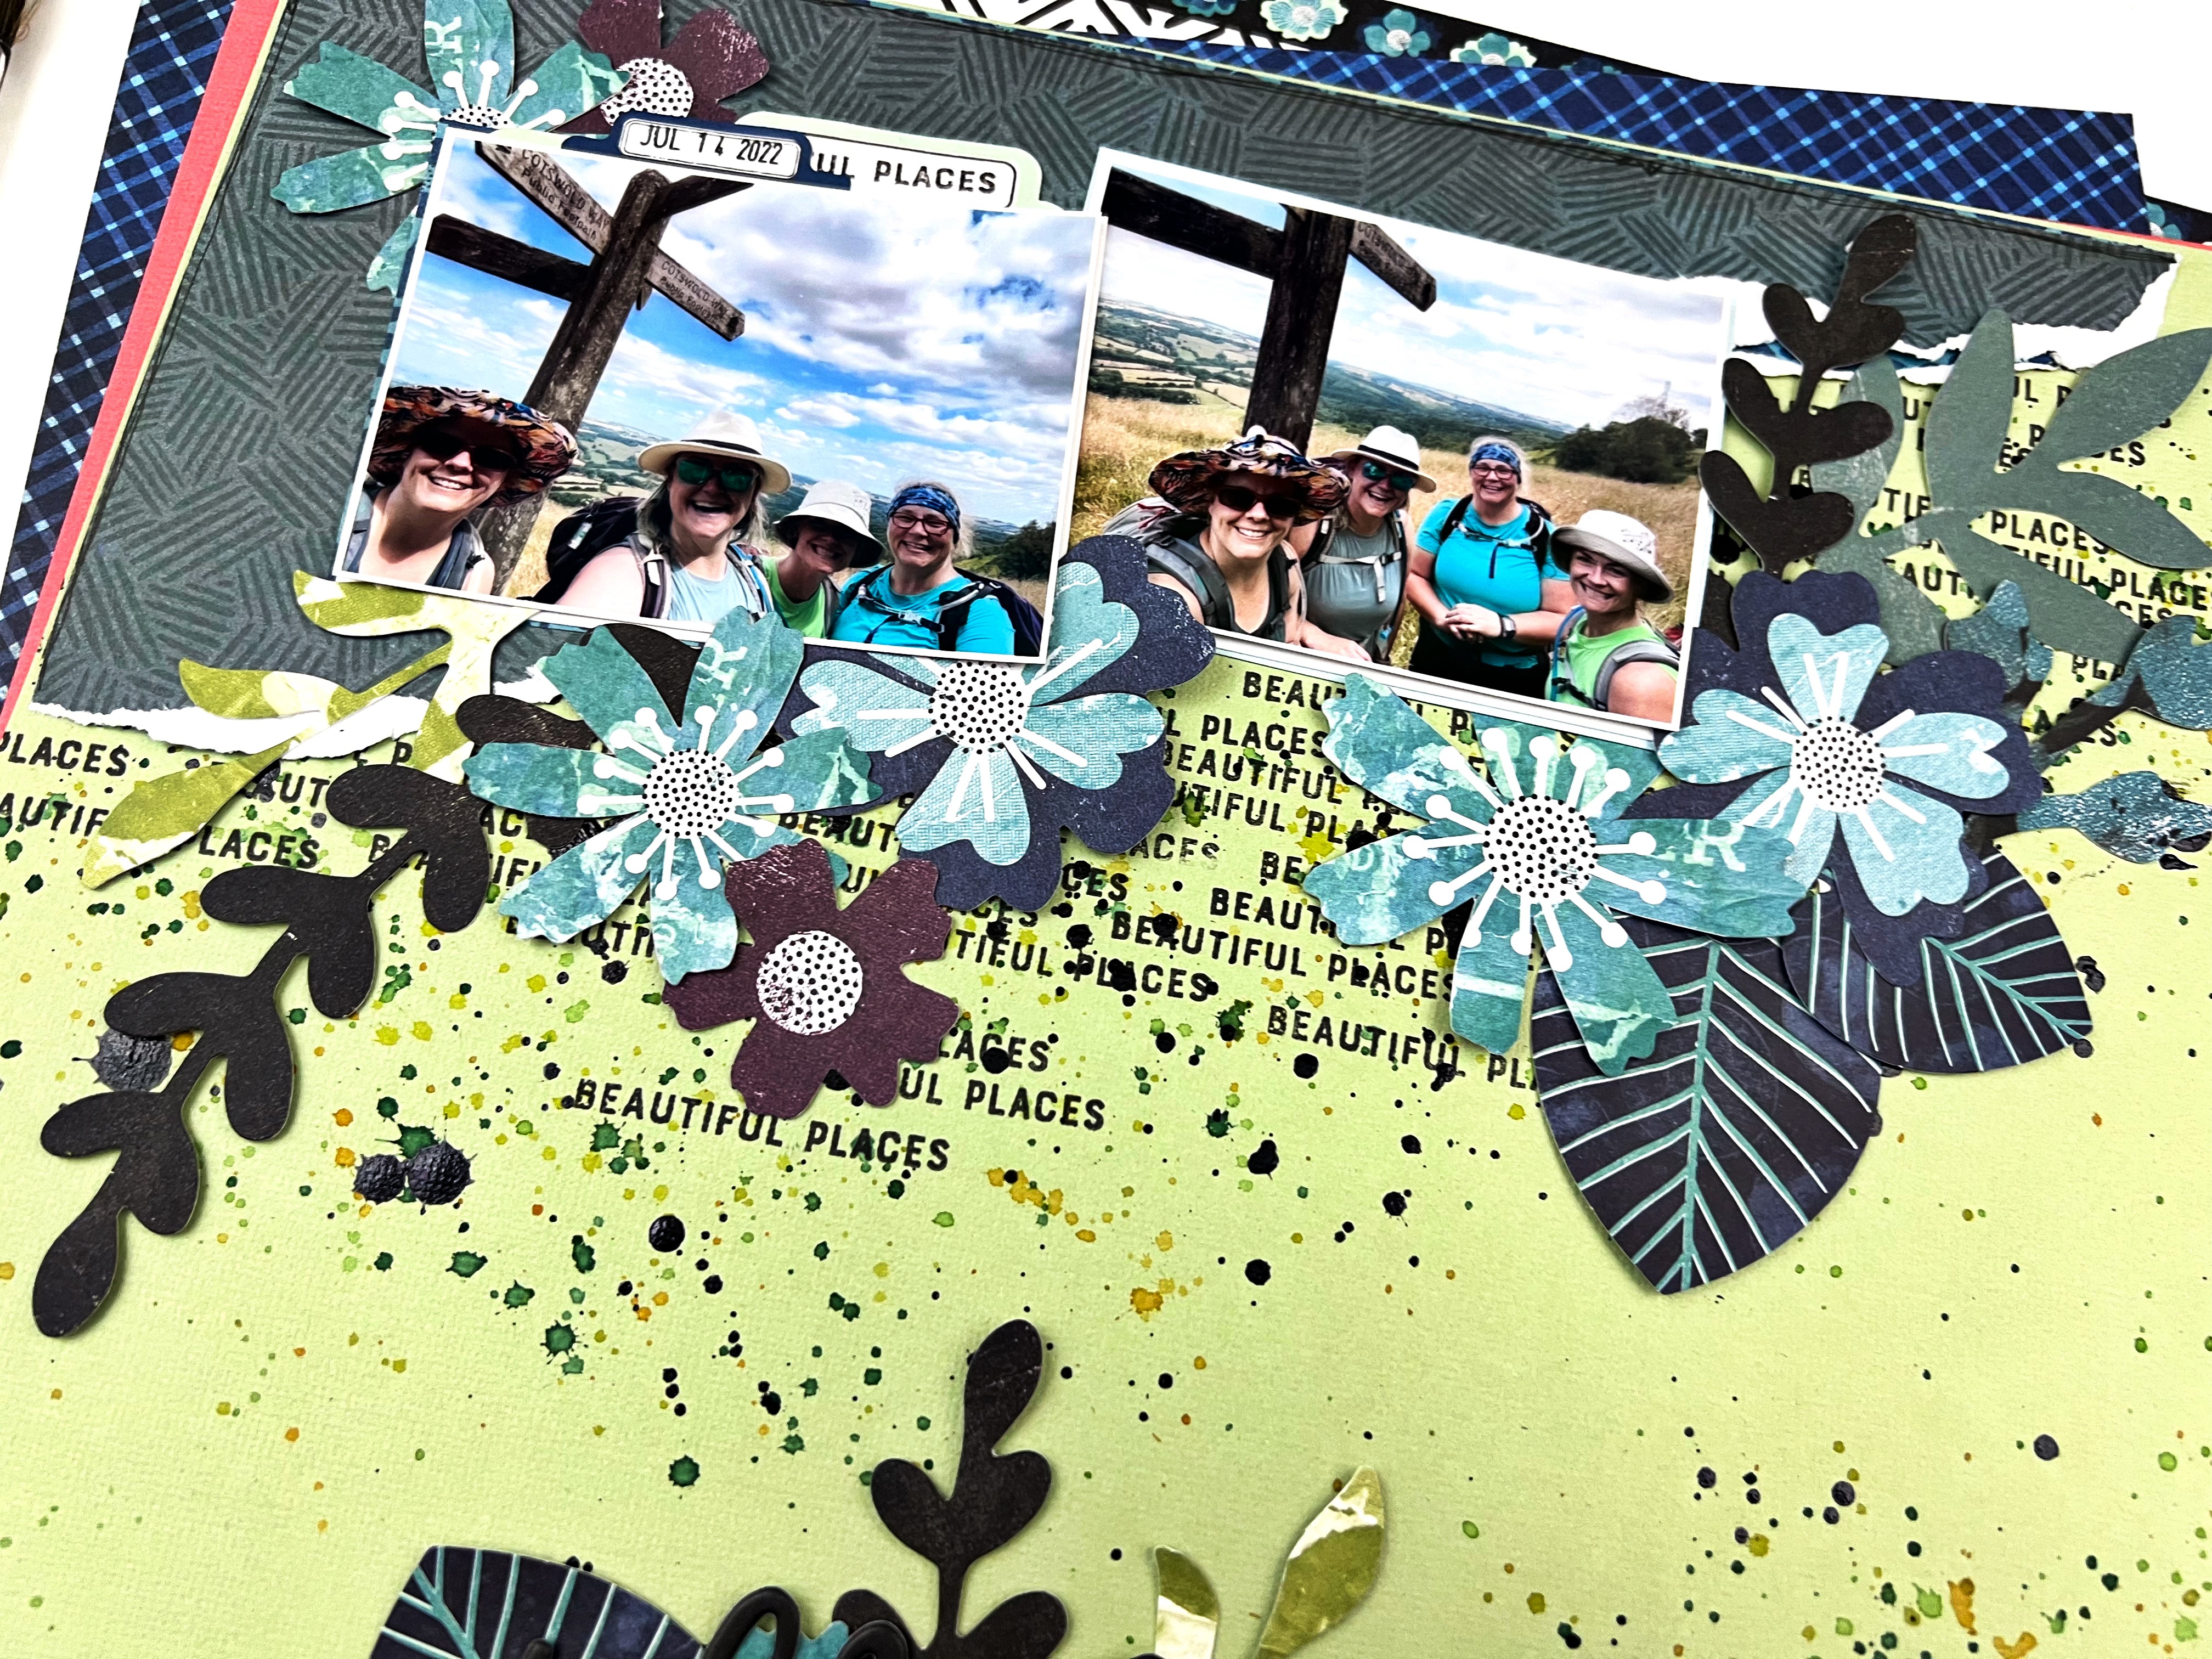
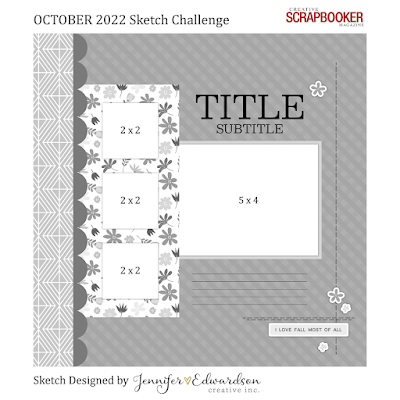
My first layout was inspired by the October sketch in the Creative Scrapbooker Magazine Sketchy Group on Facebook. I stuck pretty darn close to the sketch. My pictures were a bit larger than the dimensions on the sketch so I couldn't fit the embellishing on the right. 

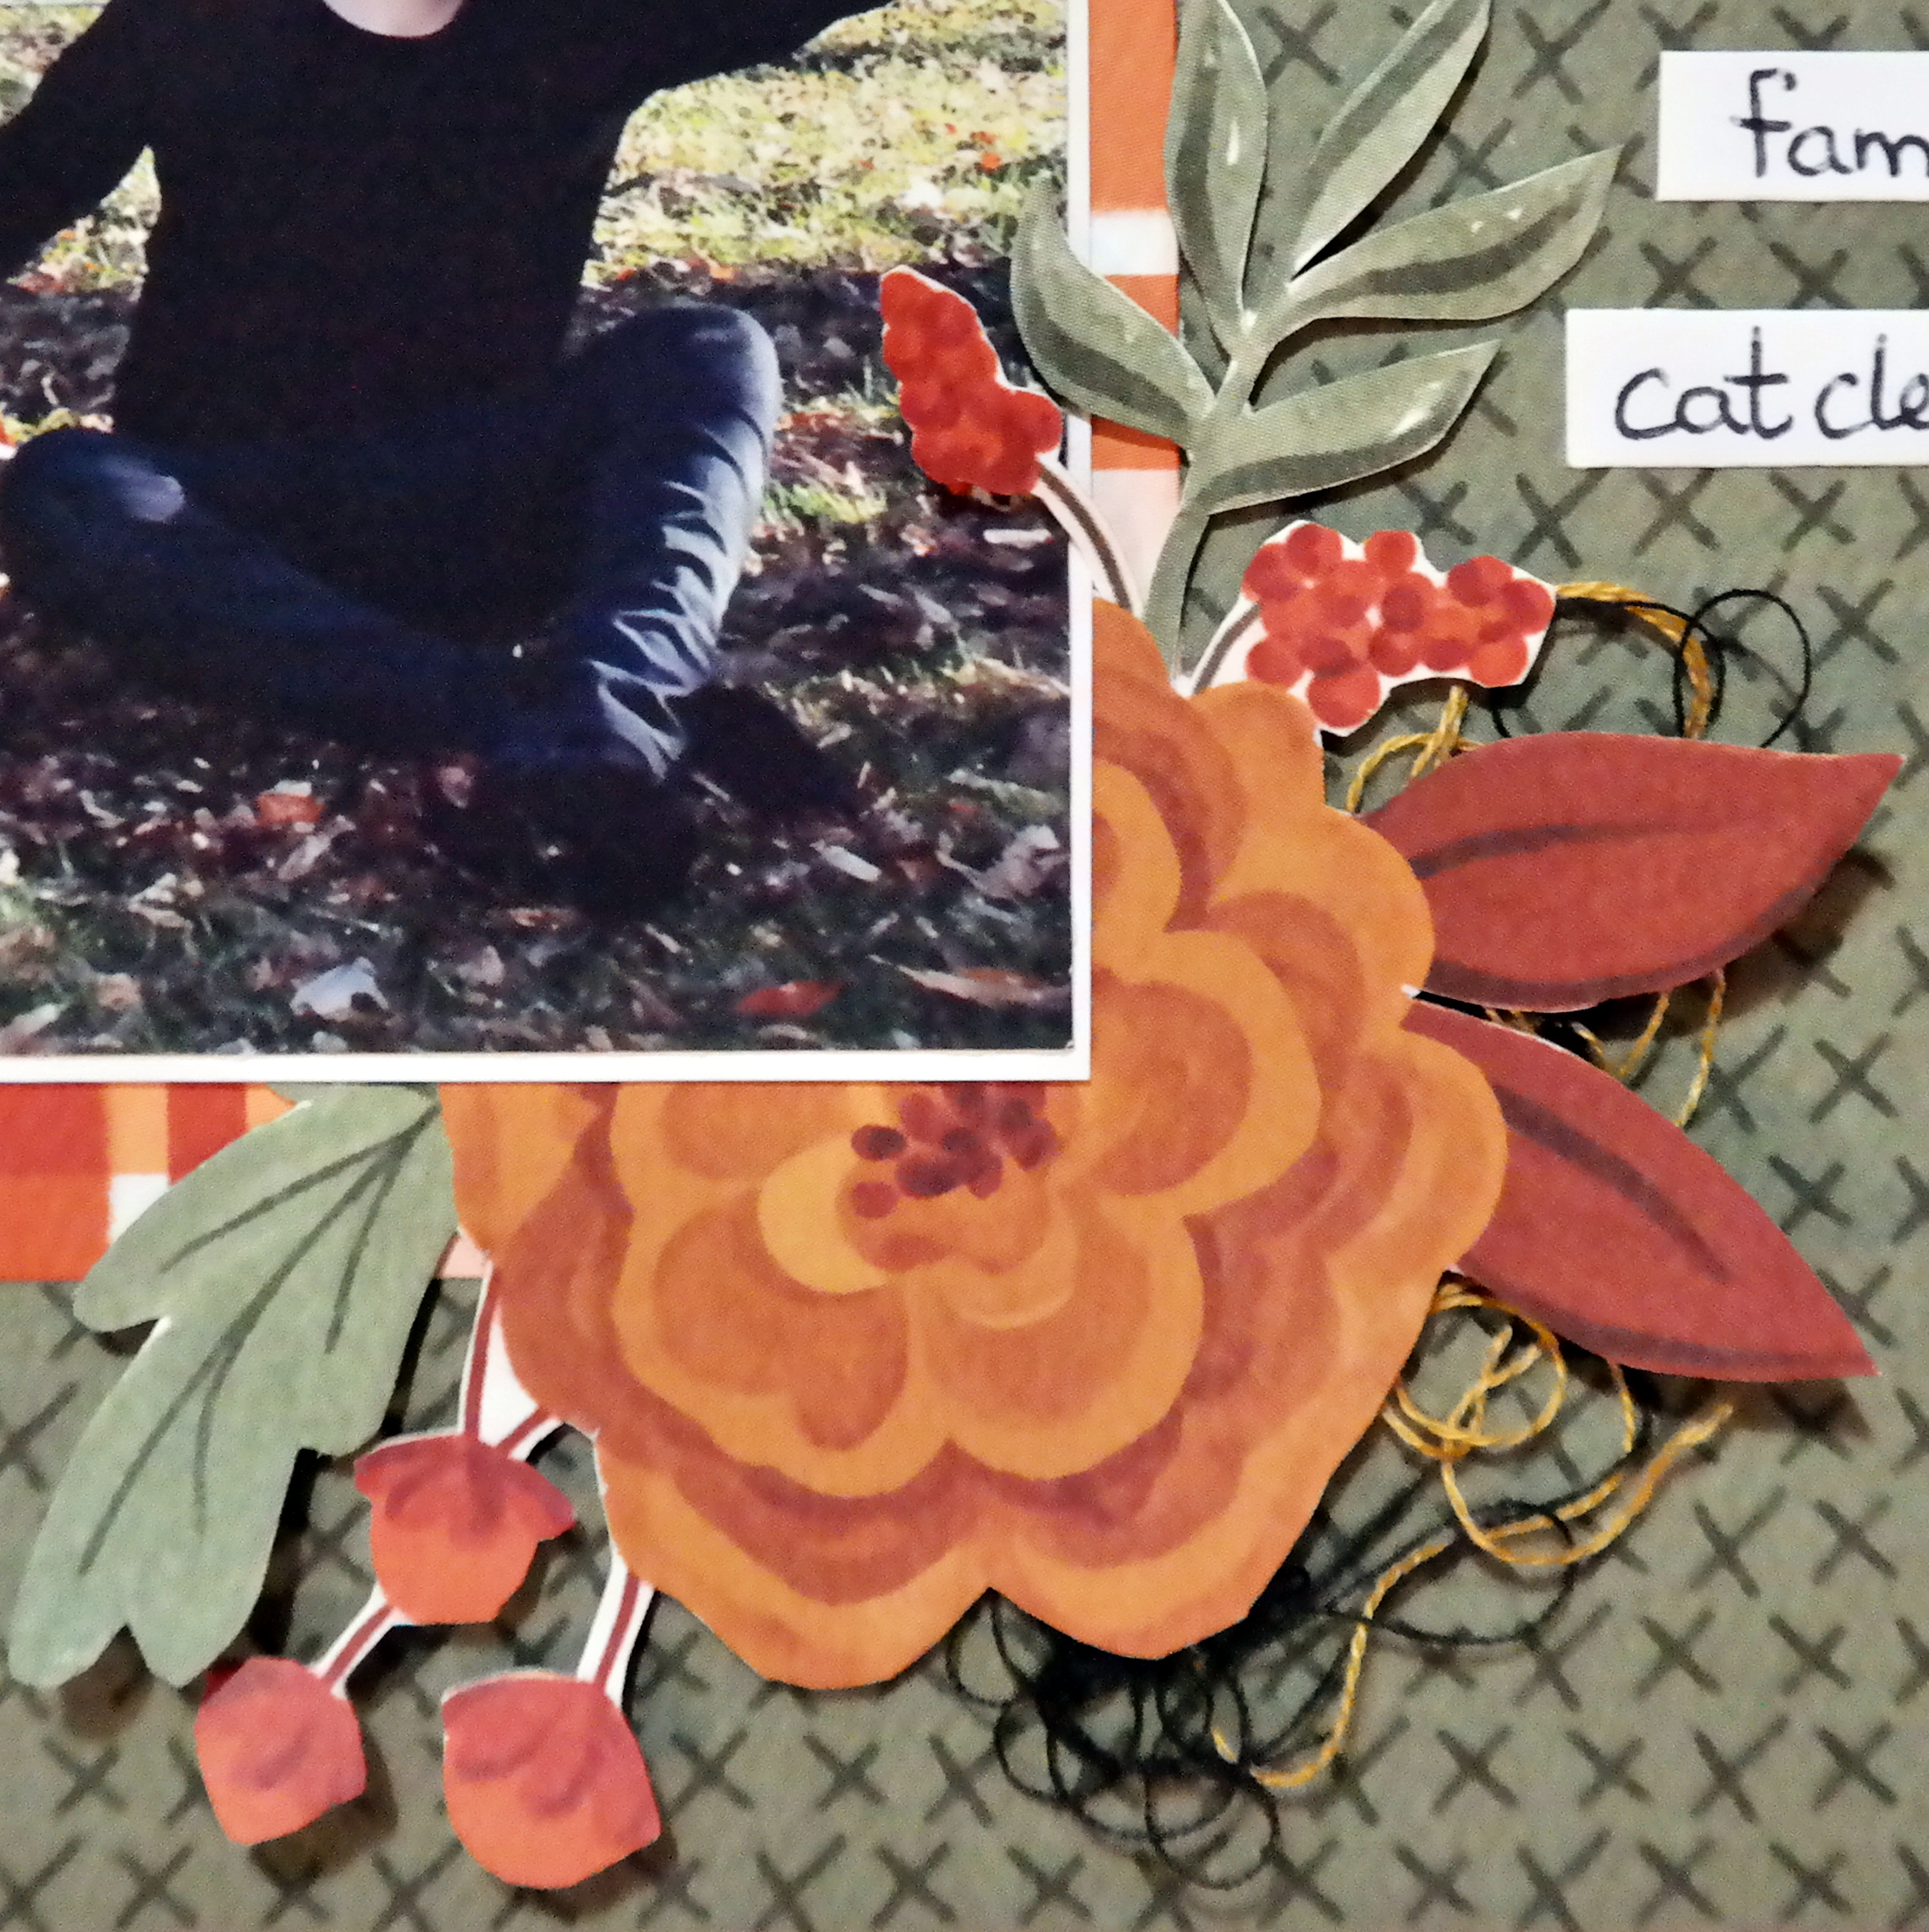
I used a stencil to cut out the scallop border and matted my pictures with white paper before taping them down. I love all the flowers on this page but they all had to be fussy cut from one of the papers in the kit so it took some time.


The rest of the layout is made with a chipboard title and a couple tags from the ephemera pack. I shoved a little bit of embroidery thread under the flowers to add some texture. Also, I couldn't forget the picture of the random cat that followed us through the park. He kept everyone entertained while we froze!


Layout number 2 was inspired by one of the pumpkin stickers (see the largest pumpkin sticker on the bottom right corner). I noticed how it has darker outer sections and lighter middle sections. So I drew by hand the three lobes of the pumpkin on a darker orange paper. On the lighter orange paper I traced the three larger lobes and then drew another circle about an inch smaller inside of them. I also drew the stems by hand using that same pumpkin as a guide. I wanted the sections to pop a little bit because they are very similar in colour so I inked the edges of the papers to make them a bit darker.


The ephemera tag kit comes with a few frames so I used them behind my picture. 


I used a chipboard piece for the title and a bunch of cardstock stickers in the bottom right corner. The final touch were a few puffy stickers and embroidery thread to add interest.


Thank-you for checking out the layouts. I'll be back later in the week with more!

Sunday, October 30, 2022

Print Shop, Vicki Boutin - October Scrapbook Kit - Continued


The new Print Shop collection from Vicki Boutin is this month’s scrapbook kit and wow is it fun to play with! 

I love how much variety Vicki includes in her collections - this one feature florals and snails to scissors and paint splatters. There are so many memories you can document with that range of goodies! 

Cardstock Grid Layout 


For this layout I wanted to showcase this fantastic coordinating cardstock in this month’s kit - what a colour! I had to add a little mixed media to bring the ‘me’ to the design so reached for the kit’s circle stencil and some Distress Inks. 

Using a ruler I drew a line down the middle of the page horizontally and vertically using a couple of different widths of journal pens to create the grid. Then I used the circle stencil and a random combination of Distress Ink stormy sky, crushed olive, saltwater taffy and a bit of black soot to add pattern to each grid square. 

I didn’t worry too much about how much of each colour I used and purposely made sure it was a bit uneven so it was a little messy. I finished off with the plus sign stamps with Paper Rose Studio, Premium Dye Ink in Intense Black and some black splatters. 

After that I created a cluster of pattern paper behind each of the three photographs and dropped them into one of the grid squares. Making sure each cluster included one of the cut apart tags. Then the real fun begins - embellishments! I had so much fun tucking things here and there until it looked busy. 

All the Patterns 

For this next layout I reached for all of my favourite patterns from the kit and made strips of paper 6 inches wide and of varying heights (about 2 inches each). I wanted to create a cascade of paper strips all messy down the middle of the page to give me lots of places to tuck embellishments. 

Before adhering the strips down, I used a paper punch to give one edge a notebook journal edge. I also used my ruler and a journal pen to create some random stripes across the paper strips. Once adhered down, I went through and added any embellishment that was about creating, making, being awesome and even the cardstock scissors found a home tucked in the layers of pattern paper for this one. 

I have lots of goodies left to play with and you can bet this kit will be on my desk for a while yet - such fun! 

You can also check out the first two layouts I made at Print Shop, Vicki Boutin - October Scrapbook Kit - these ones focused on the floral and botanical ephemera. 

If you are playing with the kit, we would love to see! Pop your creations up on the Scrap Shotz Paper Crafting Facebook Group or tag us on Instagram so we can ohh and ahh! 


Saturday, October 29, 2022

Print Shop, Vicki Boutin - October Scrapbook Kit

I am loving playing with the new Print Shop collection from Vicki Boutin - this month’s scrapbook kit! All the amazing colours and florals and oh my! 


I decided to start my Print Shop adventure with a focus on the flowers and botanical ephemera. There is a great mix of florals, leaves and stems that make layering on a page super easy. Here we go … 

Monochromatic Botanicals


For the first layout I pulled all the blue, green and purple botanicals from the ephemera kit - I also picked out papers from the collection and corresponding cardstock go the same colour scheme. My idea was to feature the design on the top and bottom of the page with all the leaves and such ‘growing’ towards each other to fill the space between. 

I prepped the cardstock background with a bunch of repeated stamping with the word ‘beautiful places’ from a past Vicki Boutin stamp collection using Paper Rose Studio Premium Dye Ink in Intense Black. I also added some black splatters over the stamping using some Nuvo Crystal Drops, Black mixed with a touch of water. To add a touch of colour I splattered some Distress Ink in mowed lawn, crushed olive and peeled paint too. 


From there, I ripped some of the pattern paper to create an anchor for my photos on the top and bottom of the page - making sure to not cover all the stamping and splatters. I added my photos and then spent the next bit tucking and layering the ephemera I had put aside until it looked messy but somehow still organized. 


A little trick if you want to layer after the big stuff like photos and pattern paper are stuck down - only glue or tape down the very center of things so you have lots of room to tuck and layer behind. When it’s all in place you can go back and gently add a few more spots of glue to make sure it stays put. 

The title ‘perfect day’ was the final touch - I love how it’s nestled in with the leaves and stems! 

Overflowing Envelopes


For my next layout I had an idea to create a line of envelopes all overflowing with florals and butterflies. I had three photos of me and my wee niece where she tried to take the selfie of us that make me laugh so much. I thought the ‘overflowing’ design would be a way to how my love this little peanut often feels the same. 

I selected a few of my favourite patterns from the collection and used my Big Shot and the little envelope die from Paper Rose Studio to create 4 envelopes - they are sort of hard to see in the final layout, I may have overflowed the overflowing look.

I selected this text pattern from the kit so there was some pattern but nothing that would overwhelm the envelopes. I prepped the background with the repeated heart stencil from the collection using Distress Ink in scattered straw, saltwater taffy and a touch of crushed olive. First rubbing the inks through the stencil randomly so they blended here and there and second as light splatters across the page. The text pattern already has some black splatters,  so I added a few more to bring some more black in. 


I adhered the 4 envelopes across the hearts and added my 3 photos, then just started tucking and playing with the florals from the die cuts, stickers and chipboard stickers in the kit. A few butterflies here and there added some contrast. Finally I added the title from the phrase puffy stickers in the collection for a pop of black. 


I am off to play some more! There is a whole pattern paper of cut apart tags that I have my eye on - be back soon to show you what I come up with. 


Monday, October 24, 2022

Christmas with Lawn Fawn!

 Hello friends! Karla back today with a whole lotta Lawn Fawn Christmas fun!! I was fortunate to be able to take a retailer class for Scrap Shotz last week and got to put together the cards below with Kelly and Jenn from Lawn Fawn!! 

Here is a card with the Oh What Fun Lawn Fawn die, which is great by itself, or in combination with stamps and various backgrounds! We added the cute bear from Ugly & Bright coloured with Copics and layered the diecut over a background blended with Twisted Citron and Mowed Lawn Distress Oxide Inks.


Here is a very similar card using the opposite colours of cardstock for the Oh What Fun Lawn Fawn diecut - inserting the green letters inside the openings. I used a metal shim when cutting this die and it cut so smoothly! This time the cute critters from Snow One Like You decorate the card. PS - if you're ever looking for out of stock or older product from Lawn Fawn, feel free to email Sandy@scrapshotz.com with your requests and she'll add them to her next order!


Next we created a fun 'warm wishes' Christmas card using the Beachy Christmas Stamp Set, Lawn Fawn Background Sunray Stencil, Merry Christmas die and Christmas Palm Tree die. Santa is looking super cool and relaxed!!


This card uses the same Beachy Christmas Stamp Set with a cute little Lawn Fawn penguin character. Lawn Fawn sets work together so well, and there are so many images in this set you could use in many different ways, combined with other sets!


The Ugly & Bright Set is one of my favourites!! I just love their adorable little sweaters!! There is even a plain shirt waiting for you to add your own tiny image to! This card is so basic and sweet with Lawn Fawn patterned paper on the bottom of the card, a bit of bling with the strip of gold glitter paper and the cute little critters. The card was finished off with a couple cute sentiments!


Lastly, again using the Beachy Christmas Stamp Set and Lawn Fawn Background Sunray Stencil, we created a warm Christmas wishes card! By using a pink ink to create the sunray background and changing the images around we get a totally different look!


And here is a look at the card I created for last week's Thursday Live Class using the Oh What Fun Lawn Fawn Die, Distress Mica Stains and Crayons, Spellbinders Origami Embossing Folder and Pinkfresh Ornaments! That fun large die is great to mix and match with lots of stamps!!


The embossed background sprayed with Mica Stains is so beautiful peeking out from behind the Oh What Fun Die!


Watercolouring with the Mica Crayons on the stamped ornaments creates a soft, pearly effect!


Inside, I've stamped with Altenew Inks - some of my favourite for blending and stamping!


Here's the Facebook Live process video where you can craft along!!

Happy Crafting!

Monday, October 17, 2022

October Kit Club - Vicki Boutin Print Shop!!

Hello friends! Karla here today with a look at a layout created with the October Kit Club, some Add-On's and products from the shop featuring Vicki Boutin Print Shop!! It is such a pretty collection, and there are so many ways to use it! I created this layout to scrap some photos I took of us in my oldest daughter's neighborhood, where you can see the downtown city lights. We don't get to see this view from our house so we all thought that was pretty cool!  


If you're wondering what the fabulous Scrap Shotz Kit Club is... check out the info HERE
You can get a closeup look at the October Kit Club in this video HERE!!


I used a piece of cardstock from the Ready To Use background paper pad as the base of my layout and added mixed media using the heart stencil included in the kit. I layered on Tim Holtz Translucent Grit Paste and Embossing Glazes for a textured effect and stamped images on using the Love This stamp set and Distress Oxide Inks. I added a title and puffy sticker embellishments using the Puffy Phrases stickers, also in the kit.


I added a cluster of elements from the Journaling Ephemera pack on the bottom left of the layout. I used the Creative Scrapbooker October Sketch as inspiration and a starting point! 


I journaled on a cut apart tag from one of the papers in the kit using a Zebra Sarasa Porous pen after adding lines with my Olfa ruler. You can see some of the blue washi sticker, from the amazing Paperie pack, peeking out from behind the tag.


I added on a butterfly, fussy cut from one of the papers in the kit and splattered on some of the blue metallic watercolor from the Cosmic Watercolors set. You'll also see various stickers and other ephemera pieces scattered around the page. 


Here's a look at the process video where you can see this layout come together! Watch below or click HERE to watch on YouTube. You can also find the full Live video on Facebook at this link HERE


Thanks so much for stopping by! Be sure to check out this week's Facebook Live Demo on Thursday for more inspiration on the Scrap Shotz Facebook Page. 

Happy Crafting friends! 


Saturday, October 8, 2022

More Christmas Card Inspiration with Spellbinders!

 Hello Friends!

Rosie back to share some card inspiration featuring Spellbinders!


This is Dancin' St. Nick and his legs move when you tilt the card side to side. The bottom third of the card is embossed with the Spellbinders Argyle Socks Embossing Folder. Sentiment is from the Spellbinders Mix & Match Holiday Greetings Die Set. I've embellished the card with Pinkfresh Studios Gold Metallic Pearls.

Next is another card with a swinging element, Spellbinders Holly Jolly Gnome.


I've die cut pieces from the following papers:


The background is stencilled with the Lawn Fawn Snow Flurries Stencil and Nuvo Glitterati Glimmer Paste.


The Spellbinders Holiday Group Hug stamp set is a fun set to colour and I love it's size. I used to Copic markers to colour it and added some white highlights with the white pen in the Altenew Must Have Gel Pen Set.


I fussy cut the image and popped it up with foam adhesive over a background made with the Spellbinders 8.5"x 11" Cable Knit Stencil and Nuvo Sea Sprite Glacier Paste. This is a great stencil as you can use it over a full sheet of paper and then trim it into four A2 card fronts!

I think this die set is my favourite from Spellbinders this year, it's the Gnome Tree Die Set.


I'm not going to lie, this was a little time consuming to put together but oh so much fun! I added shading and details with Copic markers and the white and gold gel pens from the Altenew Must Have Gel Pen Set.


The background is inked with Distress Oxide inks and then misted with water. I added Spellbinders Color Essential Gems to the wreath and "lights".

There are lots more great Spellbinders products in the store, click HERE to see them all!

Thanks for stopping by!


Wednesday, October 5, 2022

Oh What Fun & Good Cheer!

 Hello Scrap Shotz Friends!

October has arrived so quickly but there's still time to get your Christmas cards done if you're making some for the season. Rosie here to share some inspiration with you!


I've inked a card front with Distress Oxides and die cut with the one layer of the Mama Elephant Into The Woods Creative Cuts, I die cut the second layer from Spellbinders Glitter Foam and layered them together. These cuties from the Mama Elephant Little Merry Sign Agenda are Copic coloured and the sentiment is stamped with the alphas in the stamp set. Lastly, I've embellished with a few Studio Katia Iridescent Bubbles.

I used the same stamp set to create the merry portion of the sentiment and then die cut Christmas from Spellbinders Glitter Foam with the Spellbinders Mix and Match Holiday Greetings Die Set. The card front is cut from Spellbinders Mirror Red Cardstock with the Mama Elephant Magic Snow Creative Cuts plate.

This next card features the Pinkfresh Studios Ornaments Stamp, layering stencils and die.


This group of products is genius as the ornament images are stamped all in one go and they are super easy to colour with the stencil. Once you're all done adding colour, the die cuts all 10 images out in one pass!


I added some Sizzix Crystal Glaze over the last layer and embellished the ornaments with Spellbinders Color Essential Gems Crystal Mix

I'll be back in a few with more Christmas Card inspiration for you!