My scrappy desk is full of fun farmhouse cuteness right now. Great florals, vintage barns, fantastic sentiments and sweet little chickens, goats, pigs and cows... hello Simple Stories, Farmhouse Garden!
So glad Scrap Shotz sent me these goodies to play with this month - I had the chance to dig deep into my photo stash and document some fun but almost forgotten memories.
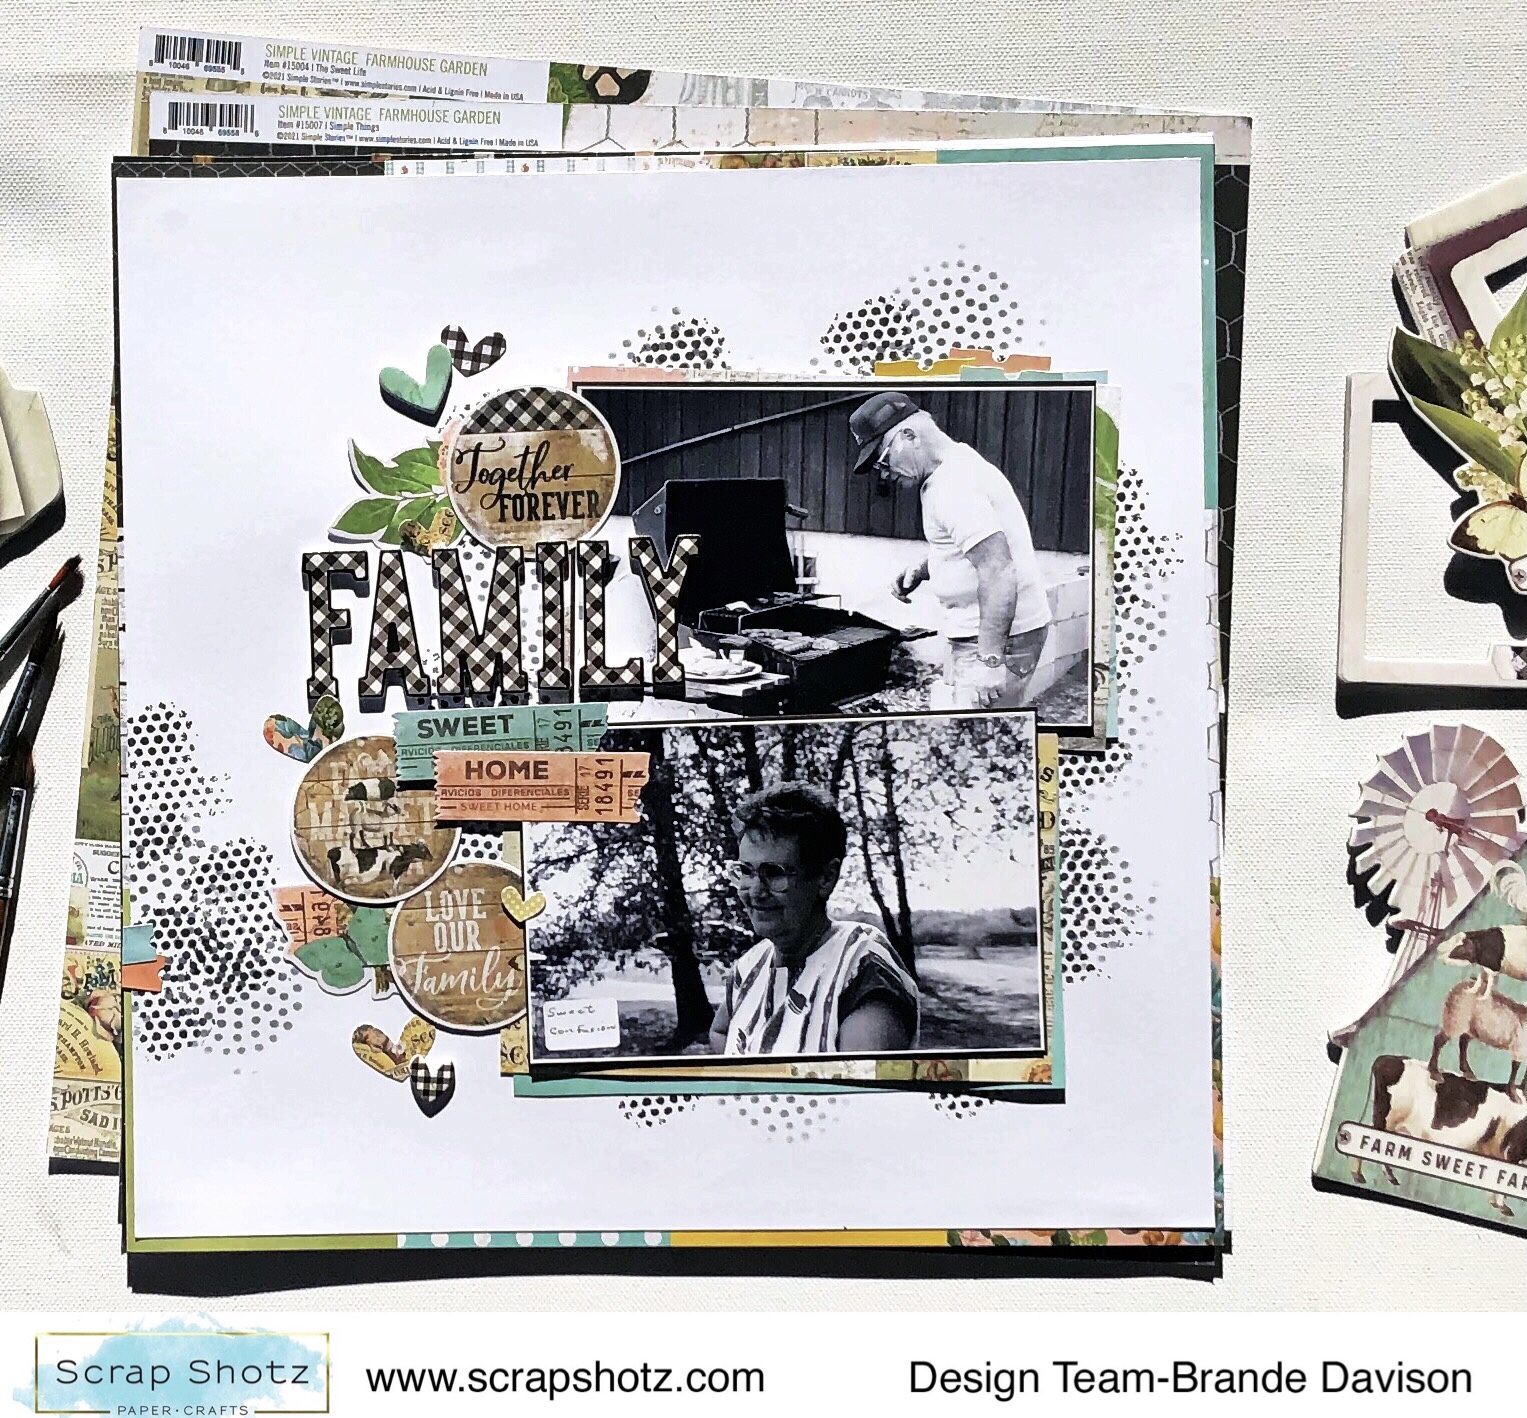
For my first layout I pulled out some 30+ year old photos of my Grandma and Grampa at one of our classic family BBQs at their acreage. The photos were in rough shape so I printed in black and white (which also looks great with the colours of this collection). Oh and that little sticker on my Grandma’s photo says ‘sweet confusion’ is actually her writing! She used to add small labels to photos to journal her thoughts or the details - so precious!
I used some Distress Ink, Black Soot through a stencil and a background stamp to anchor my photos on some black texture breaking up the white space. Then I layered some embellishments and title down the left of the photos. That big ‘family’ title in plaid really pops!
From there I went even farther back in the photo archive. Grabbing photos of my big sister and cousin as wee toddlers eating a popsicle on the porch steps. Another photo that needed to be printed in black and white to hide the poor shape it’s in.
For this layout I used my most favourite texture paste Picket Fence Studios, Paper Glaze in Black Peony to create a horizontal pattern across the page. Then used the photo and embellishments to almost fill up the textured space. I knew I wanted to get the blue barn on this page and love the little spot it found. I liked the ‘Bloom & Grow’ title - seems a good one for these little kiddos who were doing just that!
After a couple of white background layouts, I needed to get some pattern paper into the game. Another 30 year old photo for this one folks - this time me and my little sister on the swing our dad made when we lived on the farm. Perfect for this collection.
I used some die cuts from my stash to cut a whole bunch of Polaroid frames from different pattern papers in the collection
- then scattered those up at the top of the page and added some white splatters. From there I just started adding and layering all kinds of stickers, chipboard and puffy phrases stickers from the collection - using the Polaroid frames as an anchor point. I wanted a really busy look at the top of the page with just a touch of the design at the bottom.
Such a fun collection to work with - the pink, blue and mustard kit colours compliment the vintage look and patterns wonderfully. I am already thumbing through my throw back photos for more to pair with these goodies.
If you are playing with the Simple Stories, Farmhouse Garden - we would love to see. Especially what you do with the embellishments that have a chicken standing on a goat standing on a pig standing on a cow - yup! So cute.
Hello friends! Karla back today with two more layouts using the awesome May Kit Club! So far I've created four layouts and two cards... and I still have lots of supplies left to keep crafting! If you missed last week's post with a full review of the kit plus two layouts and two cards, be sure to check that out HERE! First up, I have a layout to share using our camping photos and a visit to the beach. I decided to add in some blues to match the water in the photos and decided to pull out the new Tim Holtz Salvaged Patina Distress Ink and Oxide, and I love how it turned out!
I used Distress Ink to cover some of the white areas of the paper, and since it's translucent it doesn't show when you go over the black. The Distress Oxide in the Salvaged Patina was great to add a chalky look to the edge though! You can see how that works in the video below!
The black and gold letters from the Thickers in the kit are some of my favourite! I used some puffy stickers and enamel dots to embellish my title area.
I used a tag from the cut apart page in the paper pack and then created a second tag from patterned paper, again using the Salvaged Patina Ink and Oxide.
I finished off the layout with some chipboard, the adhesive brads and chipboard stickers and ephemera and added my journaling with a white gel pen.
Here's a look at the process video showing you how the first layout came together from start to finish!
For the second layout, I used a piece of the black cardstock from the kit and layered on papers from the collection pack.
I used those fabulous gold and black Thickers and added on some chipboard and ephemera pieces to complete my title and added pops of colour with the enamel dots, adhesive brads and puffy stickers!
I coordinated various pieces from the 12x12 sticker sheet, the chipboard elements and ephemera with some of the cut apart elements from the paper pack to embellish the page.
Thanks so much for stopping by! You can check out the current Scrap Shotz Kit Club kit HERE and get all the details on these awesome kits HERE! Even though this month's kit may be sold out, you can find a few more elements from the Let's Go Anywhere Collection in the shop!! Have an amazing week my friends, and happy scrapping!
If you were lucky enough to get your scrappy hands on the new Wicker Lane collection from Photoplay from the Scrap Shotz shop then this post is for you! This new collection is another example of Photoplay’s fantastic skills at creating colorful collections - so bright and fun.
For my first kick at the Wicker Lane goodies I played with the diagonal stripe pattern ‘our house’. I sliced the paper up to get just the actual stripes to use as an anchor for my title and photo. This photo is a family portrait drawn by one of my little siblings!
From there I found all the little embellishments that made me happy in the collection and added the puffy hearts and title from Vicki Boutin’s Color Study, The Details Puffy Phrase Stickers and some black splatters touches. I love how colorful but also how much white space there is too on this page - might be a new go to design.
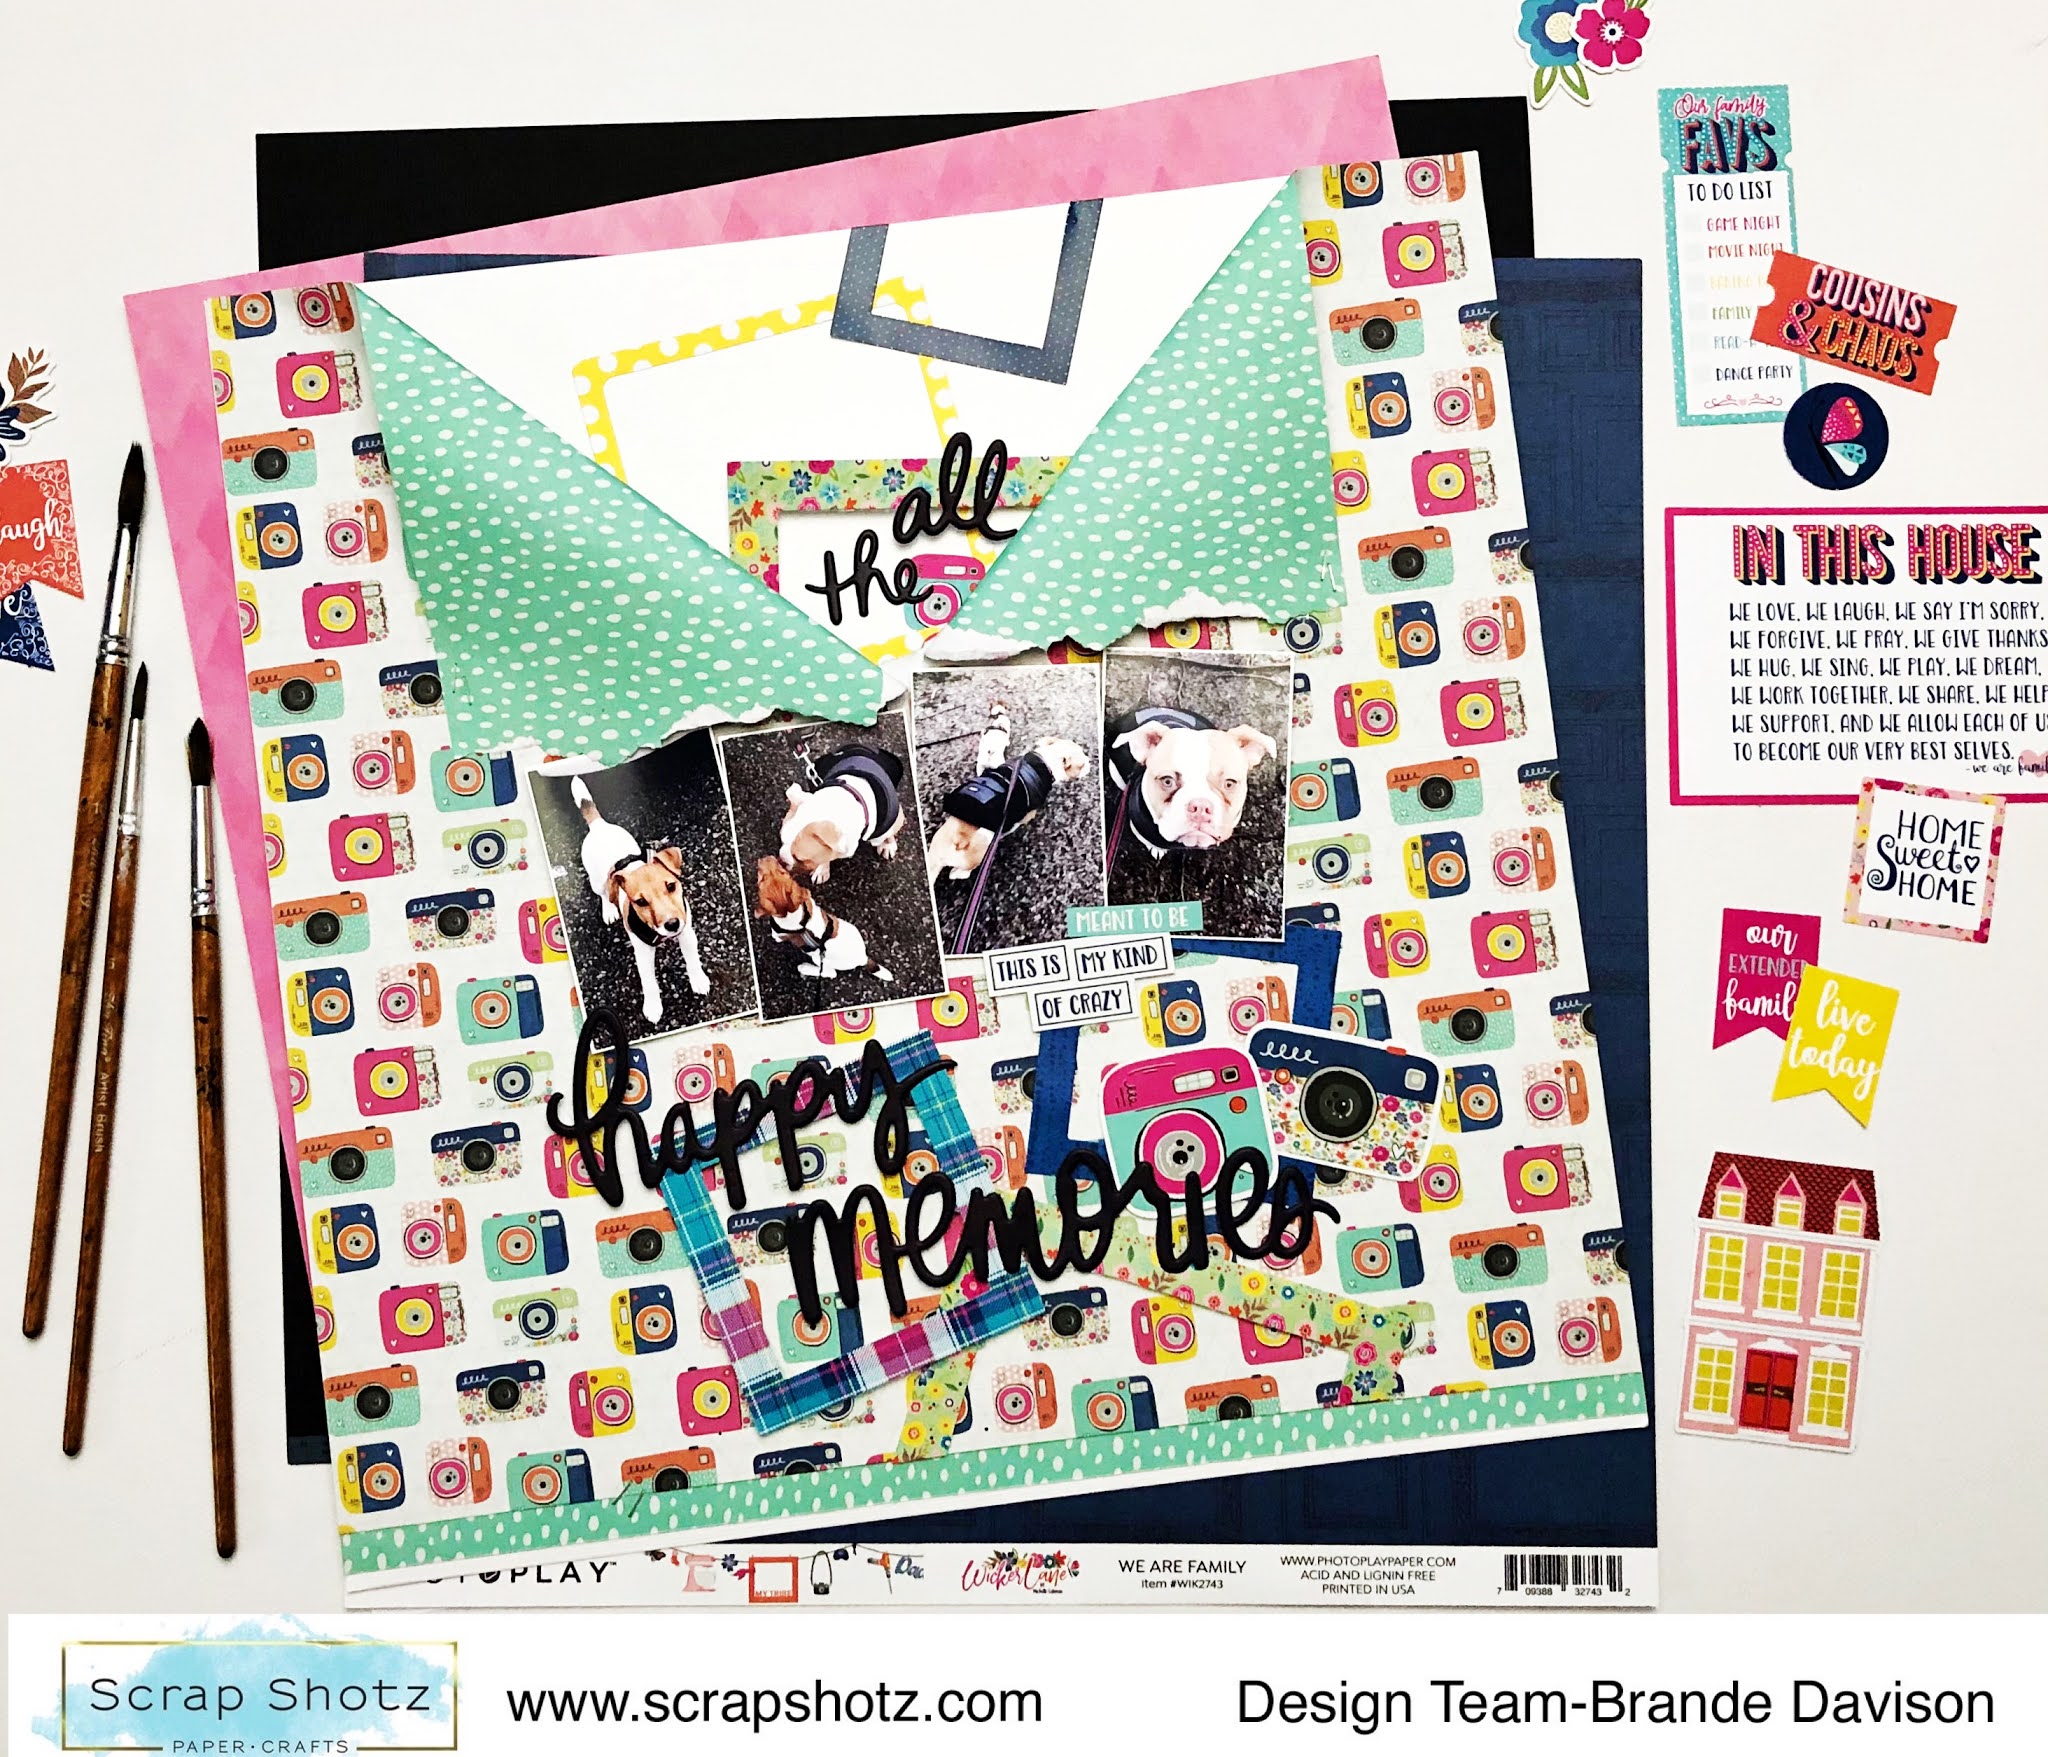
From there I moved on to playe with the fantastic camera ‘moments’ pattern paper. I love this pattern so much I had to think of a design that would show off as much as possible - insert the ‘zipper’ design. Well, ok not sure thats an official design name but it’s the best name I could think of. Zipper it is folks!
I used all of the frames in the collection ephemera package to build on the photo theme and then grabbed the Vicki Boutin phrase puffy stickers creating a title that sort of follows the cascading pattern of the frames down the page or zipper.
Final touch? These adorable pics of my pup Bella Bean (the Jack Russell) and her bestie Lola the pup of one of my close friends. So cute!
For this next one, I fell in love with this cut apart 3x4 pocket card from the collection and let it inspire the page design. ‘A little bit of crazy, a little bit of loud, a whole lot of love’ describes our pup perfectly. Thanks Photoplay!
I wanted to keep the page design really simple - this one is all about that saying and the cute pic of Bella Bean. A little Tim Holtz Distress Ink, Black Soot blended through a stencil, a couple pattern layers behind the photo, title and all the little puffy colour dots from the Vicki Boutin puffy phrase stickers to create a blast wee bits of colour from that cute furry face. Really easy to create this design and I love how it turned out.
These layouts will create a great pop of colour in my albums - lots of fun to work with so many coordinating, fun patterns!
If you played with Wicker Lane let us know - pop a post up in the Scrap Shotz Paper Crafting Group on Facebook or tag us on Instagram so we can ohhh and ahh!
Hello friends! Karla back today with a look at the May Kit Club goodies featuring the Echo Park Let's Go Anywhere collection!! One of the awesome things I love about the Scrap Shotz kit club is that you get so much inspiration on using your own kit! Each month, the Design Team puts together blog posts with fabulous projects created using the kits, so you'll never be without ideas!! Here's a look at what I've created with it so far... Plus you can check out what's in this month's kit in the video below and decide if you want to subscribe and be part of the kit club so you don't miss out on any fantastic deals! First up, I've created a 12x12 camping layout using the black and white print/woodgrain paper in the kit.
I didn't want to waste any of this amazing paper, so I cut a 1" frame from the black and white print and then flipped the woodgrain side to the front and placed it back inside the opening! I added some Walnut Stain Distress Oxide ink around the edges and glued each of the pieces to a 12x12 piece of cardstock from my stash.
Next, I layered a piece of red sky printed paper on top, cut to 8 5/8 x 9 5/8". I added three 3x4 photos and three 3x4 journaling cards. Two of them came from the cut apart sheet from the paper pack in the kit, and one I had previously printed from the Project Life App. I added the Thickers from the kit across the top of the page - these are beautiful black and gold stickers that stick on really well!!
I finished off my title by using some of the fun stickers from the 12x12 sticker sheet included and used some enamel dots and adhesive brads.
I added another sticker and one of the fabulous (my fav 😉) puffy stickers as embellishments on the top right.
I used a white gelly roll pen to add some more journaling and another puffy sticker and adhesive brad on the bottom of my layout.
I used a camera from the ephemera pack and then added a few more stickers and enamel dots to the bottom right to finish off this layout!
Here's a look at a Video showing you all the amazing products you get in the May Kit Club as well as the Add-Ons we had available this month! Remember to sign up now to be part of the next kit!! You can find all the details on being a Kit Club member HERE!
I cut out a circle from the middle of the black/tan cardstock from the kit and flipped it as I did with the layout above, so as not to waste any paper! I used those awesome Thickers from the kit again and created a title to follow the top of the circle cut. I stamped a coffee cut from a Lawn Fawn stamp set and coloured it to fit with the theme of the layout!
I used lots of fun ephemera and stickers and journaled on the 4x4 journaling card from the cut apart paper in the kit. I added an ephemera banner and adhesive brad along with an enamel dot and sticker from the 12x12 sticker sheet to the bottom of the layout.
Instead of journaling on the edges of the layout, as you can see on the sketch HERE, I added stickers and ephemera details.
Here's a look at the Live Video from the Scrap Shotz Facebook Page to see just how this layout came together!
The Kit papers and Chipboard worked well to create a couple of fun masculine cards! I finished them off with the enamel dots and Avery Elle White Ink Spray to create cool splats!
You can check out how to make these cards in this Live Video here on the Scrap Shotz Facebook Page!
Thanks so much for stopping by! Be sure to check out how to become a Kit Club member HERE and find fun New Products HERE! Don't forget to mark your calendars for Thursdays at 3 pm MST when you'll find me LIVE each week on the Scrap Shotz Facebook Page sharing what's new, fun techniques and project ideas!! I'd love to see you for a crafty chat!
Hello scrappy friends. Today I have three layouts (and a bonus one) made with the Simple Stories "Safe Travels" Collection. I love the bright colours and fun embellishments. Perfect for travel pictures with kids.
Layout #1
I have this night picture from the plane so I thought I should use a black background. I backed the cut file plane with as many of the manufacturer's strips as I could. I had to cut into a few papers for the bigger sections. I used a glue pen to attach the pieces. The clouds were another cut file using white cardstock. I used yellow ink to blend some colour into the clouds and then sewed a white thread across the bottom. The embellishments are from the ephemera pack, puffy stickers, chipboard stickers and cardstock stickers.
Layout #2
This layout was about Magnetic Hill which makes it seem like your car is pulled backwards uphill. I ripped some cardstock from a previous kit to make a hill and used all the arrow stickers to show it is going uphill. I also love those journaling cards and enamel dots to make it look like they are hanging on the wall.
This layout was fun to make. I layered cut files and papers and clustered the various types of stickers and die cuts. We didn't stick around for the highest tide but we were there long enough to see the difference and walk around on the beach so I wanted to highlight these pictures. The title alphas are from a previous kit.
I die cut some leaves out of the kit patterned paper with the Pinkfresh Studios Curvy Leaves die and layered them underneath the photos, ephemera and layout title.
Now for a couple of cards; I've made a slimline and mini-slimline card:
If you struggle with the larger format of the slimline card, try out the mini slimline which measures 3 1/2" x 6".
For the regular size slimline I fussy cut a portion from one of the patterned papers and layered it over the coordinating "B" side of the paper adhered to the slimline card base. The fussy cut portion is popped up with foam to add dimension.
The sentiment is stamped directly on the patterned paper and is from the Poppy Stamps Diamond Sentiment set.
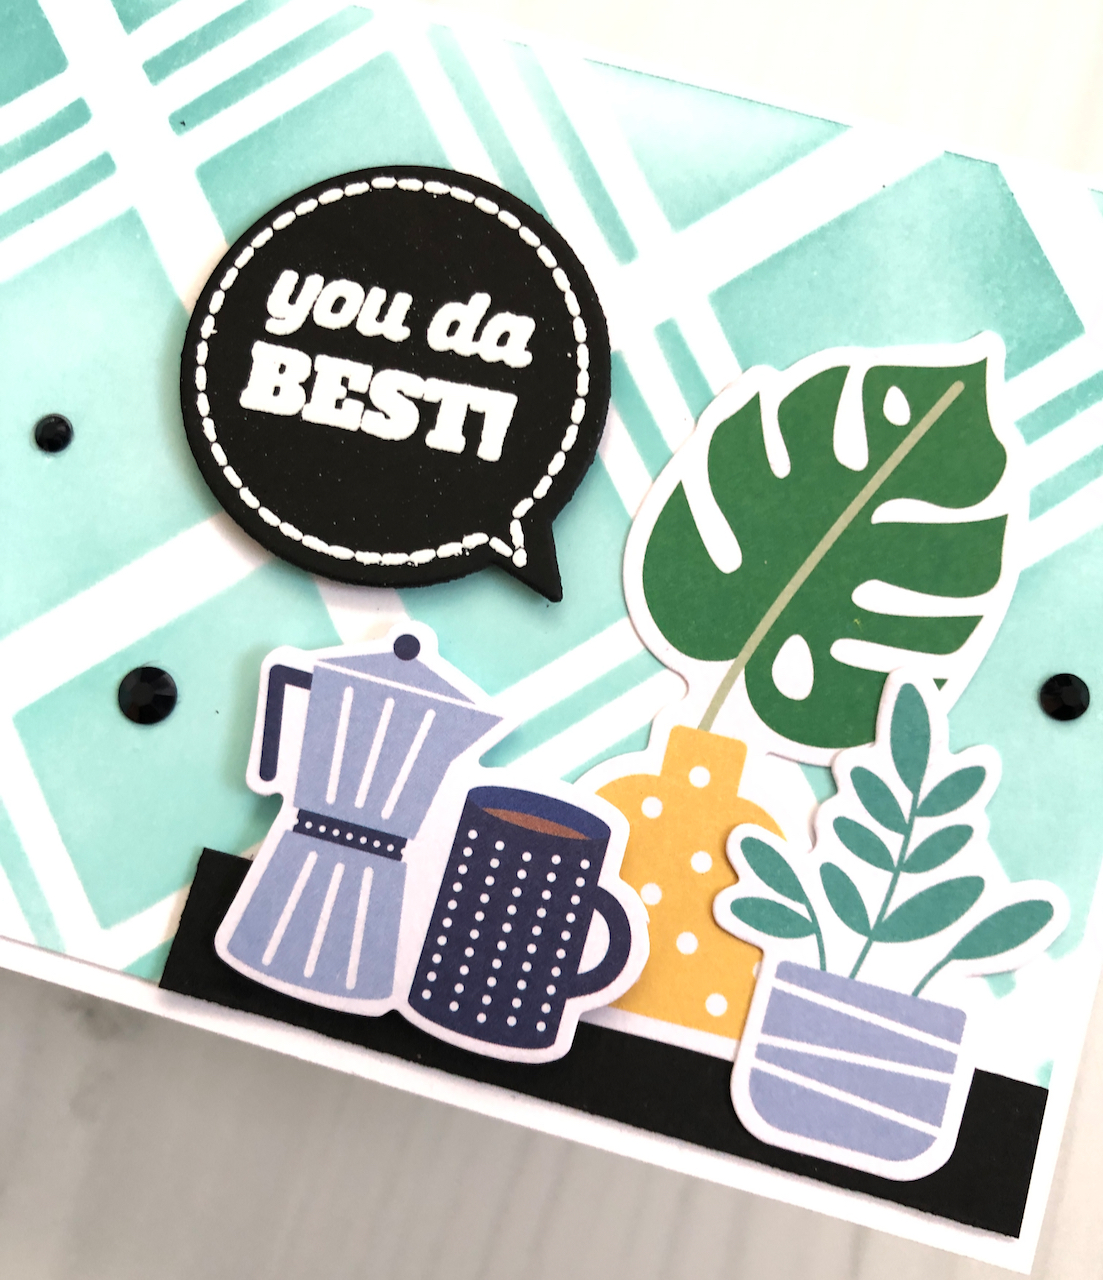
This mini slimline was a lot of fun to make! I put together the two layers of the Pinkfresh Studios Diamond Plaid Slimline layering stencils and inked with Salvaged Patina Distress Oxide ink which is the newest colour from Tim Holtz.
I then cut a small piece of black card stock to ground a selection of die cuts from the die cuts pack.
I stamped the sentiment from the Photoplay Say It With Stamps-speech bubbles- set and die cut with the coordinating die, popping it up with foam adhesive. A smattering of Studio Katia Onyx Crystals complete the card.
I was thrilled to be able to use this Simple Stories line for my Scrapshotz blog post this month. Our son and his bride eloped to Jasper in February, so I have so many beautiful photos to scrap! Here's my first with this gorgeous paper.
For this layout, I fussy cut the florals from the patterned paper and mounted them with some foam tape. I used a variety of stamps and alphas for my title, and doodled a frame around the photo.
To give the frame some extra interest, I doodled some flowers in the same style of blooms and embellished them and the fussy cut blooms with Nuvo drops.
The second layout is simple, but I used a couple of the lovely patterns from the line. The pink and gold diagonal lined paper is foiled and beautiful!
To give this simple design some depth and texture, I used varying levels of foam, with some doubled up to help lift it off the page.
This tape roll from 3L is amazing to use! Click on the photo to go to the Scrapshotz store to get some!
My final layout for today highlights a single 5x7 photo. I used the huge "Love" chipboard piece and cut out tags from the patterned paper for embellishments and a journaling quote. I thought that this photo was gorgeous and represented the couple looking toward their wonderful future together.
That's it for today. Check out this great line of paper at the Scrapshotz store here: