Hope you are all experiencing spring wherever you are right now. If not quite yet, the April Scrapbook kit features Carta Bella Farmhouse Market, a lovely spring-y feeling line!
Here's a quick video giving you a look at the kit:
There are a number of add ons in addition to what's shown in the video and you can see them all HERE.
Click the link to join the group and get all the details on the upcoming crop. Our theme is "I Heard It on the Radio" aka "I Have It In My Playlist" so it will be about songs, lyrics anything music! We'll have lots of challenges, prizes and a few FB lives as well! Best part of all, it's free to participate!
Hello everyone! Carolyn here to show you a layout from a new collection in the Scrap Shotz Shop. It is called New Moon by P13. One side of the papers has a night time feel (think stars and moons). The other side of the paper has a daytime, garden feel (think flowers, leaves and even some bugs!).
I decided to scrap these pictures of my daughter overtaking my new shelf with her dolls. As I was setting it up, she was setting it up as her own. I thought the purples and blues in the pictures would work well with the blue background. I also thought the stars went with the idea of sleep.
For the title, I layered a few of these tags. I used the purple alphabet stickers on the bottom and layered the blue Happy Birthday collection alphabet stickers on top. I used a white pen to journal.
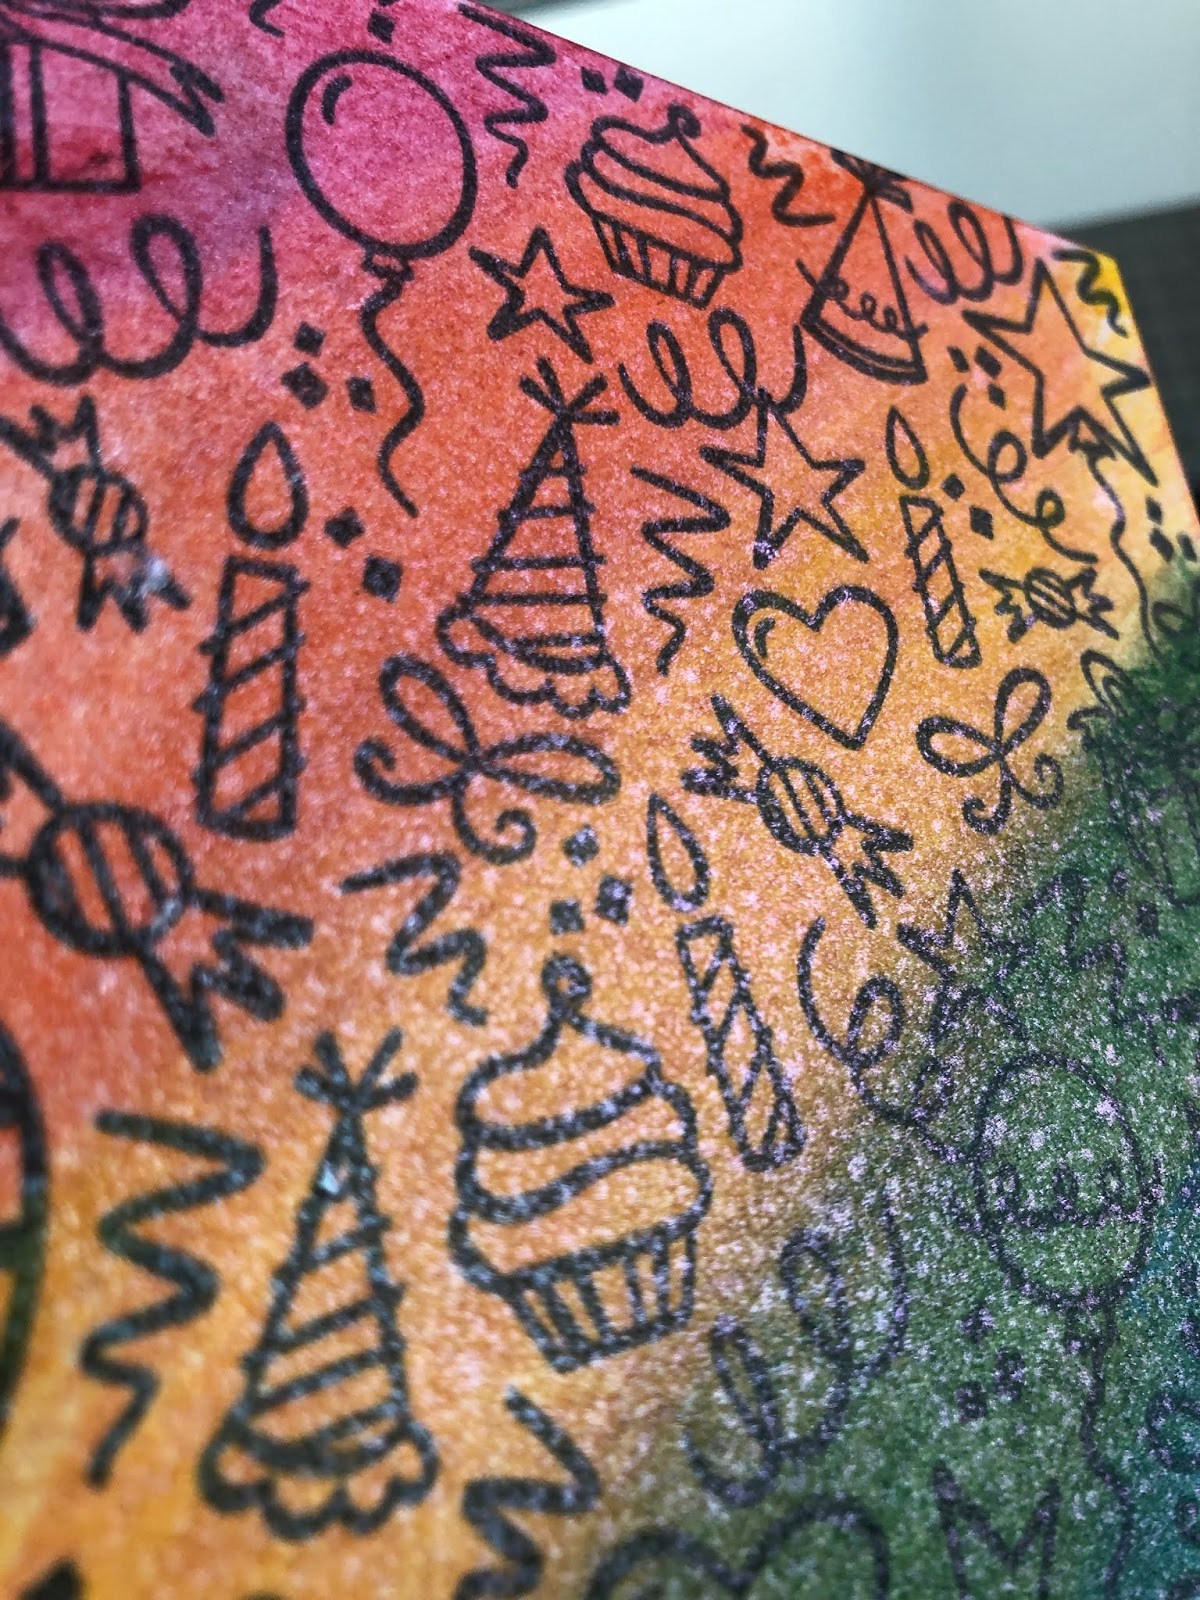
Rosie back with a quick tutorial using a seldom used supply from my stash, Distress Crayons!
After stamping a couple of backgrounds on watercolour paper with Gina K Amalgam Ink I came across this youTube video using Distress Crayons.
I pulled out all my crayons and picked out "rainbow" colours...
-Candied Apple
-Carved Pumpkin
-Mustard Seed
-Mowed Lawn
-Salty Ocean
-Seedless Preserves
Beginning in the top left corner I scribbled the crayons in rainbow order diagonally down the paper to the lower right hand corner.
Once the entire paper is covered, take a baby wipe and wipe in the direction the crayon is applied from top left, diagonally, to bottom right blending the colours along the way.
After drying with a heat tool, I wanted to darken the colours up so I applied another layer of crayon and blended again with a clean baby wipe.
After blending and drying, I spritzed the card front with Altenew Iridescent Ink Spray
I created a frame with layered rectangle dies and die cut from the center of the panel. I stamped the sentiment on white card stock inside the "frame". Sentiment is from the Stamping Village Happy Birthday stamp set and watercolored with distress crayons.
The outer card front is adhered with foam adhesive and then embellished with Studio Katia Clear Drops.
There are many, many things to love about Pinkfresh Studio collections - but one of my favourites is their pattern paper. The patterns are the perfect foundation to build on! I like to add elements to the pattern to give even more texture to the already great design!
For this page, I added small strips of paper and some word phrases to the highlighted phrases to bring in more of the navy and pink from the collection into the layout:
For this page, I added some acrylic paint splatters and some sticker elements to play on what is probably meant to be a cut-apart paper but I liked it as a background:
I love how they turned out! Are you playing with the Noteworthy Collection from the shop? We would love to see - tag us!
For these pages I'm continuing on with the cute farm pictures I used on one of the layouts from Monday with the adorable chicks HERE. I printed these photos as 3x4's, using the Project Life app to get two pictures per 4x6 photo, and love that I was able to get lots on these pages! I actually took the back of the chick layout and added my layers and photos directly to it! The paper was just too cute to waste ;) I cut one of the rainbows from a piece of 12x12 paper from the Kit and added it to my background for a fun touch!
I used a tag from the Add-On Cardstock Tags package and used the Phrases Puffy Stickers and coordinating Alphas from the Kit to create a title. There are lots of fun ways to add embellishments with the Ephemera Pack and Enamel Dots from the Kit, and I added some pretty florals from the Add-On Floral Ephemera Pack. Don't forget, Kit Club members always get to choose their add-on's first so it's a lovely perk!
The colours in the My Favorite Story collection are so bright and sunny - I just felt happy working with these papers and photos!! I added some of the Ephemera and Phrase Puffy Stickers directly on top of my photos. It was so fun to get these cute pics scrapped!
I added one more cluster of embellishments at the bottom left of the page with some Floral Ephemera Add-Ons, Phrase Puffy Stickers, Ephemera and Enamel Dots! I am so excited to get these photos scrapped and into my album!!
Thanks so much for stopping by! Don't forget to check out the March 2020 Kit and all the beautiful Add-On's in the Shop and find details about becoming a Kit Club Member HERE! You'll always find monthly inspiration here on the blog for using your gorgeous kits. Have an amazing day friends, and stay safe!!
There is nothing whimsical about this COVID-19 pandemic but I refuse to let my scrapbooker display the morose mood in the air - instead, I will design my pages focusing on the good things this has brought to our home and journal the hard stuff in some hidden way.
With this in mind, I set out to use every cute embellishment I could from the Noteworthy collection using colour blocking.
I split my page into quadrants, sewed a bunch of times down the middle of the 4 quadrants, picked 4 colours that show up most on the collection and painted each section a different collection - then added every embellishment that matched that colour.
I tried to use a few enamel dots, some of the stickers, and the puffy stickers in each quadrant to give a touch of texture. The chance to use little couches and potted plants and coffee mug puffies was to fun to pass up!
I used the white alphas to add a COVID word that comes to mind in each quadrant and the little together piece from the layered stickers as my title. I love how it turned out - happy and bright!
Looking to use up all those embellishments in a kit or collection, try colour blocking. You do not need watercolour paint to do it either - try just for 3x3 pattern papers, or strips of paper or circles and more. Simply pick a few colours and then, without overthinking, bring in every embellishment of that colour to match.
Once the colouring was completed I die cut with the Hero Arts Peek a Boo Door Die. I then placed the die cut on top of white card stock and traced each door with a pencil to plan out the interior stamping. This stamp set has small sentiments that fit perfectly within the die cut doors.
I placed the card stock in my Misti stamping tool added the sentiments within the penciled in boxes and stamped in black in with the stamping tool. The red hearts are from the Sunny Studio-Love Monkey stamp set which just happens to be on sale right now!
After erasing the pencil lines I adhered the die cut panel to the stamped base with foam adhesive, cutting the adhesive with Tim Holtz Non-Stick scissors.
There are so many ways to use this set with and without the peek a boo die and these next two cards will show you how easy it is to create something lovely without the die :)
For these cards I stamped the background stamp on copic friendly white card stock and then cut the stamped card stock in half diagonally.
I coloured one half in blues and the other in reds to create the bases for two cards.
I added a blue card stock strip behind the coloured portion and adhered them both on to blue patterned paper from the Lawn Fawn 6x6 Rainbow Scallops paper pad. Prior to adding the Studio Katia Clear Drops.
I stamped the birthday sentiment with the Altenew Birthday Greetings stamp set (not currently in store but can be special ordered, email sandy@scrapshotz.com to order).
I then created the same card with the other half of the panel coloured in reds in the same manner:
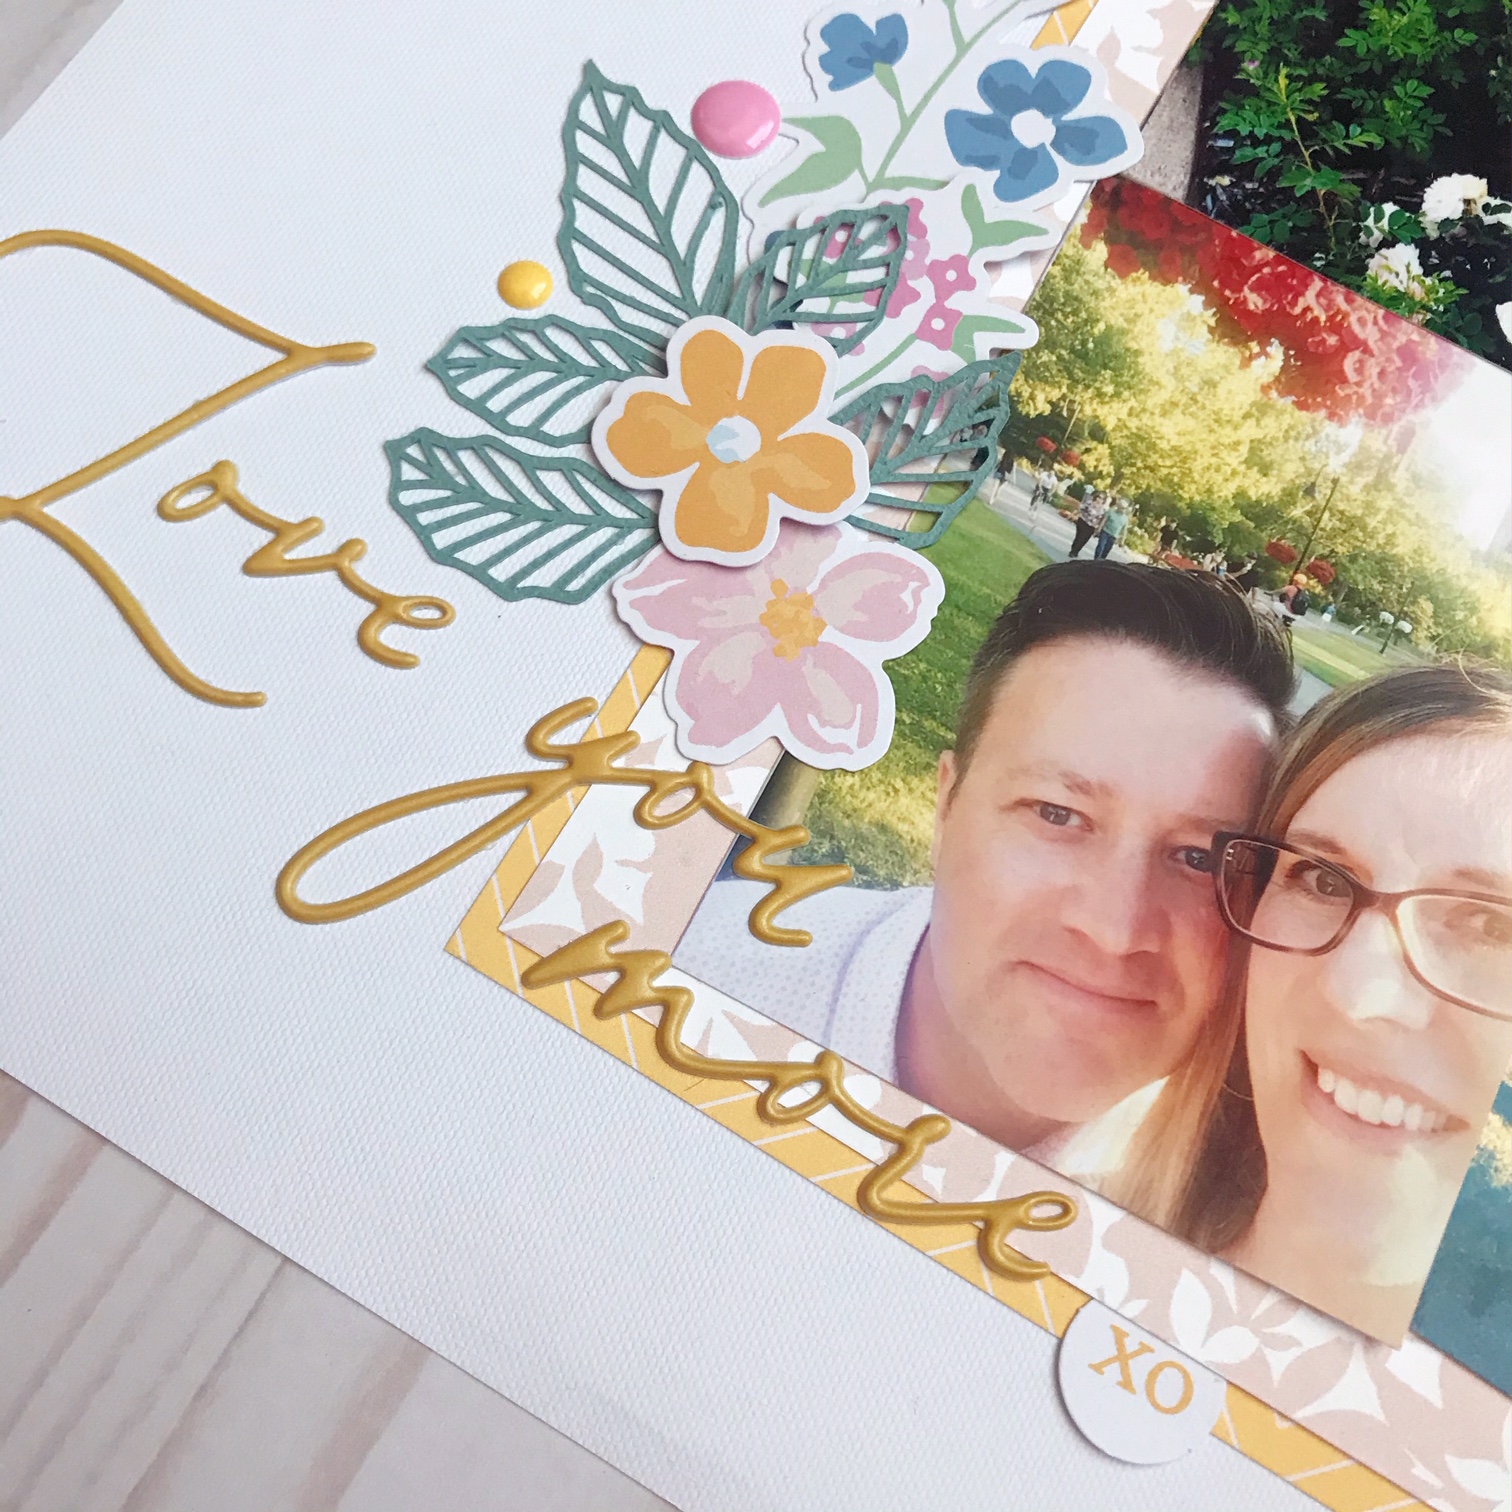
Hello! Karla back today with two pretty layouts using the gorgeous March 2020 Scrapbook Kit that features Pinkfresh Studio My Favorite Story collection! There are so many fun things you're going to do with this kit!! It's perfect for spring and summer- oh those lovely colours! I couldn't stop at just one layout today, so I'm sharing two - and even created a process video of one of them for you 💗 First off we have a scrapbook page of my husband and I a few years ago on a date night. How nice to remember these things right now when our lives are so different. I'm definitely going to appreciate date nights in the future - but for now I'm loving having time to scrapbook these special photos.
I used some of the beautiful Puffy Phrase Stickers from the Kit as my title and layered on some Add-On Floral Ephemera pieces, popping some up with foam tape.
I found these pretty diecut cutfiles in the Pinkfresh Studio Fan Group! The albums have all the available files free to download and there is lots of inspiration, as well as challenges in their group! I even used this week's Sketch Challenge to base my layout on. I cut the pieces out with colours of cardstock that were included in the kit and even used papers from the kit to back those lovely florals!
I tucked in pieces of the Diecut Ephemera from the kit and added this tag from the Add-On Cardstock Tags, where I did my journaling. If you're a Kit Club Member you get dibs on all the awesome Add-On goodies!! I tucked in a few of the neat enamel dots from this kit to finish it off.
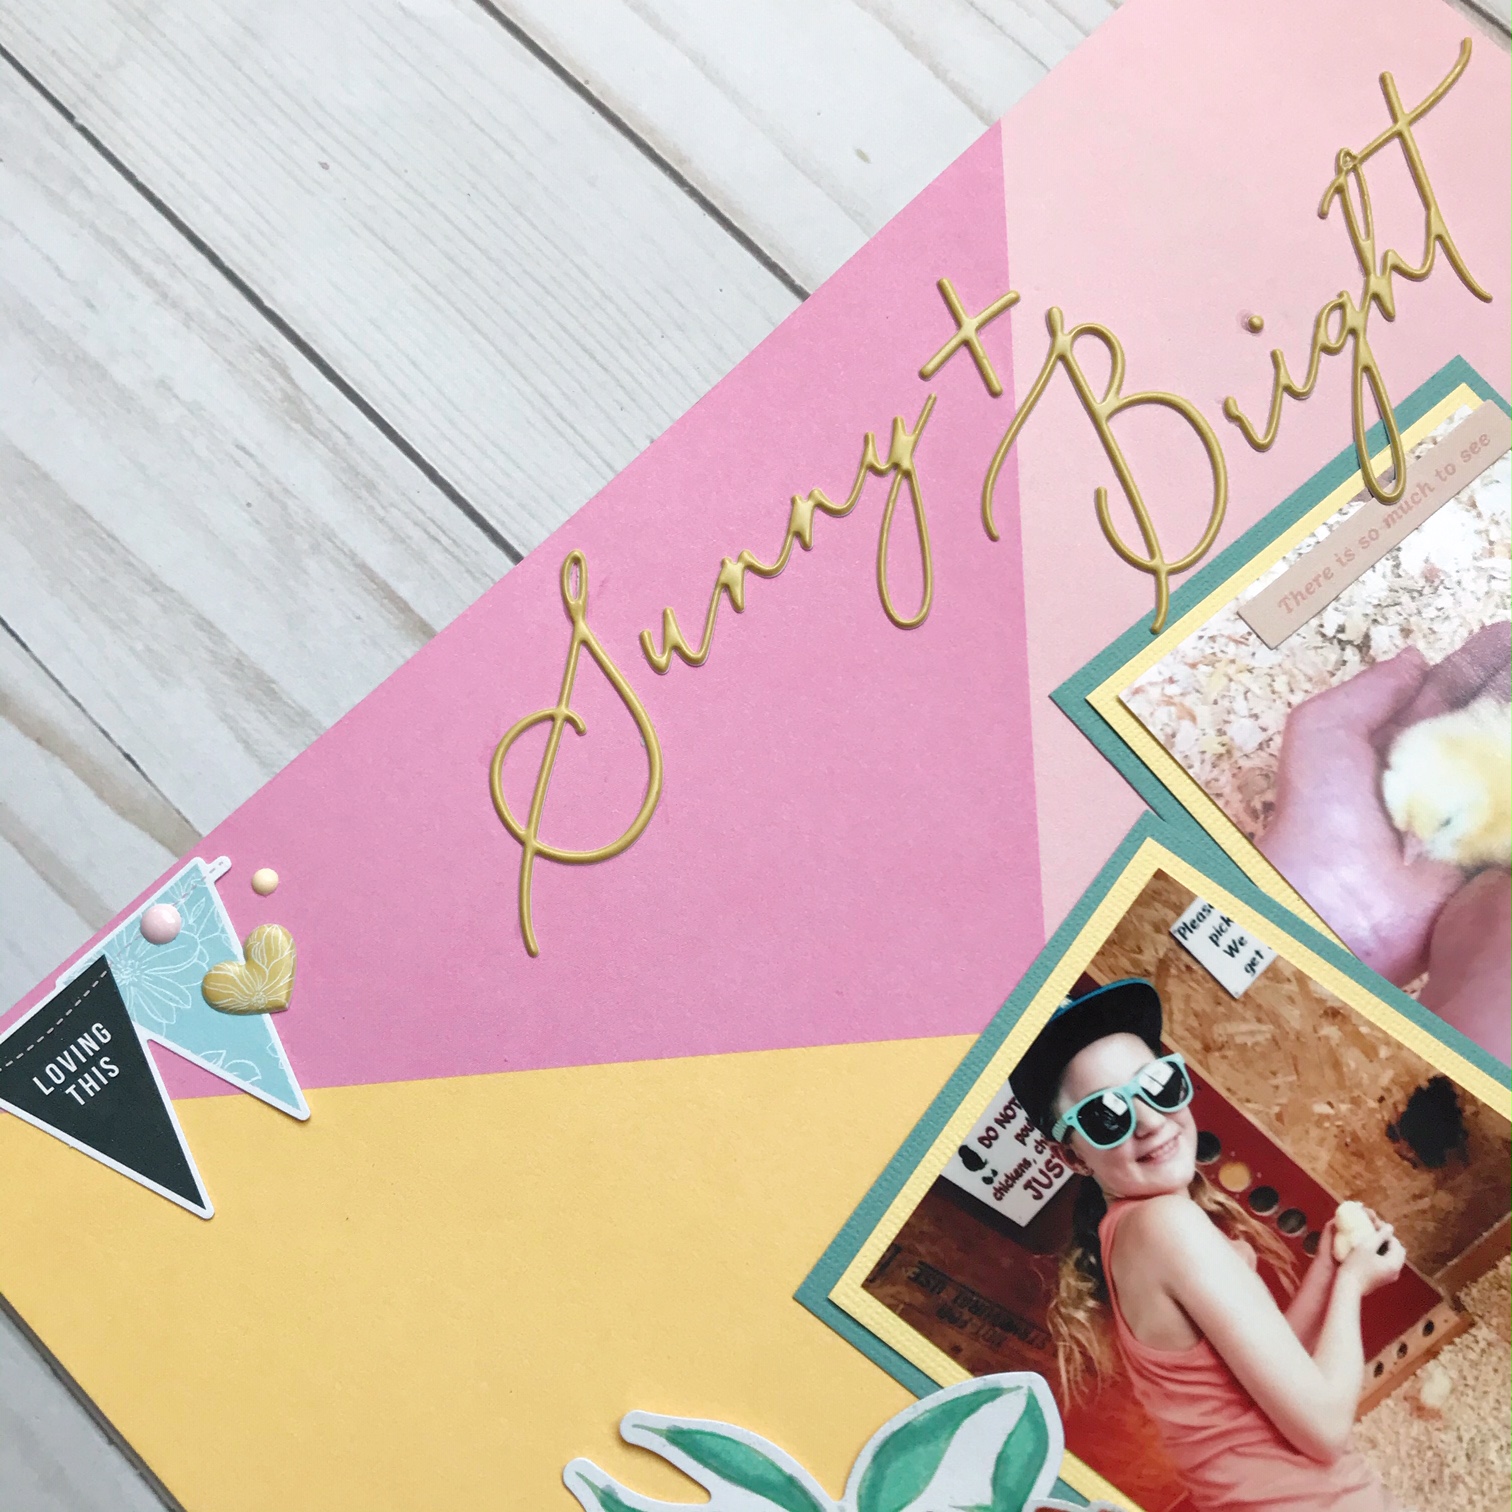
For my second layout (you can find the process video below) I decided to use the Creative Scrapbooker Magazine April Sketchy Challenge to start off with. I just love starting with a sketch and this one was perfect to use four 3x4 photos from our trip to Butterfield Acres Farm in Calgary a few years ago. Plus, seriously, the colours in the photos were awesome with this collection, lol! Don't you love when that happens?!!
I matted the pictures on cardstock from the kit and then customized the Add-On Floral Ephemera with Tim Holtz NEW Distress Embossing Glazes. You can see how easy it is to do this in the video below. I love the translucent quality of the glazes - perfect for this technique!
There are so many awesome pieces in the Ephemera Pack from the kit - I added lots of sentiments and little pieces to embellish the photos.
The Puffy Phrase Stickers in the Kit are so lovely and I used them for my title. You even get little puffy hearts in this pack!! Yay! They worked perfect side by side with the Enamel Dots to finish off the layout.
Here's a look at the process I used to create this layout and add colour to these fun Floral Ephemera Add-Ons with Tim Holtz NEW Distress Embossing Glazes 😍 You can find the Video HERE or watch below!
Thanks so much for stopping by! Be sure to head over to the shop to grab the March 2020 Kit before it's gone.
** ALSO - HAVE YOU HEARD - We just started a new Scrap Shotz Paper Crafting Group on Facebook, and we'd love to see you over there! There's going to be some fun stuff happening next month ;)
** I'm going LIVE on the Scrap Shotz' Facebook Page at 1 pm MST on Tuesdays to share fun new things in the shop, tips and techniques! Mark your calendars!
** You can also find out about fun things happening and crafty savings on the Facebook Page! Click HERE to get the info on this week's Monday Sale!
I'll be back in a couple days with even more inspiration. I hope you all have a safe, happy and very crafty week!