Wednesday, September 15, 2021

P13 Summer Vibes


Not sure about you, but I am not ready to say goodbye to summer just yet. So I am extending the season by focusing only on summer themed scrapbook supplies while in my crafty space, such as P13 Summer Vibes collection. Documenting some of my favourite summer memories with these happy supplies keeps the sunshine around a little longer! 

Layout One - Hello World 

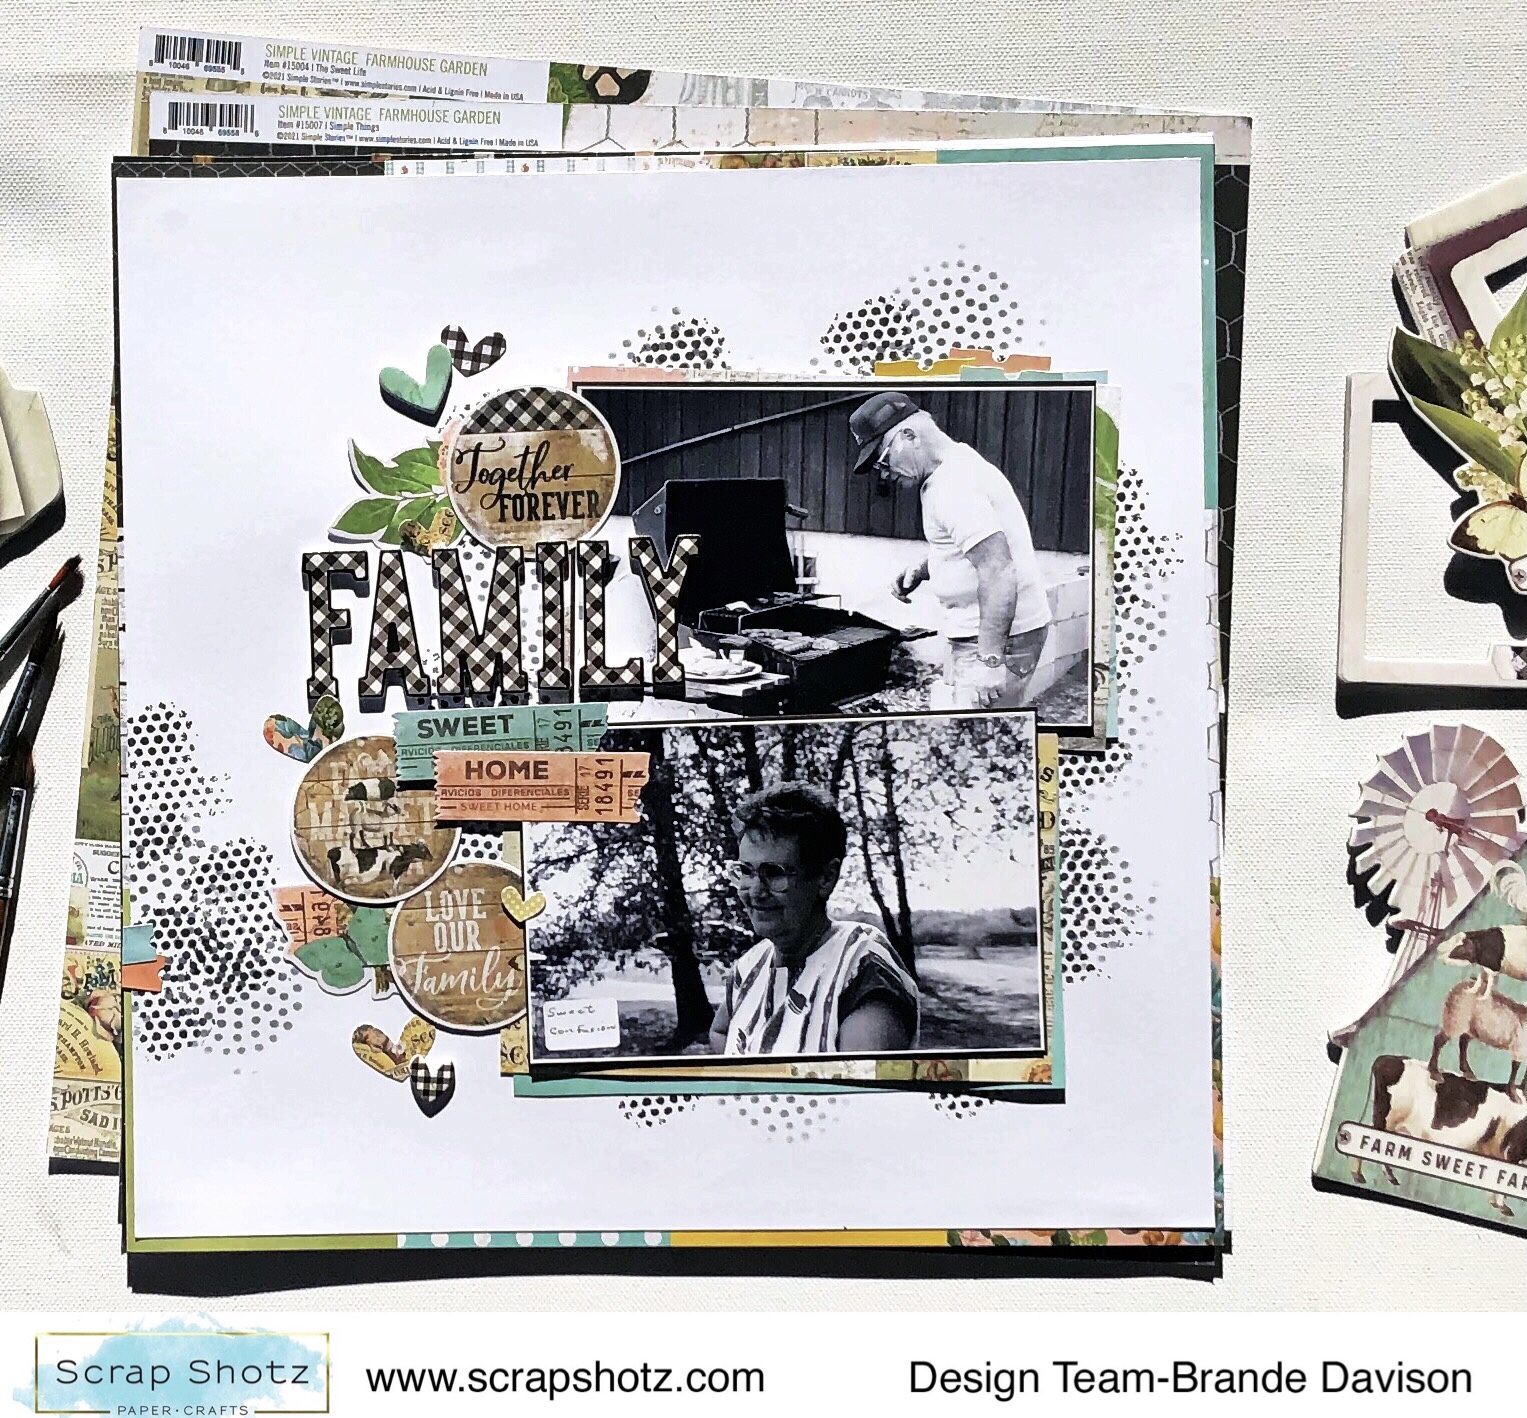
For my first layout with these watercolour summer goodies I went straight for the map pattern paper #06 - I am a sucker for a good map or globe inspired pattern. 


I wanted the pattern to do all the work, so picked just one photo and layered it up with all kinds of goodies from the P13 collection. Then used the Hickory Smoke, Distress Oxide from Tim Holtz to add some arrows and a heart from the photo to Portugal (where the photo was taken). 

I used some of the same ink to add a few splatters behind the photo cluster and some arrow stamps on the top and bottom of the page. 


The title Hello World and the 3 botanical stems are from a gray Thickers collection deep in my stash. I love how bold they look on all the white space, and they matched the stamped ink perfectly. 

Layout Two - Sweet Stripes

For my second layout, I just had to use the diagonal stripe paper #04 - the pastel colours reminded me of a yummy, sweet ice cream cone and there is no one sweeter than my wee niece! She just had to be featured on this pattern paper. 


With this layout, I again focused on creating a fun photo cluster - layering all the cute things and patterns with my photo and leaving the rest of the layout to just be colourful. 

I cut apart most of the pattern stripes and then used my distress tool to rough up the edges of each strip to give the page a bit more texture and dimension - and then glued it all down on a scrap white paper back in the same order of the pattern. 


With my P13 goodies, Scrap Shotz included the cutest, little matching paper florals from Prima Marketing (no one does florals like Prima) - I added a few these to the photo cluster too. I love the touch of feminine to this photo of her in her ‘movie watching’ seat (aka laundry basket with a blanket and stuffies). So cute! 

Layout Three - Surf's Up

For my third layout, I am all about the circles! The pattern paper #05 features gentle waves and instantly inspired me to reach for some boogie boarding photos from South Africa. My photos are not the best so I cut them in circles to try and hide the flaws - and this inspired a circle design layout! 


Once I had my photos cut in circles and scattered down the page, I just played with all the stickers and goodies from the P13 collection until I had a happy, jumbled, layered “mess”. I did add some white acrylic paint splatters on the pattern paper behind the photos as well. 

A few of the embellishments are fussy cut from pattern paper #03. I liked the combo of botanicals and cameras or sneakers on the pattern. I also added some of the die-cut chipboard pieces #08 (they look and feel like delicate wood veneer - love!) to a few spots on the page to bring a little texture to the layout. 

The ‘Surf’s Up’ title that follows along a photo - playing on the circle design - was the finishing touch.

How are your documenting your summer? 

There are still some P13 Summer Vibes goodies in the shop - pop over, grab some of these watercolour inspired designs and extend your summer! 


Tuesday, August 24, 2021

Simple Stories Simple Vintage Coastal Flipbook Kit!

 Hello friends! Karla back today with a look at the beautiful Simple Stories Simple Vintage Coastal Flipbook Kit. This new collection is gorgeous and the flipbook kit does not disappoint! 


Here's a look at the video flip through of the completed book and any extra items I used to complete this album.


You can find the Simple Vintage Coastal Flipbook Kit in the Scrap Shotz Store and if you love mini albums you may want to check out the Howdy Flipbook Kit as well!


The kit includes the flipbook, 12x12 papers, a 6x8 paper pad, layered stickers, cardstock stickers, page piece elements and instructions to create this awesome book - perfect to document your summer or vacation photos!


The flipbook comes with an assortment of page protector sizes and you'll be a pro at layering and creating interactive elements when you've completed this book!


I felt refreshed and relaxed just completing it!


Check out the full Simple Stories Simple Vintage Coastal collection in the Scrap Shotz store! Thanks so much for stopping by and have an amazing week!


Monday, August 16, 2021

Cardmaking With The Sandy Paws Collection!

Hello friends! Karla back today with set of summer cards using the fabulous Sandy Paws Collection from Craft Consortium! This is such a cute beachy set, perfect for hot summer days! We recently took a trip to Saskatchewan to visit family and I wanted to send out some thank you cards after our stay, and these were perfect to do just that! The 6x6 paper pad is filled with awesome images and patterns and has some really cool cut aparts too! 


I stamped the images on Bristol Smooth Cardstock and watercoloured them with Zig Clean Color Real Brush Markers while we were away! It was the perfect way to craft on holidays. I chose images from the Ice Cream Stamp Set, but I love that there are so many different stamp sets to choose from!!


The little Enamel Rings are so cute and are perfectly colour coordinated! I added in some other embellishments from my stash as well for even more pops of colour. These Rainbow Wheels from Studio Katia would be fun to use too!


I used the Tim Holtz Label Stickers to add sentiments to my cards. These have the same dimension and texture as an actual label maker - so cool! 


I used the colouring guide on the stamp set packaging to colour in the images for the most part. I like that I could just follow along and know that it was going to match these fabulous papers perfectly! 


I stamped several of the smaller images, including these yummy ice cream cones, to use as embellishments.


How cute is this little truck?!! Seriously! And, yes, we did eat lots of ice cream while we were at the lake, lol. There is a little grocery store called Fern's Grocery, and it was just a few minutes walk away from the cabin, so.... 🤣


The beach house is one of my favourite images from this set! The paper even has a glossy coating on the little houses on one side - so fun! 


I used the cut apart strips from the pages with various scenes printed, across each of the cards, placing them so that I had scenery for the stamped images.


I used some sparkly Stardust Gelliroll Gel Pen to add some shimmer to various images on the cards, because sparkle is awesome! 


Be sure to check out the full Sandy Paws Collection in the Shop! 


We are also super excited to soon be at the Creative Scrapbooker Magazine Great Canadian Scrapbook Carnival and we hope to see you there too!! If you would like to shop online and have your order ready to pick up at either the Edmonton or Calgary locations, just choose local pickup and make a note where you'll pick up!! Have an awesome week friends!


Wednesday, July 21, 2021

Photoplay Snail Mail Card Kit

Hello everyone! I'm so happy to be back scrapping and trying something that is a little out of my comfort zone. This month I'm playing with the Photoplay "Snail Mail" thank-you card collection pack. I don't make a lot of cards but wow, having a kit made just for making cards sure does make it a lot easier! The colours are bright and the animals are so cute.

Card #1


I used a sketch from the winter issue of Scrapbook and Cards Today for inspiration. The yellow parts are stickers and the pink parts are Nuvo Drops

Card #2


This whole card is made from stickers except the piece of embroidery thread and the Nuvo Drops

Card #3


This card uses a combination of cardstock papers and stickers. The corner dots are Nuvo Drops and the center flower and frame are from the die cut pack

Card #4


This card uses three different papers and the flowers and windows are stickers. The Nuvo Drops are on the pink leaves. I also used the stamp set to stamp the T and U. 

Card #5


For this card I used a sketch on Pinterest from Queen and Company. The black is cardstock from my stash but the rest are papers and stickers from the kit. 

Card #6


This card uses some kit papers for the background and a cut-apart card. There is a picture of the same bird behind the sticker but I liked the dimension I could add with the sticker and some adhesive foam.  Nuvo Drops are in the corners.

Card #7


Two different papers make-up the background. The sentiment is in the die cut pack. The trim and grass are stickers. The bird is stamped and coloured with pencil crayon. One of these days I will learn to Copic colour!

Card #8


This card is two different papers and I used a punch to make the border. The sentiment is from the die cut pack. The bird and grass are from the sticker sheets. 

Card #9


I used my Colorshine paints to drip down the card using the stickers as a guide. I put clear gesso on the card first. The sentiment is from the stamp set

Thanks for checking out the cards! I hope you have a chance to check out this great set in the store!

Friday, June 11, 2021

Let's Go Anywhere Layouts Part 2

Hello friends. Carolyn back again for round 2 of the Echo Park "Let's Go Anywhere" Collection layouts. This is the May kit and it is fabulous!


Seriously - so many embellishments in this collection. It was so hard to pick what to use so why not use it all!? I'm a sucker for wood grain backgrounds so I had to use that paper. Then I laid the frames around the page until they fit. Next, I added tags and finished by squishing brads and stickers in the extra spaces. It is kind of busy with no dominant element so I used the Thickers in the kit to number the photos and direct the eye around the page. I love that little journaling card and had to use it. Bonus, it was printed on wood grain so I didn't have to fussy cut around the spirals of the notepad. I crossed my fingers that I had enough tiny pictures to fit those frames and I just made it. I propped up the frames with some foam backing. I'm so happy with this one!


For my next layout, I started with the three background papers and liked how they looked together. From there I chose these lobster pictures because of the red in the papers. I needed an interesting element so I looked through my cut files and had no lobster file! The horror! So I found a picture of a lobster and freehand drew it on a piece of scrap paper. When I was happy with it, I traced it onto the red paper and cut it out. I think he is pretty cute. I also propped the lobster up with foam pieces. I really wanted my title to be "You Are My Lobster" but it would've been too long so I used the "our" sticker instead and the Thickers in the kit. The layout is finished with some chipboard stickers, cardstock journaling card, enamel dots and ephemera

Thanks for stopping by!

Tuesday, June 8, 2021

Let's Go Anywhere Layouts

 Hello everyone! Carolyn here with some May kit inspiration. Remember traveling? We took an amazing vacation to the Maritimes two years ago so the Echo Park "Let's Go Anywhere" collection was perfect to finally get some of these pictures scrapped. 


I think this is one of my all time favourite layouts. There are soooo many stickers and embellishments in this kit and I remembered that Melinda Spinks, who designs with Doodlebug, would always fill shapes with them. I decided to give it a try and I might have to do it again! It was so much fun even my daughter got into picking out the stickers and where to place them. I cut around the stickers so they were still on their backing so I could move them around until they fit. Otherwise, it was pretty simple to make. Backed a cutfile and wrote with a white pen on the cut apart card.


Another black background but this time I used this rectangular style. Mainly because my pictures were able to crop down to fit together so well. The Thickers are called Avenue and look really cool with the light shining off the gold highlights. This layout also used a variety of embellishments. The sticky brads are my favourite. There is also chipboard and cardstock stickers and some ephemera flags. I even put a whole row of enamal dots on there!

Thanks for taking a look at the layouts today. I'll be back on the 11th with some more!

Monday, May 31, 2021

Playing with Simple Stories, Farmhouse Garden


My scrappy desk is full of fun farmhouse cuteness right now. Great florals, vintage barns, fantastic sentiments and sweet little chickens, goats, pigs and cows... hello Simple Stories, Farmhouse Garden

So glad Scrap Shotz sent me these goodies to play with this month - I had the chance to dig deep into my photo stash and document some fun but almost forgotten memories. 

For my first layout I pulled out some 30+ year old photos of my Grandma and Grampa at one of our classic family BBQs at their acreage. The photos were in rough shape so I printed in black and white (which also looks great with the colours of this collection). Oh and that little sticker on my Grandma’s photo says ‘sweet confusion’ is actually her writing! She used to add small labels to photos to journal her thoughts or the details - so precious! 

I used some Distress Ink, Black Soot through a stencil and a background stamp to anchor my photos on some black texture breaking up the white space. Then I layered some embellishments and title down the left of the photos. That big ‘family’ title in plaid really pops! 

From there I went even farther back in the photo archive. Grabbing photos of my big sister and cousin as wee toddlers eating a popsicle on the porch steps. Another photo that needed to be printed in black and white to hide the poor shape it’s in. 

For this layout I used my most favourite texture paste Picket Fence Studios, Paper Glaze in Black Peony to create a horizontal pattern across the page. Then used the photo and embellishments to almost fill up the textured space. I knew I wanted to get the blue barn on this page and love the little spot it found. I liked the ‘Bloom & Grow’ title - seems a good one for these little kiddos who were doing just that! 


After a couple of white background layouts, I needed to get some pattern paper into the game. Another 30 year old photo for this one folks - this time me and my little sister on the swing our dad made when we lived on the farm. Perfect for this collection. 

I used some die cuts from my stash to cut a whole bunch of Polaroid frames from different pattern papers in the collection 
 - then scattered those up at the top of the page and added some white splatters. From there I just started adding and layering all kinds of stickers, chipboard and puffy phrases stickers from the collection - using the Polaroid frames as an anchor point. I wanted a really busy look at the top of the page with just a touch of the design at the bottom. 


Such a fun collection to work with - the pink, blue and mustard kit colours compliment the vintage look and patterns wonderfully. I am already thumbing through my throw back photos for more to pair with these goodies. 

If you are playing with the Simple Stories, Farmhouse Garden - we would love to see. Especially what you do with the embellishments that have a chicken standing on a goat standing on a pig standing on a cow - yup! So cute.