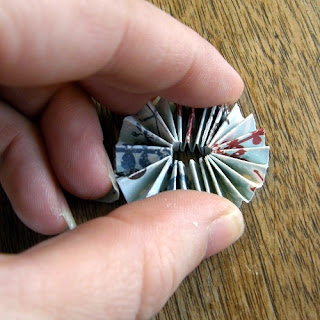
Looking for the perfect personal touch to any gift or card? Well, design team member, Laura Gilhuly has the perfect tutorial for you today!
Supplies:
3 strips of paper 12 inches long. The width is up to you. If you wish a wider rosette, if you choose over 1 1/2" you will need to cut two strips and glue them end to end. The ones I chose to do are 1/2 inch
glue gun
scoring blade or score pal
button, pearl or other accent for center
punched circle smaller than the flower
1) score your strip of paper every 1/4 inch and fold like an accordion
2) overlap the ends to form a tent and glue together
3) lay your circle on a hard surface and push the center down and squish together to form the rosette
4) put some hot glue on your punched circle.
5) pick up your rosette and place on the circle
6) hold in shape until glue is dry
7) add button or gem to middle
and voila you have your own rosette!
Here are some examples of some rosettes
Thanks Laura for the inspiration!
Wednesday, December 15, 2010
Subscribe to:
Post Comments (Atom)


1 comment:
I love your projects and thanks for sharing the technique to make these flowers.
Post a Comment