Showing posts with label fussy cut. Show all posts

Wednesday, March 3, 2021

Take a Hike, Inspired by a Shape


Another fun collection Scrap Shotz sent me to play with is the ‘Take A Hike’ collection from Reminisce. I have never had the pleasure of playing with one of the Reminisce collections and I have been missing out - such fun! 

One of the bits of a collection or kit I generally check out first are the die cuts - my favourite! While the Reminisce collections don’t seem to come with die cuts they sure come with some fantastic stickers on a 12x12 sheet (which I popped onto some white cardstock and fussy cut to make die cuts) and cut apart pocket cards (which I fussy cut the images from). A couple of episodes of Departures and some fussy cutting scissors and I now have Take a Hike die cuts. Perfect! 

Circles ... 

For my first layout I was inspired by all the fantastic circles in the collection - mostly from the sticker sheet but some are fussy cut too. Using the Take a Hike circles and some circle stamps in my stash, I created a messy circle infused pattern -working to cover the full background. I stamped some word phrases in and around the clusters of circles and added done green paint to give it even more mess. 

When I went to add my photos to the layout it made sense to continue the circle theme for at least some of them. So those that were far away pics of our crew hiking, looking down at my boots, or a landscape shot I made them circles and added them into the background pattern. 


I topped off the layout with a 4x6 feature picture of myself - this is my happy place. Fresh air, hiking boots on, tech gear, good weather and a trail and friends around me. 
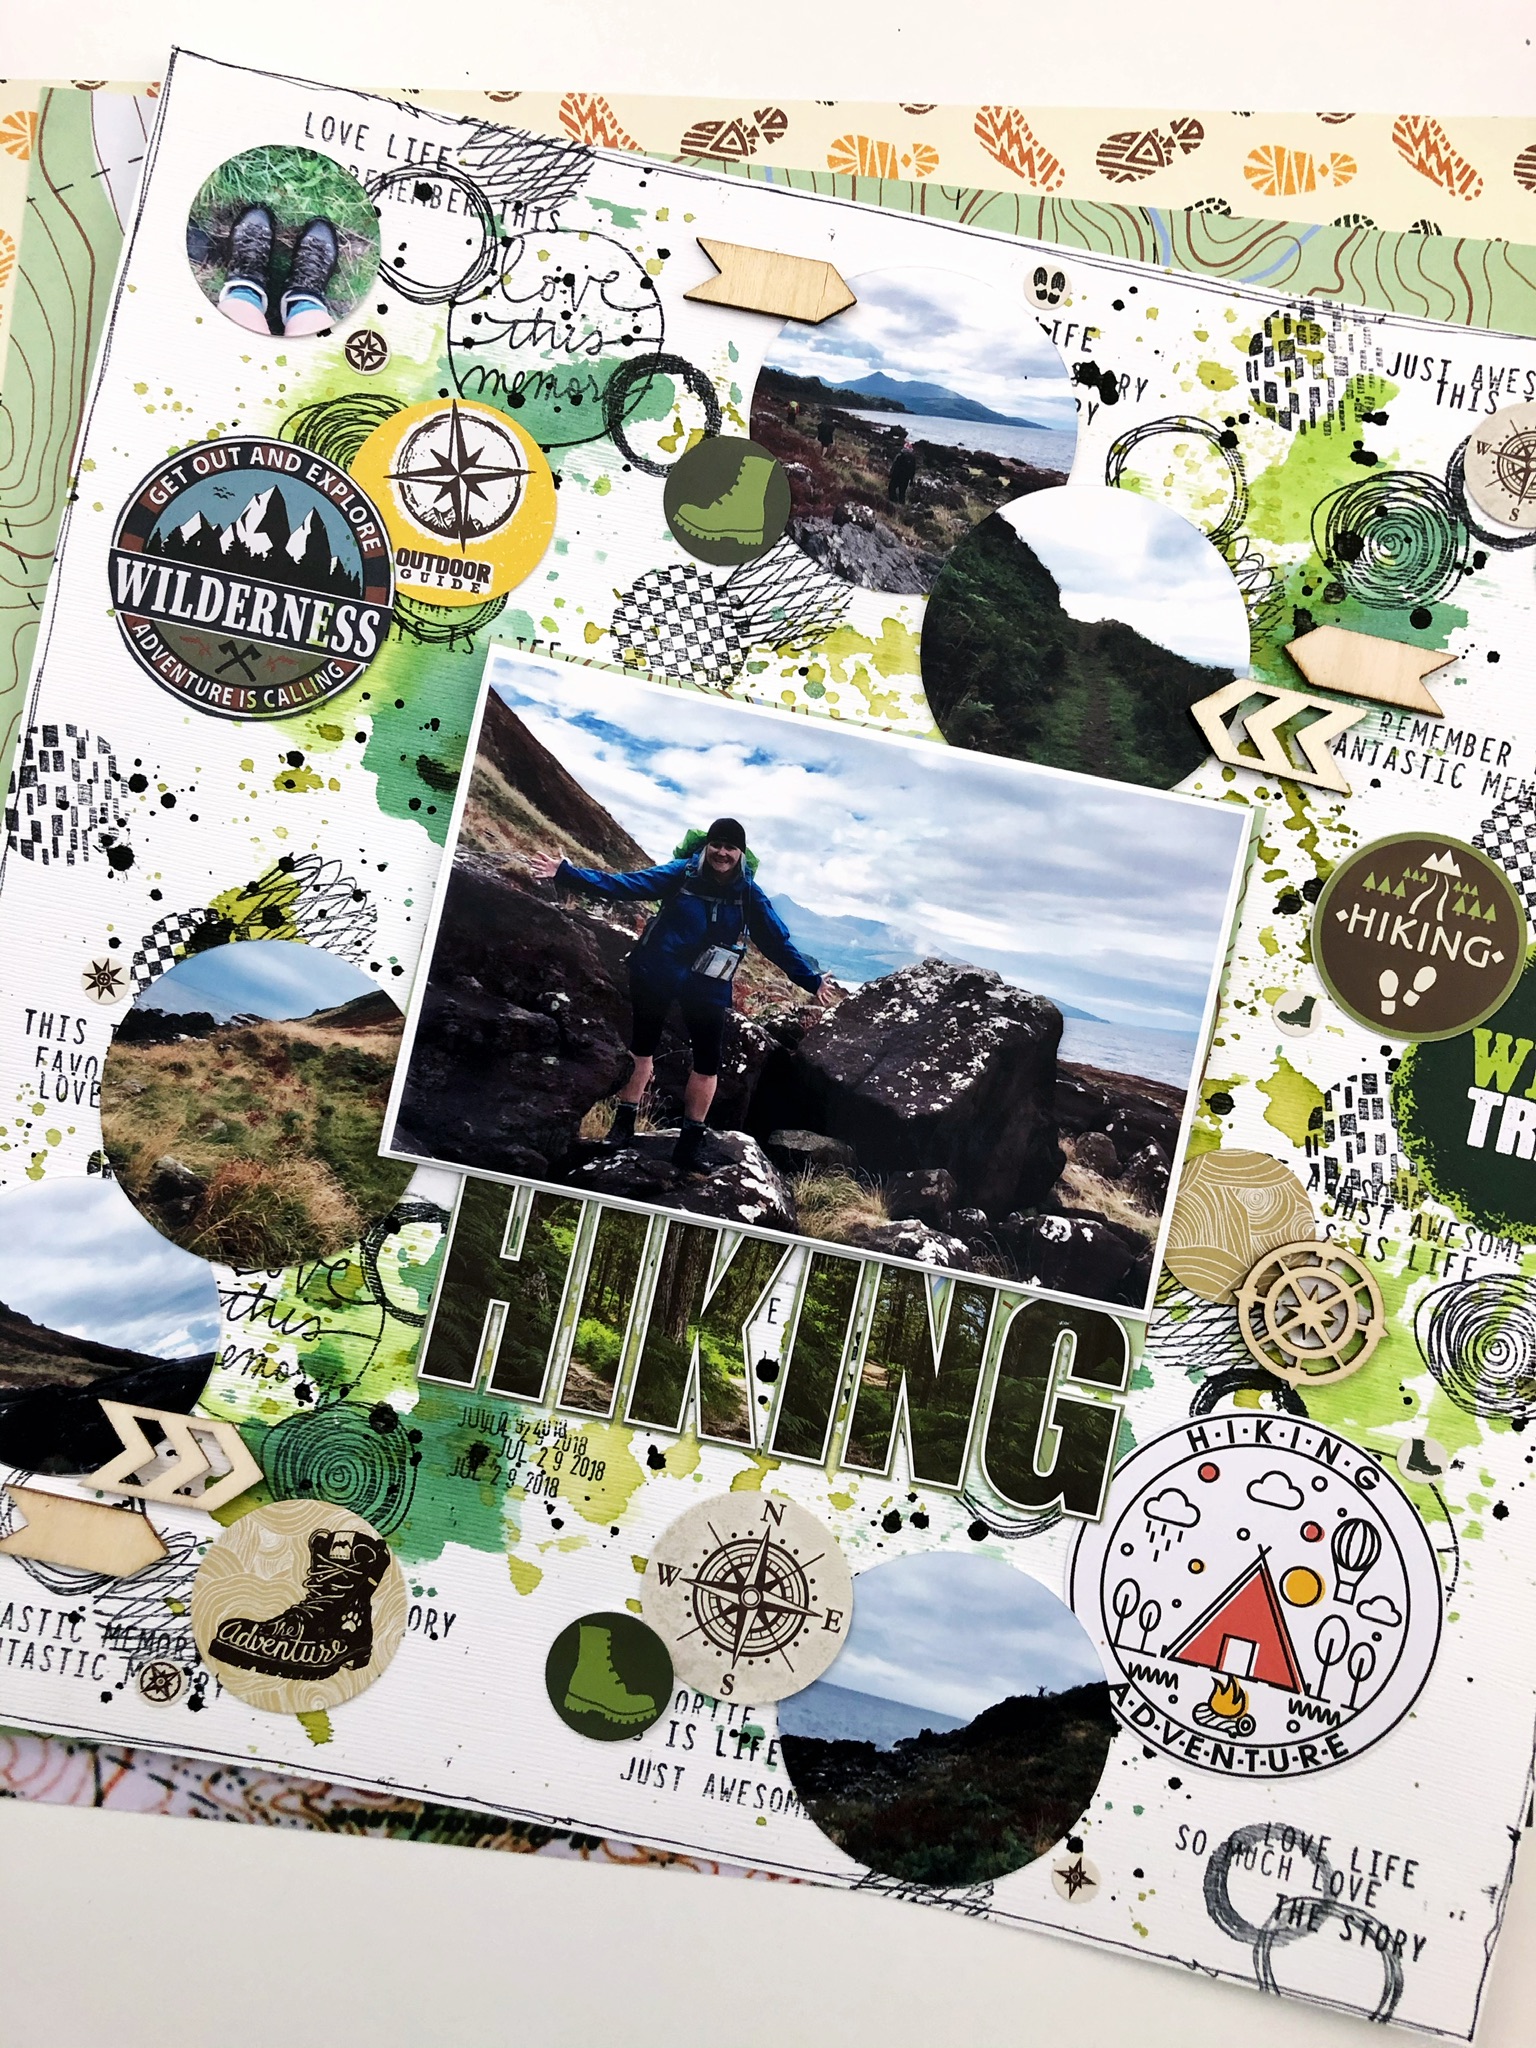
For the title  I used ‘Hiking’ (nothing like stating the obvious eh!) which I fussy cut from on of the large stickers in the kit. I love how bold the title is, even with so much going on in the background. 

To finish it off, I added some black splatters and a few wood veneer bits from my stash. 

Chevrons... 

For my next page, I started by with chevrons. A couple of the stickers had some great patterns - a brown/tan compass pattern, and a French topographic map. You had me at map and compass! I popped these onto cardstock and then using a chevron stamp from my stash I punched as many as I could for my background. More die cuts! 

Keeping most of my design to the right of the page, I set up the chevrons to look like short stripes out both sides of this 4x6 portrait oriented photo. I liked this stripe idea so I kept building on that with the stickers and fussy cut pieces I made into die cuts from the collection. 

From there it was just a lot of fun tucking some patterns here and there, adding a few tree stamps where I had a gap in the chevrons and of course some splatters. This is a hiking photo after all - a little mess is expected. 

For my title I couldn’t resist grabbing the Kaisercraft Chipboard Alphas in the shop that I have been loving playing with. So fun! I covered each with a green/blue Bazzil Cardstock scrap from my stash (most than likely from a past Scrap Shotz kit!) and stamped them each a few times with that tree stamp for a slight pattern. I did the same for a few arrows from the chipboards too and placed those at the top and bottom of my layer of strips around the photo. 


For the finishing touch I messy cut a little bit of each side of the white cardstock away, roughed up the edges with my distress tool and placed the whole thing down on a Mysterious Teal, Bazzil Cardstock. I love how this gives the whole thing a bit of a frame - really drawing the eye to the center. 

I still have loads to play with in the Take a Hike collection and see a grid layout in its future ... 

Thanks for stopping by! 


Tuesday, October 13, 2020

Use ALL the Die Cut Words

Hello, me again playing with the Cocoa Vanilla, Daydream collection (the September Scrapbook Kit). 

I know I have said it in past posts but I will say it again ... I love this collection, it really is so dreamy! I have not spared a single embellishment or touch here or there, no hoarding is possible with this beauty. All of it must find a forever home on a layout. 

In my pursuit to use it all (kill the kit as you may see on social media, a great hashtag to follow btw), I decided to take all of the remaining Die Cut Words and see if I could make a sentence to inspire my next layout. Well, my grammar is a bit off but the sentiment is perfect! 

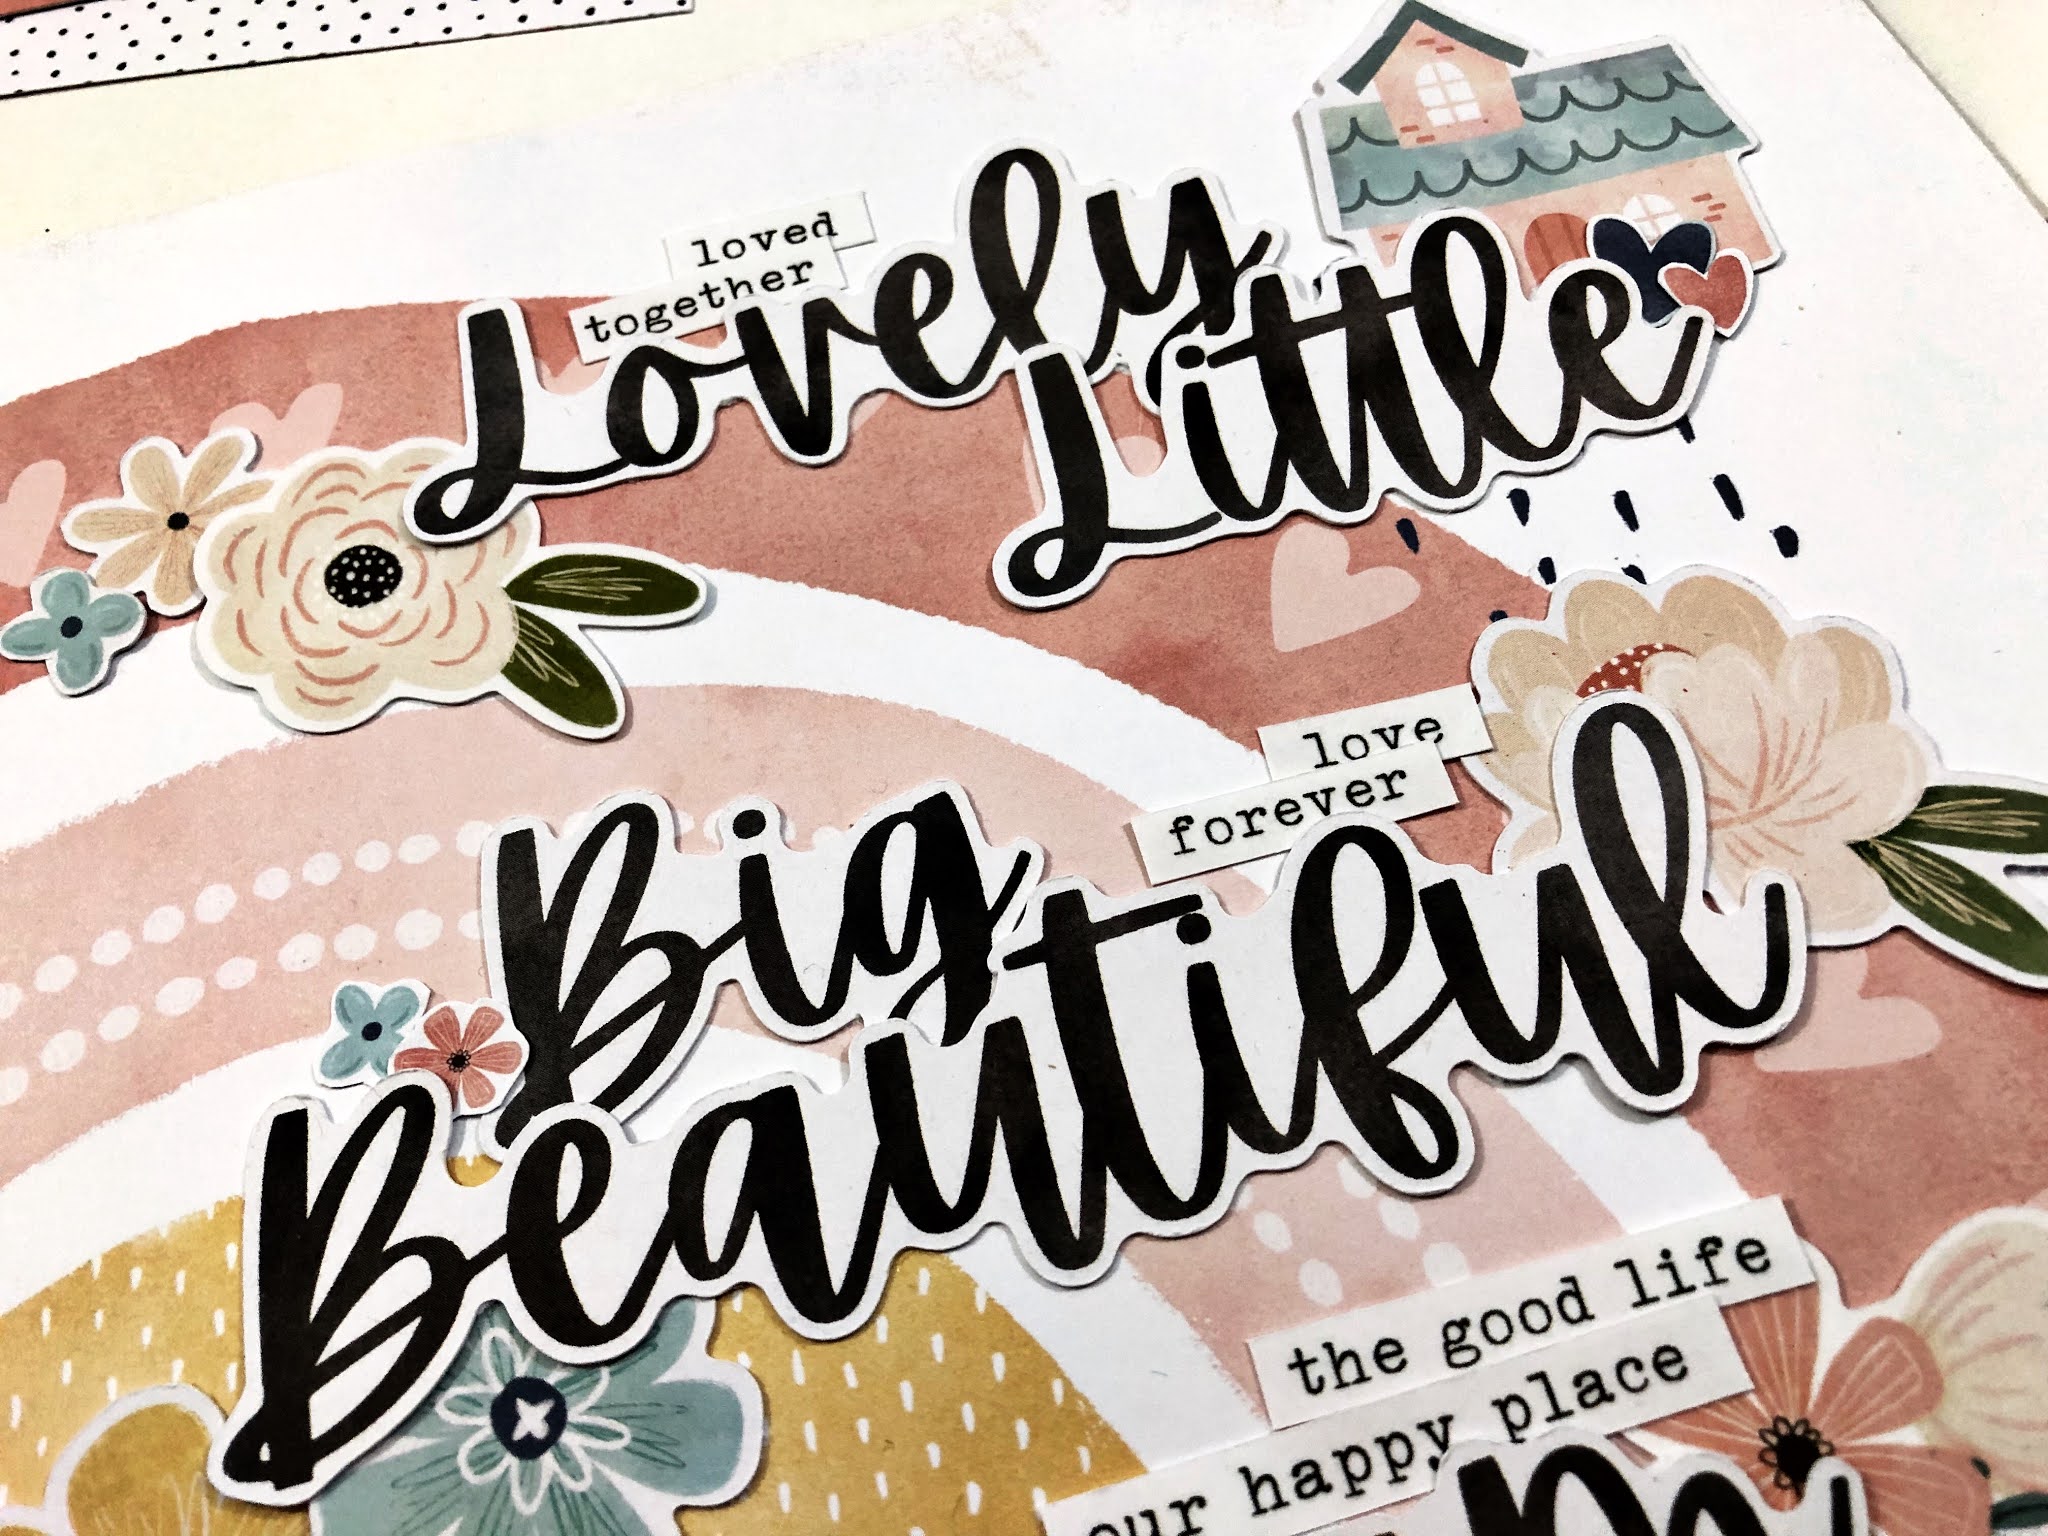
Here is my layout titled "Lovely, little, big, beautiful, dream together. Our home."


Honestly, I did not do too much more to this layout besides the "fancy" title which I jazzed up a little by tucking the 3 little homes and some florals from the Die Cut pack in and about, added a few floral and heart stickers (which I first backed on white cardstock then fussy cut),and then tucked in a few of the phrase stickers too. The rainbow background pattern did all of the work for this design! 


The photo is an awful one - well I love the photo but it is not of great quality - so I printed it quite small 2x3. Printing small also left loads of room on the page for my long sentence title. (The photo was a just-for-fun selfie I took while we were out house hunting. We didn't know at the time this would be our home. We just moved in a couple of weeks ago!) 

I used one of the tags in the Die Cuts and the Pinkfresh Studio alphas in my kit to document the actual house address, and then tucked that behind the photo so it just peeps out. 


I love how this page turned out - sometimes I am inspired by a photo or a story, and sometimes I let the product do the work. Between the little Die Cut houses in this kit and the fact that such a fitting sentence came together for a big bold title is well .. a Daydream. See what I did there? wink, wink


Sunday, September 27, 2020

Daydream is Dreamy

Summer season is over and while I am sad to see the long days of sunshine giveaway to long dark nights, I am way ver excited about the return to Scrap Shotz Scrapbooking Kit Club season! Over July and August, we take a pause on the Kit Club and then kick it off again in September, and what a kickoff! 

Right out of the new-season-gate we are playing with the brand new collection from Cocoa Vanilla, called Daydream. Wow is it dreamy! Florals and bold colours and little houses and loads of hearts and pretty moths and butterflies too. Scrap Shotz paired mine with a Vicki Boutin Speciality Paper (vellum with a rainbow of butterflies and a gold accents) and colour Pinkfresh Studio alphas. I was so excited to get this kit and within minutes of playing, I am loving it as much as I thought I would. 


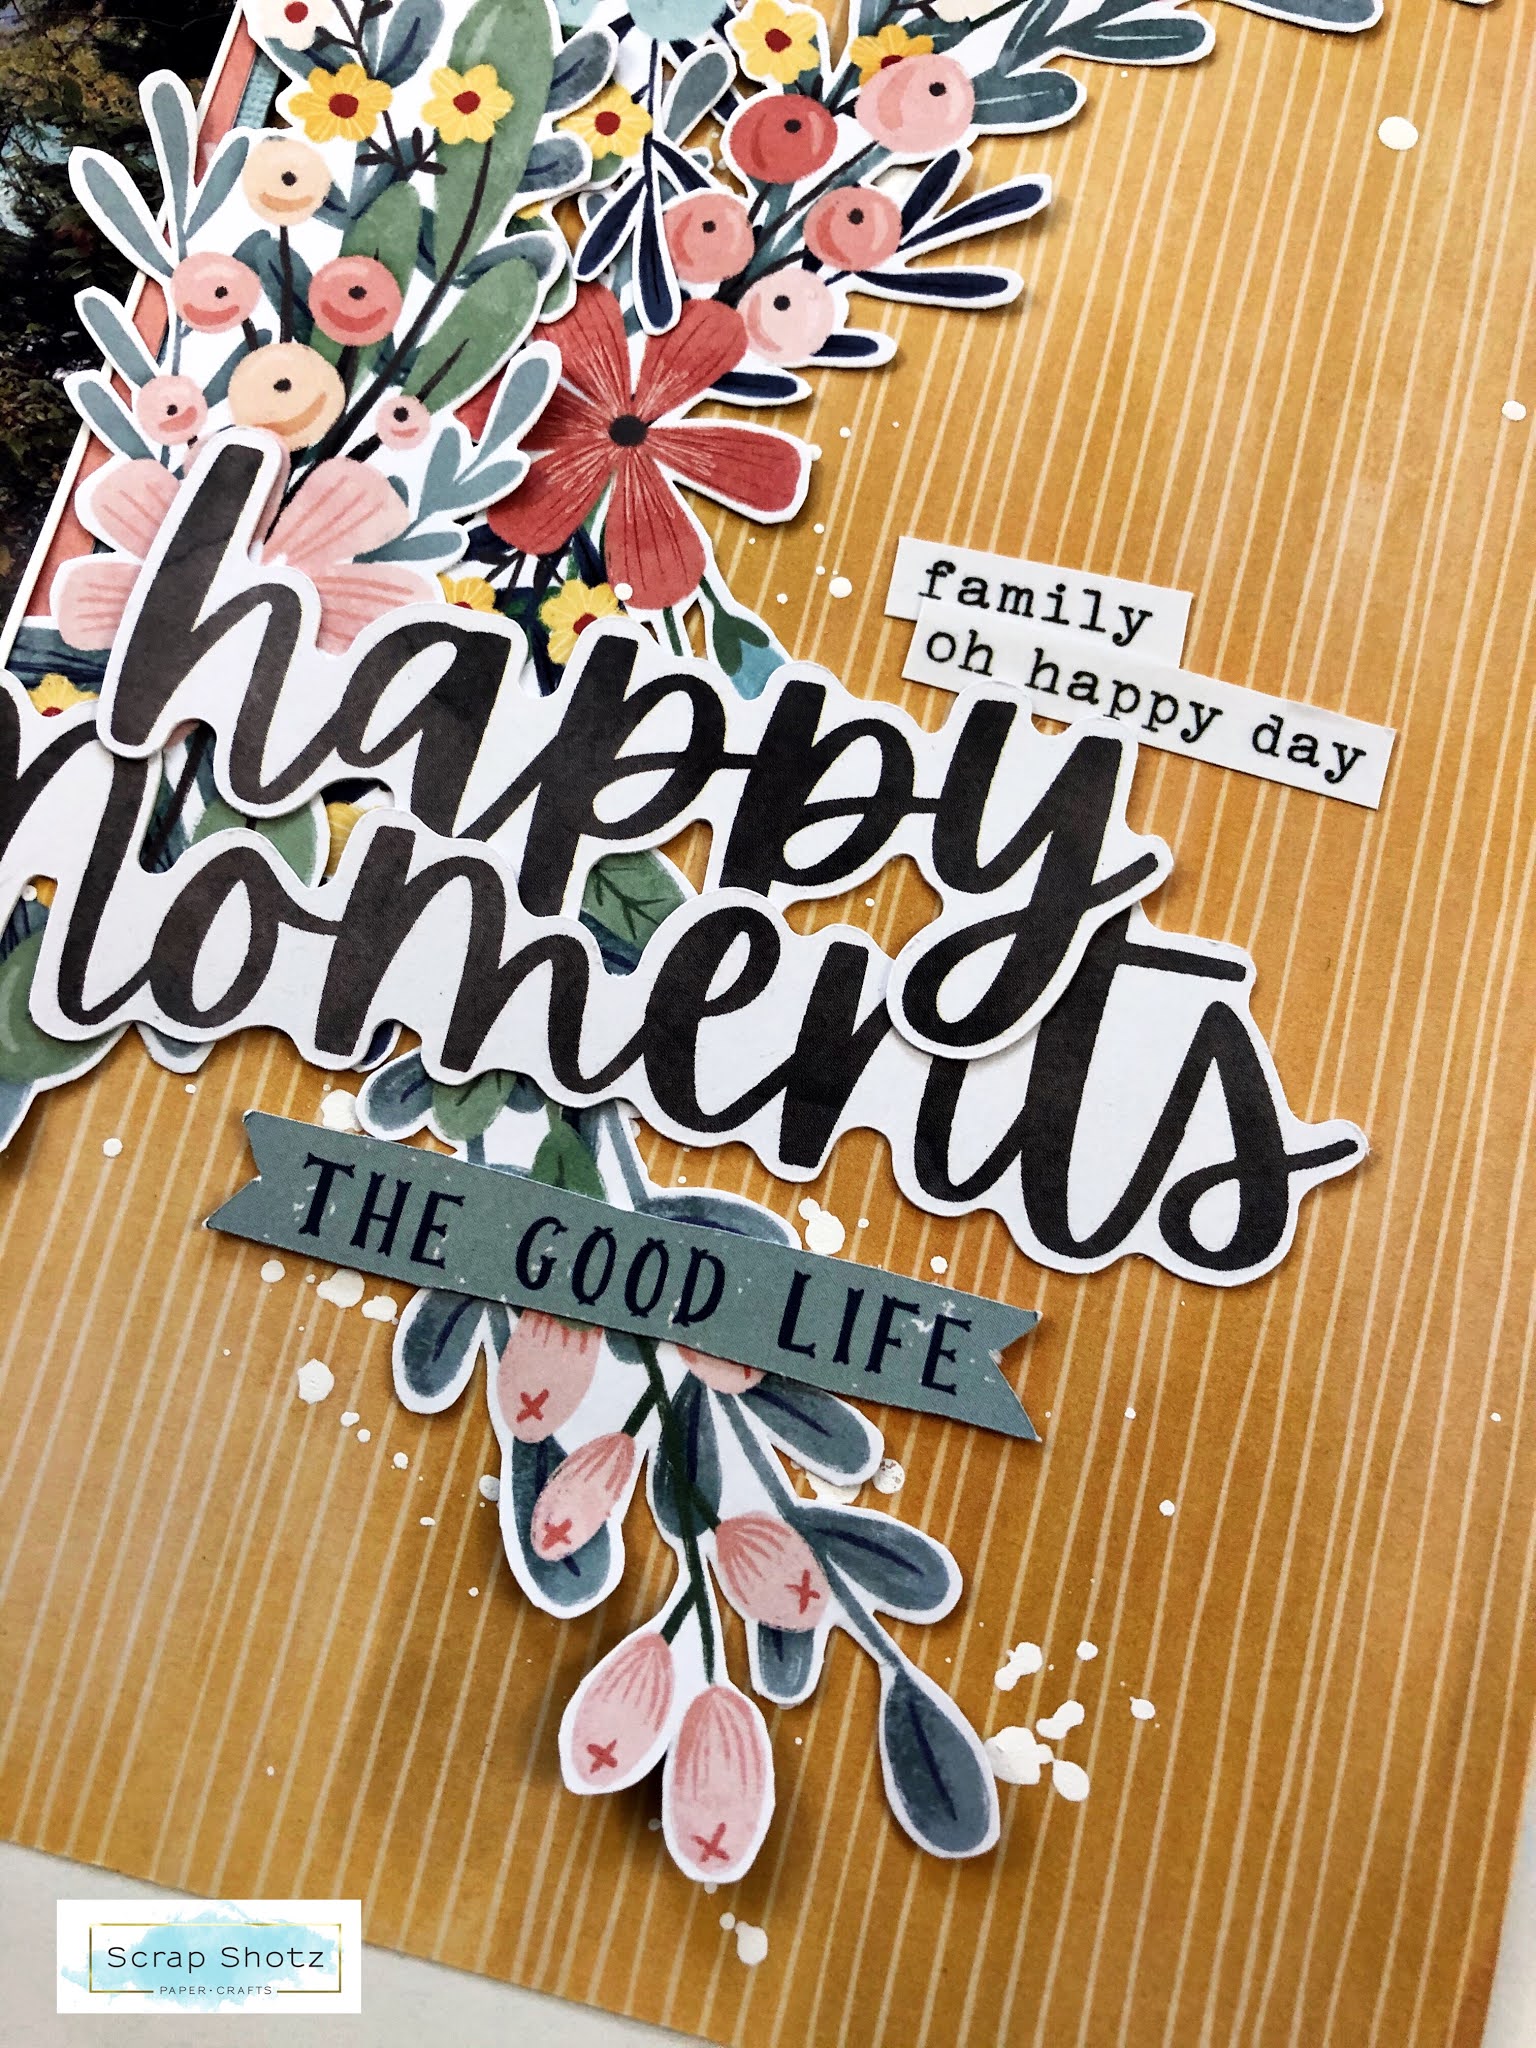
For my first layout with the kit, I started with the Daisy Days pattern paper. This one has A side that features a floral wreath on white, and a B side of small white daisies on a baby blue background - both really cute, but I had my eye set on the wreath. I fussy cut it into 3 floral pieces and bunched those as the focus of my design. Before glueing it down though I added a few splatters with white acrylic paint just behind the florals to make it really subtle. 

From there I used two of the words from the Kit to create my title "happy moments". Then I added a die-cut phrase below the title and the one above to balance it too. To avoid a righted-side heavy look, I added a small cluster of the Daydream goodies to the left too.  


Wow, I love how it turned out! Full disclosure, I have never been successful using a wreath designed pattern paper - but that is ok. Fussy cutting for the win. Make every supply your very own. etc. 

TIP: If you ever come across a pattern paper you just know you cannot get behind, pause and think " do I like anything about this paper?". If yes, fussy cut that part and tuck it as a layer behind a photo or as an embellishment!

Happy crafting!  


Friday, May 8, 2020

All the Layouts, Farmhouse Market

Today instead of sharing a technique or design idea, I thought I would just take a moment to share some of the layouts I created with our April 2020 Scrapbook Kit which features the Carta Bella, Farmhouse Market!

In my last post, I shared a double page layout - today lets show you some single page layouts...

First up, a very very very simple layout - I literally matted 3 photos in white cardstock, tucked some fussy cut florals and a few of the amazing brads from the kit and voila! This collection is so pretty it takes so little to make each page beautiful! Honestly, except for the floral fussy cutting time (which took a couple of Parks & Rec episodes), this layout took less than 30 mins. 


Second in line and still on the 'scrapbook my wedding' kick, I used the amazing black and white plaid background (my second most favourite in the kit) to scrapbook this artistic photo of our wedding rings strung on some of our garland decor. I love how busy the background pattern is but yet it's such a simple layout too.


Next up, I cut up the filing drawer pattern paper into strips and used them to create a layered jumble of the filing cabinets, chipboard and stickers along the right and the left edge. I like how busy it is but also with all the white space in the middle there is still a place for the eye to rest. Add a photo of me and my very good friend and a few more embellishments and this one was ready for the 'done' pile.


Finally, a scrapbook session is never complete until there is a photo of our land shark, fur beast Jerk Russell Terror puppy has been documented. Do not let her cuteness fool you! For this one, I created a watercolour background on white paper with paint from my stash, cut a few thin circles from the matching cardstock in the kit and then used those to anchor my photo and various embellishments! 


|That's me folks! Have you created with your kit? We would love to see. Tag @scrapshotz or #scrapshotz on social media so we can check them out! 


Thursday, May 30, 2019

Try Fussy Cutting

Hello, crafty Scrap Shotz friends!

Today I am here to encourage you to find those pattern papers that you find a little intimidating. You know the ones ... the papers that have very busy patterns. They feel too busy for a background, .too beautiful to waste as a layer and are so fabulous you are intimidated and (gasp) you end up hoarding them in your stash. Not anymore!

I have to admit the papers in this month's Scrapbook Kit from the talented folks at Altenew felt this way for me - they are absolutely stunning, busy, gorgeous and worthy of a frame! I show you each of the papers in my 'favourite items' unboxing video on my YouTube Channel (Scrapstorian) if you want to see what I mean. Fabulous!


Brace yourselves, the first thing I do when I find a pattern I love but its too gorgeous and busy to find a way to use it as a solid 12x12 .. I grab my fussy cutting scissors and start making die cuts. Yup, that's right, I cut that beauty apart and make it a whole bunch of beauties. Then I feature them on a layout with a more neutral background to make them pop.

Inspired by the Just Nick Studio cut file that came with the kit and matches perfectly with the pink blossom with blue stems pattern paper I cut - I just started layering and tucking and poking and placing all the amazing and matching leaves I cut.


The colors I was working with are blue and pink with a dash of teal; so anything in the kit matching this description also got included. I love working with just a few colors, and making bold busy patterns more "Brande" friendly as die cuts.

Here are a few close-ups so you can see that I literally added everything that matched from the kit.


I loved creating this page - it was one of those layouts that just came together so well.

If you have a Kit this month, I would love to see how you are using the amazing products from Altenew. Please post and hashtag #scrapshotz

Happy crafting!


Wednesday, February 7, 2018

February Kit Release with Cathy

It's time for the February Kit Release and the sketch we are working with! This month, Vicki Boutin and her "All Good Things" is in the house! And our sketch come to you from Stuck Sketches. Here is the sketch we are working with.

http://stucksketches.blogspot.ca/2018/01/january-15-2018-challenge-featured_25.html


I used a few of the gorgeous 12X12 papers from the pack, the stamps and die set and the sticker collection. I love that the arrow stamp has the matching die!

I used the Distress Oxides to ink up left over piece of card stock then stamped the flower image and heart images in Black Archival once it was dry. All the Good Things Stamp and Die Set is in the store.
And here is my version of our sketch for this month.

I adore this page in the package!! And the best part is those hanging jewels in the corner...are also a stamp in the set! It's just a beautiful design and I'm trying to decide how I'm going to use it on my next project.


A few close ups of some of the embellishments I added.

Images stamped on Distress Oxide stained cardstock, and there are dies for the flower and the hearts.

I love the arrows. I just used the die on it's own and chose the paper I wanted. But you can stamp the arrow image and colour in the feathers on the image.
A quick close up of my pictures, my and my kids, acting normal and goofing around. I did enjoy the bottom pic because I got to be the tall one in the picture for a change LOL


I felt like it was a glitter kind of week so I added the words from the Thickers All Good Things set. It has the gold glitter and also black words.

My second project using the kit supplies is a simple cover on a signature for one of my traveler's journals. This signature was a ready made one so it needed some jazzing up.


I cut pieces from a 12X12 sheet from the paper pack. Loved the teal colour and the small design on this one. I cut the pieces at 4 1/4" across and 8 1/4" tall. I did not cover the spine since it won't show once it is tucked into the journal.

Stamped the arrow images in Wendy Vecchi's Cactus Flower Archival Ink, and the flowers at the top are a paper clip that comes in a package with other designs.


I fussy cut all the flowers from one of the sheets and attached them all with pop dots.

Head on over the shop to get your hands on the February Kit featuring Vicki Boutin's All Good Things Collection. And be sure to check out all the add ons that go with this release! 

Be sure to keep checking in to see all the amazing projects to come from the Design Team!

Have a great day!
Cathy