Showing posts with label circles. Show all posts

Saturday, November 25, 2023

Travel Memories with Mintay Papers

Have you had the chance to get your scrappy hands on a Mintay Papers collections lately? Wow, they are amazing! I am playing with the Mintay Papers, Places We Go collection Scrap Shotz sent me and loving it! 

Let’s show off the Mintay Papers goodness here a little and see how long it takes you to pop over to the Scrap Shotz shop for some Mintay of your own.

Use Circles to Create Focus

Right out of the package, I was drawn to this fantastic brick wall background first – does it have anything to do with my father being a bricklayer? Maybe. I knew with such a bold background I would have to create a design that helped bring focus to my photos. This is where circles can do the work for you.

I cut 4 large circle outlines about 10 inches wide, 2 in white to pop a little and 2 in another pattern from the collection. I placed these centre stage on the page, then used the circles not only to bring focus to the centre where my photos would be but also as an anchor. Any other embellishments, photos, etc. could all be placed along the circle.

I focused on a large photo with a smaller to compliment. I backed both in white to match the white circle, added a few layers of coordinator pattern paper behind and popped them up on foam dots. From there I add a few die cuts to the left and the right of the photos. Inspired by the circles, I tucked in that fantastic chippies globe on the left. For balance I added a couple of chippies words on the right as my title. 

Finally for the ‘design rule of three’ I added a small die cut with chippies cluster at the top right. 

To finish it off I added made some “enamel dots” using Nuvo Crystal Drops. HOW TO: a tiny little drop from the bottle on the page. When it looks like a soft ice cream cone shape do not worry. Gently pick up the page and flick the underside where the dot is with your finger – it will flatten out. The bigger the dot you drop then flick, the larger your “enamel dot” will be. Do I have Nuvo Crystal Drops in EVERY colour for this reason, oh yes I do.

Use Triangles to Create Focus

Another design I go for quite often to create focus is a triangle.

HOW TO: Simply take a background paper and cut it into a large triangle. Then you either put it on the top of the page to point down to your photos OR on the bottom to point up to your photos. Often I will use the ‘from the top’ look when it’s a picture of people, but the ‘from the bottom’ when its landscape, hiking, mountains, etc. I also usually cover the point of the triangle, sometimes make it a little off centre and use a multi layered triangle to show off more patterns. Also, if you have a really busy background paper a plainer patterned triangle can calm down the page (like I did here) OR if you have a really plain background and busy pattern triangle can add some pizazz!

For my background, I reached for that amazing floral pattern which is a little busy so I created my triangles use the simpler patterns in the collection. The point is a little off centre and I used 2 layers – seems I was looking for anyway to use that brick wall paper again. 

Once the triangle was on the page, I added my photo first backed with white paper then some patterns from the collection and popped up on foam dots. Then it was just a matter of tucking and layering the die cuts from the collection to the left and right of the photo, and I dropped in a few of the chipboards as well. Similar to the page above, I added some Nuvo Crystal Drop “enamel dots”. Voila.

I will be back to share a few more pages from this collection! If you want to see these and the additional pages I am finishing off on my scrappy desk come to life, we will be featuring some Reels on the Scrap Shotz Instagram.

Thanks for popping by … see you over in the Mintay Papers section of the shop ;)


Wednesday, March 3, 2021

Take a Hike, Inspired by a Shape


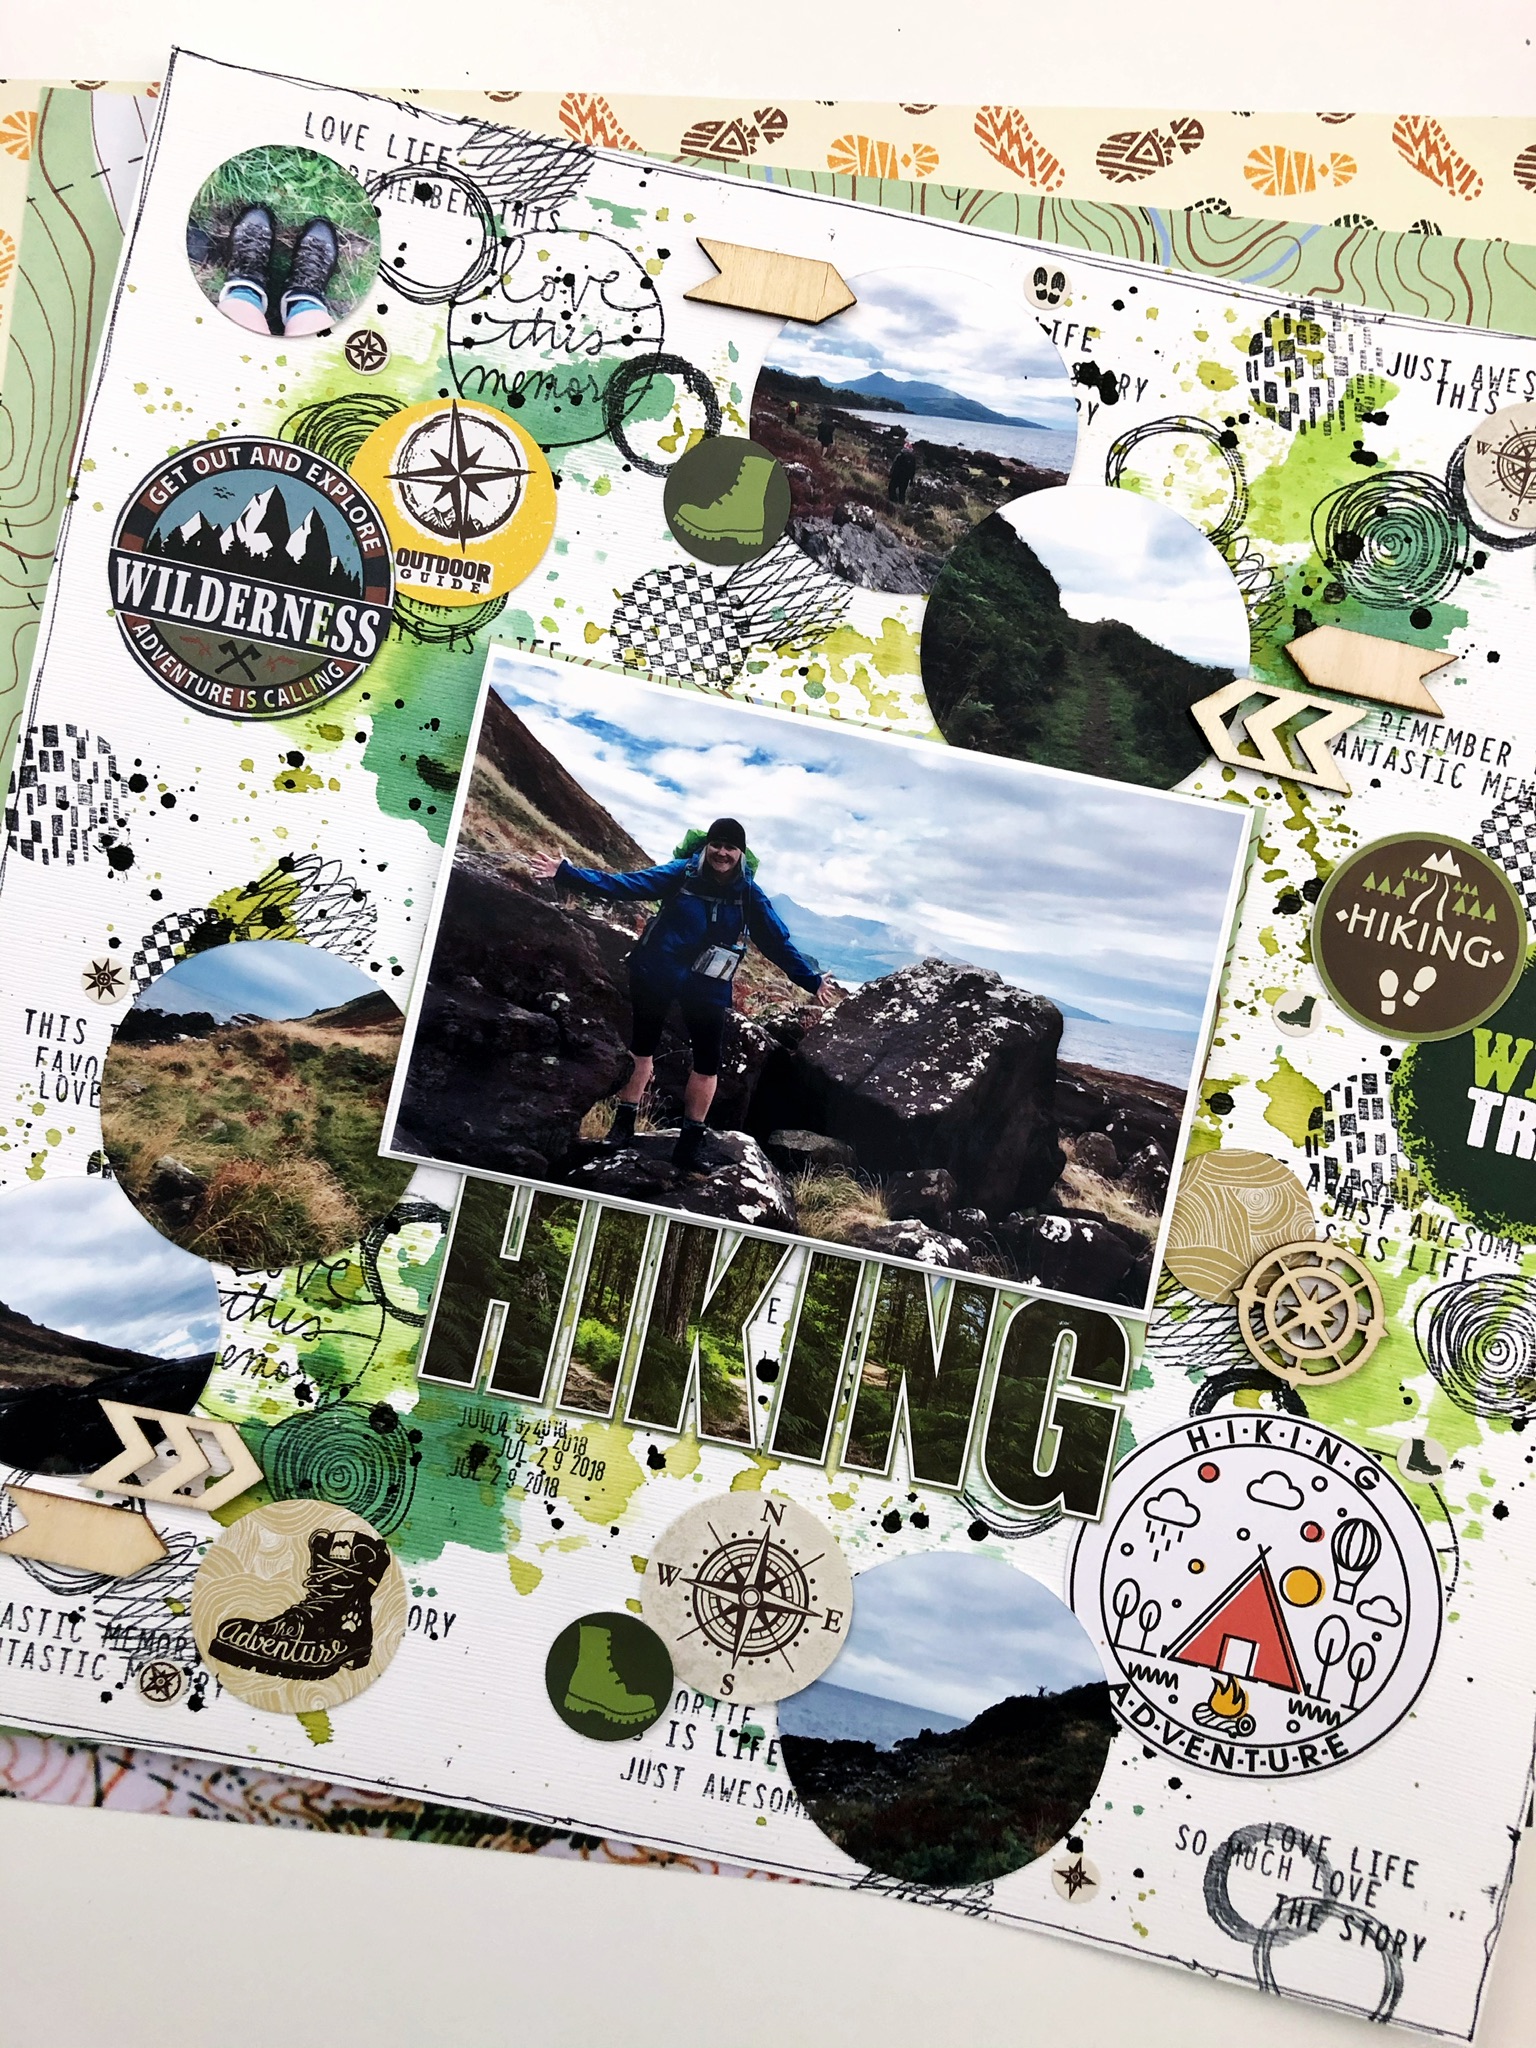
Another fun collection Scrap Shotz sent me to play with is the ‘Take A Hike’ collection from Reminisce. I have never had the pleasure of playing with one of the Reminisce collections and I have been missing out - such fun! 

One of the bits of a collection or kit I generally check out first are the die cuts - my favourite! While the Reminisce collections don’t seem to come with die cuts they sure come with some fantastic stickers on a 12x12 sheet (which I popped onto some white cardstock and fussy cut to make die cuts) and cut apart pocket cards (which I fussy cut the images from). A couple of episodes of Departures and some fussy cutting scissors and I now have Take a Hike die cuts. Perfect! 

Circles ... 

For my first layout I was inspired by all the fantastic circles in the collection - mostly from the sticker sheet but some are fussy cut too. Using the Take a Hike circles and some circle stamps in my stash, I created a messy circle infused pattern -working to cover the full background. I stamped some word phrases in and around the clusters of circles and added done green paint to give it even more mess. 

When I went to add my photos to the layout it made sense to continue the circle theme for at least some of them. So those that were far away pics of our crew hiking, looking down at my boots, or a landscape shot I made them circles and added them into the background pattern. 


I topped off the layout with a 4x6 feature picture of myself - this is my happy place. Fresh air, hiking boots on, tech gear, good weather and a trail and friends around me. 

For the title  I used ‘Hiking’ (nothing like stating the obvious eh!) which I fussy cut from on of the large stickers in the kit. I love how bold the title is, even with so much going on in the background. 

To finish it off, I added some black splatters and a few wood veneer bits from my stash. 

Chevrons... 

For my next page, I started by with chevrons. A couple of the stickers had some great patterns - a brown/tan compass pattern, and a French topographic map. You had me at map and compass! I popped these onto cardstock and then using a chevron stamp from my stash I punched as many as I could for my background. More die cuts! 

Keeping most of my design to the right of the page, I set up the chevrons to look like short stripes out both sides of this 4x6 portrait oriented photo. I liked this stripe idea so I kept building on that with the stickers and fussy cut pieces I made into die cuts from the collection. 

From there it was just a lot of fun tucking some patterns here and there, adding a few tree stamps where I had a gap in the chevrons and of course some splatters. This is a hiking photo after all - a little mess is expected. 

For my title I couldn’t resist grabbing the Kaisercraft Chipboard Alphas in the shop that I have been loving playing with. So fun! I covered each with a green/blue Bazzil Cardstock scrap from my stash (most than likely from a past Scrap Shotz kit!) and stamped them each a few times with that tree stamp for a slight pattern. I did the same for a few arrows from the chipboards too and placed those at the top and bottom of my layer of strips around the photo. 


For the finishing touch I messy cut a little bit of each side of the white cardstock away, roughed up the edges with my distress tool and placed the whole thing down on a Mysterious Teal, Bazzil Cardstock. I love how this gives the whole thing a bit of a frame - really drawing the eye to the center. 

I still have loads to play with in the Take a Hike collection and see a grid layout in its future ... 

Thanks for stopping by! 


Tuesday, July 21, 2020

Circles, Circles, Circles

When your Scrap Shotz kit features the Simple Stories, Simple Vintage Great Escape with loads of amazing circle elements - you most definitely have to create a design to show them off. 


For this layout I went through the kit and pulled out all the circles that made me happy, focusing on the insect and mushroom elements specifically. I am scrapbooking photos of some Scotland Cows (coos) so wanted to focus on the nature circle elements of the kit and make it look all messy and save the hiking pieces for future layouts. 

After picking one of the pattern papers as a background in muted brown tones (to play off the brown of the Coos), I added some white acrylic splatters for a little texture and to anchor the circles. I also painted just the very outside edge of the page as a sort of border or frame. 


I cut the couple of photos in circles and then just stared clustering the photos and kit element circles in a wide strip down the page. I tried to bring in chipboard, stickers, and some brads into each ‘cluster’ so there was a lot of texture down the design. 


Sitting back I felt I needed something black to give some pop to the muted tones of the kit and give me that messy ‘cows in the mud’ look I was hoping for. I pulled some Tim Holt’s rub on backgrounds from stash, cut them in circles and brought those into some of the clusters as the most bottom layer. I think the black draws the eye to the other circle items. I also pulled some black alphas from my stash for this same reason - a little pop! 

I finished it off with some kit washi and border strips down the opposite side for a little balance, added a few tiny staples for some added texture and black splatters.


I like how it turned out - and that with circles you don’t have to worry about the lines being all straight and perfect the most clustered and crazy the better!   

How are you using your kit this month? We would love to see! Tag Scrap Shotz on social media so we can ohhh and ahh! 


Monday, January 13, 2020

Embellishments - Inspired by Shape

Hello, hello - Brande here again with a little post all about how the shape of an embellishment inspired the design of my latest project for Scrap Shotz!

When flipping through all of the oh-so-pretty collectables of the Scrap Shotz December 2019 Scrapbook Kit I was really drawn to the gold and foil ornaments. I decided to play on the shape, the shine, and the texture of these ornaments for all my design decisions.


For the shape, I went through the goodies in the kit to find all the circles. In addition to the 3 ornaments - I found the 2 circle titles 'Season's Greetings' and 'Merry Christmas', wood veneer circles, the glass circle curios, and a gold die cut that resembled the shape of the wood veneer circles. Perfect! I also went through the papers and cut random circles out of any that felt especially pretty to me at that moment. Solid scrapbooker decision making at its best!


For the shine, I did a little simple packaging smoosh technique in the background with some Nuvo Mica Mist, Antique Gold from the Scrap Shotz shop. I also painted the wood veneer with the Antique Gold - compared to the foil on the papers and collectables, the wood veneer looked plain and I feel they had shine envy. (wink) I also took a little bit of Antique Gold on a paintbrush and rubbed the edges of each of the paper circles. Some splatters on the page with the Gold tied it all together.


For the texture, I was super keen to use the gold / white twine included in the kit. So I wrapped it loosely around and within the circles. This was super easy - I was able to hook it behind the ornaments that were popped up on foam and then go back and tack it down in a few spots with glue. For a little more texture I did use some Staz On Black to stamp some messy circles in the background and added some gold sequins and black enamel dots around the circles too - these last few items are from my stash.


I finished the layout off by matting the whole thing on some of the Bazzil Cardstock, Kraft in the kit (which I also used to mat my photo) and a few more Nuvo Mica Mist, Antique Gold splatters. My title is part of one of the branding strips from papers in the kit - love Kaisercraft for their branding strips. So useful!

Ever been inspired by an embellishment shape? Give it a go! If there are hearts in your kit - add way too many hearts (in a good way) all over your page or better yet, cluster your embellishments into a big background heart shape. If you are keen on florals - consider sketching and fussy cutting some black and white stems or leaves to tuck and peek from behind the florals of the kit you are working with. So many possibilities - embrace the shape ... and the shine, and the texture!


Wednesday, December 18, 2019

Create Anchors for Embellishments

Are you addicted to embellishments as much as I am? There are so many amazing embellishments in the November Scrapbook Kit and I simply want to use them all - die cuts, stickers, chipboard, enamel dots, paper bow clips and more.

My desire to use way too many embellishments on my layouts has made it necessary to create some go-to page designs in my scrapbook repertoire that allow me to do just that - use way too many embellishments. These page designs focus on creating "anchors". A place where an embellishment can naturally be nestled or layered - not just floating in background paper space. 


One of the page designs I use often is this layered circle look. So simple! I cut a variety of sized circles (just the outline in this case but the full circle works too) of matching patterned papers (usually from scraps) and layer the circles down or across or diagonally on the page. For this layout, I layered the circles down the right-hand side and used one large circle on the left to sort-of frame my main 4x6 photo and give the layout some balance. You could also create a pattern of circles on the entire background - this is especially fun for bathtime photos, sort of like bubbles!

Once your circles are down, add you photos - I like to use a little foam to pop the photos up a little so they do not get lost in what will be embellishment organized chaos - and then start embellishing! Just make sure some edge of the embellishment is touching or "anchored" on one of the circles. Don't stop embellishing until you think you have way too many ... add a few more, then stop. 


You will notice I kept the background paper pretty plain on this layout - I knew I would have lots going on with the way too many embellishments and the circles so chose one of the Simple Stories, Winter Farmhouse coordinating dot papers from the kit as the background. I love how the simple and faint dots of the background paper also add another circle element.  

Don't have a circle cutter? Do not fret. This "anchor" concept can be created with squares of pattern paper, strips of paper (try washi or the banding strip), or stamp some words or phrases. I also love hand-drawn circles for this concept! Simply grab a few different sized cups, put them mouth down and trace with a black journaling pen - trace each a few times and make one of the lines a little less perfect than the others to give it a little something-something. 

Thanks for stopping by - I hope you are having a great December!