Showing posts with label Scrapbooking. Show all posts

Tuesday, February 27, 2024

Scrapbooking with the Doodlebug Design Snow Much Fun Collection!

Hello friends, Karla here today with two fun and frosty layouts using the fabulous Doodlebug Design Snow Much Fun collection! I love the blues and purples in this line and there are so many fantastic pieces to embellish with! I was excited to get out my photos from a recent trip to a local park!

I used my Cricut to diecut the title and mittens and then used the Petite Prints and 12x12 Collection Pack to back the cut files with. 

I smooshed Villainous Potion and Broken China Distress Oxide Inks onto a Waffle Flower Stencil Mat and after spritzing with water, used some plastic packaging to pick up the colour and add it to my white cardstock background. 

I added puffy stickers and stickers from the 12x12 sticker sheet (also included in the Collection Pack).

The cut apart tag sheet was perfect for layering on smaller photos to add to my page. 

On the second page I again used the Petite Prints for a border and then a pretty snowflake pattern on the white cardstock. 


I used one of the journaling cards from the cut apart sheet and added some cute heart stickers.


I added some of the sentiment and snowflake stickers to decorate the page.


The adorable Winter Wonderland Shaker Pop was perfect to decorate the page, layered on some cute Bits & Pieces ephemera!


Be sure to head over to the shop to check out Doodlebug Design Snow Much Fun collection! 

Thursday, February 8, 2024

Traveler's Notebook Layout with 49 and Market

 Hello, Jenn here to share a Traveler's Notebook layout. I've been inspired by Scrap Shotz challenge for the month of February to get an unfinished project FINISHED! I know I'm not alone in having a pile of half finished projects that need some attention so I think this challenge is the perfect push to pick one and get it done. The first project I've chosen is my May 2019 Traveler's Notebook, which only has a few pages left to finish, one of which just happened to be a picture of my peach lemonade from Starbucks, the perfect match for the 49 and Market Color Swatch Peach Collection that I got from Scrap Shotz! Here is what I did:


All month long I have been playing with the sketch that I created for February so I thought it would be fun to try shrinking it down to a Traveler's Notebook size for this layout. I threw in a few of my favourite techniques, as well, to ingnite some creative sparks and complete the rest of the notebook. To start I used some watered down Abandoned Coral Distress Ink to create splatters on my background. While that dried, I chose the cover paper from the Peach collection, which has a small sample of each paper pattern on it. I really love using this paper in every collection to stretch my collection. I tore strips of paper from this sheet so there would be multiple patters on each strip, for my horizontal and vertical layers. This gave me a lot of colour for my layers without having to sacrifice a small strip torn off of multiple pieces of paper. The torn edges also give a lot of texture and interest without too much dimension. 


I layed down in strips in layers, similar to the sketch, and then added an envelope and tag from the Peach Envelope Bits pack, and some leaves and butterflies from the Peach Acetate Leaves pack. I also had a piece of a cutfile that I used as a stencil for an earlier layout in the Traveler's notebook and thought might make a nice embellishment so I cut it apart to fit it around my little picture. The finishing touches were a few sequins from the SpiegelMom Scraps Peach Fizz sequins mix and a sketchy border around the layout using a peach marker.


I always enjoy creating fun little layouts that come together quick and easy. I like to stick to my comfort zone to get started with finishing a project that I haven't touched for a little while, and then I can slowly build up my creative confidence with go-to techniques. For me, those include using a sketch to inspire design, using scraps, paper tearing, splatters, sequins, and sketchy borders. I try to keep it simple and use a limited amount of supplies, like a single collection. After creating this layout, I went on to finish three more and completed this project, WOOHOO!!! Please check out my Youtube Channel for a more detailed list of all of the unfinished projects I am working on this year, as well as the process video for this layout and a flip-through of the finished Traveler's Notebook. To find all of the supplies I used, click the links that are highlighted, or head to the Scrap Shotz store to see all of the beautiful 49 and Market products now available.

Thanks so much for popping by, Happy Scrapping :)
Jenn


Tuesday, October 17, 2023

49 and Market Christmas Spectacular 2023!

Hello Scrap Shotz Friends!

Sharing a couple of projects using the awesome 49 and Market Christmas Spectacular 2023! 


First up is this Kaisercraft Advent Calendar, this is a DIY advent calendar which provides all the pieces for you to assemble and then decorate with your choice of products. 

Kaisercraft no longer produces these calendars so if you want one grab it quickly!  

You can save yourself a bunch and take advantage of the PICK UP ONLY pricing if you're in Calgary!

I painted all the pieces, excluding the boxes, with black acrylic paint and then assembled. 

The individual boxes are assembled and covered with Christmas Spectacular 2023 6x8 papers, Scor-Tape and liquid adhesive.


After covering the boxes with patterned paper, I sanded the edges and inked them with Vintage Photo Distress Ink, you can use any dark brown ink for this. 

The date numbers are a combination of fussy cut and trimmed numbers from the Christmas Spectacular 2023 Ephemera Ticketed. 


Boxes are also embellished with the Washi Tape Postage Roll, Chipboard Set and Acetate Foliage.


The centre portion is covered with paper trimmed from the 12x12 collection pack (background and word strip). Hanging holly and potted tree are from Laser Cut Outs Greenery. The present is fussy cut from the Laser Cut Outs Greenery packaging. 

Next up is this layout which is based on this card sketch from Scrapbook and Cards Today.


I love how many fun, coordinating products 49 and Market offers for each of their lines!

The background is from the 12x12 collection pack which I trimmed and matted on a black cardstock base. The photos are cut into circles with a circle cutter and matted on cardstock cut with nesting circle dies.


The photo mats are layered over cards from the Ticketed Ephemera, the left side of the layout holds borders of Washi Tape Roll-Postage along with Film Strip Frames.


I've also added Acetate Foliage, pieces from the Chipboard Set and a heart and dot from the Wishing Bubbles & Baubles.

Thanks for stopping in!

Monday, August 14, 2023

Scrapbook Layouts with Simple Stories Trail Mix!

Hello friends! Karla back today with four fun layouts using the awesome Simple Stories Trail Mix collection!! This is a wonderful summertime, adventure collection, which could be used into the Fall! This first layout we made Live on Facebook, but I've added an edited video below which you can view on YouTube! Be sure to scroll down to see three more projects!! Seriously I just couldn't stop!


I used the Creative Scrapbooker July sketch as a starting point for this layout, but flipped the orientation. I added in Distress Oxide Inks and a Vicki Boutin World Traveler Stencil from her Where To Next Collection.


There are so many fun elements in this collection - I used the Decorative Brads, Patches Bits and Pieces, Chipboard Stickers, Foam Stickers and the 12 x 12 Collection Pack, which also includes stickers. I also pulled in some of the Fall Color Vibe papers from the 6x8 paper pad. There are lots of fun papers available in the Color Vibe Line! 


I added on The Robin's Nest Dew Drops and some hemp twine for my cut apart tag and then journaled on the tag and around my photos.


Next, I created a layout using the August sketch from the Creative Scrapbooker VIP Group. I added in some stenciling again with the Distress Oxide Inks. The colours just happen to go perfectly with our Summer Colour Palette Challenge in the Scrap Shotz Papercrafting Facebook Group! You have until the end of the month to add a project for a chance to win! Check out the Album with details HERE!


I added the Decorative Brads and used various pieces from the collection to add a few clusters of embellishments.


I created my title using the Foam Stickers, Patches Bits and Pieces and a sticker from the collection pack!


I added a few Oxide Ink splatters with the Tim Holtz Splatter Brush, which always gives a cool effect!


Thirdly, I created a layout documenting our travels out to the mountains.


I used one of the 4x4 cut apart cards and those pretty Color Vibe papers and created a grid design with strips of patterned paper.


This cute camper is so fun!! I added in a cluster of embellishments and those lovely The Robin's Nest Dew Drops!


Lastly, I used the beautiful trails and trees paper and the August sketch from the Creative Scrapbooker Sketchy Challenge FB Group! 


The cut apart tags are great for journaling on, making tag booklets or just as decorative elements.


I added a foam sticker title, a cluster of embellishements and matted my photo with some of the Color Vibe Fall paper. 


Thanks so much for stopping by! I love how these all turned out! And, I'll be back on Thursday with FOUR more layouts with this collection!! 

PS. Don't forget to stop by the Scrap Shotz Facebook Page at 1 pm MT on Thursday for a fun LIVE Demo - every week!! 


Monday, February 27, 2023

January Kit- Simple Stories Vintage Winter Woods Layouts!

Hello friends! Karla back today with 2 layouts and a pocket page created with the January Kit featuring Simple Stories Simple Vintage Winter Woods. We no longer have month to month subscriptions, but there will continue to be kits for purchase as they become available. The Winter Woods Collection is so beautiful, and can also be purchased piece by piece in the shop!! 

I found some photos of my daughter playing in the backyard 10 years ago! It's amazing how quick the time flies!! The winter theme of this collection was of course perfect to document her adventures on this day!

I used pretty papers from the kit and used the frame to add one of the photos to. I layered stickers, chipboard and ephemera to make clusters around the page. 


The foam sticker sheet is perfect for titles and I cut some of the cut apart journaling pieces down to create tags for the top right corner. I used the February Creative Scrapbooker Sketchy Challenge to inspire this layout.


I added in the Winter Woods Basic Paper Pack and the Sticker Book and some twine from my stash. 


I love the journaling cut apart page! I wrote in some journaling and added some stickers.


For the pocket page, I had a few left over photos from this day that I felt would fit nicely together in a pocket page. 

I stencilled some pretty snowflakes on the Basics Paper with the Winter Woods Stencil using Distress Oxide Ink and added the pretty chipboard banner and word.

One of the cut apart 4x6 cards was perfect to add to a pocket as I didn't need much more in the way of journaling for this page. I embellished with some stickers to finish it off!

Thanks so much for stopping by! Be sure to check out the January Kit and/or the Winter Woods Collection in the shop, and have a wonderful week ahead!!

Monday, January 16, 2023

49 & Market Layouts with the Plum Grove Collection!

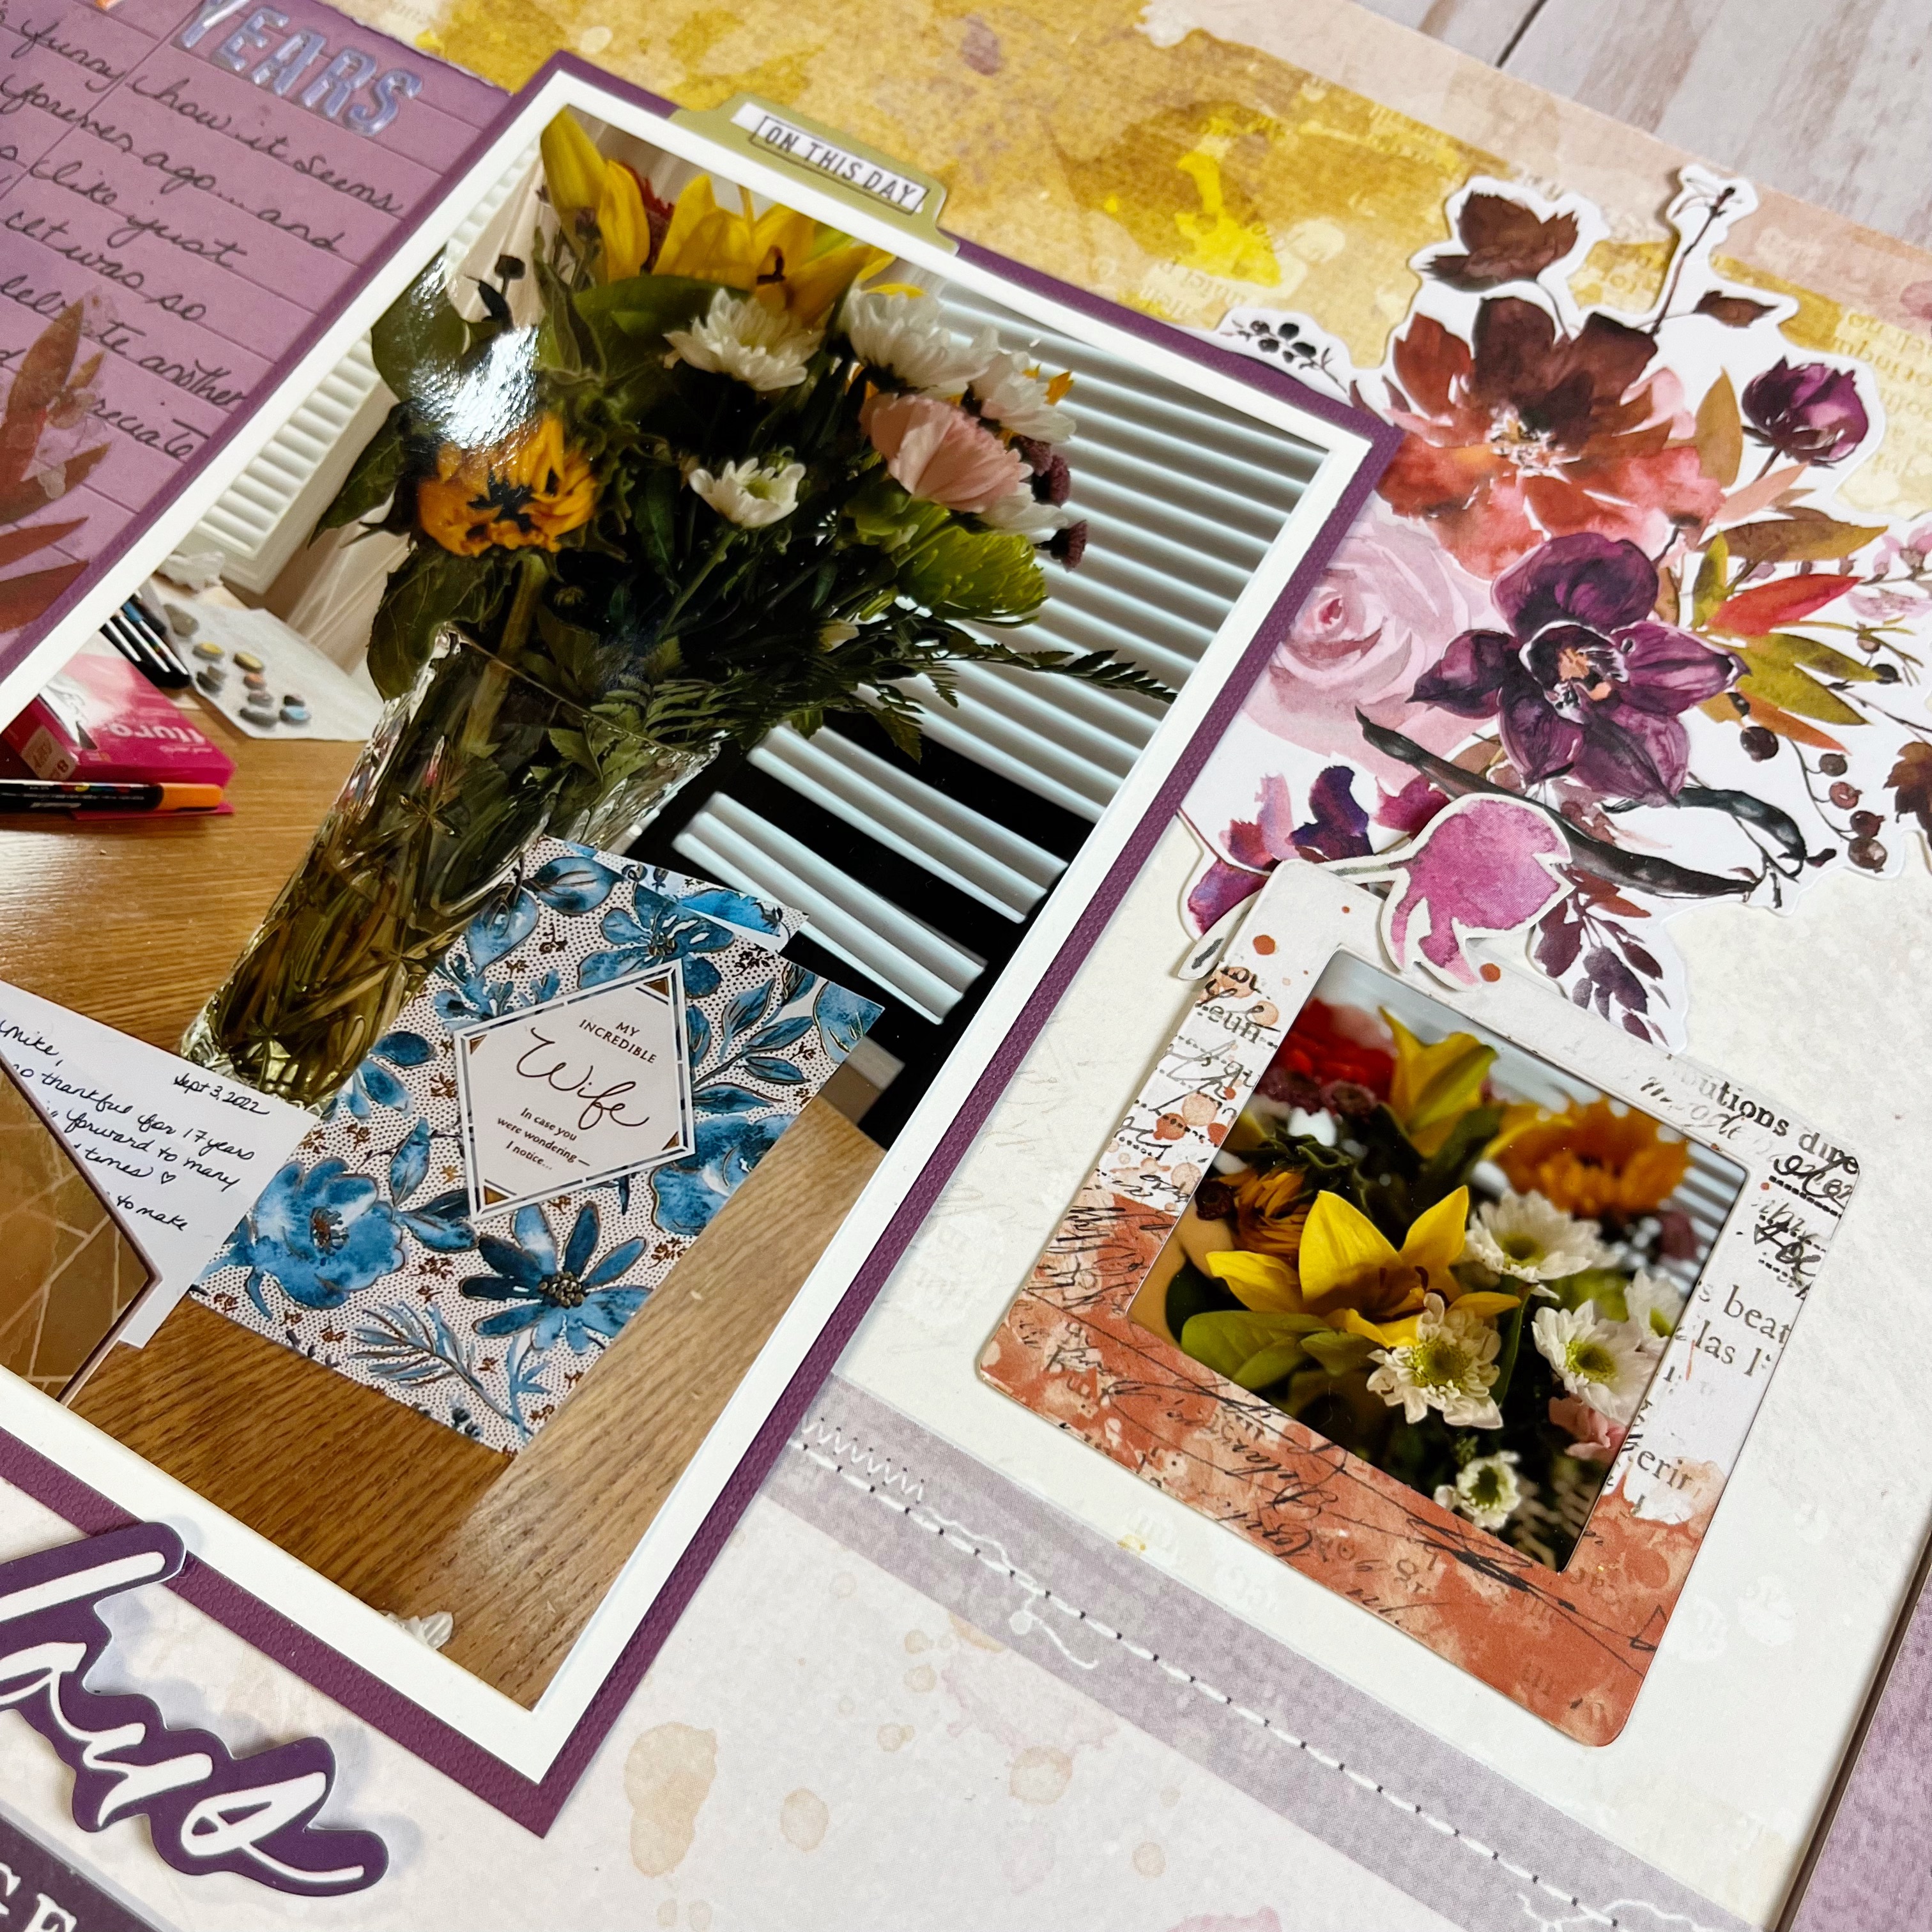
Hello friends! Karla here today with a double page layout using the December Kit featuring the beautiful 49 & Market Plum Grove Collection! You can either grab the Kit in the shop or you can pick up the Plum Grove Collection piece by piece. The Kit includes the full collection paper pack, full ephemera pack, full chipboard word set, and 1/3 of the tag package and 2 sheets of the rub on package, plus 6 matching cardstock!


This collection has a bit of a fall vibe, but can be used for so many occasions! Since my anniversary is in September I thought this would be a wonderful kit to use with these photos! For my first layout I cut two of the papers and layered them together to make a 12x12 page, using the branding strips as decorative elements at the top and middle of the page.


I used lots of the elements from the kit to create layers and an area for my journaling, including adding the beautiful rub-ons! 


I cut the pretty floral elements from the cut apart page included in the 12x12 papers and added a photo to the pretty frame from the ephemera pack.


For the second page I again combined two papers, this time with a vertical attachment. 


I matted the photos and created little clusters of elements, using my tiny attacher stapler to connect some of the items.


The ephemera and chipboard words are awesome to create fun titles and I felt like Happy Life fit perfectly! I added a couple tickets to the top and some chipboard hearts!


Thanks so much for stopping by! If you're playing with this kit or collection, we would love to see what you're making in the Scrap Shotz Papercrafting Facebook Group! I'll be back on Wednesday with another peek at more you can do with this kit, so be sure to check back!!