Showing posts with label creative scrapbooker magazine sketch. Show all posts

Friday, May 21, 2021

Simple Stories Safe Travels Layouts

 Hello scrappy friends. Today I have three layouts (and a bonus one) made with the Simple Stories "Safe Travels" Collection. I love the bright colours and fun embellishments. Perfect for travel pictures with kids. 

Layout #1


I have this night picture from the plane so I thought I should use a black background. I backed the cut file plane with as many of the manufacturer's strips as I could. I had to cut into a few papers for the bigger sections. I used a glue pen to attach the pieces. The clouds were another cut file using white cardstock. I used yellow ink to blend some colour into the clouds and then sewed a white thread across the bottom. The embellishments are from the ephemera pack, puffy stickers, chipboard stickers and cardstock stickers.  


Layout #2


This layout was about Magnetic Hill which makes it seem like your car is pulled backwards uphill. I ripped some cardstock from a previous kit to make a hill and used all the arrow stickers to show it is going uphill. I also love those journaling cards and enamel dots to make it look like they are hanging on the wall. 


Layout #3


For this layout I used the Creative Scrapbooker Magazine May sketch as inspiration. 

This layout was fun to make. I layered cut files and papers and clustered the various types of stickers and die cuts. We didn't stick around for the highest tide but we were there long enough to see the difference and walk around on the beach so I wanted to highlight these pictures. The title alphas are from a previous kit. 


Bonus Layout

I was so inspired during the crop that I made one more layout with the March collection. This is the Carta Bella "Summer" Collection with some Vicki Boutin Thickers.


Thanks for taking a peek at my layouts. Have a scrappy day!

Thursday, April 29, 2021

Carta Bella Summer Take 2

 Hello again! I have one more Carta Bella "Summer" layout to show everyone today (and I may have one more ready for the crop on Friday and Saturday! 


I used the Creative Scrapbooker Magazine April sketch as inspiration for this layout. It was an easy sketch to follow and worked so well with this background paper (the flower cart is part of the paper). 


I layered some chipboard, tags, stickers and fussy cut flowers to add dimension to the layout. The numbers I cut on my Silhouette Cameo. I made 5 text boxes, each with the correct number. Then I sized them until they fit the page. I didn't like how the pink paper didn't pop off the background so I outlined the edges of the numbers with a black Sharpie. I also had to get some enamel dots on there!


Don't forget to join us on Friday and Saturday in the Scrap Shotz Paper Crafting Group on Facebook for a virtual International Scrapbooking Day Crop. There are challenges, games and live demos. Can't wait to see you there!

Tuesday, March 16, 2021

Scrap Shotz Spotlight – P13 Free Spirit

Hello! Today I have a couple of layouts and some cards created with the P13 Free Spirit line. This line has darker colors and an industrial feel to it, so it’s pretty well suited to masculine pages and cards. I used it to create a layout with a photo of my teenage grandson. I love the strip of patterned paper with the marquee letters!

I added die cut gears from Tim Holtz dies for embellishments and used foam Thickers to create the title. A simple layout for this quiet photo.

The next layout is based on the Creative Scrapbooker March sketch from their Sketchy Group on Facebook. Here is the sketch and my layout.

I followed the sketch pretty literally, only adding interest by slanting the photos and using pop dots under some of them. Some were popped up with a double layer of foam and some only one layer, so there is a variety of texture and depth. I used CosmicShimmer Glitter Kiss on the wooden alphas in the title. It’s awesome -  goes on smoothly and covers well, then doesn’t rub off when dry! Win, win and WIN!


Here are a few cards with the 6x6 patterned papers. Here I used glossy accents on the Poppy Stamps - Happy Birthday Poe Script Die after cutting out a couple of layers. Love the polished look! A trio of sequins finished the card.

This round tag is from the P13 - Free Spirit Tag Set 01 and the sentiment is Altenew - Fancy Greetings Stamp Set , stamped in black and embossed with clear embossing powder. I cut the corners on the top of the card with my WRMK corner chomper. And added some Tonic - Nuvo Crystal Drops Ebony Black to finish it off.


The last card for today is simple too, using stickers from the line in the bottom third, some twine and an black embossed sentiment pane, once again using the Tonic - Nuvo Crystal Drops Ebony Black to accent.

This line is perfect for your masculine projects! Thank you for stopping in to have a look. 


Monday, March 15, 2021

February Kit Layouts with Simple Stories Vintage Cottage Fields

 Hello everyone! Carolyn here today with 2 layouts using the February kit. The kit is full of Simple Stories "Vintage Cottage Fields". This collection has lots of flowers and butterflies and a mixed media feel to many of the papers. 


My first layout was inspired by the butterflies on the paper. I tried to keep the titles, pictures and embellishments in the same colour as the butterflies. I'm always so excited when I can get 5 photos on a layout! This was also super easy to make. All I had to do was back the photos with cardstock and arrange my chipboard and brad stickers around the journaling. Those title stickers are my favourite part of the kit.


My second layout is inspired by the March sketch in the Creative Scrapbooker Magazine Sketchy Facebook Group. Here is the sketch:
What I like about this sketch is that I could use 2 of the cut apart cards in the paper pack. I also got to use all the cardstock in the kit. The black matting of the pictures helped them to not get lost on the page. The bottom photo looked a little weird without some extra matting. I got to use a little bit of everything on this layout. In addition to the kit elements used in the first layout, I also used the layered stickers (kit add-on), washi tape and die cuts. A few are elevated with foam stickers.

Thanks for looking! I'll be back on Thursday with some more kit creations.

Friday, June 26, 2020

Layouts with the May Kit - Bloom Street

Hello! Today I have two layouts to show you with the May Kit. This kit is fabulous!
It is full of Pink Paislee - Bloom Street. Pretty pastel colours fill the pattern papers. I'll be using every piece of this kit.

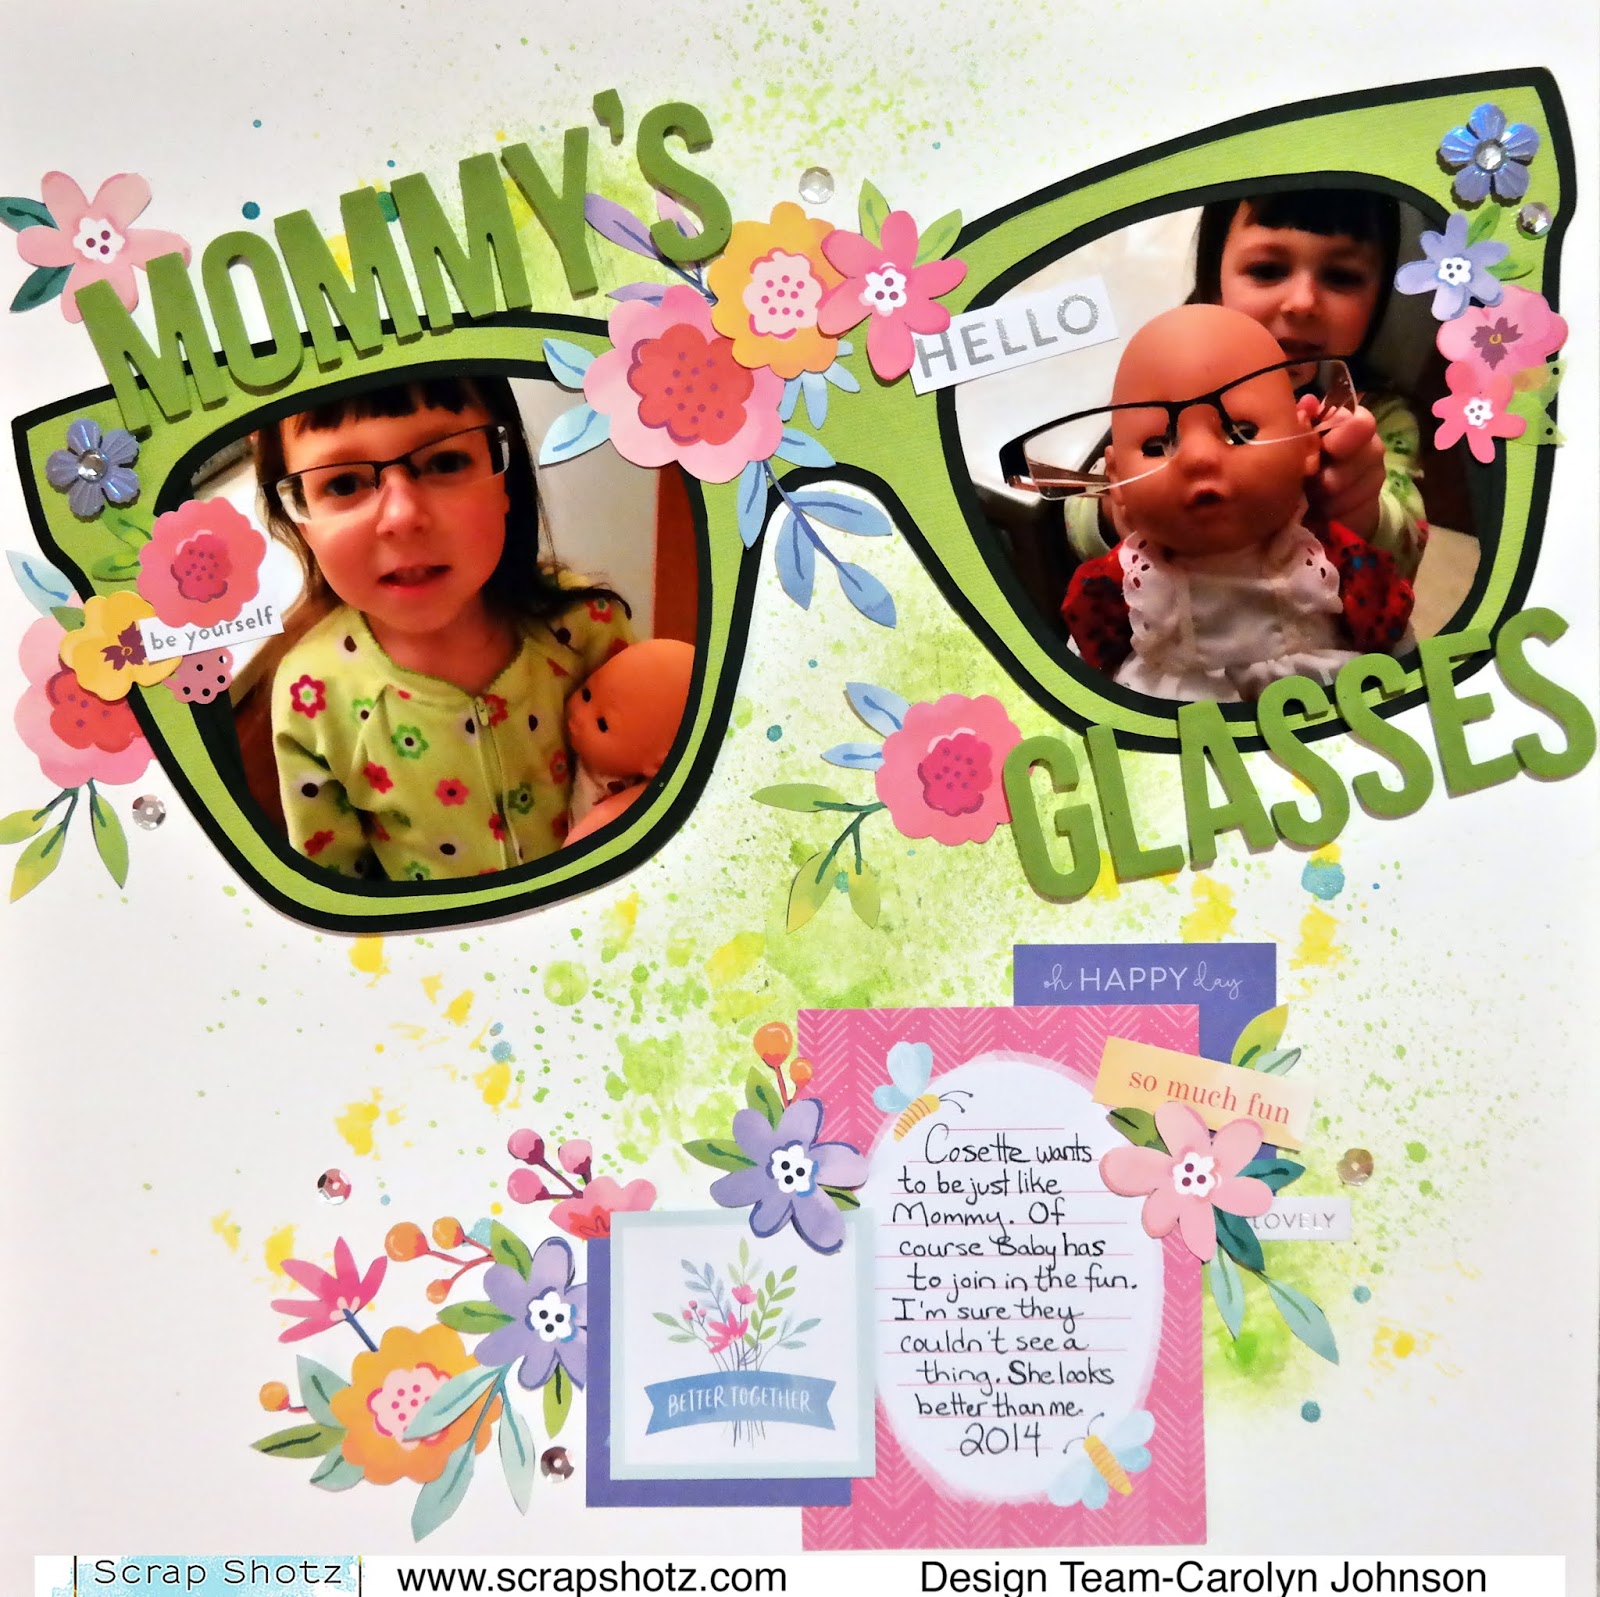
My first layout is of my daughter wearing my glasses. I cut a giant cut file of glasses using the Bazzill cardstock in the kit and some black from my stash. The green part is an inner offset of the outer black part. Then I fussy cut flowers like crazy from this paper.
The background I covered in gesso and then sprayed with green, yellow and blue Colorshine. The square cards come from the 2x2 paper pad. I layered them in some places. 
The title is made from foam Color Vibe Stickers by Simple Stories. The purple flower with a gem in the center is from the mixed embellishments pack. I used a pop dot to adhere it to the page which works really well.
I finished decorating the page with phrase stickers from the cardstock sticker sheet.
The journaling was done on a card from this sheet.
My second layout was inspired by the June sketch in the Creative Scrapbooker Magazine Facebook Group
Here is the sketch:
I followed the sketch really closely. I used a mixture of patterned papers but since I used butterflies on the base it only made sense to decorate with the Dimensional Butterfly Stickers. I tried to bend the wings so they would pop off the page. 
I love mixing fonts for a title. Here is an example:
That's all for me today. I'll be back on Monday with some more inspiration. Have a great weekend!

Friday, May 22, 2020

Dive Into Summer - Part 2

Hello again! Carolyn back again with another Echo Park - Dive Into Summer layout. I really had fun putting this layout together.

I used the Creative Scrapbooker Magazine May sketch from the Facebook group. Here it is:
Ok, let's talk about that background, shall we? All you incredible card makers are always blending inks so I thought I would pull out my stash and have at 'er. I blended a yellow and orange for the sun and a blue above the waves. Why don't I do this more often? It was so easy and made the background exactly how I envisioned. I originally had a piece of cardstock in the back but it just didn't look right. Moral of the story - try something new or that you haven't tried in awhile!

I began the layout drawing waves and cutting them out. I realize now I should've probably added a third curly wave for balance but who's counting, right? I used two different papers so the different waves would stand out. I also distressed the edges so they pop a little off the page. I used a frame behind this little cluster in the picture. 

For the title, I cut a half circle from white paper and blended the inks to make a sun. Distressed the edges again. Some of the flags, tags and die cuts are from the ephemera pack and frames and tags pack. I used some foam dots to bring out the summer sticker. The brads are stick-ons and are my favourite part of this collection. (And there are still some in stock in the store - seriously, you won't regret picking these up). The final touch was some Heidi Swapp Colour Shine splattered on the page.

That's all for me today. I hope you have a lovely, scrappy weekend!


Wednesday, April 22, 2020

New Moon Collection by P13

Hello everyone! Carolyn here to show you a layout from a new collection in the Scrap Shotz Shop. It is called New Moon by P13. One side of the papers has a night time feel (think stars and moons). The other side of the paper has a daytime, garden feel (think flowers, leaves and even some bugs!).


I decided to scrap these pictures of my daughter overtaking my new shelf with her dolls. As I was setting it up, she was setting it up as her own. I thought the purples and blues in the pictures would work well with the blue background. I also thought the stars went with the idea of sleep.

I used the April sketch from Creative Scrapbooker Magazine as inspiration.
No photo description available.
For the title, I layered a few of these tags. I used the purple alphabet stickers on the bottom and layered the blue Happy Birthday collection alphabet stickers on top. I used a white pen to journal.


To back the photos, I used paper #3. Then I fussy cut the flowers from paper #2. To embellish the page, I added some decorative tags and phrase stickers. The good night sticker is from this sticker sheet.


That's all for now. Make sure to join the Scrap Shotz Facebook Group. There is going to be an online crop on May 2. Hope you can join us!


Thursday, April 9, 2020

Happy Birthday Cards and Layouts with P13

Hello everyone! Carolyn here hoping you are all doing well and finding some extra scrappy time. It felt good to get scrappy again after a few crazy weeks. It was even better having this bright and cheery birthday line to work with. This might be the first time you've products by this company - P13. Check out the links in this post to see the products up close in the shop.

I'll start with this birthday layout using a cut file. If you would like to use this cut file, it is free on the Scrapbook and Cards Today blog. It is designed by Paige Evans.
I used paper #5 for the background and a piece of white cardstock for the cut file. I then used all the different papers in the collection to back the title. I traced around the file and cut the insides slightly smaller than my tracing and use a glue pen to attach the cut outs.
 
 I fussy cut lots of pictures from paper #7 to decorate the page. I used some dimensional glue dots to lift them off the page a little. I added a few phrase stickers from this sheet. The flag at the top is from this tag pack. Lastly, the date is done in these alpha stickers.

I made another layout using the March sketch from Creative Scrapbooker Magazine. Check out their Facebook group! For this layout, I used paper #4 as the background. I matted the photos with Bazzill Lagoon cardstock and paper #3.
The yellow dots are Liquid Pearls. I put them on scalloped circles I made with punches. Many of the tags are from the flag pack and the circle pack. Can you figure out where the yellow paper came from with my journaling? It is the backing of the tag packs.
No photo description available.
Lastly, I used some leftover papers to make 2 cards. Just so happens we had two birthdays this month so the timing was perfect. 
The cards use some fussy cutting and cut apart cards. The finishing touch was using the Liquid Pearls. Here are some close-ups.
Thanks so much for stopping by! Have you joined our new Facebook group? It is called the Scrap Shotz Papercrafting Friends Group. Come join us so we can share together. Stay safe everyone!