Showing posts with label Scrapshotz. Show all posts

Monday, April 21, 2025

Paper Rose Botanical Blooms

Today I am sharing a bunch of cards that I created with the Paper Rose Botanical Blooms 6x6 Paper Pack.

I love the dramatic look of these papers and I used them in a variety of ways. 

I dug out my die cut shapes, frames and some embellishments. Some sentiments and embellishments that were already assembled and some that I put together. Ribbon, dimensional foam and foil cardstock were also used.

I used embossing folders and die cut sentiments from my stash, and twine to "tie" layers together.


Some of these bold prints are so bright and colorful that on their own they can be overwhelming. But grounding the patterns and adding things that I already had in my stash calmed them down and created a card layout that is pleasing to look at. It was a great opportunity to add some wax seals that I had been saving and even put a full panel shaker card in the mix.


Using one of the softer colored papers, I created a 5"x7" Mother's Day card. Even though the panels are only 6" high, matting it creatively allowed an unbroken image to be the highlight on this one. A bit of sheer organza ribbon and it's a card I would be proud to give.


I used over half of the package of 18 6"x6" paper, but still have a few papers that will come in handy for fast and pretty creations. I hope some of these have inspired you to look at those bright and bold prints with a refreshed idea! If there is any product that you are wondering about, just drop me a comment and I can let you know the specifics. 

Have a great day!


Wednesday, April 9, 2025

Simply Stated and Scorched Wood Cards

Happy National Name Yourself Day! What a funny national day to celebrate. It's also National Unicorn Day. I'm sure all the unicorns are so excited. I can hardly wait for Lost Sock Memorial Day...

The real reason I'm posting is to share some masculine cards that I created with the Craft Consortium Scorched Wood 6x6 paper pad, that you can pick up now in the Scrapshotz online store right here! All of the cards were created using "Simply Stated" ephemera pieces. I have a stash of these images and find them to be a simple way to create a distinctive card. Sandy has a selection in the store here of some different packs, but if you have a special request, she would be able to order for you. 

The Scorched Wood background is very versatile and goes with everything. I have used a bit of twine, ribbon and embellishments on these, and used foam squares to pop up the images and/or sentiments.


The images vary in size, so can take up as much or as little of the card front as you like.


I liked putting the images on a white base. They are all cut out with a white border, so putting them on white gives a more seamless look.


This last card background was created with the scorched wood framing an embossed panel. There are so many gorgeous embossing folders, and many are perfect for masculine cards. Check out the current Scrapshotz selection here.


I hope this has given you some ideas for creating masculine cards. They aren't always the easiest and it's good to have a stash of them on hand.

Have a great "Name Yourself Day!" 🤣 

I think I'm going to go with "Effa" today. Effa Manley is the only women member of the National Baseball Hall of Fame!(inducted 2006) 😉

Wednesday, April 17, 2024

Photoplay - To the Moon Collection

At first glance, I loved this collection. The colors in the line are gorgeous and so different from most of the lines out there right now. Then last week we were in Houston, and the patterned paper and stickers were perfect for this photo from the Space Center. I popped up the stickers and when I cut out the alphas, I loved the look of the negative space, so used that instead of the individual letters.
This plaid patterned paper is very gender neutral, so easy to use for masculine pages. I printed the photos in black and white so they would stand out  and matted them with black. The alphas are from my stash, an old Heidi Swapp booklet. They weren't distinctive enough, so I traced them with a black pen after matting them on solid cardstock from the add on cardstock pack. To cut out the words, I find it easier to draw a bubble around them with a pencil then fussy cut. If there are any stray pencil marks, they are easily erased.

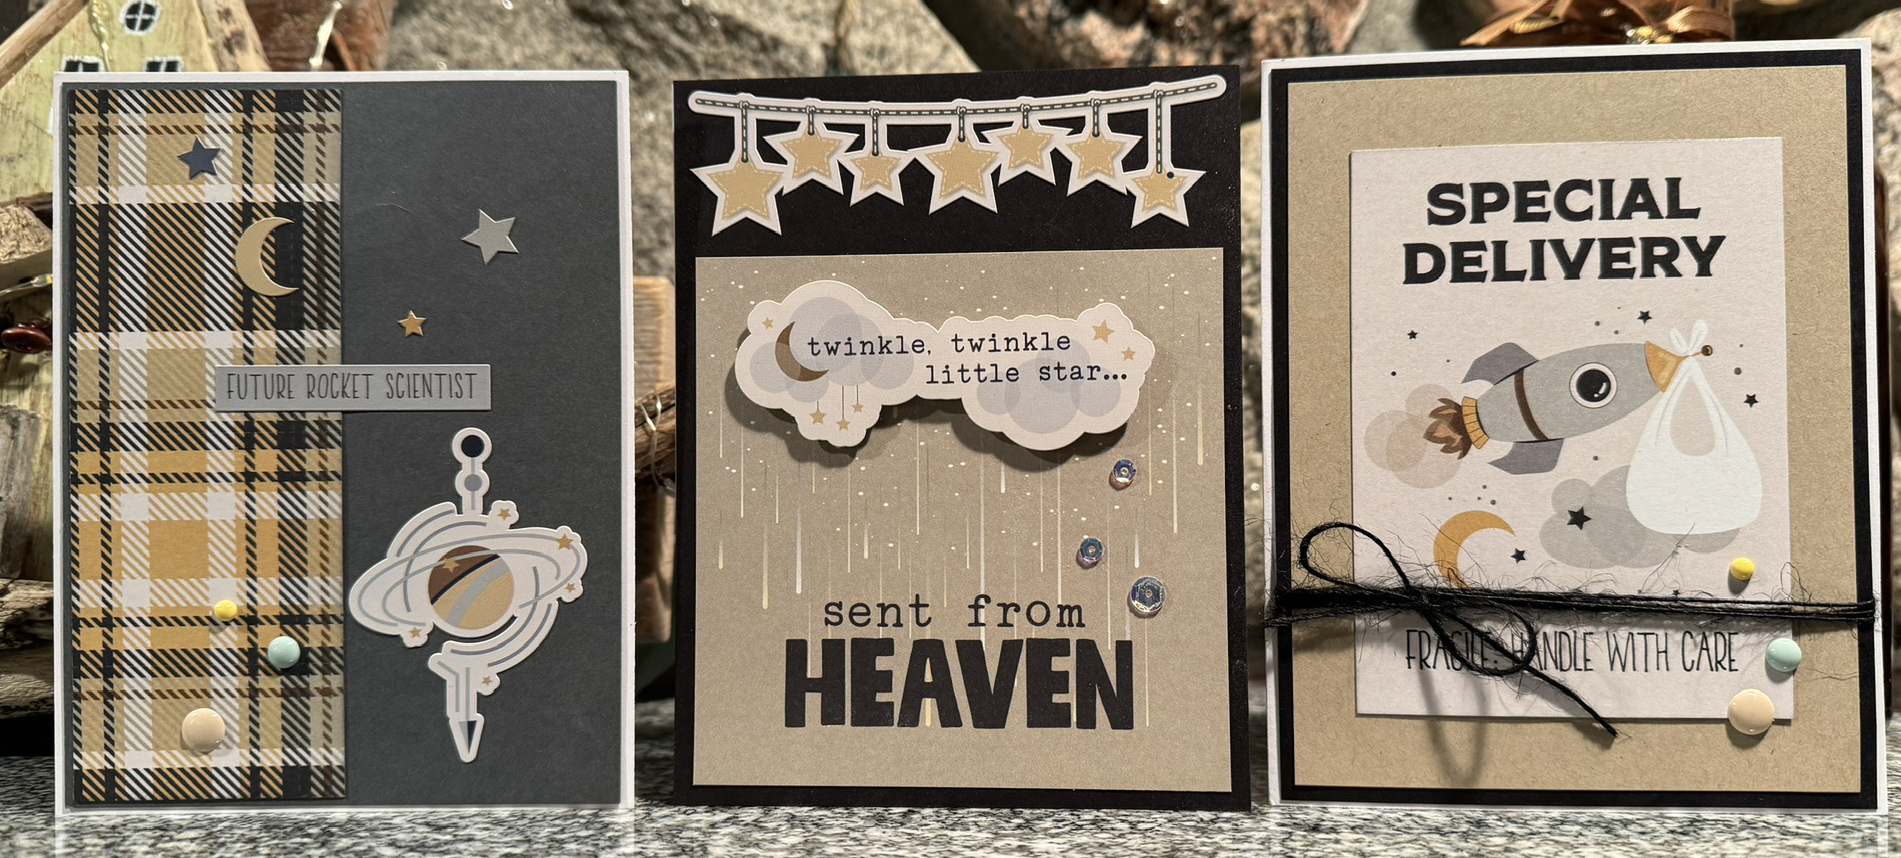
Finally, I used the sticker sheet and the 3x4 cut aparts in the collection to create baby cards. These are really sweet. All I added was foam and enamel dots and some twine and ribbon. I also used stickers for the inside sentiments where I could. This made for no-stamp cards, which are fun for a change!


Thanks for stopping in! 


Monday, August 28, 2023

Simple Stories - Simple Vintage Essentials

Hello! I am back in my craft room after a busy summer. It feels pretty good to being back in creative mode. I was excited to work with this line. "Simple Stories Simple Vintage Essentials" is very monochromatic, and I love how colors pop on it!

These older photos of my sweet granddaughter make me smile, and her bright coat helps them jump off the page. I used a few different patterns from the patterned paper pack, cutting squares at 4.5 inches and mounting them on a mat, that was mounted on a dotted background that was adhered to a cardstock base.  Over the quad patterned paper, I mounted another pattern in a larger square, popped it up on foam and used that as the base for my photos. The gold heart accents and the gold thickers are from my stash and the clipboard clips are from the Chipboard Clipboard ephemera pack. 

I really like the pattern on this paper with all the rulers on it. I mounted a 8" strip in the middle and built my layout up from that, using foam to pop up the photo, different words from the foam sticker sheet and a die cut Hello from my stash. The postcard and other layering bits were from the ephemera packs, and more of the clips from the Chipboard Clipboard pack. I knew that this photo was going to be on a layout as soon as I took it. That's my sister climbing up the ladder on our RV attempting to get a cell signal at the Big Valley Jamboree. 

This layout was fun. The layers under the photo were already done for me, I popped one of the ephemera pieces on a bit of foam, then mounted it on another. So easy to get the multi-layers! I put that onto a patterned paper piece that I cut around the tags about halfway up the page, distressed them a bit, inked the edges and sewed around it a couple of times. The flowers are 49 and Market blooms that also had a bit of distressing. I used the labels from the ephemera pack with the inserts intact. (You can use the frames or the words separately if you'd like.) To give the labels a bit of dimension, where ever you could see them, I put glossy accents on the rivets to make them look 3D. I also put glossy accents on the clips and on the heart under the photo. 
 

Of course, I ended my scrap session with some cards. These were fun and easy to create, and I think they'll be ones I use quickly. They'll be great for office greetings and occasions.


Thanks for having a look! Anytime you have a question, please just ask. Have a great week!


Sunday, April 23, 2023

49 and Market - Vintage Artistry "Everywhere"

 I am absolutely in love with the 49 and Market releases, and I can't choose a favorite. That's okay though, as they all will work together. For this layout I used the Vintage Artistry Everywhere collection. It works so well as a travel line, with great chipboard words for all your vacation photos.  I used one of these to highlight the Michael Buble' Higher Tour that I attended in October. I used gold thickers and Doodlebug Alphabet Soup Alphas in the Coral color for my title and sub-title. In the background I used some of the acetate filmstrip frames. My journaling was typed and cut into strips that I ink blended the edges. Just a few chipboard word strips and it was finished. 


The second layout using this collection is more of a travel theme. Once again the filmstrip frames gave the background interest, and the title was created with chipboard words, highlighted with chipboard hearts. My journaling was hand written on a postcard from another 49 and Market collection ephemera pack. I am sure that I could fill several albums with just sunset photos from Puerto Vallarta. This view is amazing every day.
Thanks for stopping by. I am continuing to work with 49 and Market and plan to make some more cards with these gorgeous elements.


Tuesday, January 31, 2023

Altenew Doodle Bouquet Stamp and Die

 Hello Scrap Shotz Friends!

Rosie here to share some fun card projects using the Altenew Doodle Bouquet stamp and die set. 

This is a large 6x8 stamp set and the image will fill an A2 card front or, if you like creating 5"x7" cards, it's perfect for that size!

There are two single blooms in this set and I stamped them in a light colour of ink and then coloured with Copic markers for a no line colouring look. I inked one side of the Altenew Gem Pattern 3D Embossing Folder with Altenew Antique Gold Pigment ink and then embossed a white card front. The blooms are cut with the coordinating die and layered over leaves die cut with the Pinkfresh Studios Curvy Leaves Die.


This set has 6 great sentiments which pair well with the size of the image. I embellished with a few Altenew Satin Gold Sequins.

I picked up the new Altenew Artist's Goauche Strolling Through New York paints and decided to try them out with my Gel Press Plate. I'll be doing a video with these paints and will share more about them soon!

The large bouquet image is stamped and heat embossed with Altenew Pure White Crisp Embossing Powder on watercolour card stock. I placed my gel press plate in my Misti stamping tool, applied Coral Red and Baby Pink gouache randomly, added a little Altenew Warm Sunshine watercolour brush marker, blended with a brayer and "stamped" the plate over the embossed card stock I also placed in my stamping tool. This results in a 'negative' image left on the plate as the embossed lines resist the ink on the plate. 

What does that mean exactly? Well, you can stamp the remaining ink on the gel plate onto white card stock creating another gel press background. Here are a few examples I created:

Again, I'll be sharing this in a video coming soon so you can see this technique in action!

Back to the card...I kept it simple to show off the background, trimming and matting on black cardstock and then using a simple die cut sentiment from the Altenew Versatile Greetings Die Set.


Here's a mini slim card I created, this time combining Altenew Sunkissed ink and Coral Red gouache on the gel press plate.

Again I kept it simple and just embellished with a few Altenew Satin gold sequins.

The gel press plate background in this card didn't quite turn out how I wanted so I layered Spellbinders Brushed Gold card stock die cut with the Altenew Diamond Frame Cover die over top.

I again used leaves cut with that Pinkfresh Studios Curvy Leaves die with the small blooms from the stamp set. This time I embellished with a few Altenew Satin White Sequins and popped up the sentiment from the stamp set with foam adhesive.

This is a great stamp if you enjoy colouring and I coloured this with Copic markers and then added shading with coloured pencils. I finished it off with some white gel pen details.

I stamped the image along the top and bottom of the card front leaving an area in between to stamp the sentiment.

I hope you've enjoyed taking a look at what's possible with the stamp set. 

Thanks for stopping by!

Thursday, January 19, 2023

49 and Market - Plum Grove - Cards

Hello! Lorraine with you today, sharing some cards made with this amazing line from 49 and Market. The line was the December kit from Scrapshotz, and this weekend I picked up some of the additional elements of the line and created cards.


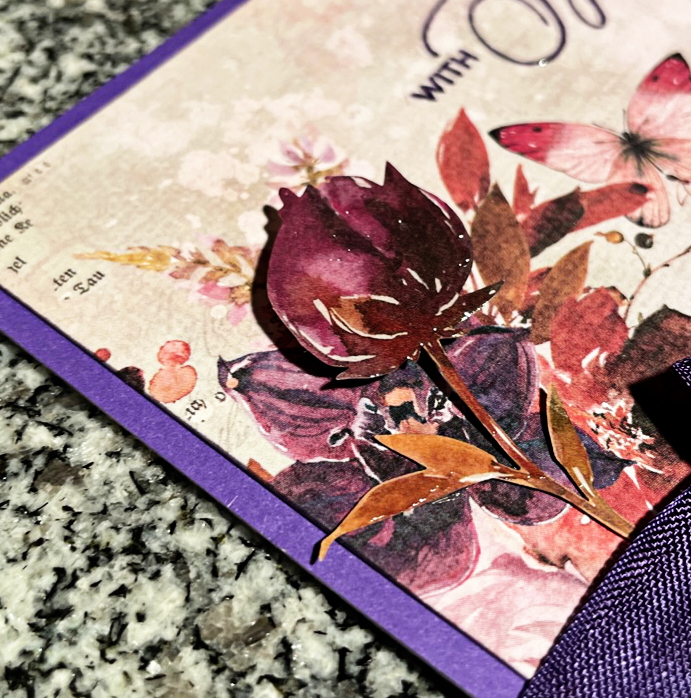
I love the colors of this and the paper quality is nothing short of amazing! With this card I matted and embellished with purple, bringing out the rich colors of the patterned paper in the 6x8 Paper Collection. I stamped the sentiment with Distress Ink directly on the background and embossed over top of it with clear embossing powder. The only embellishment is a bloom from the Laser Cut Outs. The quality of paper and the intricate designs in the cut outs are so easy to work with. 

I was able to put foam under the bloom and then cover it with glossy accents to bring it out even more. I love the subtle depth that the bloom gives the card. 

This card uses another sheet of the heavy cardstock in the 6x8 pack, as well as a bloom from the laser cut outs. 

Changing up the color but using the same simple ideas with the laser cuts, I kept these blooms just raised a small amount by rolling up glue dots to put under them.

The depth is really subtle and the blooms fit perfectly with the patterns of the background.

Changing the mood slightly, I created a one layer encouragement card, using a Pinkfresh Foiled Sentiment. I love having these on hand. Just a few drops of Metallic Silver Lining Nuvo Crystal Drops and some metallic thread, and my card is done!

I popped up this cut out with a thinner foam square. Copper Penny Nuvo Drops were used for the embellishments and the sentiment is from Simple Strips from Taylored Expressions.


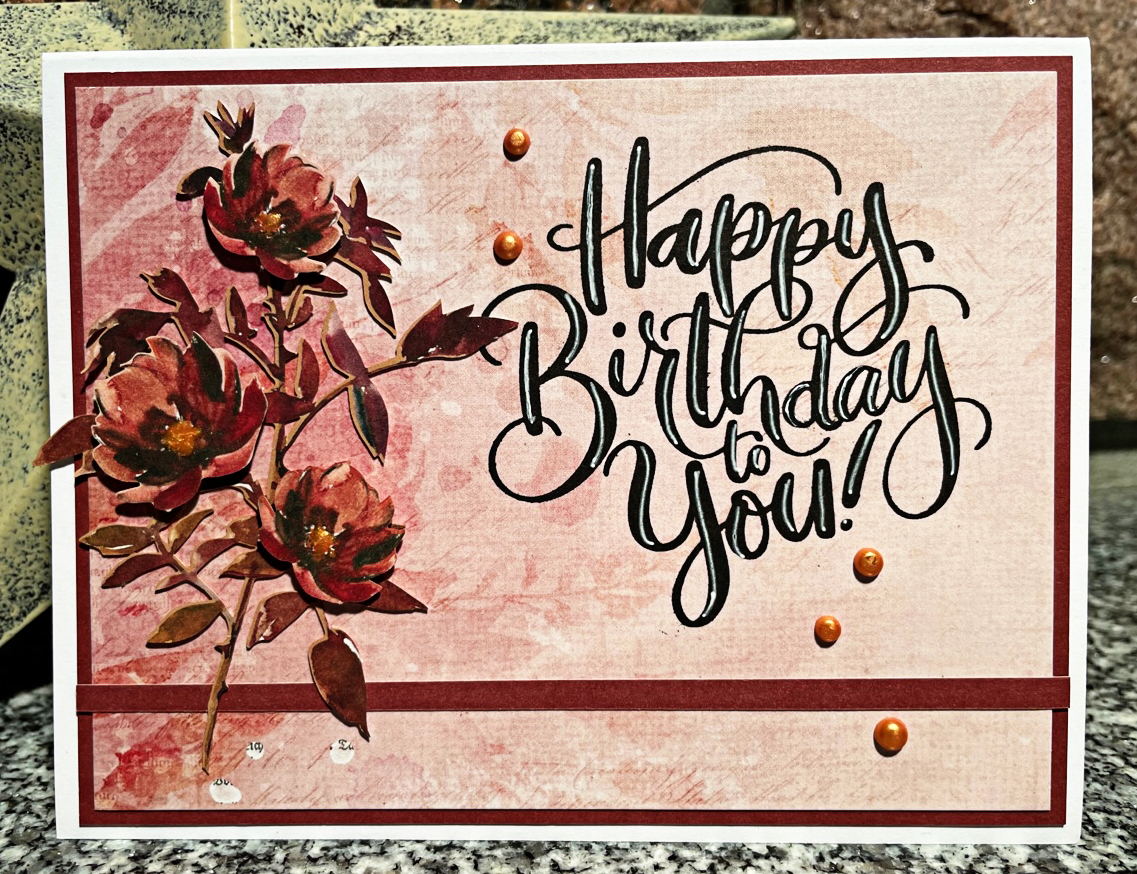
And finally, I created this simple Happy Birthday card using a stamp from Studio Katia, layered laser cuts and more Copper Penny Nuvo Drops. I felt that the black sentiment was too harsh for the mood of the card, so I doodled a bit of white pen on top of it to soften it a bit. Again, putting a little Glossy Accents on the blooms made them shine and pop over the leaves. The stripe is a piece of cardstock cut off of the background that grounds the design.

Check out the wonderful 49 and Market Plum Grove items in the store. They won't disappoint!!!


Sunday, November 6, 2022

Vicki Boutin Print Shop - Scrapshotz October Kit

 Hi! I am having so much fun with the American Crafts Print Shop by Vicki Boutin line! It is so versatile and fun. 

It's not often that I am allowed to use pink on a hockey photo for the boys, but this one is just right for it. I trimmed a piece of patterned paper 1/8" on all sides and matted it on a black base. The photo is also matted and popped up with black cardstock. The funky thickers are part of the kit, and I added a puffy heart sticker to dot the i. The rest of the embellishments are from the Paperie Pack. I love the variety of this pack and 200 pieces? Wow. I embellished with a trio of ink splats and a few more puffy hearts. I didn't want to put all the names of the players on here, so I put the program from that game in an envelope on the back of the layout. It lists all the players from both teams, so that's perfect.

I also used the patterned paper to create some cards. 


Check out this line of awesome goodness! It is amazing! Vicki Boutin Print Shop is in the store!

Thanks for stopping by.