
As promised, I am back with more Mama Elephant projects.
First up is this card using the Mama Elephant Offset Rainbow Creative Cuts:

I cut the rainbows and clouds from white card stock. The rainbows are coloured with Copic Markers in rainbow order-ROYGBIV, that's red, orange, yellow, green, blue, indigo and violet.
The clouds are inked with Tumbled Glass Distress Oxide ink and the sentiment from the Flying With Friends stamp set is stamped on the cloud in black ink. I popped up an image also from the Flying With Friends stamp that has been coloured again with Copic Markers and die cut with the matching Creative Cuts.

Here's a close up look at the rainbow, I also added a glitter layer with a Wink of Stella clear glitter marker.

I arranged all the die cuts and glued on a white card stock panel which has been embossed with the Cuttlebug Swiss Dots embossing folder.
This second card uses the Mama Elephant Circular Grid Creative Cuts.

I die cut 2 frames, one from plain card stock and the second from this coloured card stock in my stash.
I placed the plain die cut over a piece of copic friendly card stock and traced the circles with a pencil so I should know where to stamp the images.

I then stamped images from a variety of Mama Elephant stamps, Little Chickie Agenda, Little Monkey Agenda and Birthday Monkeys. I coloured them with copic markers and drew in a "high wire" for the 2 monkeys to hang from their tails. The mouse with an orange ballon and red ballon were stamped and die cut with the Flying With Friends stamp and creative cuts.
Next I adhered the die cut panel with liquid adhesive, stamped and heat embossed the sentiment with Versafine Onyx black ink and clear embossing powder. I finished off the card with a few Studio Katia sequins.
My final card uses the Mama Elephant Flip Slider Creative Cuts and the Mama Elephant Little Chickie Agenda stamp set.
Here's a closer look at the die itself:

The solid die is the slider portion and the small and large rectangles are what flip when you pull the tab.
I cut the slider portion from yellow card stock, the large rectangles (4) from the Lawn Fawn 6x6 Spring Fling paper pad and the smaller rectangles (4) from copic friendly card stock.
I then stamped images from the Little Chickie Agenda stamp set:

This stamp is not in the store, there is 1 available that's been used for this blog post so contact Sandy directly to order a set in for you or inquire about purchasing the set used for the blog post.
Various images were then stamped on the white card stock with copic friendly ink, I've used Gina K Amalgam black ink which is copic, watercolour and coloured pencil w/gamsol friendly!

After colouring the images with Copic Markers I layered them over the patterned paper rectangles and then assembled the flip slider. I hope to get a video done soon of how to put the slider together, I watched a few YouTube videos to understand it and it's quite easy once you get it done the first time.
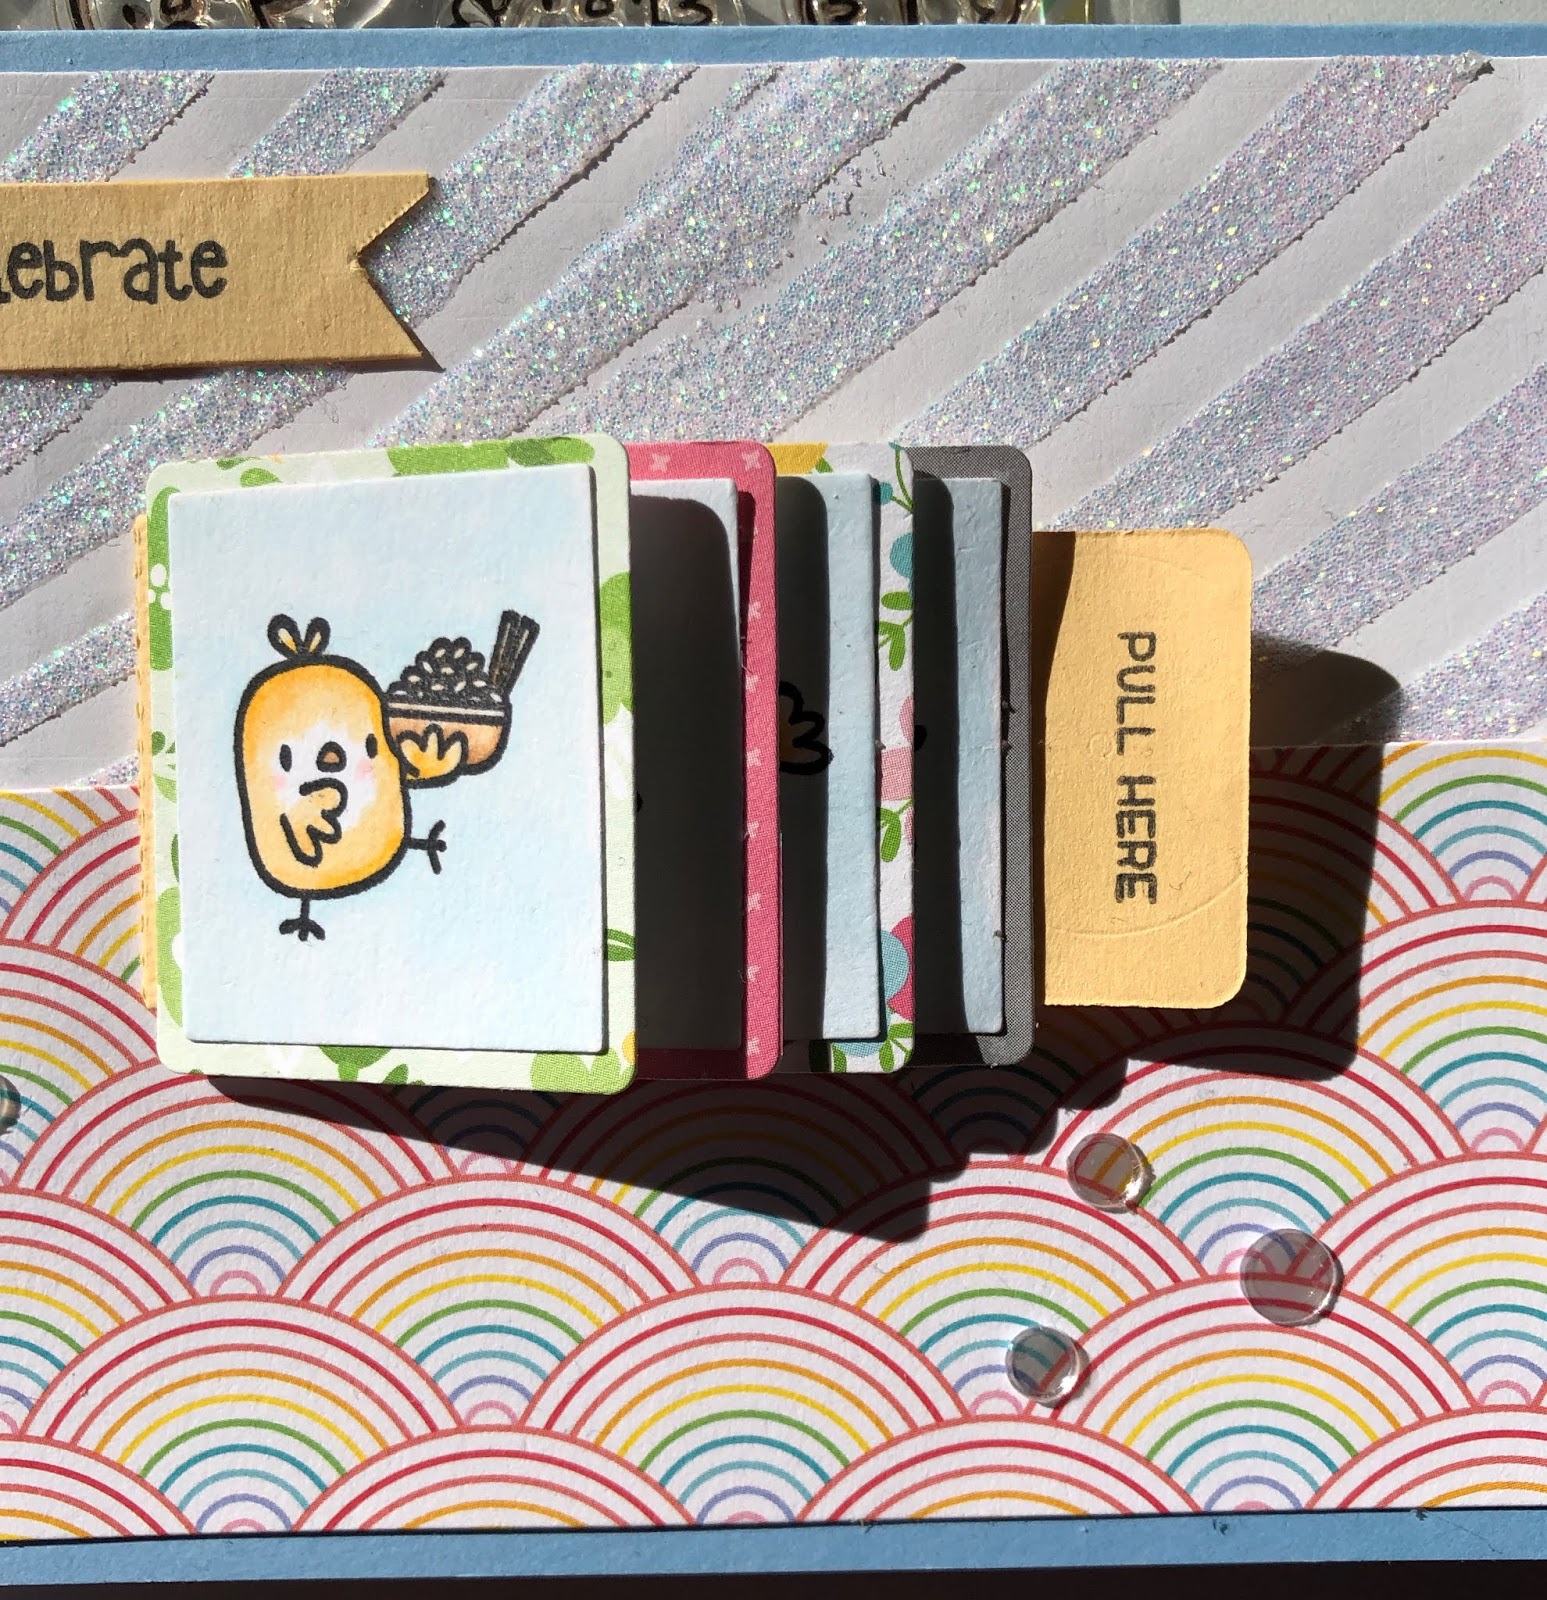
After assembling the flip slider I set it aside and worked on the card front. I applied Nuvo Glimmer Paste in Moonstone through the Altenew 6x6 Molded Lines stencil and set aside to dry.
The "Pull Here" is from an older Lawn Fawn stamp set called "Push Here". I stamped it and 'celebrate' in black ink on a hand cut banner and adhered with liquid adhesive after the paste dried.
I cut a portion from the Lawn Fawn 12x12 Unicorn Mane paper in the Really Rainbow Scallops paper pack and placed it on the lower portion of the glimmered white card front. I then adhered the flip slider with foam adhesive to make it easier to grasp the pull tab and embellished with Pretty Pink Posh clear confetti.

Here's a last look at the flip slider card and a couple of links to YouTube videos walking you through putting it together:
Mama Elephant Flip Slider Jennifer McGuire, scroll to 10:30 of the video for excellent instructions to put this together.
I hope you've enjoyed these projects and make sure you come back tomorrow to check out more Scrap Shotz monthly kit projects!
Thanks for stopping by!


No comments:
Post a Comment