Showing posts with label Bazzill. Show all posts

Friday, March 19, 2021

Well Hello Today


Are you one of the lucky ones who has the Simple Stories, Hello Today in your stash? This super fun collection is near all sold out from the Scrap Shotz shop, so a bunch of us do. I blame my need to have this collection on Design Team member Karla! Her layouts were so inspiring, I had to have it too and ohh I am loving playing with this one! 

All the Numbers  


For my first layout I started with a Bazzill Cardstock, Raven and some Picket Fence, Paper Glaze in Black Pansy and a Tim Holtz number stencil - inspired by the numbers in the Hello Today collection. I wasn’t sure if the black glaze would shop up on the black background but it sure does and wow I love it - a nice subtle touch of texture and shine.


From there I found this fantastic photo oh my littlest brother,  printed in black and white, and just had fun tucking and adding any of the die cuts or stickers that were numbers. I wanted to create this sort of  ‘all the ways I love ya bro and think you are one of the coolest humans I know’ sort of idea.

I was a little torn on if I could pull off the black and white flowers but I think it totally works for the memory and story. Some white splatters to finish it off (seems I need something messy on every layout) and I love it! 


All About the Title 


For some reason anytime I see a pattern paper or embellishment with a lot of orange, especially when paired with yellow or red, I think retro and I think bowling. Perfect! I had some cool Instax bowling photos to document! 

Inspired by the ‘Hello today’ die cut in the Hello Today Page Pieces I decided to anchor the entire design on this title. I ripped a couple of my favourite pattern papers for the bottom of the page and then started added the photos and little layers here and there all around the title. I used some Tonic, Nuvo Crystal Dots in Moroccan Red as paint to add a little colour behind all this goodness. 


There was a little too much white space above all this good stuff so I added a little bit of a confetti look up top with some die cuts, chipboard pieces including some cute hearts, and of course splatters. 


All the Circles 
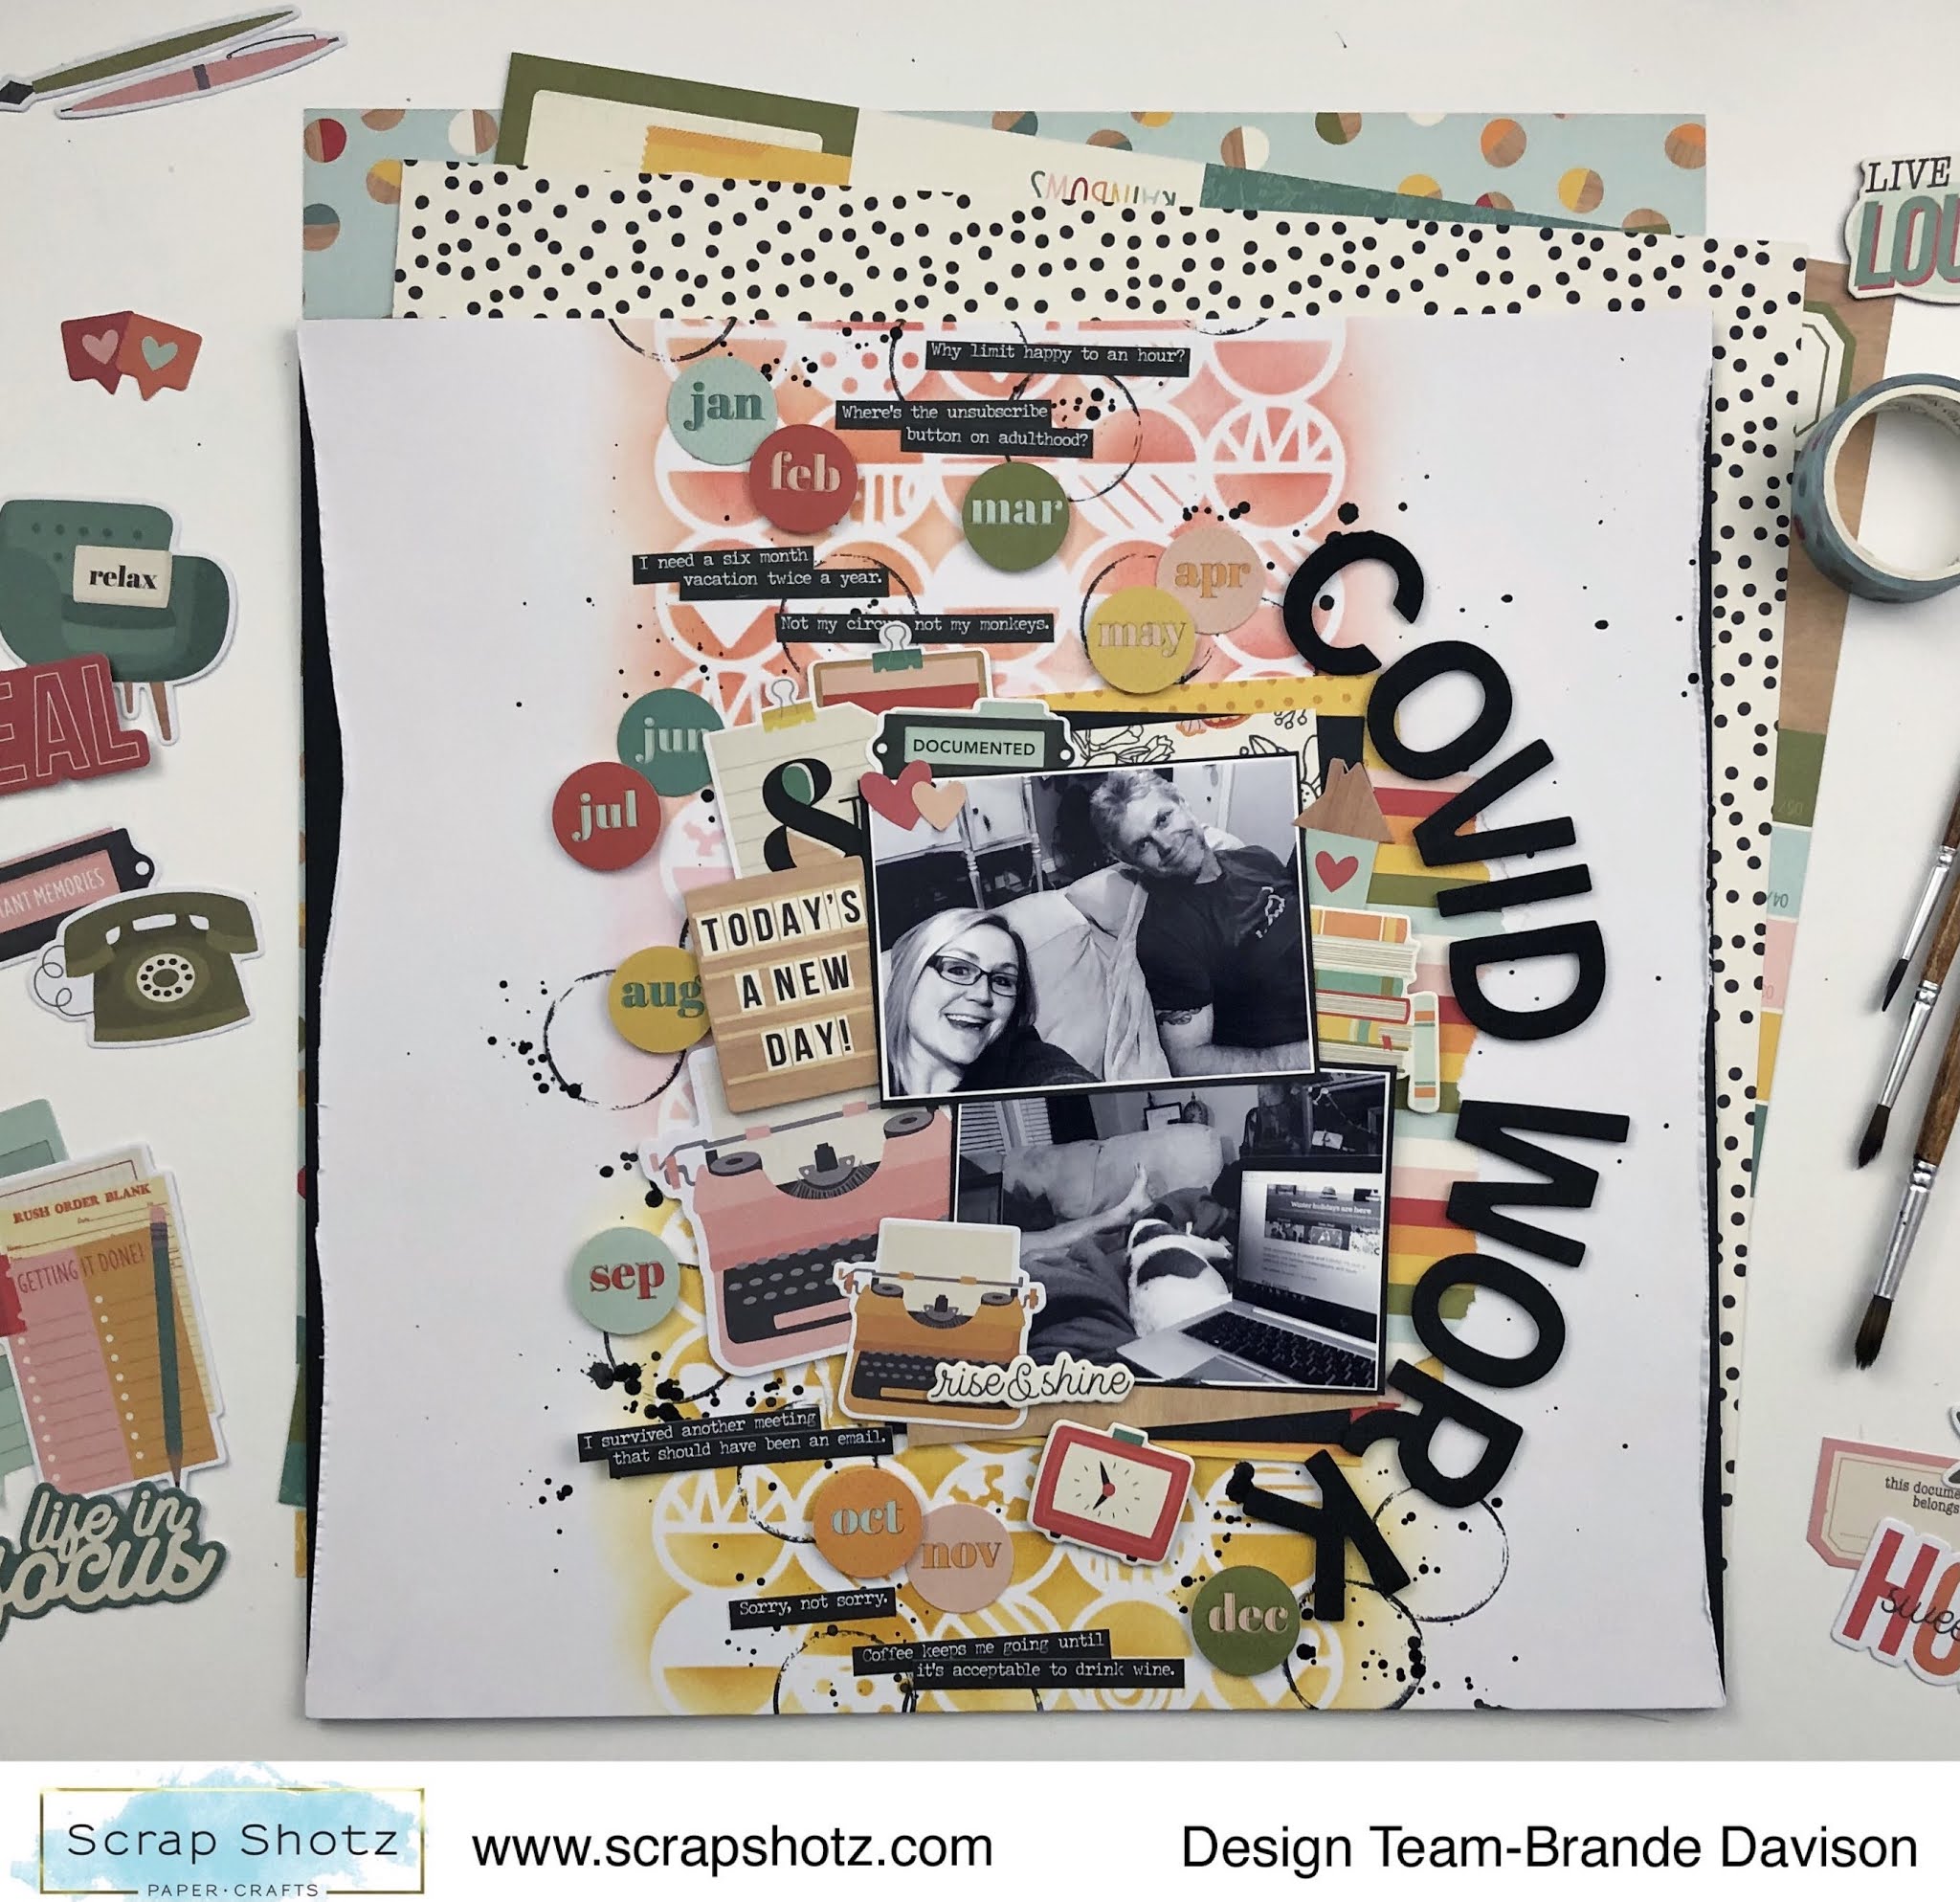
For this layout I was inspired by the die cut circles for each month in the collection! So cute! So I grabbed a circle stencil from my stash and used some Tim Holtz Distress Inks in matching colours to the collection and a Ranger Blending Tool to create a multi coloured background. 

From there it was a matter of playing with the circle die cuts and my photos to bring it all together. I used these bold black foam alphas from my stash and some cheeky Tim Holtz phrase stickers in black to bring a little drama to the page - I love the pops of black. 


Such a fun collection to play with. If you had the chance to grab some of these goodies from the shop, we would love to see your projects. Drop your project onto the Scrap Shotz Paper Crafting FaceBookGroup or tag is @scrapshotz on Instagram! 


Friday, June 26, 2020

Layouts with the May Kit - Bloom Street

Hello! Today I have two layouts to show you with the May Kit. This kit is fabulous!
It is full of Pink Paislee - Bloom Street. Pretty pastel colours fill the pattern papers. I'll be using every piece of this kit.

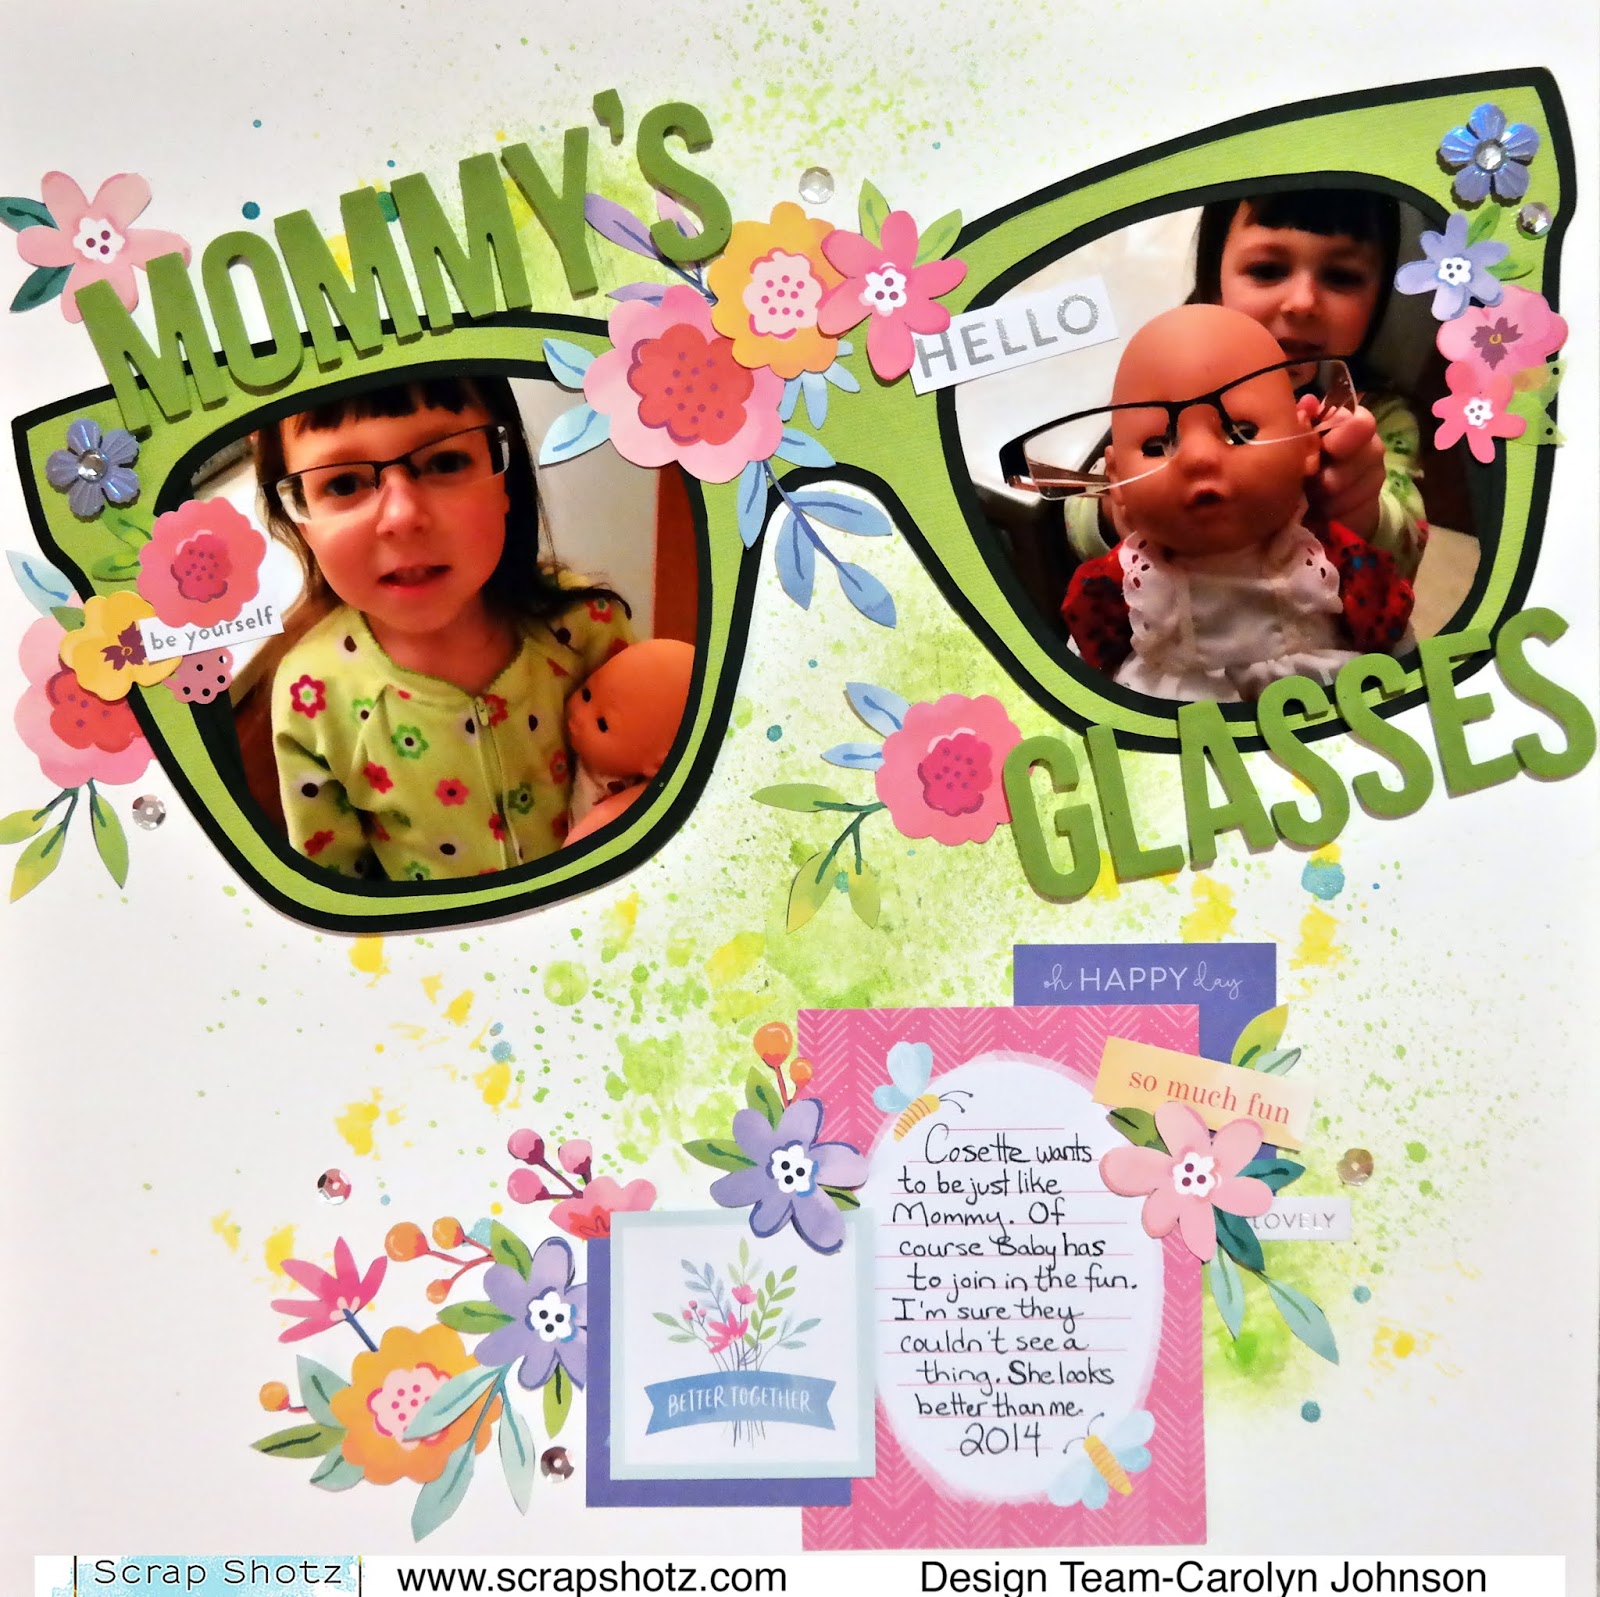
My first layout is of my daughter wearing my glasses. I cut a giant cut file of glasses using the Bazzill cardstock in the kit and some black from my stash. The green part is an inner offset of the outer black part. Then I fussy cut flowers like crazy from this paper.
The background I covered in gesso and then sprayed with green, yellow and blue Colorshine. The square cards come from the 2x2 paper pad. I layered them in some places. 
The title is made from foam Color Vibe Stickers by Simple Stories. The purple flower with a gem in the center is from the mixed embellishments pack. I used a pop dot to adhere it to the page which works really well.
I finished decorating the page with phrase stickers from the cardstock sticker sheet.
The journaling was done on a card from this sheet.
My second layout was inspired by the June sketch in the Creative Scrapbooker Magazine Facebook Group
Here is the sketch:
I followed the sketch really closely. I used a mixture of patterned papers but since I used butterflies on the base it only made sense to decorate with the Dimensional Butterfly Stickers. I tried to bend the wings so they would pop off the page. 
I love mixing fonts for a title. Here is an example:
That's all for me today. I'll be back on Monday with some more inspiration. Have a great weekend!

Friday, January 10, 2020

Kaisercraft Starry Night Layouts with the December Kit

Happy New Year everyone! Carolyn here today with 2 layouts using the December kit. I hope you found some time over the holidays to play with your kits. It is such a beauty!
For my first layout, I used the December sketch from the Creative Scrapbooker Magazine Sketchy Facebook group.
No photo description available.
The layout starts with a base of black and kraft Bazzill cardstock. I used a few 12 x 12 papers in the Kaisercraft Starry Night Collection. Lots of ephemera and wood veneer were used to decorate but the focus is definitely on the title. The chipboard is from the Southern Ridge Trading Company
 
I used gold paint on the words, antlers and sleigh accents. The reindeers are brown, the sleigh is Coppenhagen Blue and the blades are silver.
Here is a close-up of the ephemera and wood veneers. I love the dimension and pops of colour they provide. 
For the second layout, I used the Christmas Ornaments Cut Shoppe cut file with my Silhouette Cameo. It's a free file in their shop so go pick it up! I just used half the file with white cardstock as the base.
The background is white cardstock under grey Bazzill cardstock. I used a mixture of 6 x 6 Starry Night papers and 12 x 12 papers to back the cut file. The title is from the Good Tidings Thickers
The layout was finished with a splattering of white gesso.
That's a wrap! Thanks for checking out my layouts!

Monday, January 6, 2020

Wood Embellishments - Add Some Colour

Happy New Year! For those of you working this month to scrapbook all of your last month's memories - I am with you. While I do try and document daily in December, the actual scrapbooking in a traditional sense tends to happen in January and sometimes February too for me. I like drawing out the Christmas cheer a little longer!

I am currently playing with the Scrap Shotz December 2019 Scrapbook Kit which features the amazing collection from Kaisercraft called Starry Night. Wow, think blues and gold foil and beautiful. Included in the kit are a number of Bazzil Cardstock papers and one is called Stonehenge - think kraft married to the colour grey and then add some classic Bazzill texture - and I am totally crushing on this colour. So much so, it inspired this layout!


I was surrounded by the amazing gold foil papers of the Kit and still, it was the Stonehenge that caught my eye most. Funny! I love the soft tone of this colour (especially paired with a black and white photo) and how it really made the gold foil in the papers and die cuts from the Kit pop.

Loving the colour so much, I thought I would alter the wood veneers from the Kit with some paints from my stash to try and recreate it in my embellishments too. Queue Nuvo products! I reached for the Nuva Mica Mist, Antique Gold I had to get my hands on from the Scrap Shotz shop last month and started painting.


Tip: The benefit of wood veneer is that it is porous which means the colour you add from distress inks to Nuvo to watercolours to stamping pads will not look super bright on the first coat. Want a more subtle look like I did here - go with less (this is one coat). Want something a little brighter or bolder - use more paint or whatever product you are using to colour the wood veneer. 

To finish it all off - and is something I think I do on almost every Christmas inspired layout - I added some white acrylic paint splatters to give the layout some winter whimsy. 


I am working on a second layout now where I have painted numerous coats of the Nuvo Mica Mist on a chipboard embellishments to get a very, very gold colour and shine - once I have that little guy finished and its layout complete, I will be back here on the blog to share. 

Happy crafting! 


Monday, December 23, 2019

Starry Night Cards with the December Kit

Christmas is almost here so it's time to finish up those Christmas cards! The December kit is amazing! It is full of Kaisercraft - Starry Night products. So many fun embellishments from gold foil ephemera to twine to wood veneer. Let's take a look. I made 10 cards in the A2 size.

Card #1
I used a sketch from the October 2019 Page Maps collection. The Curio embellishments were the perfect fit. The papers are from the 6x6 paper pad. The paper pad has a bunch of punch out phrases and trimmings which came in very handy.

Card #2
I used a square punch to make the background from the 6x6 paper pad. The wood veneers fit into each sqaure and some gold paint topped them off. A piece of twine added a focal point.
Card #3
Twine, ephemera and some 6x6 papers.

Card #4
I fussy cut some gold foil flowers from a 6x6 paper. I used some ephemera to top it off. Those corner  pieces are actually the punch outs from one of the embellishments. I used some gold thread from my stash as well.
Card #5
Here I layered a bunch of 6x6 papers. The gold tag is so pretty and topped off with some twine and gold painted wood veneer. 
Card #6
Some more 6x6 papers, gold foil ephemera and twine. The gold dots are from the Thickers letter pack.
Card #7
I used some Stonehenge Bazzill cardstock and 6x6 papers. Wood veneer and gold thread finish it off. 
Card #8
This card uses some 6x6 papers and ephemera.
Card #9
This card uses Kraft Bazzill cardstock layered with 6x6 papers, ephemera and twine.

Card #10
My daughter really wanted to help with the cards so she helped with this one. She chose the papers. I suggested using a punch to back the tag in the center.

Thanks for taking a look! Have a wonderful holiday season! - Carolyn

Thursday, June 20, 2019

June Kit with the Creative Scrapbooker's Sketch

Hello! Carolyn here today with a 2 page layout using the June kit. The kit is full of Heidi Swapp "Wolf Pack" supplies. There are lots of nature themed papers so I pulled out my pictures from my trip to Yellowstone National Park. They also include pictures of my daughter's bear stuffie. There are lots of bear embellishments to highlight it. Then I used the June Creative Scrapbooker Magazine sketch. It's been awhile since I made a 2-pager!
Here is the sketch:
No photo description available.
Here is the first page a little closer:
Here is the second page a little closer:
I used my Silhouette Cameo to cut out the title and photo frames using the Bazzill Basics paper in the kit. The rest of the title is using the Thickers in the kit. The washi tape was a natural fit with the lines across the sketch. There are also some clear embellishments in the kit.
The kit has these fun puffy stickers. I also used the arrow cut-outs as photo corners.
I encourage you to give a 2-pager a try! There is so much fun stuff in the kit! I can't wait to see how everyone uses it this month!