Friday, November 29, 2019

Taylored Expressions| Poinsettia & Pine


Hello All! 

Rosie back with a couple more Taylored Expressions Christmas cards, featuring the Ponsettia and Pine stencil
First up is a card front stencilled with Nuvo Glacier Paste in Frostbite and the Ponsettia & Pine stencil over navy (admiral) bazzil card stock.


I taped the stencil to the back of the card stock to hold it in place while I applied the paste, then removed the stencil and set the card stock aside to dry.


Make sure you clean the stencil right away or at least place it in warm water until you can wash it off. The paste likes to stick to the stencil.

The sentiment is from the Taylored Expressions Simple Strips Christmas stamp set which is a genius stamp in combination with the coordinating die. It stamps 18 sentiments all at once which can then be die cut all at the same time with the matching die, such a time saver!!! 


I kept this card simple adding just the embossed sentiment strip and Autumn Red Nuvo Crystal Drops.


I inked white card stock with Iced Spruce Distress Oxide ink and then used my heat tool to dry it.
Next I inked the stencil with Evergreen Bough Distress Oxide ink. The pine boughs are cut out of glitter white card stock with the TE Pine Clippings die and adhered to the card front with liquid adhesive once it was dry.


A sentiment strip adhered with foam adhesive over the area the pine boughs are layered and a few Autumn Red Nuvo Crystal Drops complete the card. So easy to create different looks with one stencil!

Thanks for stopping by!


Thursday, November 28, 2019

Embrace Those Busy Patterned Papers

The November Scrapbook Kit featuring the Simple Stories, Winter Farmhouse collection has some fun and busy patterned paper! I love a busy pattern but once in a while I find them hard to work with - this month I am all about finding simpler ways to make the busy patterns in this collection work for me and loving it! 

If you have a magic machine (my name for any machine that can cut intricate designs on paper - magic), busy patterned paper is your best scrappy friend. Cut files backed with patterned paper look amazing! If your paper is super busy - choose files that have smaller windows or openings  (the sections you back) to show less of the busy and more of the cut file. Use a solid colour to cut the file will also help. I prefer white so it really pops off the page and contrasts fabulously with the patterns - giving the eye a place to rest. 

The Christmas Banners Background cut file from Cut To You offers a great balance between large and small openings making it a great way to showcase the simple and busiest patterned papers in this kit. Also, it’s just a really fabulous cut file! Check out how un-busy these busy patterns look now: 


I love how it turned out! The photo is of me as a little girl and clearly either I have or my family has stuck all of the Christmas present ribbons and bows on me as we opened presents - I probably did it to myself. The picture is pretty cute but wow, did you notice the couch I am sitting on? Speaking of busy patterns!  

Here are a few other ideas for embracing busy patterned papers in your projects: 
  • Add a thin layer of white Gesso over the page. This will make the colours more subtle and adds a mixed media element to your layout. 
  • Use patterned papers to mat your photos. The peek of the pattern behind your photo will really separate it from the background and draw the eye! Use a few different patterns to get that layered look. 
  • Instead of cutting patterned paper to the size you need  - rip it! Not only is this fun (and maybe a little adrenaline pumping if you only have a sheet or 2) it also looks fabulous. Bonus, the ripped edge will be white - giving the eye place to rest and break up all that busy pattern. 
  • Create a background image or design using small squares, triangles or circles of the patterned paper. A quilted heart using triangles of various patterned papers or a Christmas tree shape created with lots of small circles of the patterned papers. A quilt pattern, Christmas presents (oh with stitching for the ribbon), buildings, and more!
  • Cut the patterned paper in strips and use them like you would washi tape. Create a whole layout with these strips all down the page -  rip a few shorter than the others for a fun, washi tape look! 
If you still find your page is too busy (and I bet it's not), take a photo of your layout and see if you still think so when you see the layout in a photo. When we are creating we are just a couple of feet away from all the busy - preventing us from seeing the forest from the trees. I find taking a photo gives me an opportunity to see the project as if I had stepped back and I end up really liking it!  

Embrace the busy patterns - have fun, get crafty! 


Wednesday, November 27, 2019

Fluffy Friends Holiday & Pine Clippings

Hello Scrap Shotz Friends!

Rosie here to share the first couple of holiday cards using Taylored Expressions products.  

I've used the Fluffy Friends stamp set:


I stamped and die cut a bunch of images all at the same time, you can see by the stamp graphic above that this bear is actually sitting on a sled. I wanted to have him ride the die cut sled so I trimmed the sled portion off. All the images are coloured with Copic markers and I added shading to the sled with an E30 copic marker as well.

I inked the background with yellow, orange, red and navy dye inks from my stash with Taylored Expressions blender brushes.

I then adhered a white glitter card stock die cut hill from my stash, placing the sled on the downhill :).


I added the presents and birdie from the stamp set. The bear was holding a black string in the stamp so I added gold thread attached to the runners to cover that up. The sentiment is from the TE Simple Strips-Christmas stamp set. This coordinates with the Simple Strips die, and gives you 18 Christmas themed sentiments cut in a banner, perfectly sized for each sentiment. Pretty Pink Posh confetti adds some shine as a final touch.

Next up is the Pine Clippings die:


I created a frame around the centre inked portion of the card with silver card stock Pine Clippings die cuts. The centre was inked with Distress Oxide inks in Cracked Pistachio, Mowed Lawn and Lucky Clover. I then inked outside the centre portion with Evergreen Bough and brushed Perfect Pearls Perfect Pearl across the entire surface.

I then embossed the panel with the We R Memory Keepers Gemstone embossing folder. I stamped the Christmas Simple Strips on red card stock with embossing ink and heat embossed with white embossing powder, then cut with the coordinating die.


I finished the card off with Nuvo Glitter Drops in Ruby Slippers.

I'll be back in a few days with a couple more cards.

Thanks for stopping by!


Tuesday, November 26, 2019

November Scrapshotz Kit - SS Winter Farmhouse


Hello scrappers! Today I'm sharing a couple of layouts created with the November Scrapshotz kit featuring Simple Stories' Winter Farmhouse line.

This line is full of fun images, and I had a bunch of un-scrapped photos from a Christmas photo session that my son's family had a few years ago that were perfect for it. The line has lots of earthy neutrals with deep red and mint throughout. I loved the outdoorsy feel of it.

The title for the layout above was created from stickers in the kit. What great phrases for winter pics! The embellishments are chipboard stickers.
This layout was based on the Creative Scrapbooker November sketch. I don't believe I've ever put so many photos on a layout. What a great way to cascade them. I did have to stretch it into a 2-pager! The sketch is shown below.

Here is the title for the double page spread. I used the Thickers included with the kit and an old alpha set from my stash that kind of looked like it was cut out of a magazine. Appropriate for the page, don't you think?

Thanks for looking! I'll be back later this week with a couple more layouts with this fabulous kit!


Monday, November 25, 2019

Process Video: Winter Farmhouse, Dad's Hockey Rink

I am playing with the November Scrapbook Kit this month and loving it! This kit is a beauty and features loads of the amazing Simple Stories, Winter Farmhouse collection.

I am taking full advantage of having such a fun, winter and farmhouse themed collection to document winter and Christmas stories from our family farm. In this process video, I am documenting the homemade rink my dad makes every year for us 'kids' and our friends and family get together.


Here are a few still shots if you don't have a chance to check out my video - I recognize we are embarking on the busiest season of the year here but do think a cup of coffee and some scrapbooking YouTube would be a nice treat you (wink, wink):


I love how the vintage feel of this collection is encouraging me to tell the stories from years ago but there are enough cute elements to have a little fun with it too. A perfect balance! If you would like to see all the goodies I am playing with, check out the Unboxing Video.

Hope you have a chance to get crafty this week!


Saturday, November 16, 2019

November Scrapbook Kit - Unboxing Video


Hello! Have you had a chance to check out the November edition of our Monthly Scrapbook Kit?

This month's kit has loads of goodies from the Simple Stories, Winter Farmhouse collection - pattern papers, 12x12 sticker sheet, ephemera, washi, enamel dots and more. I am so excited to start playing. Before I took out the paper trimmer to get started, I filmed a quick unboxing to show you just how fabulous the kit is this month, check it out:


So fabulous right!? For more information on this kit, our monthly kit subscription and the great Add-ons each month, visit Scrap Shotz November 2019 Monthly Kit.

If you already receive our kits, pop over to the Scrap Shotz Shop and start one today, or receive any of the goodies from our Shop we would love to see what you create. Be sure to tag us @scrapshotz or use hashtag #scrapshotz so we can ohh and ahh at your fabulous creations!

Happy crafting - I am off to play!


Wednesday, November 13, 2019

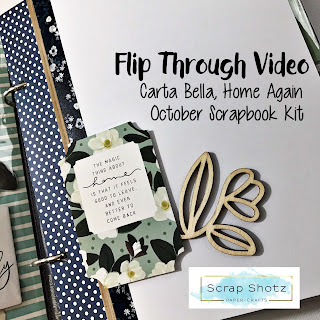
Carta Bella, Home Again - Mini Album Flip Through


Hello, hello! Brande here very excited to show you a flip through of the mini-album I am making with the Scrap Shotz October Kit - which features loads of pretty products from the Carta Bella, Home Again collection and some Jen Hadfield wood veneer goodies too! 

I have a whole bunch of black and white photos of my dad and his siblings when they were young and my grandparent's wedding and holidays that I have been waiting for the perfect collection to scrapbook. When the October kit showed up I found my collection. The Carta Bella collection, both in sentiment and colour palette, were instant ’heritage’ album inspiration! These photos are finally finding their mini-album home! 

Here is a quick flip through of my album:


If you can believe it, I still have loads of products from the Kit left to play with. I will make this album one of those go-to "easy projects" on the edge of my scrappy desk. I like having an "easy project" on the go for when I don’t have much time or my creative juices are running low - with how amazing this collection is to create with and how easy it is to scrap black and white photos, this one fits the "easy project" criteria all the way. 

Here are a few photos of my most favourite pages that are not in the page protectors - my lights when filming or photographing at night give an awful glare, these ones are glare-free for you. Check out the flip-through video above to see all the page protector and photo flip layouts too! 


The album I used for this project is a Simple Stories, SN@P 6x8 album available from Scrap Shotz. You can find the albums in a variety of colours in the Albums / Refills / Magazines section. 

Feels so amazing to get this project going - I cannot wait to show the family! 

Thanks for stopping by and happy crafting! 


Tuesday, November 12, 2019

November Monthly Scrapbook Kit| Winter Farmhouse

Our second last kit of 2019 features Simple Stories...

You'll receive 12 patterned papers, a 12x12 sticker sheet, 8 coordinating card stock, 1 washi tape (can add on a full pack), half pack of enamel dots (can add on to make a full pack), a deco clip, ephemera, Thickers and chipboard.

Lots of great winter-y papers in this one and also great colours and patterns that will work for just about any project.

Kit add ons are in the store and you can see them all HERE.  My personal favourite is this stencil:


Kits are on their way to the Design Team, their projects will be coming in the following week or so, in the meantime, here is some inspiration from the Simple Stories blog:


Stay tuned for the team's projects with this kit and the November product showcase!


Monday, November 11, 2019

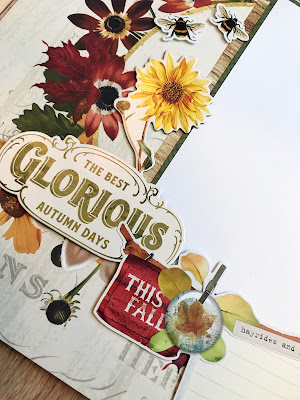
Simple Stories Autumn Splendor Layout Kit

Hello again! Karla back today with a look at the gorgeous Simple Stories Autumn Splendor Layout Kit! With this kit you'll receive the supplies and instructions to complete two double page layouts - that's four 12x12 pages!! The papers and stickers are beautiful and just perfect for documenting any fall memories.

You'll even get materials and instructions to create a bonus layout! You just provide the background cardstock piece.


The stickers and papers are beautifully layered - I think you could even frame these!


The florals on these two pages are so lovely, and the banner stickers are gorgeous!


You supply the adhesive and a trimmer. You can even ink the edges if desired, but it looks lovely either way.


I love that you can follow the instructions to quickly create so many layouts and get your fall photos in your albums.


You could easily save the instructions to create many more layouts using the design and instructions as a guide, but with different papers. Fun!


The stickers look so realistic!


Here's a look at the video where you can see everything up close!


Thanks so much for stopping by! Be sure to head over to the Scrap Shotz store and see all the new and fun goodies in the shop today! Have an awesome weekend friends.