Hello! I am again to show you another layout using our Scrap Shotz December 2019 Scrapbook Kit which features the amazing collection from Kaisercraft called Starry Night. This Kit is gold and blue perfection!
In one of my past posts, Wood Embellishments - Add Some Colour I showed you how I used some Nuva Mica Mist, Antique Gold to add a touch of colour to the wood veneers in the Kit - I love how this brought a touch of gold into all the page elements.
Today I am here to encourage you to add even more colour - so much so, you make the embellishments in your kits, your stash, your layouts, your cards SPARKLE!
To add sparkle to the "Believe" chipboard from the Southern Ridge Trading Company Chipboard, I used a paintbrush to dip deep into my bottle of Nuvo Mica Mist, Antique Gold to gather lots of the gold 'dust' and painted a number of coats. Probably about 3 in total but it took no time at all the as the paint dries really fast and was sparkly from the first application - I could have stopped at anytime but the chipboard is of great quality and did not bend or warp in any way so I kept adding and building up the sparkle.
The heart in the background is a cut file from The Cut Shoppe - the heart is full of speech bubbles and I filled each of these with pattern paper or the phrase cut apart paper from the Kit. I love Christmas sentiments especially when they are in gold. Originally I had the cut file in white cardstock but decided to paint the cardstock with some more of the Nuva Mica Mist, Antique Gold.
For the poinsettia embellishments, I fussy cut these from one of the Kit's pattern papers and used some of the swirly-doo accent pieces in the Collectables (die cuts) also from the Kit to create what I hope look like fancy gold leaves behind each flower.
I finished it all of by adhering it to one of the Bazzill Cardstock, Kraft papers in the kit I also .. surprise, surprise also added some of the Nuva Mica Mist, Antique Gold using the packaging smooshing technique and some splatters plus a few white acrylic paint splatters. I did mat the Kraft paper in a thin strip of white cardstock and a thin strip of the cut apart paper from the Kit too.
Thanks so much for swinging by today - hope your weekend is crafty!
Showing posts with label Starry Night. Show all posts
Friday, January 17, 2020
Monday, January 13, 2020
Embellishments - Inspired by Shape
Hello, hello - Brande here again with a little post all about how the shape of an embellishment inspired the design of my latest project for Scrap Shotz!
When flipping through all of the oh-so-pretty collectables of the Scrap Shotz December 2019 Scrapbook Kit I was really drawn to the gold and foil ornaments. I decided to play on the shape, the shine, and the texture of these ornaments for all my design decisions.
For the shape, I went through the goodies in the kit to find all the circles. In addition to the 3 ornaments - I found the 2 circle titles 'Season's Greetings' and 'Merry Christmas', wood veneer circles, the glass circle curios, and a gold die cut that resembled the shape of the wood veneer circles. Perfect! I also went through the papers and cut random circles out of any that felt especially pretty to me at that moment. Solid scrapbooker decision making at its best!
For the shine, I did a little simple packaging smoosh technique in the background with some Nuvo Mica Mist, Antique Gold from the Scrap Shotz shop. I also painted the wood veneer with the Antique Gold - compared to the foil on the papers and collectables, the wood veneer looked plain and I feel they had shine envy. (wink) I also took a little bit of Antique Gold on a paintbrush and rubbed the edges of each of the paper circles. Some splatters on the page with the Gold tied it all together.
For the texture, I was super keen to use the gold / white twine included in the kit. So I wrapped it loosely around and within the circles. This was super easy - I was able to hook it behind the ornaments that were popped up on foam and then go back and tack it down in a few spots with glue. For a little more texture I did use some Staz On Black to stamp some messy circles in the background and added some gold sequins and black enamel dots around the circles too - these last few items are from my stash.
I finished the layout off by matting the whole thing on some of the Bazzil Cardstock, Kraft in the kit (which I also used to mat my photo) and a few more Nuvo Mica Mist, Antique Gold splatters. My title is part of one of the branding strips from papers in the kit - love Kaisercraft for their branding strips. So useful!
Ever been inspired by an embellishment shape? Give it a go! If there are hearts in your kit - add way too many hearts (in a good way) all over your page or better yet, cluster your embellishments into a big background heart shape. If you are keen on florals - consider sketching and fussy cutting some black and white stems or leaves to tuck and peek from behind the florals of the kit you are working with. So many possibilities - embrace the shape ... and the shine, and the texture!
When flipping through all of the oh-so-pretty collectables of the Scrap Shotz December 2019 Scrapbook Kit I was really drawn to the gold and foil ornaments. I decided to play on the shape, the shine, and the texture of these ornaments for all my design decisions.
For the shape, I went through the goodies in the kit to find all the circles. In addition to the 3 ornaments - I found the 2 circle titles 'Season's Greetings' and 'Merry Christmas', wood veneer circles, the glass circle curios, and a gold die cut that resembled the shape of the wood veneer circles. Perfect! I also went through the papers and cut random circles out of any that felt especially pretty to me at that moment. Solid scrapbooker decision making at its best!
For the shine, I did a little simple packaging smoosh technique in the background with some Nuvo Mica Mist, Antique Gold from the Scrap Shotz shop. I also painted the wood veneer with the Antique Gold - compared to the foil on the papers and collectables, the wood veneer looked plain and I feel they had shine envy. (wink) I also took a little bit of Antique Gold on a paintbrush and rubbed the edges of each of the paper circles. Some splatters on the page with the Gold tied it all together.
For the texture, I was super keen to use the gold / white twine included in the kit. So I wrapped it loosely around and within the circles. This was super easy - I was able to hook it behind the ornaments that were popped up on foam and then go back and tack it down in a few spots with glue. For a little more texture I did use some Staz On Black to stamp some messy circles in the background and added some gold sequins and black enamel dots around the circles too - these last few items are from my stash.
I finished the layout off by matting the whole thing on some of the Bazzil Cardstock, Kraft in the kit (which I also used to mat my photo) and a few more Nuvo Mica Mist, Antique Gold splatters. My title is part of one of the branding strips from papers in the kit - love Kaisercraft for their branding strips. So useful!
Ever been inspired by an embellishment shape? Give it a go! If there are hearts in your kit - add way too many hearts (in a good way) all over your page or better yet, cluster your embellishments into a big background heart shape. If you are keen on florals - consider sketching and fussy cutting some black and white stems or leaves to tuck and peek from behind the florals of the kit you are working with. So many possibilities - embrace the shape ... and the shine, and the texture!
Friday, January 10, 2020
Kaisercraft Starry Night Layouts with the December Kit
Happy New Year everyone! Carolyn here today with 2 layouts using the December kit. I hope you found some time over the holidays to play with your kits. It is such a beauty!
For my first layout, I used the December sketch from the Creative Scrapbooker Magazine Sketchy Facebook group.

The layout starts with a base of black and kraft Bazzill cardstock. I used a few 12 x 12 papers in the Kaisercraft Starry Night Collection. Lots of ephemera and wood veneer were used to decorate but the focus is definitely on the title. The chipboard is from the Southern Ridge Trading Company.
I used gold paint on the words, antlers and sleigh accents. The reindeers are brown, the sleigh is Coppenhagen Blue and the blades are silver.
Here is a close-up of the ephemera and wood veneers. I love the dimension and pops of colour they provide.
For the second layout, I used the Christmas Ornaments Cut Shoppe cut file with my Silhouette Cameo. It's a free file in their shop so go pick it up! I just used half the file with white cardstock as the base.
The background is white cardstock under grey Bazzill cardstock. I used a mixture of 6 x 6 Starry Night papers and 12 x 12 papers to back the cut file. The title is from the Good Tidings Thickers.
The layout was finished with a splattering of white gesso.
That's a wrap! Thanks for checking out my layouts!
Wednesday, January 8, 2020
Christmas & New Years with the December Kit
Hello! Karla back today with two more layouts using the amazing December 2019 Kit featuring the gorgeous Kaisercraft Starry Night collection. This kit is seriously gorgeous and is packed with a ton of awesome supplies! Be sure to check back through the recent blog posts for inspiration and even a video walk through of this fabulous kit.
I really wanted to scrap my New Years pics and the gold foil and stars in this kit were calling to me to do just that!
I used the black Bazzill cardstock in the kit as my base and grabbed some Distress Oxide Inks, along with a Southern Ridge Soda Fizz Stencil and a Tim Holtz Star Stencil from my stash to add some inky fun! Distress Oxides look awesome on dark cardstocks. I used the Christmas Word Thickers to create a title - they are a fun Add-On you can pick up in the shop and they coordinate beautifully with this kit!
The pretty ephemera from the kit has lots of that lovely gold foil and added great detail to the layout. I stamped the 'Happy' sentiment using the Add-On Starry Night Acrylic Stamp Set and Emerald Creek Gold Doubloon Embossing Powder. The beautiful scripty Thickers Letter Stickers included in the kit layered over the bottom of the layout to create a subtitle. I snipped off a couple of the swirls from the ends of the letters and positioned them to create a hand written effect.
For us New Years is all about celebrating family and togetherness, and it was great to document these special photos!
For the next layout I scrapped some Santa pics using the Creative Scrapbooker Magazine January Sketchy Challenge. I cut some black cardstock into 3 1/2" squares and then layered them with various papers from the kit cut into 3" squares.
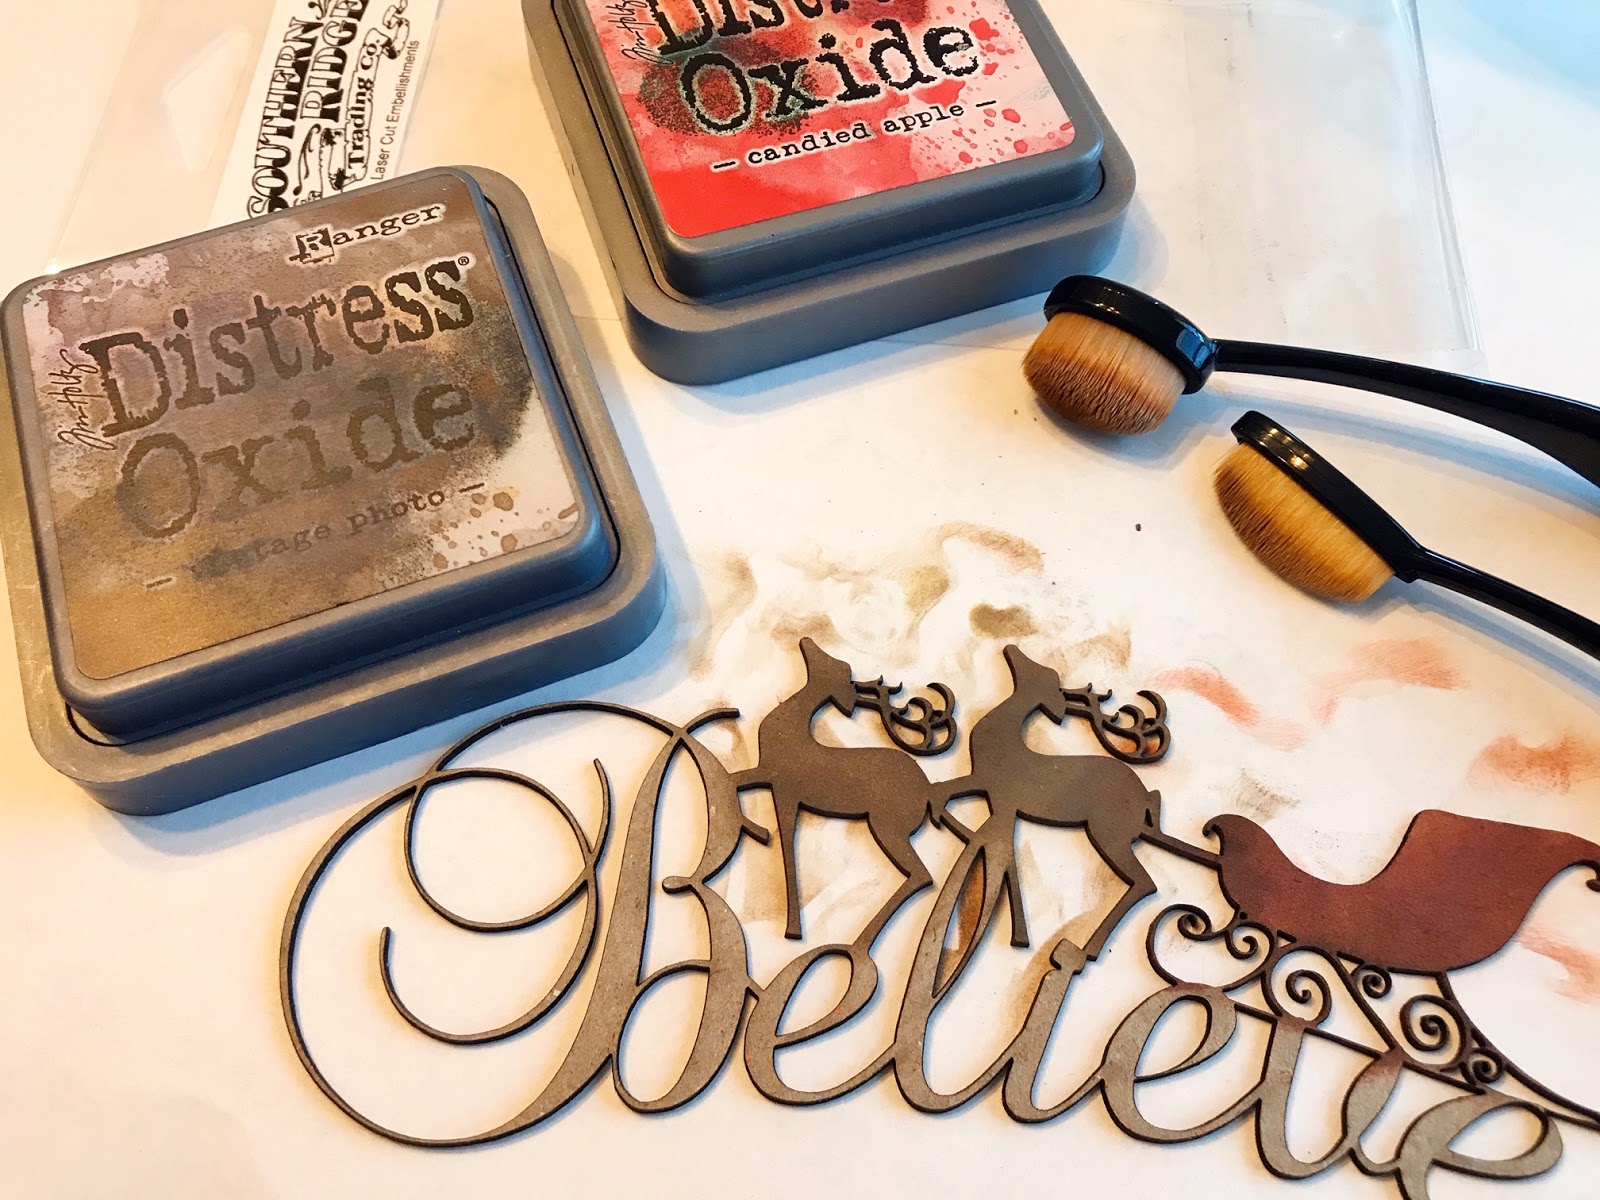
If you haven't worked with Southern Ridge Trading Company Chipboard before, you are in for a treat! There is a beautiful piece included in each of the December kits. Here I'm working with the Believe piece. This chipboard is so easy to customize or beautiful on it's own. I decided to brush on some Distress Oxide Inks to colour the reindeer and sleigh first.
Next, I sponged on some metallic Distress Paint from my stash on the scripty letters to match the gold colours in the kit.
After that dried I glued it to the center of the layout using some Art Glitter Glue - currently my favourite!! I even used the Distress Paint to paint the wood flourishes from the kit.
I used the Starry Night Acrylic Stamp Set Add-On to stamp Merry Christmas in a light grey ink using Krafty Kimmie's Granite Grey Krafty Kolours Ink onto the bottom of my journaling spot.
I then used the same set to stamp the poinsettia onto red cardstock and embossed with Gold Doubloon Embossing Powder. I will totally use this stamp over again and again - such a fast and beautiful way to embelllish cards and layouts!
Thanks so much for stopping by! Be sure to head over to the Scrap Shotz Store to check out this beautiful new KIT, and don't forget you can always find new goodies HERE. Have an amazing week my friends!
Monday, January 6, 2020
Wood Embellishments - Add Some Colour
Happy New Year! For those of you working this month to scrapbook all of your last month's memories - I am with you. While I do try and document daily in December, the actual scrapbooking in a traditional sense tends to happen in January and sometimes February too for me. I like drawing out the Christmas cheer a little longer!
I am currently playing with the Scrap Shotz December 2019 Scrapbook Kit which features the amazing collection from Kaisercraft called Starry Night. Wow, think blues and gold foil and beautiful. Included in the kit are a number of Bazzil Cardstock papers and one is called Stonehenge - think kraft married to the colour grey and then add some classic Bazzill texture - and I am totally crushing on this colour. So much so, it inspired this layout!
I was surrounded by the amazing gold foil papers of the Kit and still, it was the Stonehenge that caught my eye most. Funny! I love the soft tone of this colour (especially paired with a black and white photo) and how it really made the gold foil in the papers and die cuts from the Kit pop.
Loving the colour so much, I thought I would alter the wood veneers from the Kit with some paints from my stash to try and recreate it in my embellishments too. Queue Nuvo products! I reached for the Nuva Mica Mist, Antique Gold I had to get my hands on from the Scrap Shotz shop last month and started painting.
I am currently playing with the Scrap Shotz December 2019 Scrapbook Kit which features the amazing collection from Kaisercraft called Starry Night. Wow, think blues and gold foil and beautiful. Included in the kit are a number of Bazzil Cardstock papers and one is called Stonehenge - think kraft married to the colour grey and then add some classic Bazzill texture - and I am totally crushing on this colour. So much so, it inspired this layout!
I was surrounded by the amazing gold foil papers of the Kit and still, it was the Stonehenge that caught my eye most. Funny! I love the soft tone of this colour (especially paired with a black and white photo) and how it really made the gold foil in the papers and die cuts from the Kit pop.
Loving the colour so much, I thought I would alter the wood veneers from the Kit with some paints from my stash to try and recreate it in my embellishments too. Queue Nuvo products! I reached for the Nuva Mica Mist, Antique Gold I had to get my hands on from the Scrap Shotz shop last month and started painting.
Tip: The benefit of wood veneer is that it is porous which means the colour you add from distress inks to Nuvo to watercolours to stamping pads will not look super bright on the first coat. Want a more subtle look like I did here - go with less (this is one coat). Want something a little brighter or bolder - use more paint or whatever product you are using to colour the wood veneer.
To finish it all off - and is something I think I do on almost every Christmas inspired layout - I added some white acrylic paint splatters to give the layout some winter whimsy.
I am working on a second layout now where I have painted numerous coats of the Nuvo Mica Mist on a chipboard embellishments to get a very, very gold colour and shine - once I have that little guy finished and its layout complete, I will be back here on the blog to share.
Happy crafting!
Monday, December 30, 2019
Christmas Scrapbooking with the December Kit
Hello! Karla back today with two cute layouts using the awesome December 2019 Kit featuring the gorgeous Kaisercraft Starry Night collection. I love when the busyness of Christmas settles down and I can relax, get my photos out and enjoy scrapping all those wonderful pics and memories! For these two layouts I'm using some super adorable pics of my niece and nephew. We didn't get to see them in person over the holidays, but it was so nice to get photos and see cute videos of them opening their gifts. I love that the neutrals in this kit allow you to use any photos and add whatever colour you want! For my first layout I chose this sepia toned photo, which I knew would go perfectly with the pops of gold in the kit.
For the second layout I created I used the Starry Night Acrylic Stamp Set which is a coordinating add-on you can purchase in the shop. This is the first time I used Kaisercraft stamps and I was really impressed with the quality and how nicely they stamped! I wanted to focus on the bright outfits these two cuties were wearing, and I was really happy with how this turned out.
I started off by cutting a piece of the gold foiled poinsettia paper down to 10x10" and layering it on a piece of the black Bazzil cardstock included in the kit. I layered my photo (matted on white) on this black and gold bubbly paper. BTW, I can totally see using this for New Years too!
Next I glued down my matted photo and added a sentiment from the 12x12 sheet of sentiment cut aparts to the left of the layout. I cut one of the ephemera poinsettias included in the kit and added it to the top of the sentiment and then layered on one of the pretty round glass Curio embellishments to create a little cluster.
Next, I cut a tag and layered it above and below the photo and then cut apart a foiled gold ephemera swirl and added it to either side of the tag. The twine included in the kit was such a nice touch to add to the sweet bauble ornaments, and I added the rest of that poinsettia I cut near the top of the tag.
I added the 'love' sticker from the Christmas Word Thickers add on package under the photo and used a gold marker to colour in the wooden tree from the package of wood flourishes in the kit.
I finished off this layout with a wooden 25 coloured with an ink pad and some shiny sequins from my stash along with some handwritten journaling to document my memories!
For the second layout I created I used the Starry Night Acrylic Stamp Set which is a coordinating add-on you can purchase in the shop. This is the first time I used Kaisercraft stamps and I was really impressed with the quality and how nicely they stamped! I wanted to focus on the bright outfits these two cuties were wearing, and I was really happy with how this turned out.
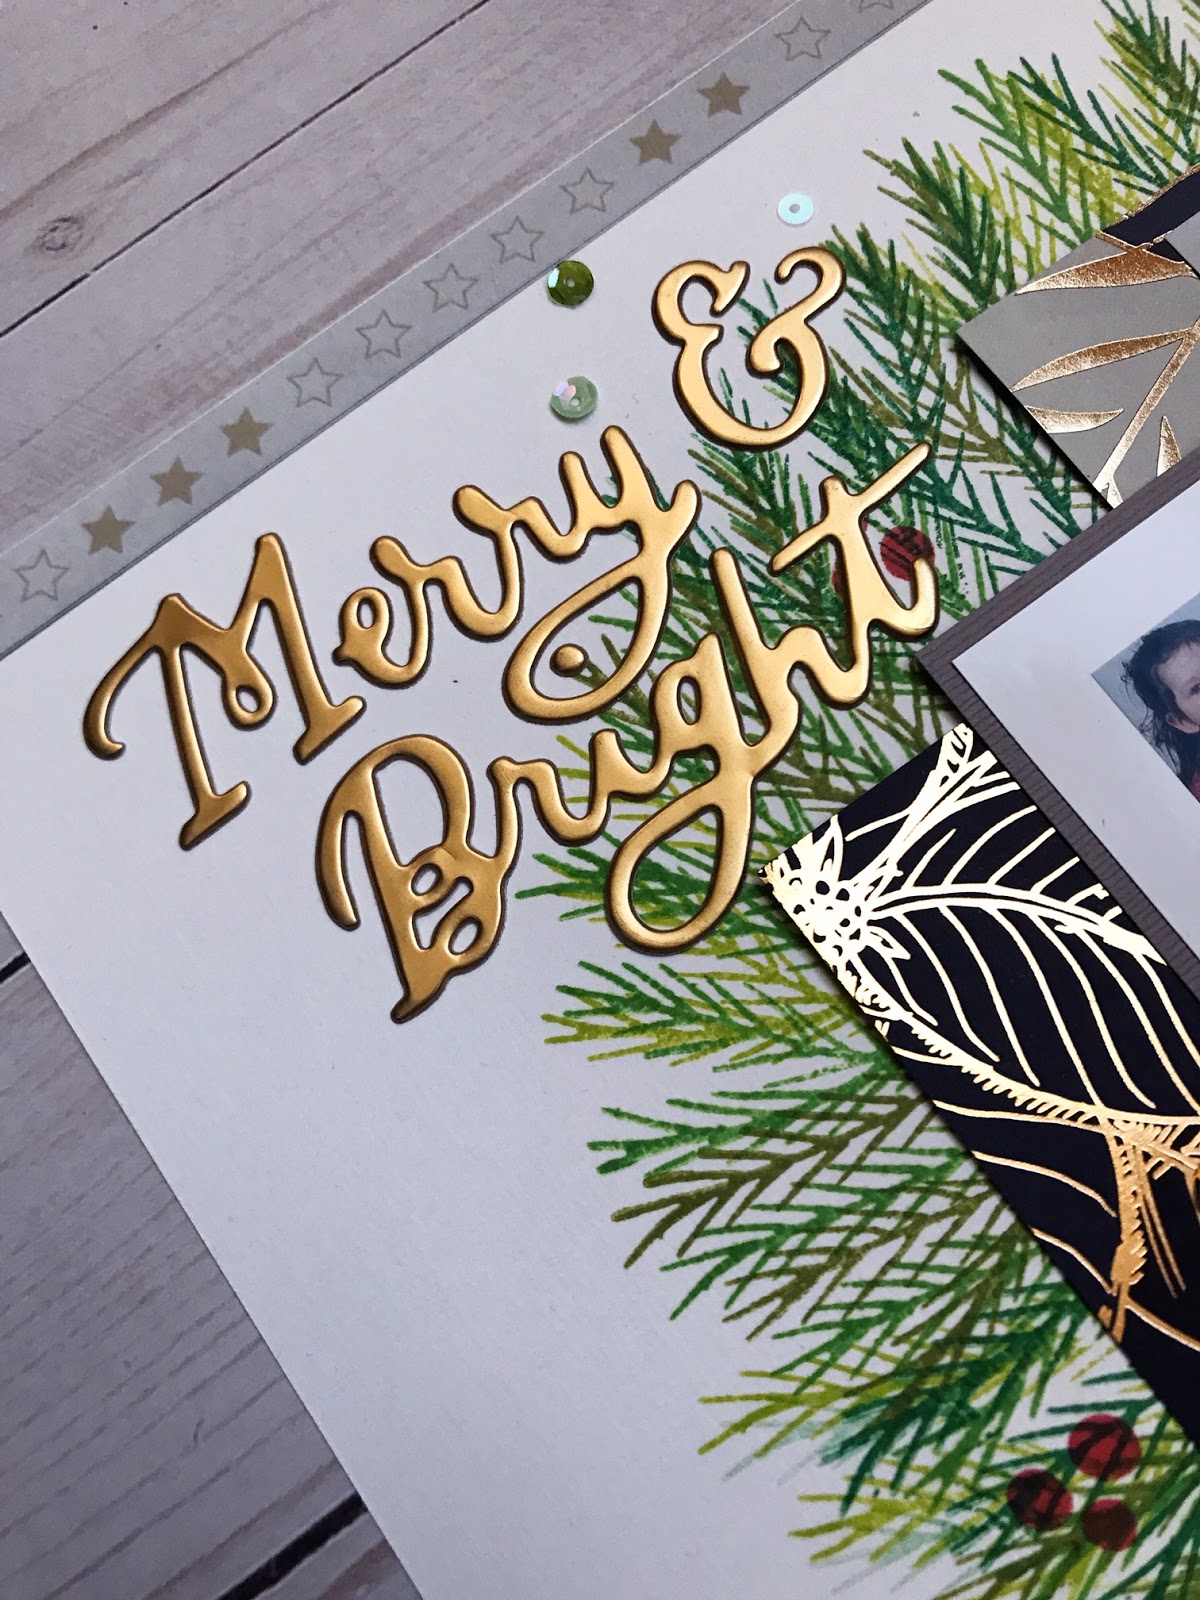
I started off by layering on two of the patterned branding strips on the top and bottom of a sheet of white Bazzil cardstock from the kit. I then added a strip of sweet gold foiled reindeer from the 12x12 paper full of cut apart border strips. I used a plate and pencil to create a round guide to start stamping my wreath on.
I stamped the evergreen bough stamp roughly around my circle using four different colours of green ink. It's not a perfect circle, but I was totally ok with that. This is handmade after all 😉 I honestly can't wait to use these stamps on some cards for next year too!
Next I used red ink to stamp just the berries from the holly stamp onto the wreath as well as stamp two trees directly on the cardstock. I did stamp on the side of the cardstock that was more smooth than textured and it worked beautifully! I created some basic paper layers with leftover scraps of my paper from the first layout and glued it to the center of the wreath.
I decided I needed one more accent for my wreath so I grabbed some pink and red inks and simply rubbed them on some white cardstock.
I stamped over the inked background with the poinsettia stamp and black ink creating a variegated look, which I love! I added some gold stone Nuvo drops to the center of the flower and tucked a banner in from the gold foiled ephemera pack.
I used the Christmas Word Thickers add on pack, which you can pick up separately in the shop, again to add a title and glued on some sequins from my stash.
I added a wooden tree from the wood flourishes pack in the kit, coloured with a red ink pad, and the gold holly leaves and berries from the Christmas Thickers pack.
If you missed it, you can find the December 2019 Kit Reveal Post HERE with VIDEO where you can see all these beautiful elements close up!
Thanks so much for stopping by! Be sure to head over to the Scrap Shotz Store to check out this beautiful new KIT, and don't forget you can always find new goodies HERE. Hope you all have a very Happy New Years and I'll be back in January for more fun projects using this kit!
Subscribe to:
Posts (Atom)