Hey Scrap Shotz Fans!
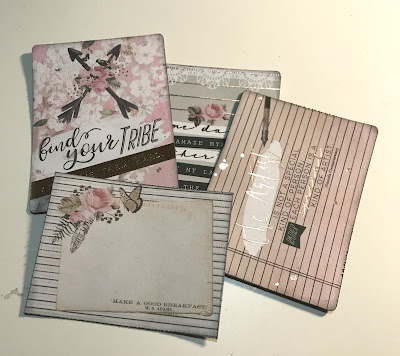
I'm excited to be back to share with you a few more projects which feature Prima Marketing's Amelia Rose Paper Collection. You can buy this collection as a kit from the store and it comes full of patterned paper, stickers, ephemera, flowers, journaling notecards and washi tape. Note, this is not part of our regular kit program.
The Amelia Rose journaling notecards are full of inspirational quotes which were the focal points for my two projects today. For my first project, I created this pretty "Find Your Tribe" tag. Read below as I have a full tutorial below so that you can recreate it at home.
To start, pull out one of the Tim Holtz Etcetera - Small Tag.
Trace the tag around a patterned paper piece as well as the ring for the top of the tag. Cut both traced pieces out. Distress the edges of the tag piece. Ink the edges of both pieces using Black Soot Distress Ink and a blending tool with foam.
Next, you'll need to cut a patterned paper piece that measures 4 3/4" x 7 3/4". Lay a dotted stencil over top of the top left corner of the paper. Using a palette knife, apply texture paste through the stencil. Repeat the previous two steps, but this time, lay the stencil in the bottom right corner of the patterned paper piece.
With the texture paste dry, rub Rose Gold Wax over top of the stenciled dots. On the bottom portion of the paper, choose a spot and tear the paper up. In the top portion of the paper, choose a spot and tear the paper down. Distress the edges of the paper. Ink the edges of the paper using Black Soot Distress Ink and a blending tool with foam.
You'll need to cut two other patterned paper pieces. One piece will measure 5 1/4" x 8 1/4" and the second piece will measure 5" x 8". Distress the edges. Ink the edges of the two patterned paper pieces using Black Soot Distress Ink and a blending tool with foam.
Choose three tickets. Distress the edges. Ink the edges of the tickets using Black Soot Distress Ink and a blending tool with foam.
From the journaling notecards, you'll need to take out four notecards. All will stay the same size, except the notecard with the postcard, you'll need to cut that one down to 2 5/8" x 3 3/4". Distress the edges. Ink the edges of all the pieces using Black Soot Distress Ink and a blending tool with foam.
From the white dot patterned paper, you'll need to cut a piece that measures 4" x 5 1/2". Cut a piece from the grid patterned paper that measures 3 1/4" x 4 1/4". Choose two borders from the bottom of the patterned papers. Cut one border to 4 3/4". Cut the second border to 4 1/2". Distress the edges of all pieces. Ink the edges of all the pieces using Black Soot Distress Ink and a blending tool with foam.
From the patterned paper with the butterflies and feathers, fussy cut two butterflies and one feather. Ink the edges of the images using Black Soot Distress Ink and a blending tool with foam.
From the floral paper, fussy cut out four single flowers and one flower bunch with a feather in it. Ink the edges of the images using Black Soot Distress Ink and a blending tool with foam.
Choose two large pink flowers, eight pink roses, four cream roses and eight black roses.
From the ephemera package, pick out the pink ruler, the clock and two arrows.
Now it's time to assemble your tag.
Adhere the tag patterned paper piece to the tag. Adhere the top of the tag patterned piece to the top of the tag piece. Adhere the top of the tag piece to the top of the tag.
Adhere the 5 1/4" patterned paper piece to the tag. Adhere the 5" patterned paper piece to the 5 1/4" patterned paper piece. Adhere the 4 3/4" patterned paper piece to the 5" patterned paper piece.
Adhere one of the tickets 1" from the top of the patterned papers. Foams square the white dot patterned piece slightly underneath the ticket. Adhere another ticket 1 1/8" from the right of the white dot patterned paper.
Foam square one of the notecards on the bottom left hand side of the white dot paper. Adhere the second notecard to slightly underneath the ticket on the white dot paper. Foam square the third notecard slightly over top of the first two cards on the right hand side of the tag.
Adhere the "Find Your Tribe" notecard to the grid patterned paper. Adhere the third ticket to left hand side of the tag where the notecard is. Foam square the "Find Your Tribe" notecard to the center of the white dot paper.
Adhere the two borders and the ruler border underneath the "Find Your Tribe" sentiment. Off setting them as desired.
In the bottom left hand corner, adhere the clock, one large pink flower, four black roses, two cream roses and four pink roses. On the right hand side of the sentiment, adhere the arrow.
In the top right hand corner, adhere one large pink flower, four black roses, four pink roses and two cream roses.
In the top left hand corner, adhere the fussy cut flowers, butterflies and feather. Use foam squares where desired.
To finish the top of your tag, add a pink ribbon bow.
Here are a few closeup shots of the finished tag.
Here's the finished "Find Your Tribe" Tag.
For my last project, I created this quick but pretty card using the scrap patterned paper pieces that I had.
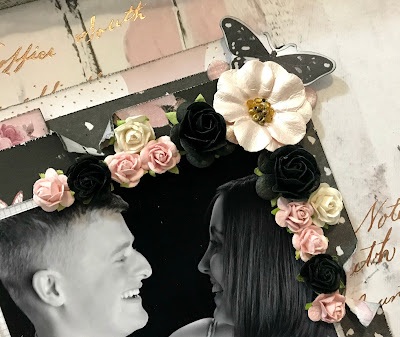
Once I adhered the inspirational notecard on the card, I layered in amongst the flowers different images. Once the flowers and images where adhered, I added in a few sparkly rhinestones.
In the top right hand corner, I kept it light by just using flowers. Once the flowers had been adhered, I added in a few of the sparkly rhinestones. To give some character on the right hand side of the card, I tore part of the paper.
Here's the finished card with all the elements.
Scrap Shotz Supplies Used:
Other Supplies Used:
- Roses
- Dot Stencil
- Art Alchmey Metallique Wax: Rose Gold
Make sure to stop by the blog on as the Design Team has a lot more inspiration to share with you this month.
Thanks for joining me today!


