Showing posts with label alcohol inks. Show all posts

Thursday, May 31, 2018

Alcohol Inks and Foils

Alcohol inks continue to be popular and I can understand why! You can make beautiful backgrounds in minutes, each unique and stunning. Adding some foil takes the alcohol inks to another level.

Check out the card I made below -  I followed the video by Kelly Latevola. What I found in my house, the alcohol inks were tacky, not wet and the foils adhered beautifully after waiting 2-3 minutes.


Here is a close-up - and I will never get tired of the WRMK Next Gen Embossing Folders - amazing!


What I love about alcohol inks is that it is so easy to find new colour combinations - I am loving teals and butterscotch these days!


Here is another card using the WRMK Next Gen embossing folders. With this color combination, I cut up a cover plate die and mounted it on the alcohol background - it just popped!


 If you haven't tried alcohol inks, I encourage you to give it a go; if you have them in your stash, dig them out!


Monday, May 7, 2018

Product Reveal: Alcohol Inks

What's old is new again and that's what alcohol inks are for me! For the following pictures, I have used the Ranger alcohol inks and Tim Holtz blending solution. Let me share a few fun experiments with you!

Below, I was learning how the inks moved on the Yupo paper - can you tell I loved it? Every background is unique and filled with texture. I will be experimenting with texture even more this week (stay tuned!) Layered on top of the alcohol ink background is a Penny Black Christmas die.


Next I wanted to challenge myself to use colours I would not normally use: green, orange and yellow. Well, can I just say how much I love this color combo :-) I could not resist using the inlaid and stacked die cut technique with the Altenew half tone Hello die.


Lastly, I wanted to try adding texture to the alcohol ink background. For this background, I added some of the Ranger metallic mixatives and gently splashed some blending solution on the background. When it dried, I added some Pretty Pink Posh gems.

When I looked at the background, it reminded me of the ocean. Hence, the super cute mermaid by Honeybee! The mermaid is heavily coated in clear Wink of Stella. In real life, this mermaid has layers and layers of glitter!


A close up of the alcohol ink background...


I hope I have inspired you to try your alcohol inks. Watch next week for some more fun techniques to try.


Wednesday, March 28, 2018

New Prooducts!!

Happy Wednesday!! Cathy here to share a couple of projects featuring all new supplies that you can get right here from Scrap Shotz
My first project features some of the new Tim Holtz Thinlits! Don't even think about it, just add them to your must have list! These are the perfect size for your traveler's journals! 

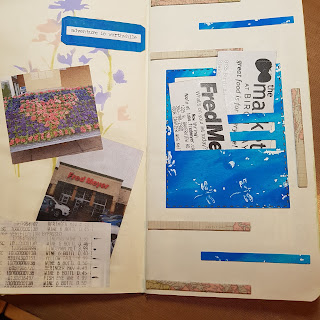
I've started a journal for my mini get away I had in February. The TH Stitched Slots die is perfect for adding more spots to tuck in your keepsakes.


I used some paper from my TH stash and glued it to some cardstock so the pocket would be sturdier.

I do not have a sewing machine to stitch, so I just used a black marker to emphasize the stitch marks. I did use a fine tip pen so the nib fit right in the stitches.

I cut mine out so the bottom part showed the map that shows the Canada/US border on the side I live on. My little getaway was just across the border into Washington.  At the top of the page I used the Tim Holtz Thinlits Shadow Script #1 for my word.
In the first stitched slot I slid in a pic from our first stop and a tag with a description of where we were and what we were up to on the first stop.


 A quick word of advice, don't throw out the little slot pieces that get cut out! I've used them on the next page.

On my second page I used the little cut out parts as embellishments. They'd make a great page border too!

This little label in blue is also from the Stitched Slots set. Perfect for adding a title or words and make them stand out a bit.

For my second project I used the Sizzix Textured Impressions 3-D Bohemian Botanicals. All I can say is WOW!! I found a piece of thin metal in my stash and decided to use that to emboss.

This folder is gorgeous!

Look how amazing the metal looks with the 3-D embossing! When using one of these 3-D folders with your Big Shot, use only 1 cutting plate. The folder itself is very thick.

To add my colour I used alcohol ink and touch of blending solution.
Once I was done with the inks, I loved how it looked just as it was. So I used a canvas board for the background and did all the edges using the glorious Baked Texture Embossing Powders.On my project I used Ancient Amber, Patina Oxed and Rocky Road.


And here a few close ups of the texture from the embossing powder and the alcohol inked 3-D embossing folder.


And the finished project!


Such amazing products just in at Scrap Shotz! You'll want to get your order in for these great tools for creating!

Thanks for supporting Scrap Shotz and our fantastic Design Team! Stay tuned because the April Kit is going to be released soon!!