Showing posts with label Paige Taylor Evans. Show all posts

Monday, November 18, 2024

Paige Evans - Adventurous

Hello! Have you had a chance to check out the Adventurous Collection from Paige Evans in the Scrap Shotz shop? Such fun! 

This collection is full of the colour and whimsy that Paige Evans is so great at - no one does patterns like Paige does. While this might be a ‘travel collection’ it is perfect for so much more. The embellishments, sentiments and patterns are also perfect for those everyday adventures in our lives. 

Cut Apart Tags


For my first layout, I reached for the pattern paper with the cut apart tags to create one of my go-to designs. I love how the tags give you a great way to showcase so many of a collection’s patterns and colours, and each tag is like a little anchor so I can load up on embellishments! 

I started with the grid pattern paper (great way to make sure your tags line up straight) and added 8 tags from the cut apart in a grid. Outlining each tag with a white journaling pen and splattering it all with white paint. 


I printed 4 of my photos in 2x3 and, after adding  a couple of layers of pattern paper behind each, dropped them onto each of the top layers of tags. Then I printed the photo of me and the hubby in 3x4 as my feature. This one I backed with a few pattern papers and placed it horizontal on the bottom row of tags. 


I finished the page off tucking in a bunch of the Cardboard Stickers, and Puffy Thickers. The title is from the collection’s Puffy Phrase Stickers. I love using a combo of different fonts. 


Another Grid Go-To 

For my next layout I leaned into another of my go-to designs. With Paige Evans collections you want to show off as many patterns as possible and this one does the trick. 


I started with a dark woodgrain from my stash and splattered it with slightly watered down white acrylic paint. Setting that aside to dry, I grabbed 3 different patterns and cut them down to about 9 by 7 (enough width and height to frame 4 3x4 picture or journal cards). I outlined each layer in white journal pen and then dropped them middle of my background with a different tilt to each to show off each pattern. 


From there, I printed 3 3x4 photos and backed each with a few more patterns (which I also outlined in a white journal pen). I left the 4th spot without a photo and just a pattern paper in 3x4 so I would have a place to anchor some embellishments from  the Cardboard Stickers, and Puffy Thickers and the title from collection’s Puffy Phrase Stickers


Piece It Together 

For my third project with the Adventurous collection, I reached for all the embellishments and papers featuring that fantastic green and blue! 


I love creating a background using fun angled pieces - like a puzzle. The trick for me is to create a puzzle pattern where each piece fits perfectly and then slice a thin amount of each side so the white background shows through. Really make the colours pop! I added a few splatters with white paint and outlined each piece in white journalling pen as well.  


Once I had my background prepped, I dropped a couple photos in the middle (each backed with a few pattern papers first. I played for a bit with some other green and blue embellishes until I landed on these fun tags from the cut apart patterned papers. 

The title is from the collection’s Puffy Phrase Stickers and I tucked in a few of the  Puffy Thickers in as well.  

Such a fun collection - off to play some more! 


Monday, December 11, 2023

Sugarplum Wishes for Christmas

Just 13 sleeps to Christmas and I am feeling inspired to scrapbook some past Christmas memories. So I reached for the Paige Evan’s, Sugarplum Wishes  that arrived in happy mail from Scrap Shotz and had some fun! So many bright patterns and the embellishments are such fun. 

Go Busy or Go Home 

For this first layout, I wanted to use all the patterns and embellishments - go all out with way too much, in a good way. A great way to keep a busy page  focused is by using a single big feature - in this case I reached for a Peartree Cutfiles cutfile. The large, white cutfile on the page breaks up the busy patterns. So you can use them all but not worry about it being too much. 

For this layout, I first backed the cutfile with a few of the fun patterns from the Collection. Then I used the cut apart tags from one of the pattern papers to anchor my small black and white photos beside the cutfile. 

From there, I tucked in a few of the embellishments in and around the tags. I finished the page off with a little ripped feature at the top right of the layout and some Nuvo Crystal Drops in Snow White. 

Make Your Own Background

Loving the look of the bright Paige Evan’s pattern papers combined with a cutfile - I reached for another Peartree Cutfiles cutfile to inspire my page design. 


After backing the cutfile with a number of the amazing pattern papers, I realize of I had created a bit of a colour theme for the page - so I ran with it! Pink, red, dark green and lime for this layout. 

For my background I used a 12x12 Completely Dotty stencil from Peartree Cutfiles. I simply used a sponge dauber and Ranger Ink, Distress Ink in Barn Door, Victorian Velvet, Twisted Citron, and Pine Needles and rubbed them each in random across the stencil allowing some to blend here and there. I added a few splatters of each ink as well. To do this, smoosh some of the ink from the ink pad on some plastic and add a couple spritz of water - then flick over the page with a paint brush. I love how it turned out! 


From there, I added my three photos in black and white below the file (each backed with a coordinating pattern paper or two) and then picked a bunch of the Sugarplum Wishes die cuts and stickers in the layout colour theme. 

Full disclosure, I am also Design Team member for Peartree Cutfiles. The cutfiles featured here are from their exclusive December Advent subscription from year’s past. Such fun to play with. 

Are you scrapping this December or maybe December past? Do you create a December Album each year? Well, if looking for bright and fun design  - reach for Sugarplum Wishes! 

Happy Holidays! 


Sunday, January 8, 2023

November Kit Catch Up, Garden Shoppe by Paige Taylor Evans


Happy new year everyone! Cold and rainy days here in West Coast Canada has me reaching for the brightest kits in my stash … well hello November Kit featuring Paige Taylor Evans, Garden Shoppe! All the colours of the rainbow, fun patterns, cute embellishments and more.

I decided to pair all my November kit layouts with a cutfile from Peartree Cutfiles. I cut the files in Bazzill Basics Paper, Avalanche and love how the bright white makes the colours of the kit pop even more! 

Hot Air Balloons 

I started this layout by backing the Peartree Cutfile A Sky Full of Balloons with a bunch of different papers from the Kit - a chance to showcase all the great patterns. I backed the clouds with Lawn Fawn Pearlescent Vellum. I popped it all up on foam dots and put it on this fun minimalist polka dot pattern. 

From there I added a couple of photos to the right, backed with a few layers of pattern paper and some embellishments. The pattern balloons were doing so much design work there wasn’t any pressure to add too much. I added a few phrases on the top left, a strip of pattern on the top and bottom, and a few little bees here and there. 

Hello You 


For my next layout, I reached for the farm inspired elements in the Kit and the Peartree Cutfiles Hello You file. I had these photos from a petting zoo where the animals were pressing their faces out of the fence looking for treats and the Hello You seemed a perfect title. 

I really liked the green plaid pattern for this one. I ripped it in half and paired it with the coordinating Bazzill Basics Paper in the Kit in that great mustard colour. I backed the ‘You’ in the cutfile with the dark floral pattern paper from the Kit then popped the title up on the green plaid. I first added a few splatters to the paper with some watered down Ebony Black Nuvo Crystal Drops


Before I added my photos to the cardstock along the broom of the page I stamped ‘photo op’ over and over using Star On in Black. The animals looked like there were trying to get in the photo so seemed fitting! I finished off with some embellishments here and there. 

Florals for the Win


For this layout, I was inspired by all the leaves in the Kit so grabbed this awesome pattern and reached for a Vicki Boutin Color Study Hello and Vicki Boutin Sweet Rush Sunshine stamp set. I stamped a cascade of flowers and leaves down the left side balanced with a couple on the right. I used the same floral stamp and some fussy cutting scissors to make matching embellishments. 


I cut a bunch of the Peartree Cutfiles Leafy Outlines so I could pair a couple of these with the leaves from the Kit with each of the floral embellishments. Before adhering things down, I added some Ebony Black splatters using watered down Nuvo Crystal Drops

I added two 2x3 photos of our pup walking in the leaves - was feeling the autumn vibes on this one - and a bunch of the gold puffy hearts peeking around the flowers. 

Tag us on Instagram or drop your creations in our Scrap Shotz Paper Crafting Group on Facebook so we can ohh and ahh. 


Monday, December 19, 2022

Garden Shoppe November Kit Layouts

 Today I have two layouts using the fabulous November kit featuring the Paige Evans "Garden Shoppe" Collection


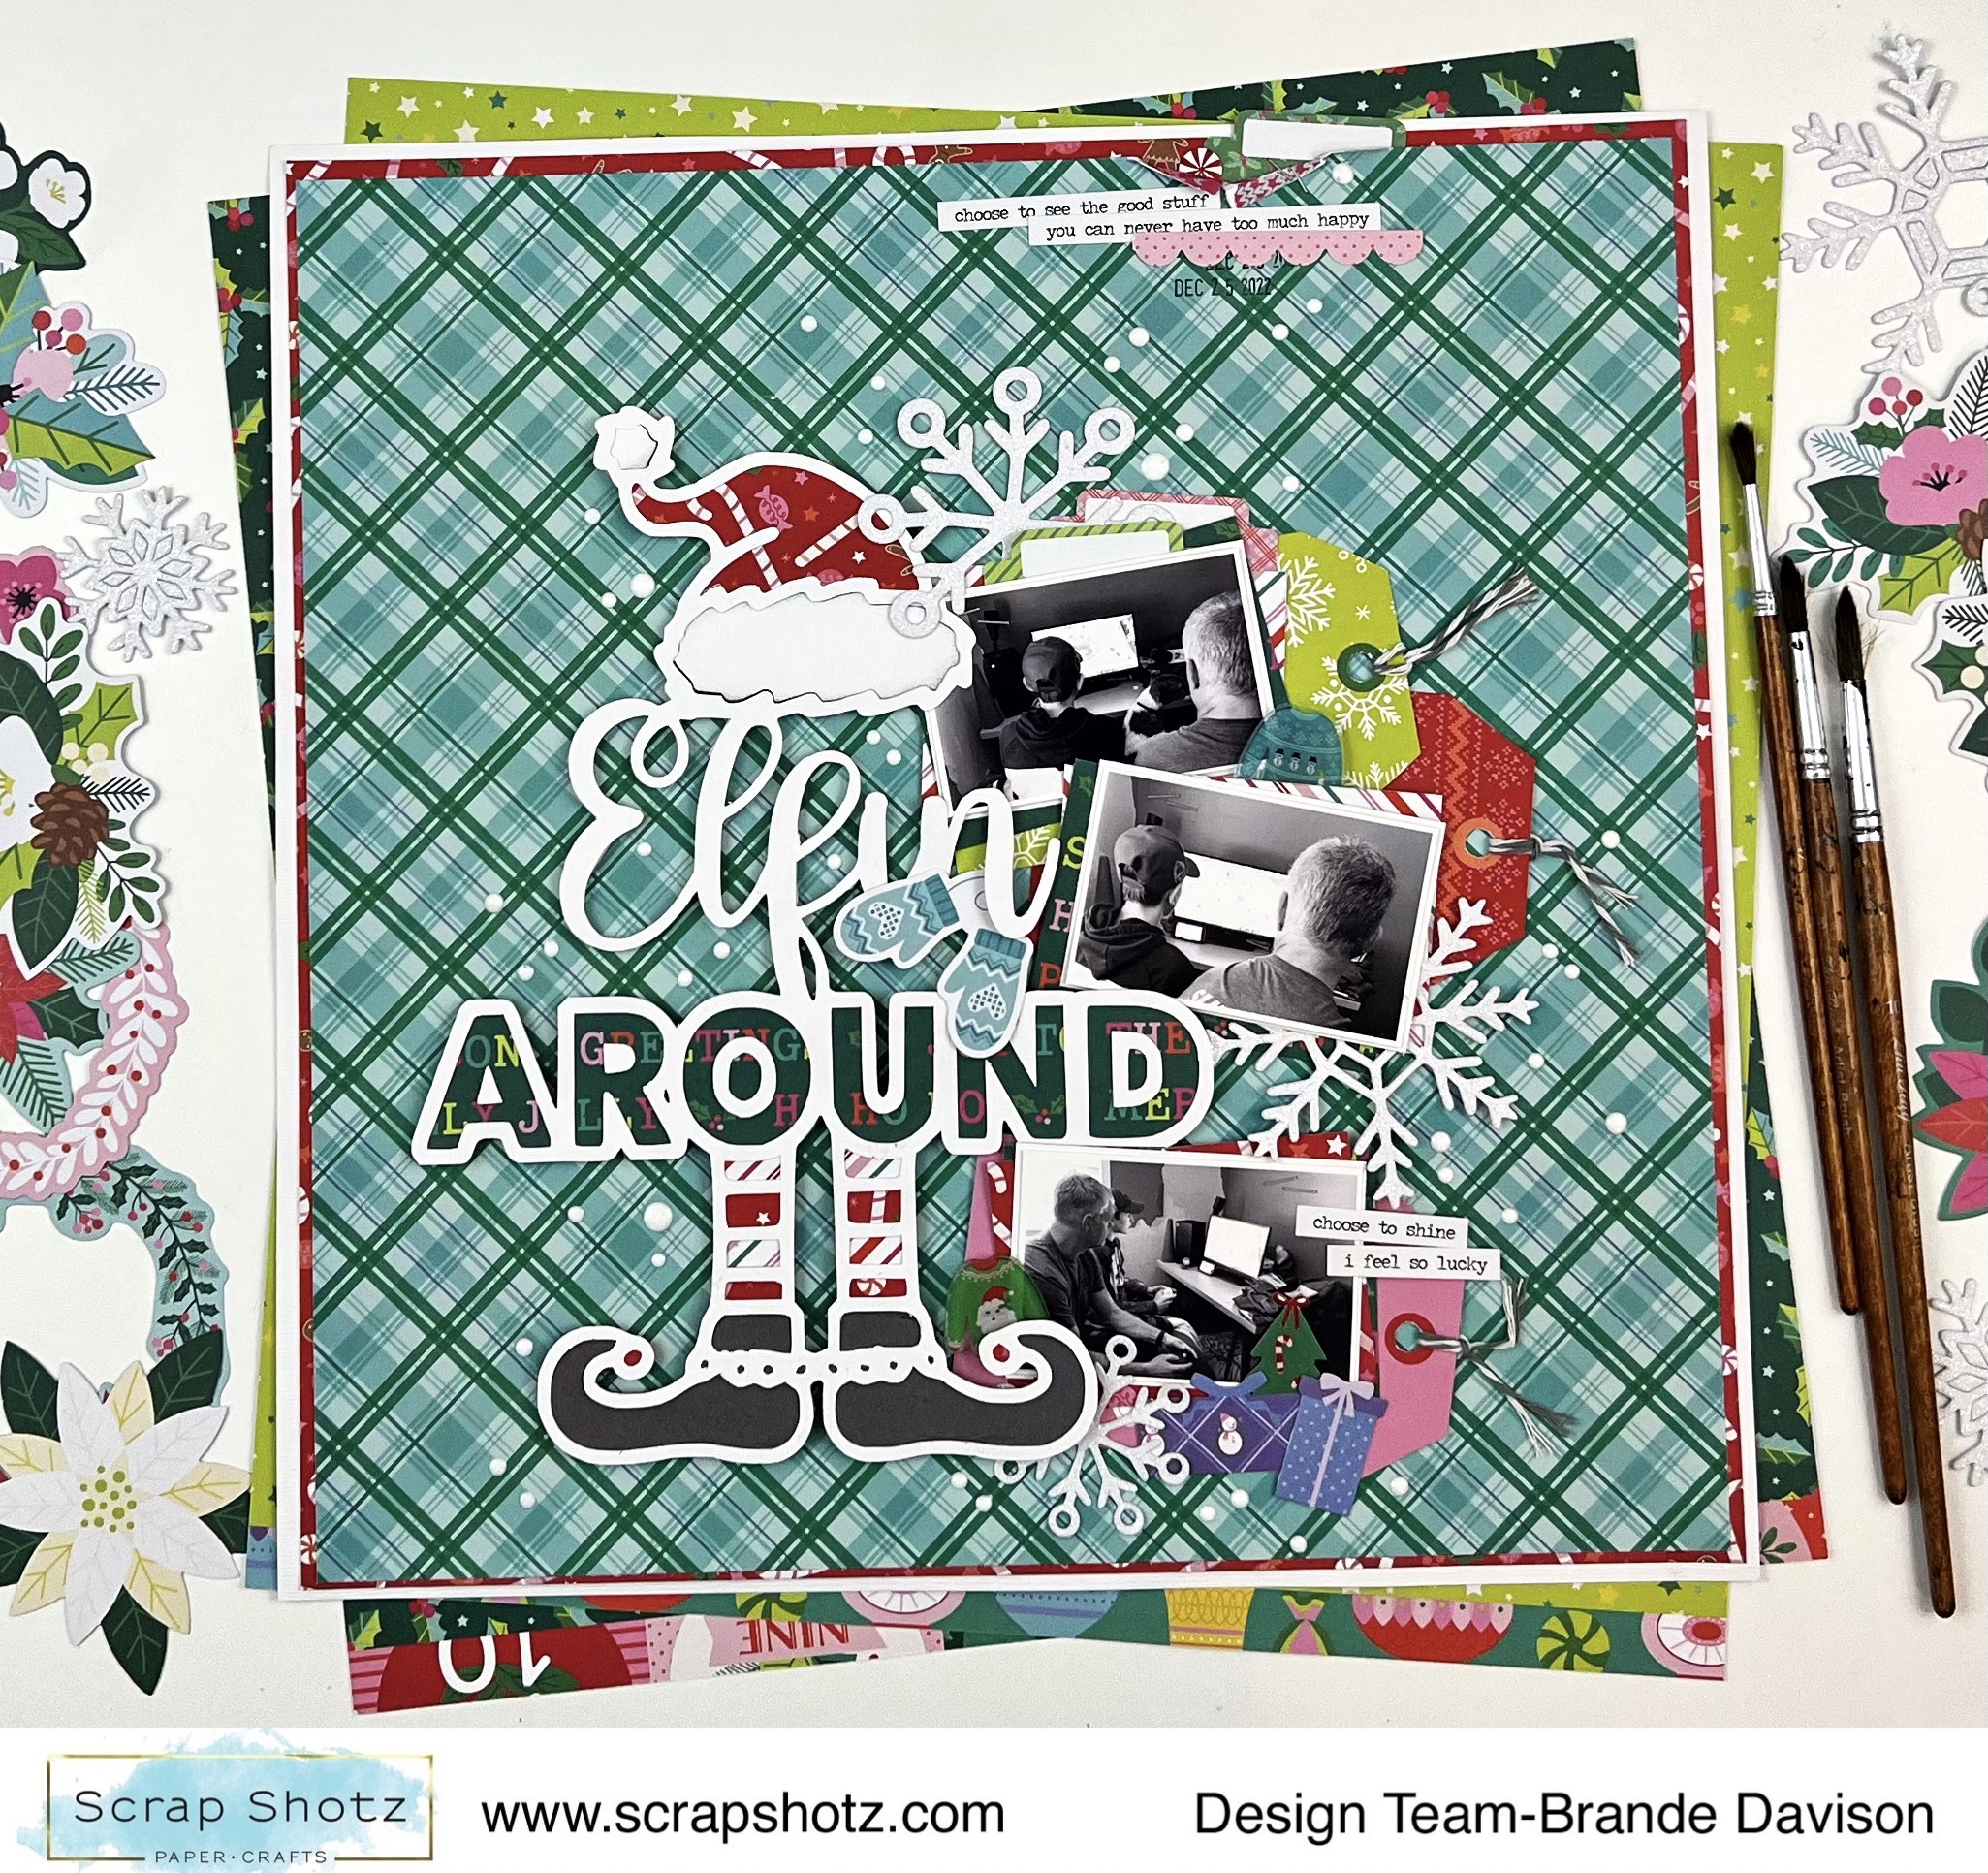
For this layout, I was inspired by the December sketch in the Creative Scrapbooker Magazine Facebook Sketchy group


I began by using the Yukon Gold cardstock to matte my photos. Then I used a variety of papers and a stencil to cover the page. 


The pink border in the middle is washi tape. The rest of the layout is full of Thicker stickers, layered stickers, ephemera and stickers from the awesome sticker book


The second layout features one of the papers in the kit. I cut the center out of the paper to create a border. Then I used the washi tape to cover the seam between the two papers. 


The paper actually has the stitching drawn on it, so I stitched over it to add some texture. 


The title matches perfectly with the stitching and come with the Thicker alpha set. The hearts in the center are cut from the paper that I removed from the center. They are actually covering up the words "Merry Christmas" as this was our card from last year. Shhh, don't tell anyone! 


Thanks so much for stopping by today!

Monday, December 12, 2022

Garden Shoppe Interactive Card

Hello everyone! I saw a really cool card on Instagram @rippels_paperlover and thought I would give it a try for my daughter's birthday. It was a big hit! I've put together a tutorial using the Paige Evans "Garden Shoppe" Collection in the November kit

Here is a video to show how it works:


I made a cut file on my Silhouette so I can easily make another card in the future. Here is a picture with the dimensions so you can make it yourself using a crafting knife or cutting machine.


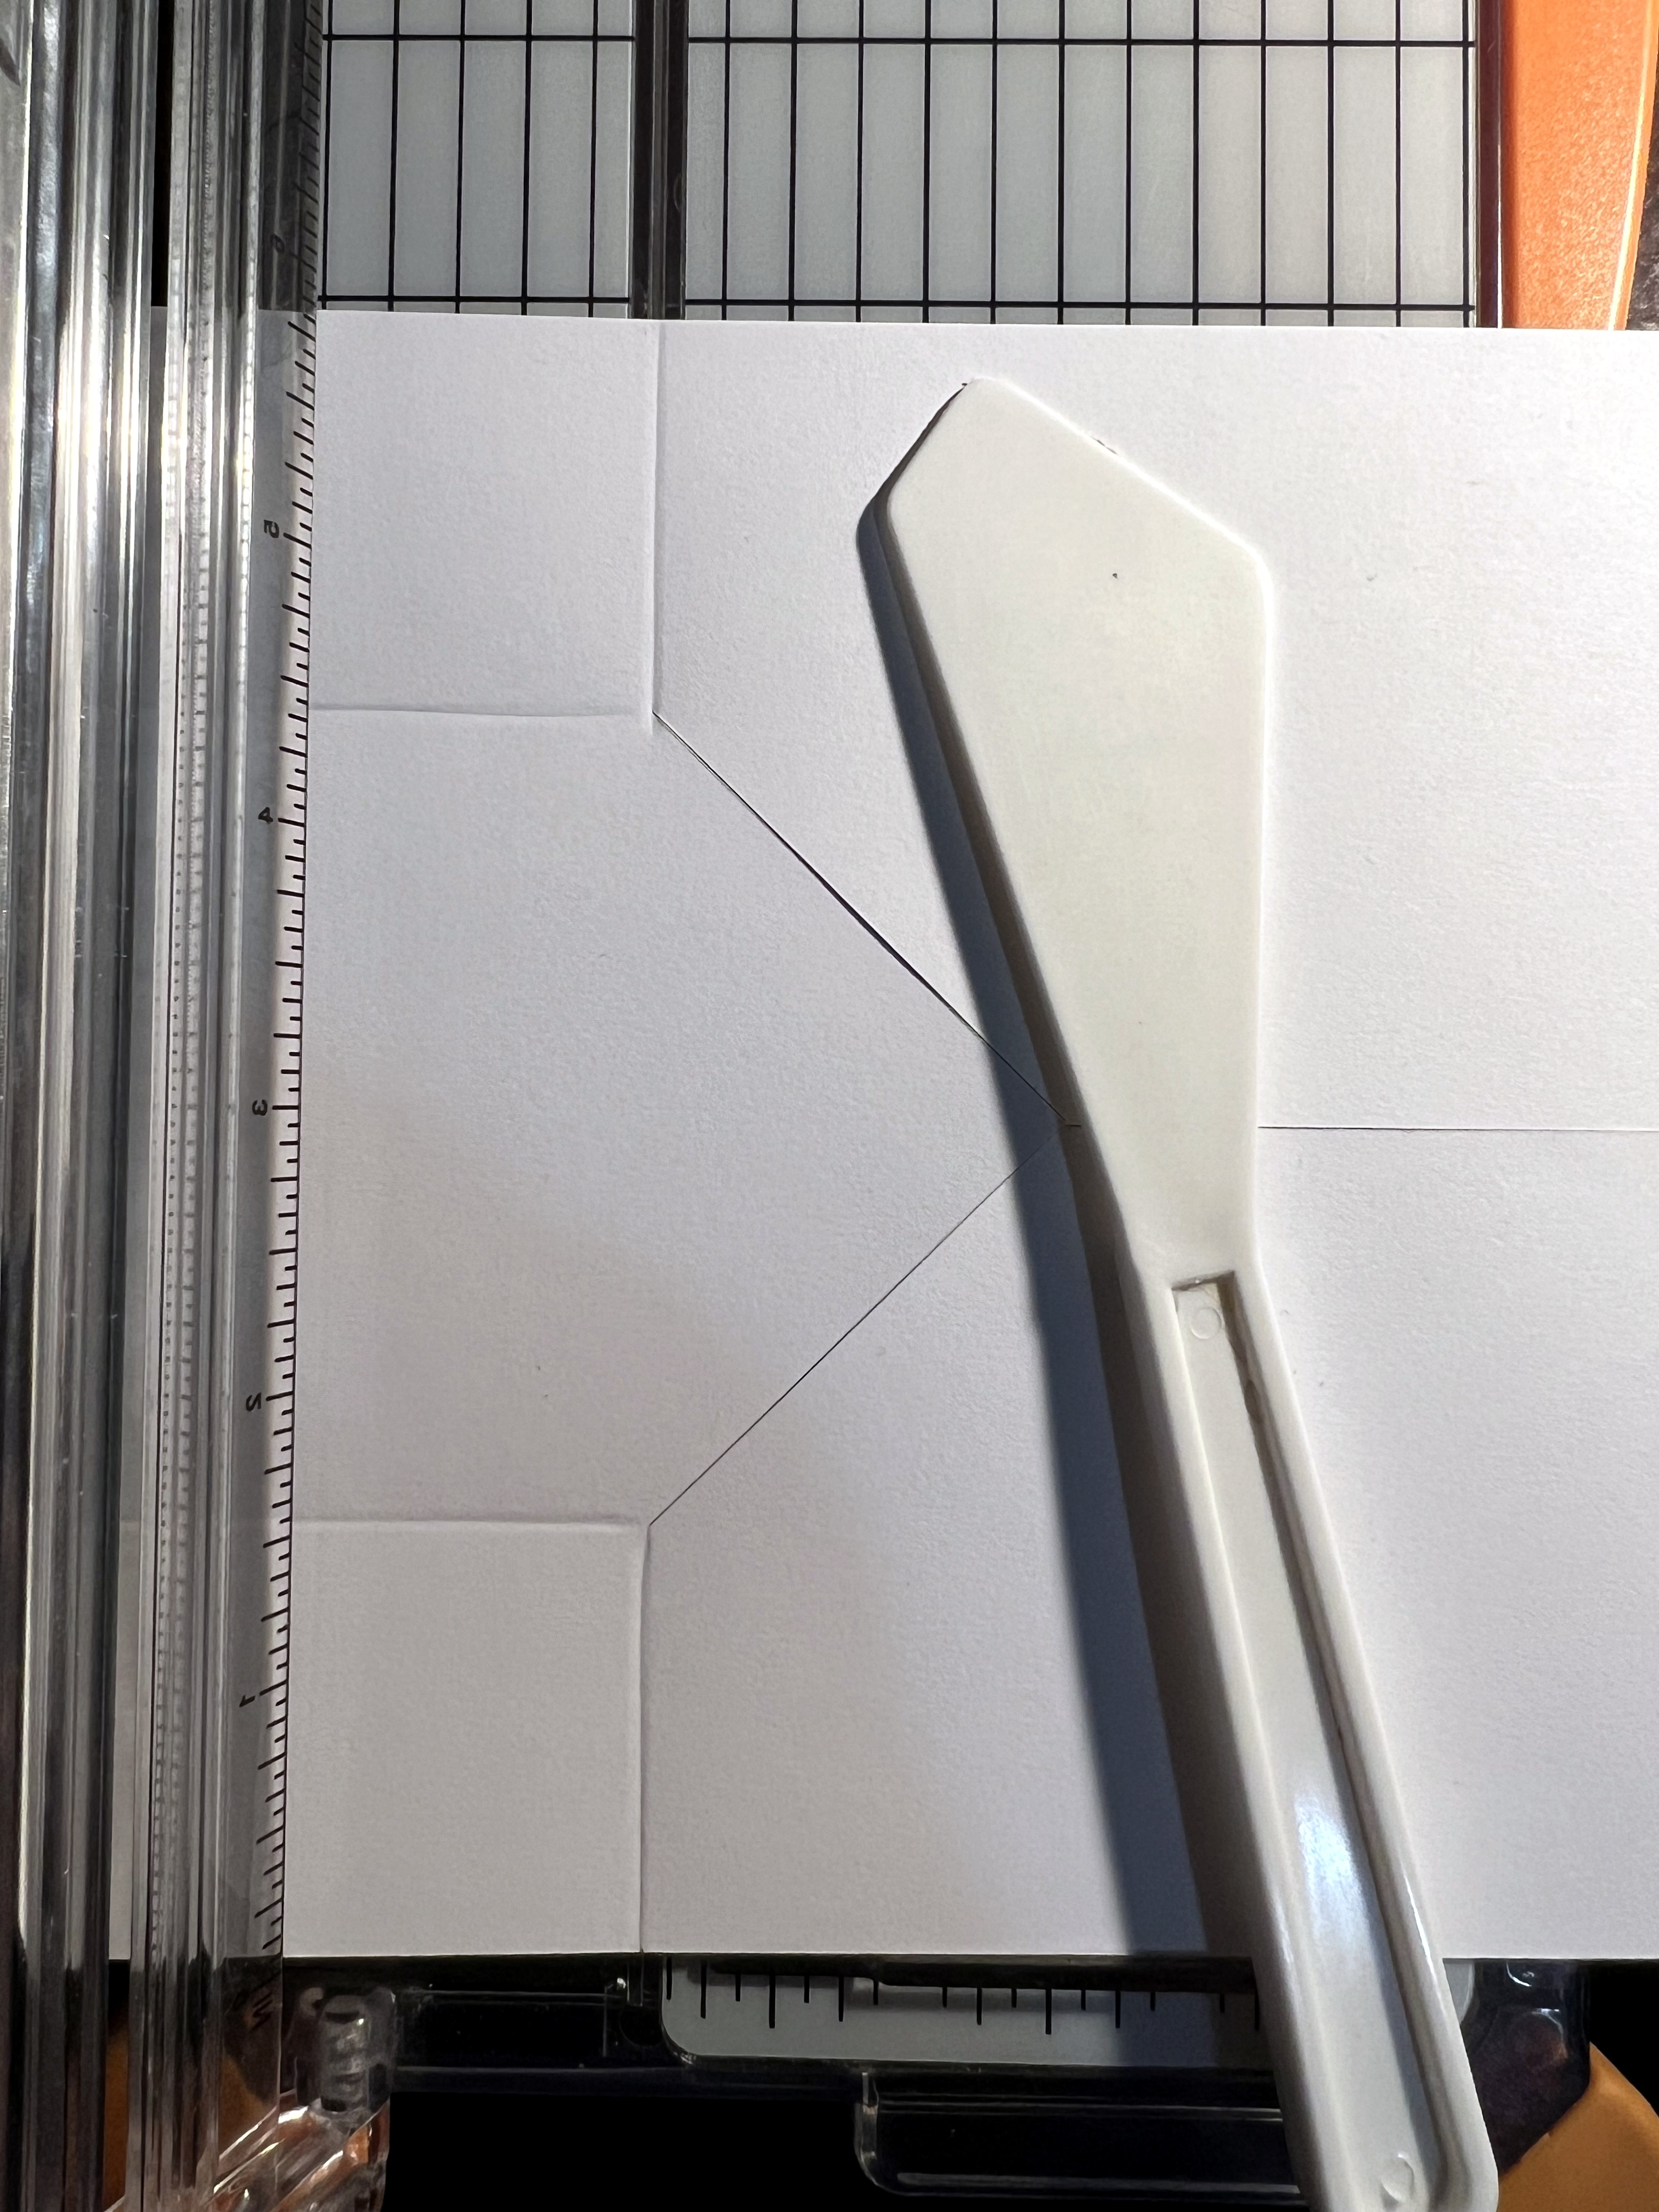
Next, I scored the folds into the card by using a palette knife and my paper cutter. 


The scores should be 3 inches long vertically and 1.5 inches horizontally. 


Here is how to fold the card. Step 1 - Bring the left side towards the middle and let the center flip around.


Step 2: Repeat on the right side. 


Step 3: Flip the paper over.
Step 4: Bend the square piece at the top backwards so it now looks like the picture below.


Step 5: Repeat with the square at the bottom flipping it towards the back. It should now look like the picture below.


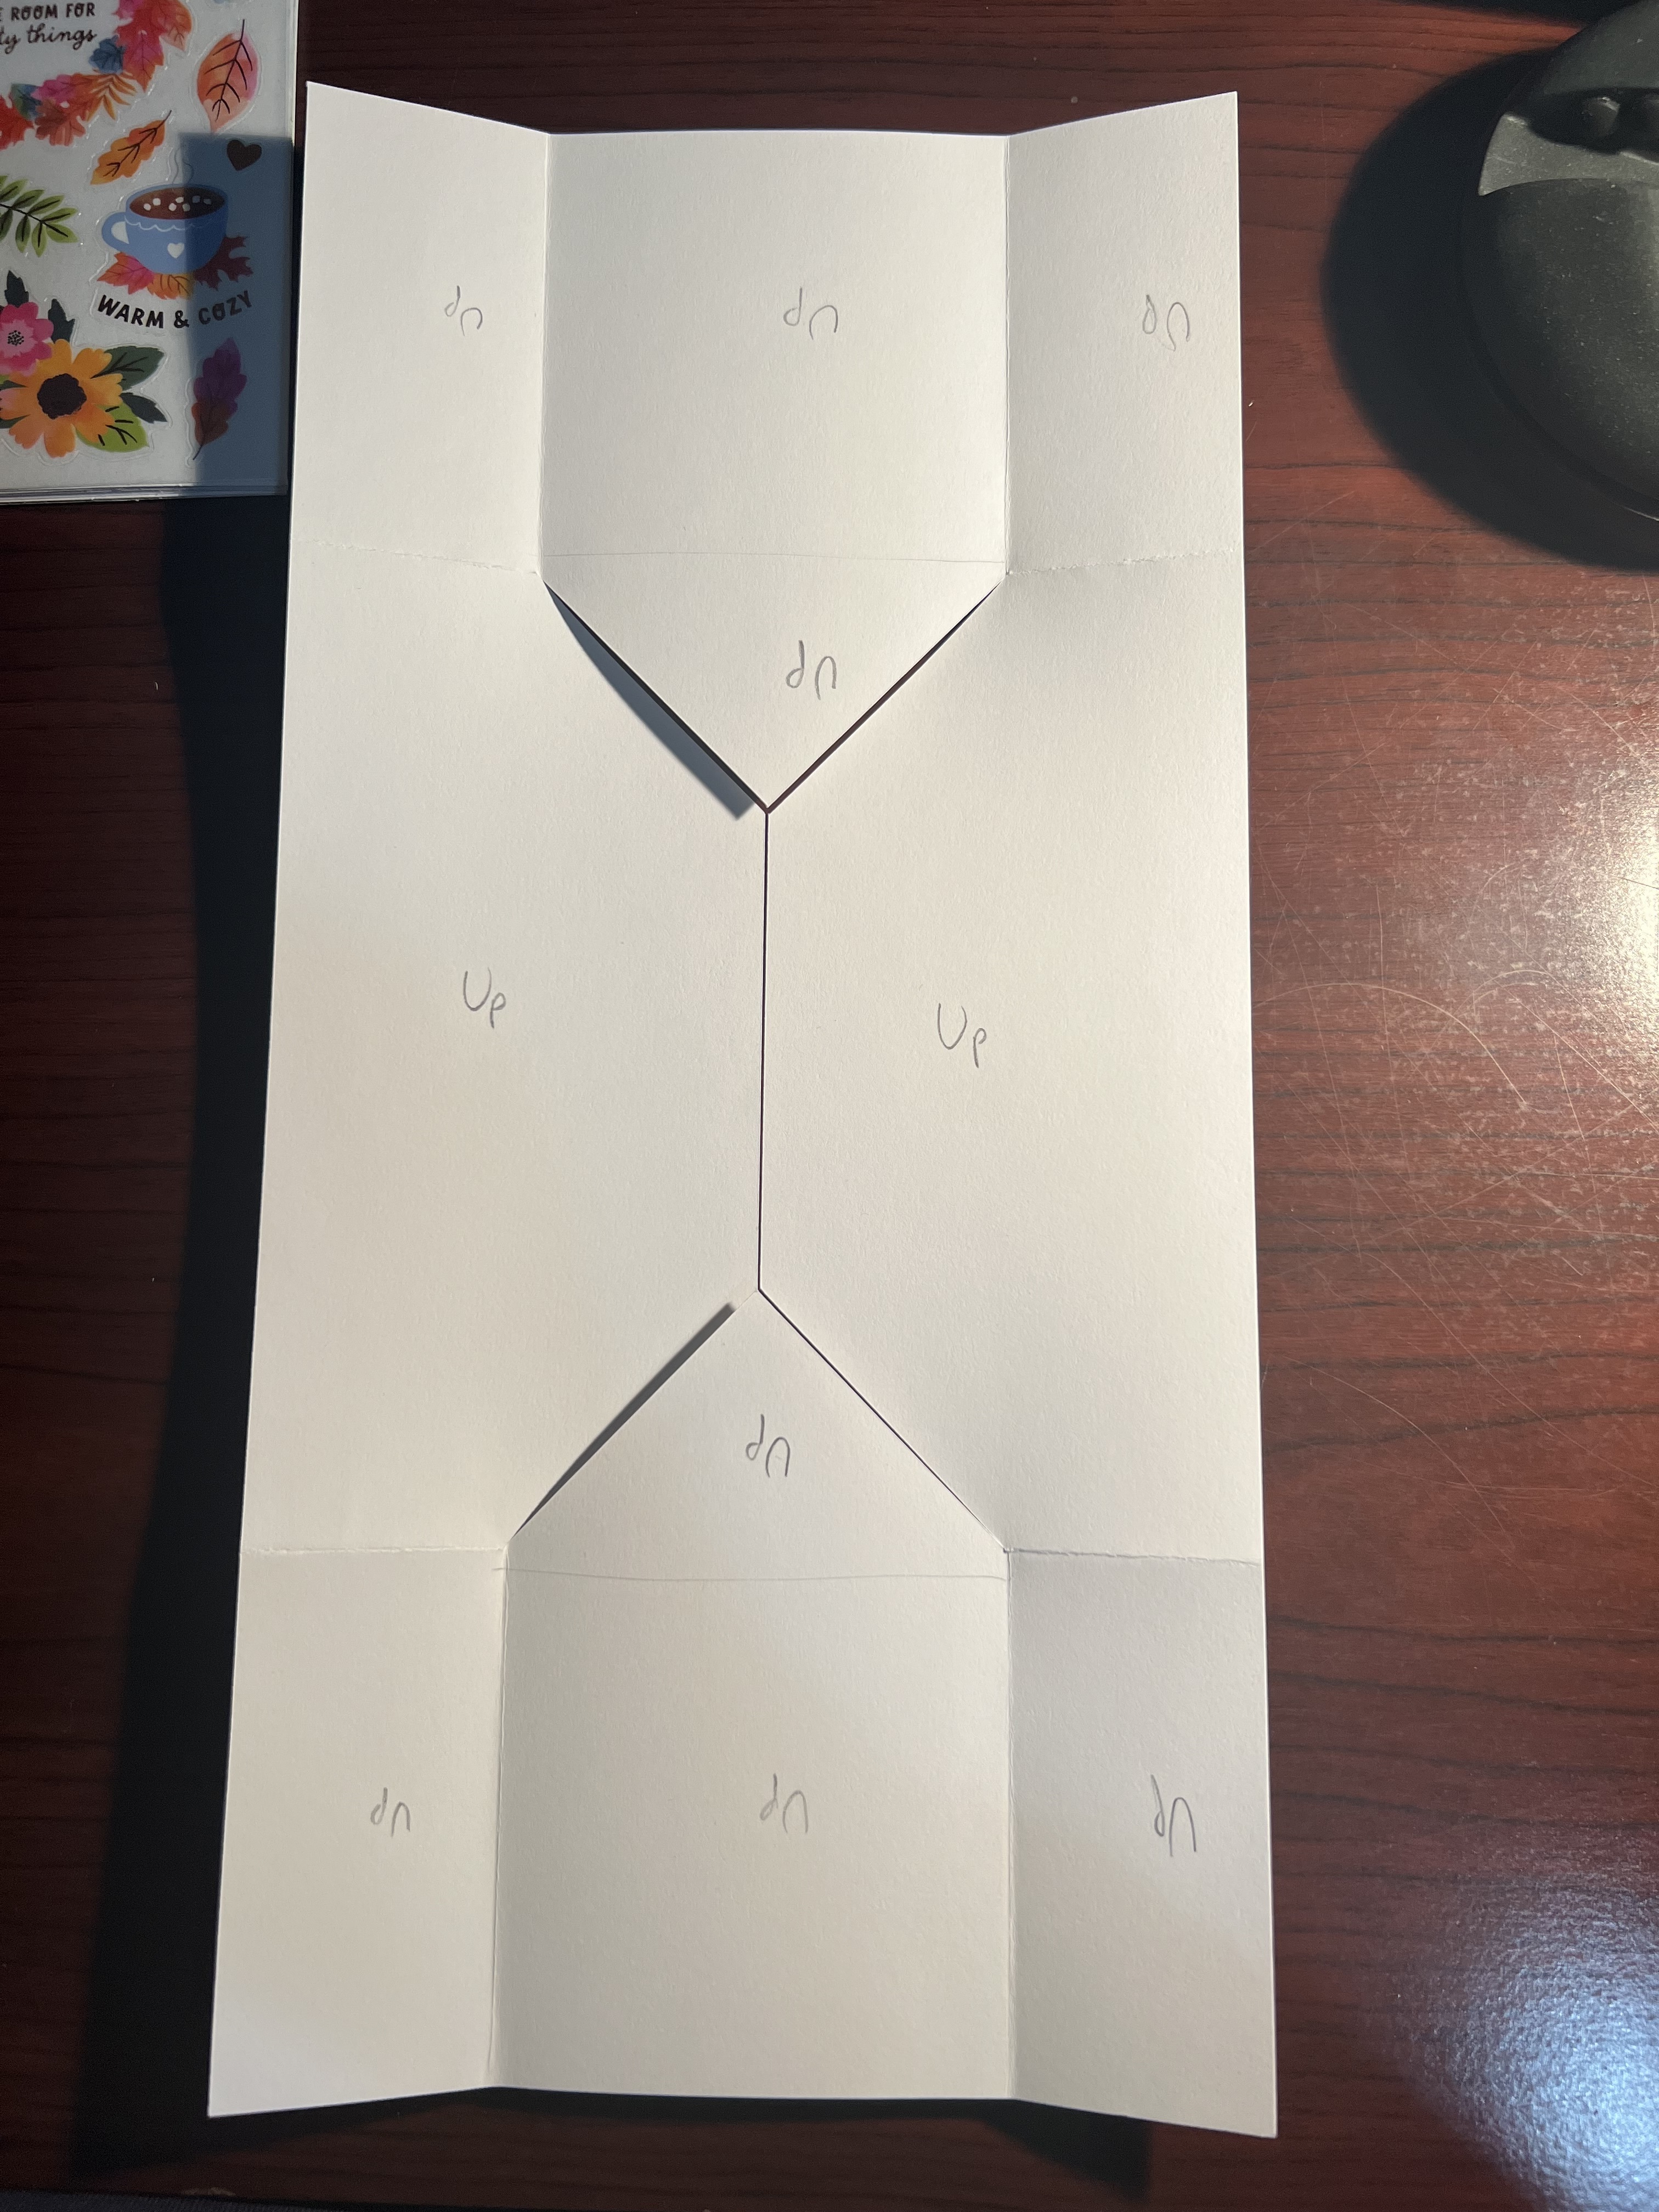
Step 6: Now you can open up the card and lay it flat on the table. I marked all the sections with the word "up" so I could easily cut the papers that go on top in the right direction. 


Step 7: Flip the paper over and write the word "up" on each section. However, be careful, some sections are upside down. 


Step 8: Begin cutting papers to adhere to the card. I found that by cutting a second card on my machine and then cutting out each section, I could use those pieces as stencils and trace them. 

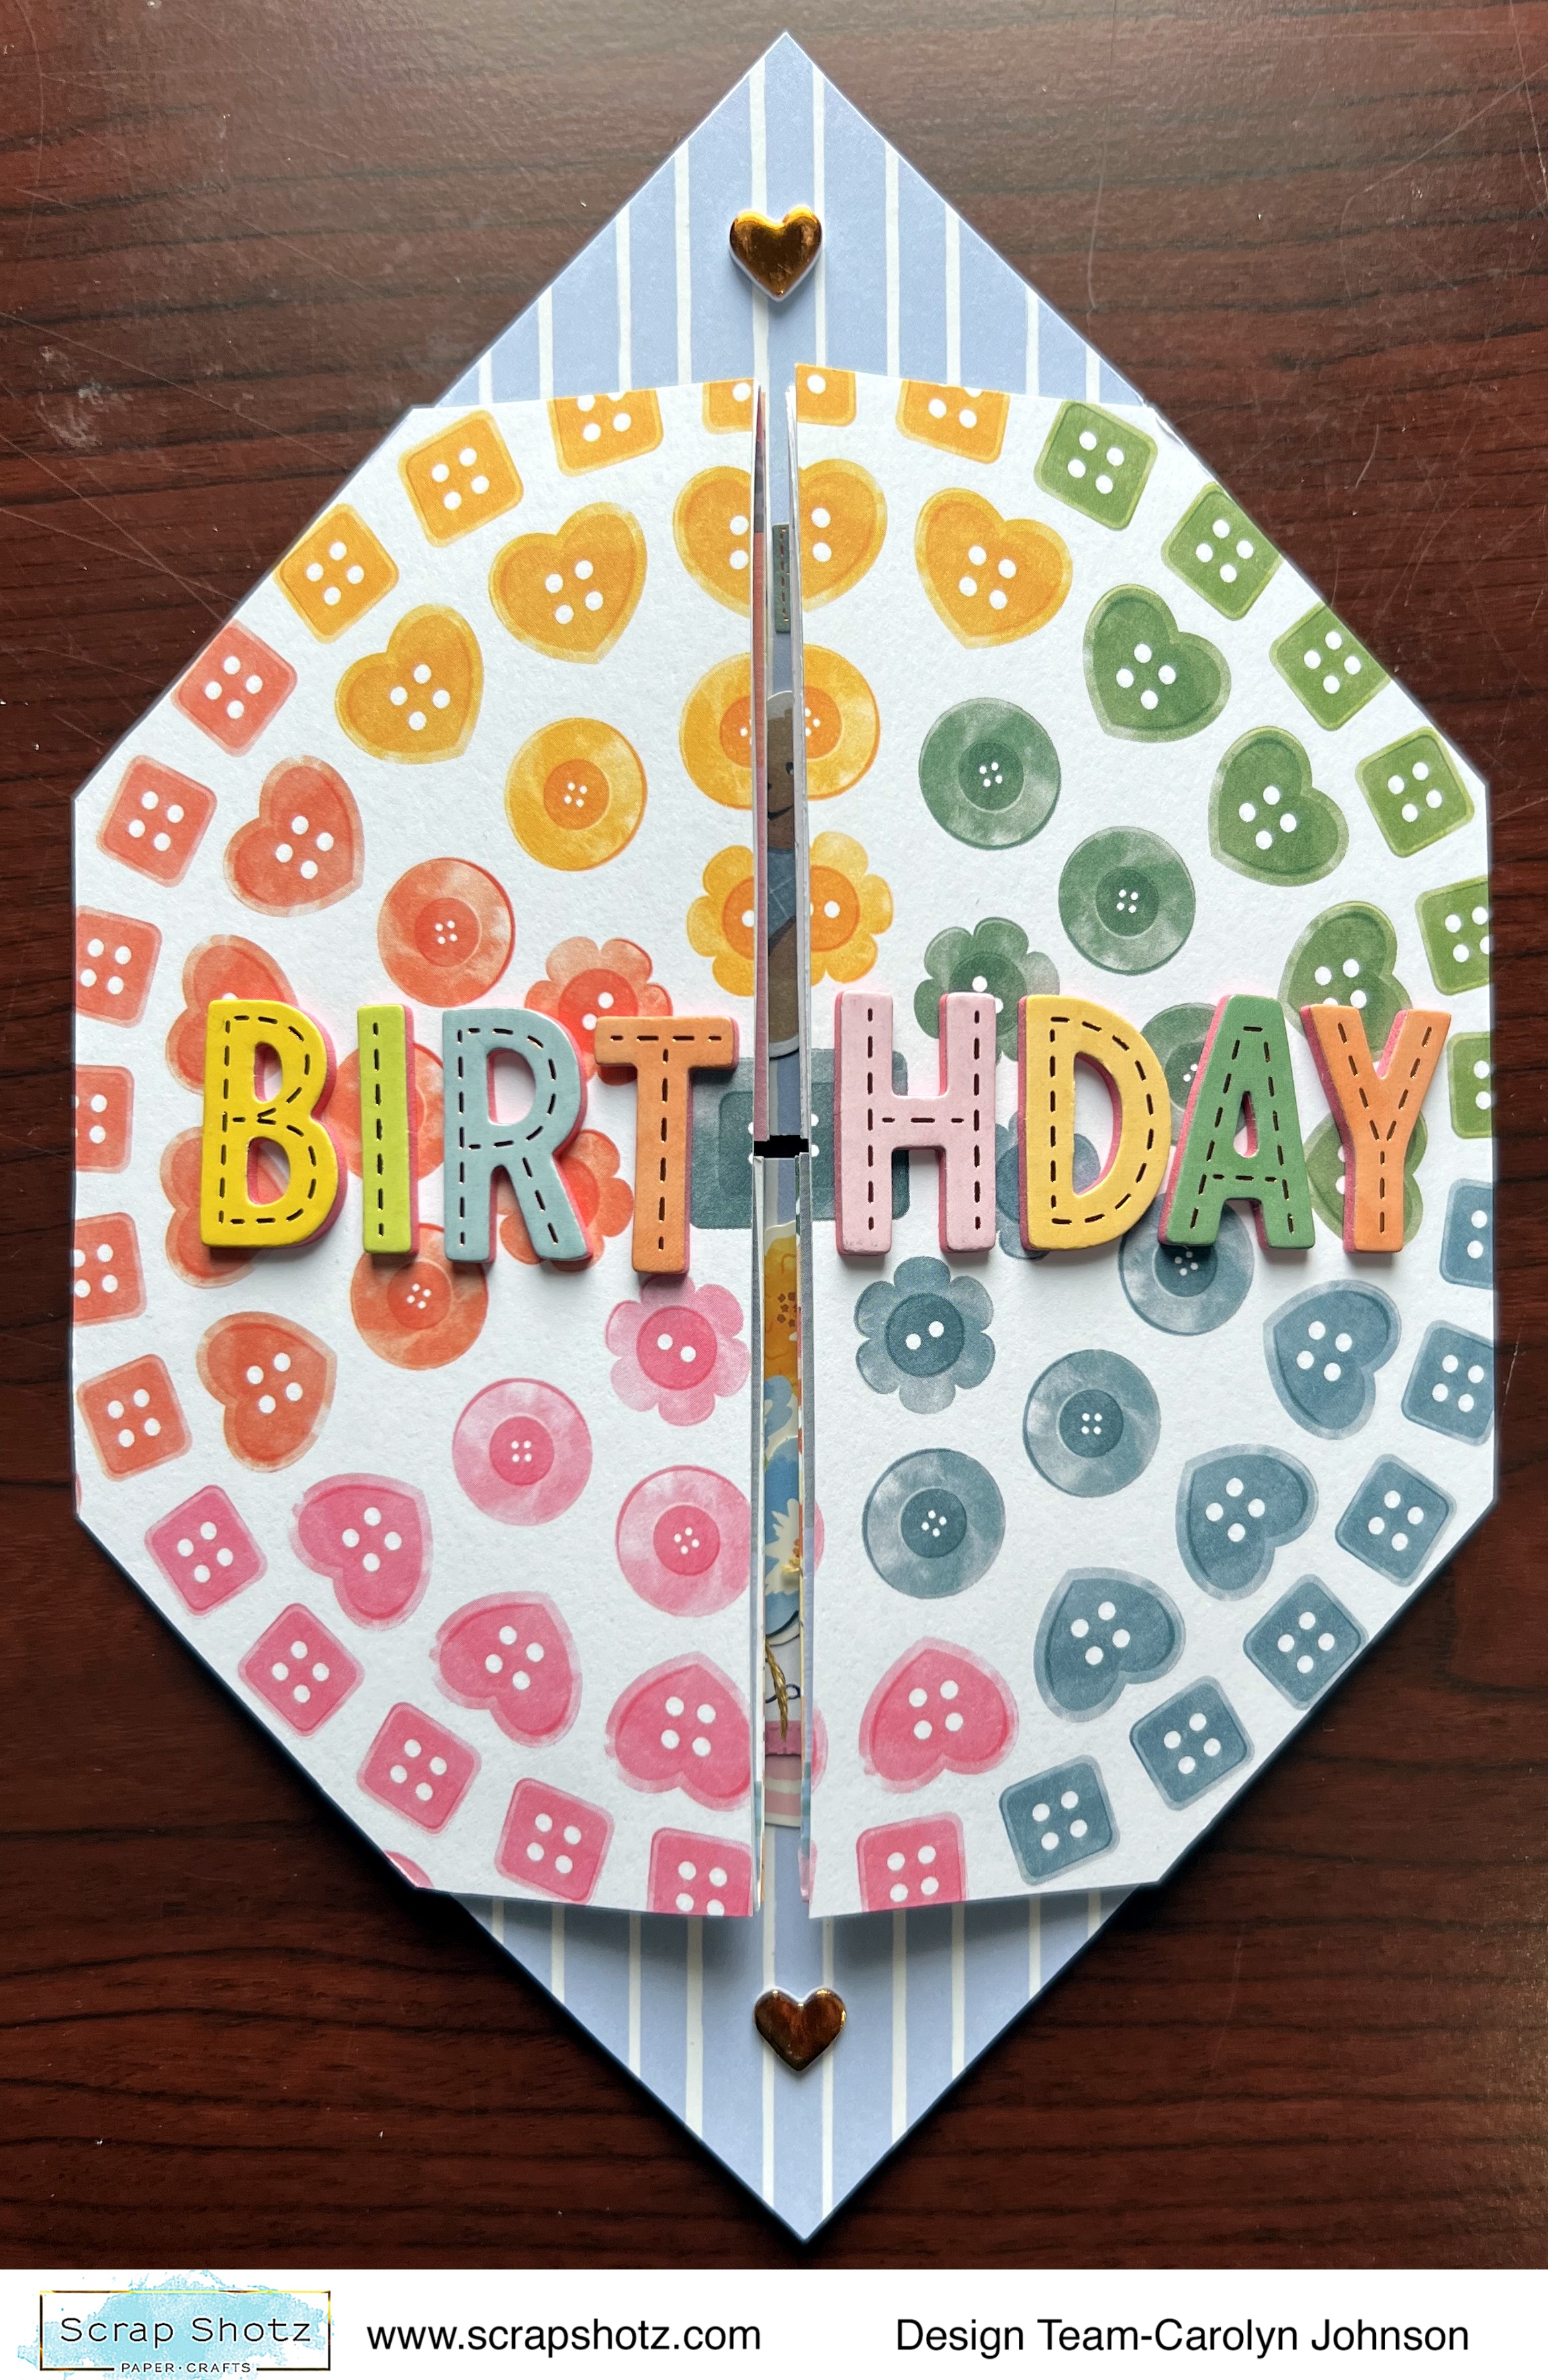
Side 1: I used one piece of paper and cut it into sections. Then I made a title with the alpha Thickers. I also used some Thickers for the leaves and hearts. There are a few stickers from the sticker book. The sections are outlined with washi tape. Finally, the flowers are from the die cut pack


Side 2: I used the button paper and added the title with Thickers.


Side 3: This is what the card looks like with the top sections flipped back.


Side 4: I used the alphas from the sticker book for the title. I used some die cuts to decorate and embroidery thread to make bows. The flowers are from the layered sticker pack.


There you have it! I hope you have a chance to try it out!


Monday, August 1, 2022

Splendid Collection Calendar Gift!

Good morning Scrap Shotz friends!! It's Karla here today with a look at the beautiful calendar gift we made in last week's Facebook Live using the gorgeous Splendid Collection and the sweet Mini Taylored Expressions calendars Set! If you got the beautiful May Kit Club featuring the Paige Evan's Splendid Collection you'll be able to use products from the kit! And you can also find them in the Scrap Shotz Store! This will look beautiful in your own house as a piece of home decor! And since you get 10 Mini Taylored Expressions calendars in the set, you'll be able to make lots for lovely gift sets for your friends, family, teachers and more!
Here's a look at January through June, embellished with stickers from the Sticker Book and 6x12 Accent Sticker Sheet. I kept the finished piece flat, but if you were adding it to a shadowbox frame or a frame without the glass you could add several layers of dimension!

This is July through December. I pulled out some of my older Vicki Boutin Sticker Sheets from the Color Study Collection as well. Any small phrase and sentiment stickers work great for this type of project!


There are so many ways you can display these calendars - choose any 4x6" frame, give them with photos for each month, put them in a travellers notebook, on a scrapbook page or in a pocket page - before or after you've displayed each month! And the embellishment ideas are endless!


Watch the Video on Facebook where you can see just how these calendar cards came together! Plus you get to see some new goodies close up!!

Thanks so much for stopping by! Be sure to check out the Scrap Shotz Facebook page this Thursday at 1pm mst for a Live Demo by the beautiful Rosie! 

Have a happy, crafty summer!!