Showing posts with label Fabulous Fridays. Show all posts

Friday, May 20, 2011

Fabulous Friday - Chromotherapy Challenge

Today we have an awesome Fabulous Friday challenge from the wonderful Wendy!


Use the colours in this card to create another card or LO.


The paper and embellishments are from this month's kit and the stamp can be purchased in the store!  Can't wait to see what you come up with!


Gorgeous Wendy!

Thursday, May 19, 2011

Fabulous Friday - Anything But Challenge


It isn't Friday but I wanted to post Gail's beautiful and awesome challenge! (Last week, blogger was down due to some technical difficulties.)

Here is Gail...

For this challenge, I decided to take 2 pieces of 12 x 12 paper that I would normally have used for a scrapbooking layout and use them instead to make a card.  I used the Pink Paislee – Daily Junque paper found in the Scrap Shotz store. 

I used the lower left corner of one the sheets for the background and then cut various elements out the other piece and layered them on top.  This is my result:


So I challenge you to use 2 pieces of coordinating scrapbooking paper and cut out different elements from it to make a card.

Note: I used plain cardstock and glued on the decorated piece to give extra weight.

Well, I am sure you will agree that this is just one of the cutest cards you have ever seen!

Thank you Gail! 

Friday, April 22, 2011

Fabulous Friday - Blueprint Challenge

Hola!!!!! We have a fantastic Fabulous Friday Blueprint challenge from the wonderful Wendy this week!

Here is her blueprint-


Ooooh this sketch is SO versatile! I can envision a layout from this sketch too!

And here is Wendy's interpretation!


Absolutely stunning Wendy!

Let's see our interpretations!

Friday, April 15, 2011

Fabulous Friday - Anything But Challenge


Welcome, welcome, welcome on this Fabulous Friday!!! We have a wonderful challenge from the marvellous Melissa!

One of my favorite things to do while I am “scrappy surfing” the internet is to take a sneak peek into the scrap spaces of others.  I love photos people post of where they create, and it doesn’t matter to me if it is someone famous - like Ali Edwards or Jennifer McGuire – or if it is the scrapper down the street sharing their space.  Each of these rooms has wonderful storage ideas and a personality of their own.

One of the things that I am typically envious of is how “decorated” some of the scrap spaces are.  My scrap room is bright and big, I am very lucky there, but it is largely functional.  It just contains my hoard of supplies tucked into this organizer or that one, there is nothing to reflect my personality.  I adore my space, but it is quite plain.  I decided to change that with this week’s challenge!

I decided to make this wall art for my challenge.  The pink paper is from everyone’s favorite manufacturer, Echo Park – one of the patterns in their Be Mine collection.  The letters are die cut from smooth Bazzill cardstock.


My challenge to you this week is to create something beautiful for your creative space.  We can all use a little more pretty in our lives, right??  Go nuts, just make something for YOU!!

OH Melissa!!! That is just such a darling project! Thanks for sharing!!!

Friday, April 8, 2011

Fabulous Friday - Inspired By Challenge

On this Fabulous Friday, we have a wonderful Inspired By challenge from the lovely Gail.


As many of you know, I collect Tammy dolls. So I’d like you to be inspired by my original Tammy doll, just like I was.

Tammy came out in the 1960s and was a competitor for Barbie. She was marketed as a “sweet sixteen, girl next door” type of doll. 


For my layout, I used the colour turquoise (in her original outfit) and a photo of me when I was “sweet sixteen”.  This was the only photo I could find so I tried to “girly” it up some since I look like such a tomboy (which I wasn’t).  I used the fabulous BoBunny Gabrielle papers found in the Scrap Shotz store.   


So let’s see how Tammy inspires you....whether you do a layout in turquoise, “sweet sixteen”, the 1960s, dolls/toys or something completely different.  I would love to see what you come up with.

Thank you Gail for this awesome challenge!

Friday, April 1, 2011

Fabulous Friday - Chromotherapy Challenge

Today we have a wonderful Chromotherapy challenge from the Lovely Laura. 

I love spring, the temperatures are warmer, the sun shines longer, and everyone just seems happier.  Well happy means happy colours!  So this week I would like you to use these colors
Blue - the blue skies are shining
Orange - one of my favourite spring flowers - the daylily
and green - for the beautiful green grass, leaves, and shrubs.
Here is your palette
and here is my example using the Fancy Pants ~ Like Father line available at the Scrap Shotz store!


Beautiful layout and wonderful challenge - thanks Laura!!!!

Friday, March 25, 2011

Fabulous Friday - Blueprint Challenge


This Fabulous Friday is our Blueprint Challenge from the lovely Laurel. Perfect timing for a weekend of scrapping!!!! Heeeeeere's Laurel!!!!!

Hi there Laurel here.  My favorite challenges are sketch challenges so I love when it is my turn to do the Blueprint challenge for you.  I borrowed this sketch from Liz at The Scrappiest and used some Bo Bunny Ad Lib paper to do a layout about my daughter and her best friend. 
 
Here is the sketch:

 
Here is what I came up with using the Bo Bunny papers, some Glitz mini letters and some twine from The Twinery.


I would love to see what you do with this sketch.

Thanks Laurel!
 

Friday, March 18, 2011

Fabulous Friday - Anything But Challenge


We are so fortunate to have Stevie host today's Fabulous Friday - Anything But challenge!

Today I thought I’d change things up a bit and do a photography tutorial.  We’re going to learn how to use an 18% Grey Card.  A grey card is a tool that photographers use to adjust and get the correct white balance in a photo.  These cards are very inexpensive to buy –mine came in a 2 pack  (8x10) at my local camera store for $14.99.
 
You may say “My camera has Automatic White Balance, isn’t that good enough?”.  Yes, MOST of the time, but there are times when even your camera is fooled.  This happens mainly at night when the camera is reading exposure and trying to focus in a low light situation.  For these times, and any other time you want the correct white balance, a grey card comes in handy.  A grey card works with cameras that will allow you set a CUSTOM WHITE BALANCE.  This is the easiest, BUT if your camera doesn’t have this setting, then don’t worry.  We can get around that.   Check your manual on how to set it.

You will see in this first photo of my ancient teddy bear, the colour is off.  I shot this in daylight on a white sheet.  Notice that the sheet appears blue and the bear, even though he is tan, has a blue tint to him? 


It’s very easy to correct this.  Take your Grey Card and place it beside whatever it is you wish to photograph.  Make sure that you are focused on the grey card.   In this second photo, you can see that the tones are correct.  Don’t erase this photo! 


Now you can set your custom white balance on your camera, if it has this feature.  If it doesn’t, just save this last photo and continue to take your photos. 


You can see that my teddy bear is the correct shade and my sheet is now white. 

If your camera doesn’t have a custom white balance feature, then open up your photo editing software.  I use PSE9, so directions are for that.  Open up your photo with your grey card in it.  Go to Enhance/Adjust lighting levels.  This will open a dialogue box.  You will see three eyedroppers. Click on the grey one (in the middle) and then click on the grey card in your photo.  Like magic your photo will adjust to the correct white balance.  If you don’t want to buy a grey card, I have found that the Bazzill “thunder” grey cardstock is very close in colour. 

Give it a try!

Thanks Stevie - I am going to give this a try right away!


Saturday, March 12, 2011

Fabulous Friday - Inspired By Challenge

We have a Fabulous Inspired By challenge from the lovely Laura today. She calls it "Words!" I am SO intrigued by this; aren't you?


Every time you open your mouth and speak they come out.....these brilliant ways of communicating....these awesome concepts of expression

Whether you chat chitchat, confab, consult, converse, have a discussion, talk or a tête-à-tête, we all use them....some words we use more than others....

Do you have a saying that you are always using?  Do your kids constantly spout something that makes you laugh or grates on your nerves?  Is there another way you and your teen or preteen say 'I love you' so they don't get embarrassed?  Are there sentences that you or someone you love routinely say?  I want you to be inspired by the words you speak.  To use something you or someone you love say a lot as your inspiration of your project.

Every night when my boys got to bed we say to each other "I love you around the world and back again, forever and a day' and I decided to use that on this layout.


Can't wait to see what you create. 

Friday, February 25, 2011

Fabulous Friday - Blueprint Challenge

Whooo hooo! We have an awesome blueprint for this arctic Friday from the lovely Laura!

Isn't this sketch THE cutest??? And banners are seriously all the rage now!


Here is Laura's interpretation, equally delicious!


Let's see your interpretation!

Friday, February 18, 2011

Fabulous Friday - Anything But Challenge

Hello, hello, hello Ladies! On this wonderful Friday, the lovely Ruby has created a fabulous Anything But challenge for us! Here it is...


I have coloured the canvas with 3 shades of dye inks. I found that daubers worked well to do this.  I applied water in a mister over the inked sections of the canvas. The inks started to move around on their own. I let the canvas dry and took a look at the way the ink moved.  Just played with the inks , canvas and water until I liked the result. After the canvas was fully dried, I used the  Unity stamps (Donna Downey)  to apply the designs.  In order to have a firm base  to stamp on , I used the cutting boards from my Cuttlebug for support. The ink  used was Rich Cocoa by Memento. After all my stamping was done, I let the canvas  dry for several days. To finish the canvas, I added embellishments, Ric Rack ribbon and the distressed frame.


Gosh Ruby, this is gorgeous! Thanks for your challenge!

Friday, February 11, 2011

Fabulous Friday - Inspired By


Good morning Everyone! It's a fabulous Fabulous Friday, don't you think? Today we have an Inspired by challenge from the lovely Laurel.
  
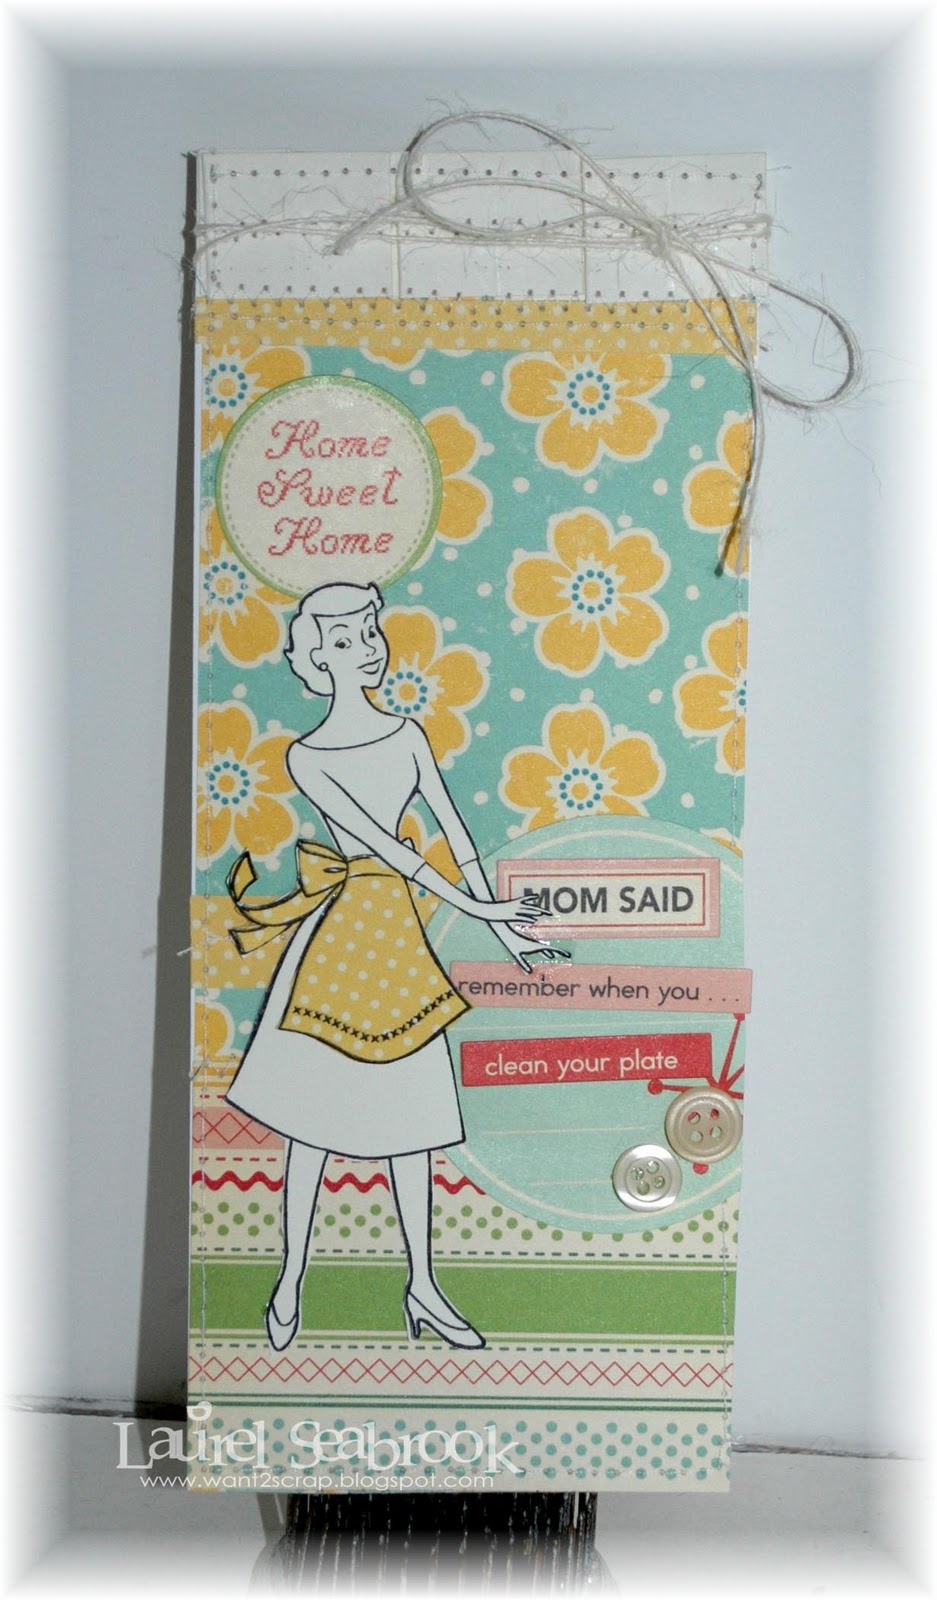
Hi there, Laurel here.  I was browsing the Anthropologie website one day when I saw this pretty apron. 


It made me think of the October Afternoon Modern Homemaker paper so I decided to make a card for my mom.  I used both the Modern Homemaker and the Fly A Kite papers on this.  This could be a 'just because' card, a thank you card or even a birthday card. 
 

I would love to see how this apron inspires you.

Thank you Laurel!

Friday, February 4, 2011

Fabulous Friday - Chromotherapy Challenge


Today we have a fab-u-lous challenge from our Guest Designer, Rebecca Hilligas. Rebecca has prepared a stunning Chromotherapy challenge. Here are the details:

For scrapbookers color is a very important element in our process of memory keeping. We’ve all looked through a row of papers or embellishments in a scrapbooking store or online. Color inspires us; it can create a calming aura or a happy vibrant one.  You don’t need to stop just at craft stores or websites to get color inspiration. I did a little virtual surfing through the Pier 1 website and found lots of great sources of color inspiration. Take this cute little picture frame with the kraft colored background and the brightly embroidered flowers. Its a great starting point for a layout or card.


Here’s my interpretation of the frame. I used a kraft background with Echo Park’s Little Boy pattern paper for my pop of bright colors.


My challenge for you this week is to use kraft cardstock with brightly colored papers. I can’t wait to see what you all come up with!

Thanks Rebecca! Let's show what you got!!!!


Friday, January 28, 2011

Fabulous Friday - Blueprint Challenge

So how has January treated you thus far??? I've got a treat for you this Fabulous Friday; it's a Blueprint Challenge from the lovely Stephanie.

Here is the blueprint:


And here is Stephanie's awesome interpretation!


I look forward to seeing your interpretations!

Friday, January 21, 2011

Fabulous Friday - Anything But


How is everyone on this Fabulous Friday??? I personally am glad the week is wrapping up and have planned some much need scrapping time this weekend. To kick start my scrapping, I am going to tackle Laurel's Anything But challenge. Take a look below for the details!

Hi there, Laurel here.  This week the theme is Anything But.  I love the anything but challenges, it gets me out of my scrapbooking/card making box to try something new or different.  This week I have used some of the Bo Bunny Crush papers to cover a 'to go' coffee cup.  I purchased some of these at our Dollar Store, cut one down to use as a template and voila, quick and easy!  I have filled this with some yummy cinnamon hearts and willl surprise hubby with it on Valentine's Day.  I challenge you to see what you can come up with and make a quick and easy gift for someone.


Thank you Laurel for this awesome challenge! I see 56 of these in miniature form in the very near future! My daughters are looking for something fun and interesting to make for their friends at school!
 

Friday, January 14, 2011

Fabulous Friday - Inspired By

Today we have a wonderful Fabulous Friday Inspired By challenge for everyone from the lovely Ruby Marchand. Ruby's inspiration was this layout from Unity Stamps designer, Lesley Langdon.


Here is Ruby's interpretation of the inspiration piece.


I think you will agree that it is equally stunning. How will you be inspired by Ruby's challenge? I would love to see your projects.

Friday, December 31, 2010

Fabulous Friday - Blueprint Challenge

On this Fabulous Friday New Years Eve edition, we have a fantastic blueprint challenge from the lovely Carolyn. Here is her blueprint...isn't it awesome?


Here is her interpretation!


Thank you Carolyn for this awesome challenge!

From all of us at Scrap Shotz, we wish we all a Happy New Year and all the best in 2011.

Friday, December 24, 2010

Fabulous Friday - Anything But Challenge

Hi there, Laurel here. My challenge for you today is anything but a card or scrapbook page. I upcycled a can from some chipboard elements. I covered it with paper and stickers from the Echo Park Wintertime kit and made a tag to match. I will put some homemade hot chocolate, some mini marshmallows, mini candy canes and a Tim Hortons gift certificate. This is going to be a gift for our mailman. So I would love to see what you do for my anything but challenge.


Thanks - enjoy your Christmas Eve!

Friday, December 3, 2010

Fabulous Friday - Blueprint Challenge

Today we have an awesome Blueprint Challenge for our Fabulous Friday series from Stephanie Schan.

Here is the blueprint:


And here is Stephanie's interpretation:


Beautiful Stephanie! I look forward to seeing your interpretation in the gallery!

Friday, November 26, 2010

Fabulous Friday - Anything But Challenge

Today we have a wonderful Fabulous Friday Anything But challenge from Carolyn. I know I'll be making several of these! Here is Carolyn...

With Christmas fast approaching now seems a good time to get a start on those gifts. Here is a little gift card holder that comes to you in the shape of an ornament. I made mine from the beautiful Midnight Frost line by Bo Bunny.

Step 1

Cut 2 circles from cardstock or pattern paper the size you want your gift card holder to be. Mine are 4.5 in so they will fit in a square envelope.


Step 2

Cut one more circle of the pattern paper and cut in half as this will form the pocket to hold the gift card.


Step 3

Cut a rectangle from cardstock or pattern paper. This will form the topper on your ornament. You can size it as desired. I cut mine 1.75in x 2.5in. Score the rectangle in the middle to fold over the circles. Trim the ends with a border punch or pattern scissors as desired.


Step 4

Attach the ornament topper (rectangle) to the top of both circles as shown. Punch a hole in the top of the topper for a hanging ribbon.


Step 5

Adhere your half circle to the inside back circle to form a pocket. Embellish as desired.


Step 6

Embellish the front of your gift card holder as desired. Thread a length of ribbon through the hole you punched in the topper leaving a loop. Voila! A cute little gift card holder you can hang on your Christmas tree.


Thank you Carolyn for this awesome tutorial!