Hello Jenn here sharing some layouts from my Camping Traveler's Notebook, using the Great Escape Collection from Cocoa Vanilla Studio. I am using 12x12 papers, chipboard stickers, cardstock stickers, foam phrases, puffy stickers, and ephemera from the collection to create a TN documenting our camping trips from the summer of 2023. To stretch the collection a little bit further, I am combing it with the Adventure collection from Wild Whisper Designs and a few other elements along the way.
I started with the cover for the TN, where I also incorporated some hand stitching for the Scrap Shotz Paper Crafting Facebook Group's April Challenge. Throughout the album I will carry the stitching by using faux stitching to embellish the pages, and occasionally I will add some hand stitching as well, keeping in mind how chunky my TN is getting!!! The cover is a great place to add some bulky embellishments like chipboard, buttons, flair, foam stickers, ect... that might be too thick to add inside the pages of the TN. Be sure to add extra strong adhesive to the embellishments on the outside cover because they are more likely to get caught on something or knocked off.

I have a lot of pictures from these trips and I'd really like to get as many as possible into the TN so I like to sort my pictures and tuck them all into the pages in the order I think I'd like to see them, to help me judge how much space I have. I have a feeling that I will need to stretch my summer camping picures of a few different TN's but I aim to find creative ways to get multiple pictures onto each page so that I limit the amount of TNs it will take the document all of the pictures. The other goal is to limit the added dimension on each page so that the TN can close nicely when it's finished. Keeping all of this in mind, lets get started and see how I do!!!
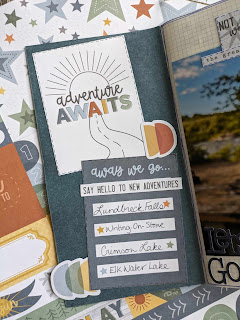
My first page is the inside cover of the TN. This is a great place to add journalling cards, cutapart pieces or ephemera that you really like that you want to showcase in some way! I like adding a table of contents or list of what you will find in the TN. Its also a great place to add photos if you have a lot of them so don't skip the inside cover!!! I added a list of the places we went camping throughout the summer.
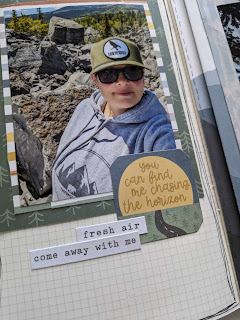
I kept my second page very simple! I have a fun tradition of taking a picture of my camping mug that says "The Adventure Begins" at the start of every camping trip. I always try to do it in a different way so that each one is unique. I thought this picture would be a great first page to the album, so I just printed it at 6x4 and then added two stickers, and the title "Let's Go Camping" using some old Basic Grey alphas.

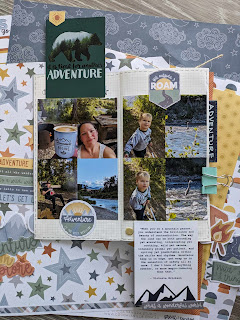
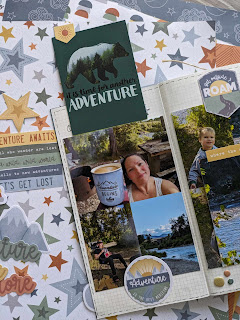
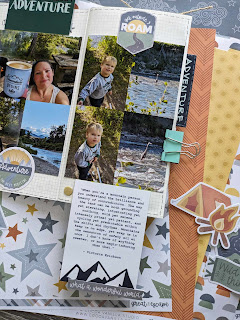
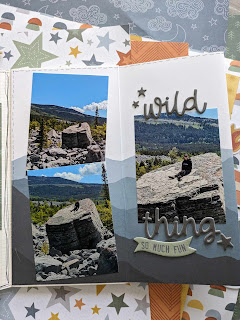
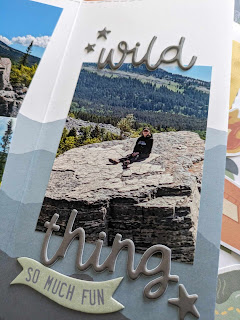
My third page is a full layout that includes 10 photos. I like to print my photos at 2x3 quite often and when I do, I always try to arrange them in a way that I can use the fill 4x6 picture as one, or I can cut them apart as 4 separate photos. For this page I kept the collage together on both sides, but I also had two 4x3 photos that I wanted to add so I created two fun tip-ins to include those photos. The tip-in on the left side flips upwards and I put a Wild Whisper journalling card on the back of it, and the tip-in on the right flips downwards with another Wild Whisper card on the back. I use washi tape to create my hinges because I find it a little it easier and less bulky, but you could easily create a paper hinge as well. An alternative would have been to create just one tip-in with the pictures pasted back to back instead of including the cards, but I like that this is another opportunity to showcase a card you might not want to cover up, or gives you an area to do some journalling of your own. I completed the layout with a simple embellishment on each side from the Great Escape Ephemera Pack.


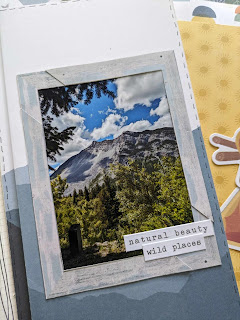
My final page for today is a fun one! On the left side of the page I added just one 4x3 photo, with some layers of paper behind it, and a few stickers. On the right side, I took one of my favourite 12x12 papers from the
Great Escape collection and folded it into three sections so that it created a fold out page where I could then add 4 4x3 photos, and also preserve the mountain range image on the paper. I kept the embellishment very simple, with a phrase from the foam phrases, and a piece of chipboard on the middle section, and then a frame around the picture on the right section, with two little phrase stickers. To add the chipboard piece, I peeled back the top layer of chipboard, that has the image on it, so that it wasn't very thick, and then I could add it to my page without adding extra dimension.
I love adding unique pages and elements like the tip-ins and folded page. They are a great way to get extra pictures onto your layout, and also makes the TN fun to flip through and look for all of the interactive elements. There is no limit to what types of interactive elements you can include. My biggest piece of advice is to look at the supplies you are working with and then think about fun ways you might be able to include them in the album. Give your ideas a try and see what works. I try to alternate interactive elements with more simple pages to help keep TN as flat as possible, but I like to have fun and experiment with different ideas that keep each TN I create interesting. I have full process videos on my channel of each of these pages, as well as the others I have created in this TN so if you'd like to see how I put the pages together, please visit my channel
https://youtube.com/@JenniferGagne . You can also find me in Instagram and TikTok as KaezMum, with more closeups and flip-throughs of this TN as I progess. If you have any questions, please let me know, and head over to the
Scrap Shotz Store to grab the
Great Escape Collection for yourself :) Thank you so much for popping by. Until next time, Happy Scrapping!
Jenn


.png)

No comments:
Post a Comment