Thursday, November 1, 2012

Fabulous Fundamental: Using Copics with Elizabeth Craft Designs Stickers


Today we have a fabulous blog post from Carolyn Waldschmidt. Thank you Carolyn!

At the Carnival, this is the very popular snowman tag we created to demonstrate the products:  Elizabeth Craft Peel-Off stickers, Glitter Ritz Micro-fine Transparent Glitter and Copic markers.  Thanks to everyone who stopped by our demo table and waited patiently for their turn to give it a try.


Once you see how easy this technique is you will want to try it yourself and there are so many different applications to use the stickers. Plus, it’s wonderful to have another use for your Copic markers.

These instructions will show the snowman sticker tag but the technique is the same for any sticker you choose.

  • Cut a piece of double-sided adhesive tape (Sookwang) to the correct size needed for your sticker. Then you may adhere one side of the double-sided adhesive to a piece of cardstock also cut to size. I used white as I wanted the snowman to be white. 
  • Peel off the tape liner to expose the sticky surface. Don’t throw your liner away! Place it slick side up on your work surface. 
  • Take your sheet of Elizabeth Craft stickers and gently peel the outline of the sticker. You may find tweezers helpful for this. You need to place the outline sticker sticky side up on the liner you saved. This is so you can realign any areas of the sticker that get twisted or misshapen when you peel it. This step is recommended by Elizabeth Crafts as the bigger or more intricate the sticker the more likely you will need to realign it before placing on adhesive. The stickers are vinyl and pretty forgiving of some tugging and pulling. The hardest part of this whole process will be getting your fingers unstuck from the sticker!


  • Now carefully pick up your exposed adhesive cardstock piece and place sticky side down on top of your outline sticker. This is how you keep the outline sticker nicely aligned. Rub over the outline sticker firmly to make sure it is adhered. Now you can peel off the liner once again and your sticker is ready for glitter.


  • Using the Glitter Ritz micro-fine transparent glitter you can pour a small amount onto your sticker. Rub the glitter all over the image with your finger. This is to “burnish” it in, fixing it firmly and bringing out the shine of the glitter. Brush away excess.  You use a tiny amount of glitter in this process, so one jar will do lots of projects.


  • Now color your image with copics as desired. You will want to keep a “light” hand and do not color too heavily in one place as you may rub the glitter off. If any glitter stays on the tip of your copic it can be wiped off easily.


  • Next step is to cut out your image along the black outline and place your image on your project. Voila! You are done!

Here are some different ways to use the glittered stickers. Instead of adhering to cardstock as we did for the tag, either leave the bottom liner in place (if you have the Sookwang sheets) or if you have the Sookwang tape you can place it on some wax or parchment paper temporarily. Then you complete the sticker as directed and peel off the bottom liner or wax paper and adhere your sticker to glass, china, candles, wood, or plastic. As you can see there are lots of options to create some fabulous projects!


Absolutely stunning Carolyn! Thank you for this blog post!


Tuesday, October 30, 2012

Carnival Make and Take: Shadow Box Photo Card

Good day Scrap Shotz Friends!

Today I would like to share with you how to recreate my Carnival Make and Take: a Shadow Box Photo Card. Here is the front of the card.


 And here is the inside of the card.


Before I start, let me extend my thanks to everyone who came to the Twoonie Make and Take bar; all monies raised were donated to charity - Thank You! And a Big BIG thank you to everyone who kindly waited in line. I was overwhelmed by your response. As well let me extend my apologies who waited so patiently but I unfortunately ran out of supplies and time! I tried hard to put through 5-7 people at the make and take table at a time.


Now let me divulge the instructions for the card:

Prepare the card base:

First, cut a 6"x12" piece of sturdy cardstock (ie. Bazzill works wonderfully); this is the card base.

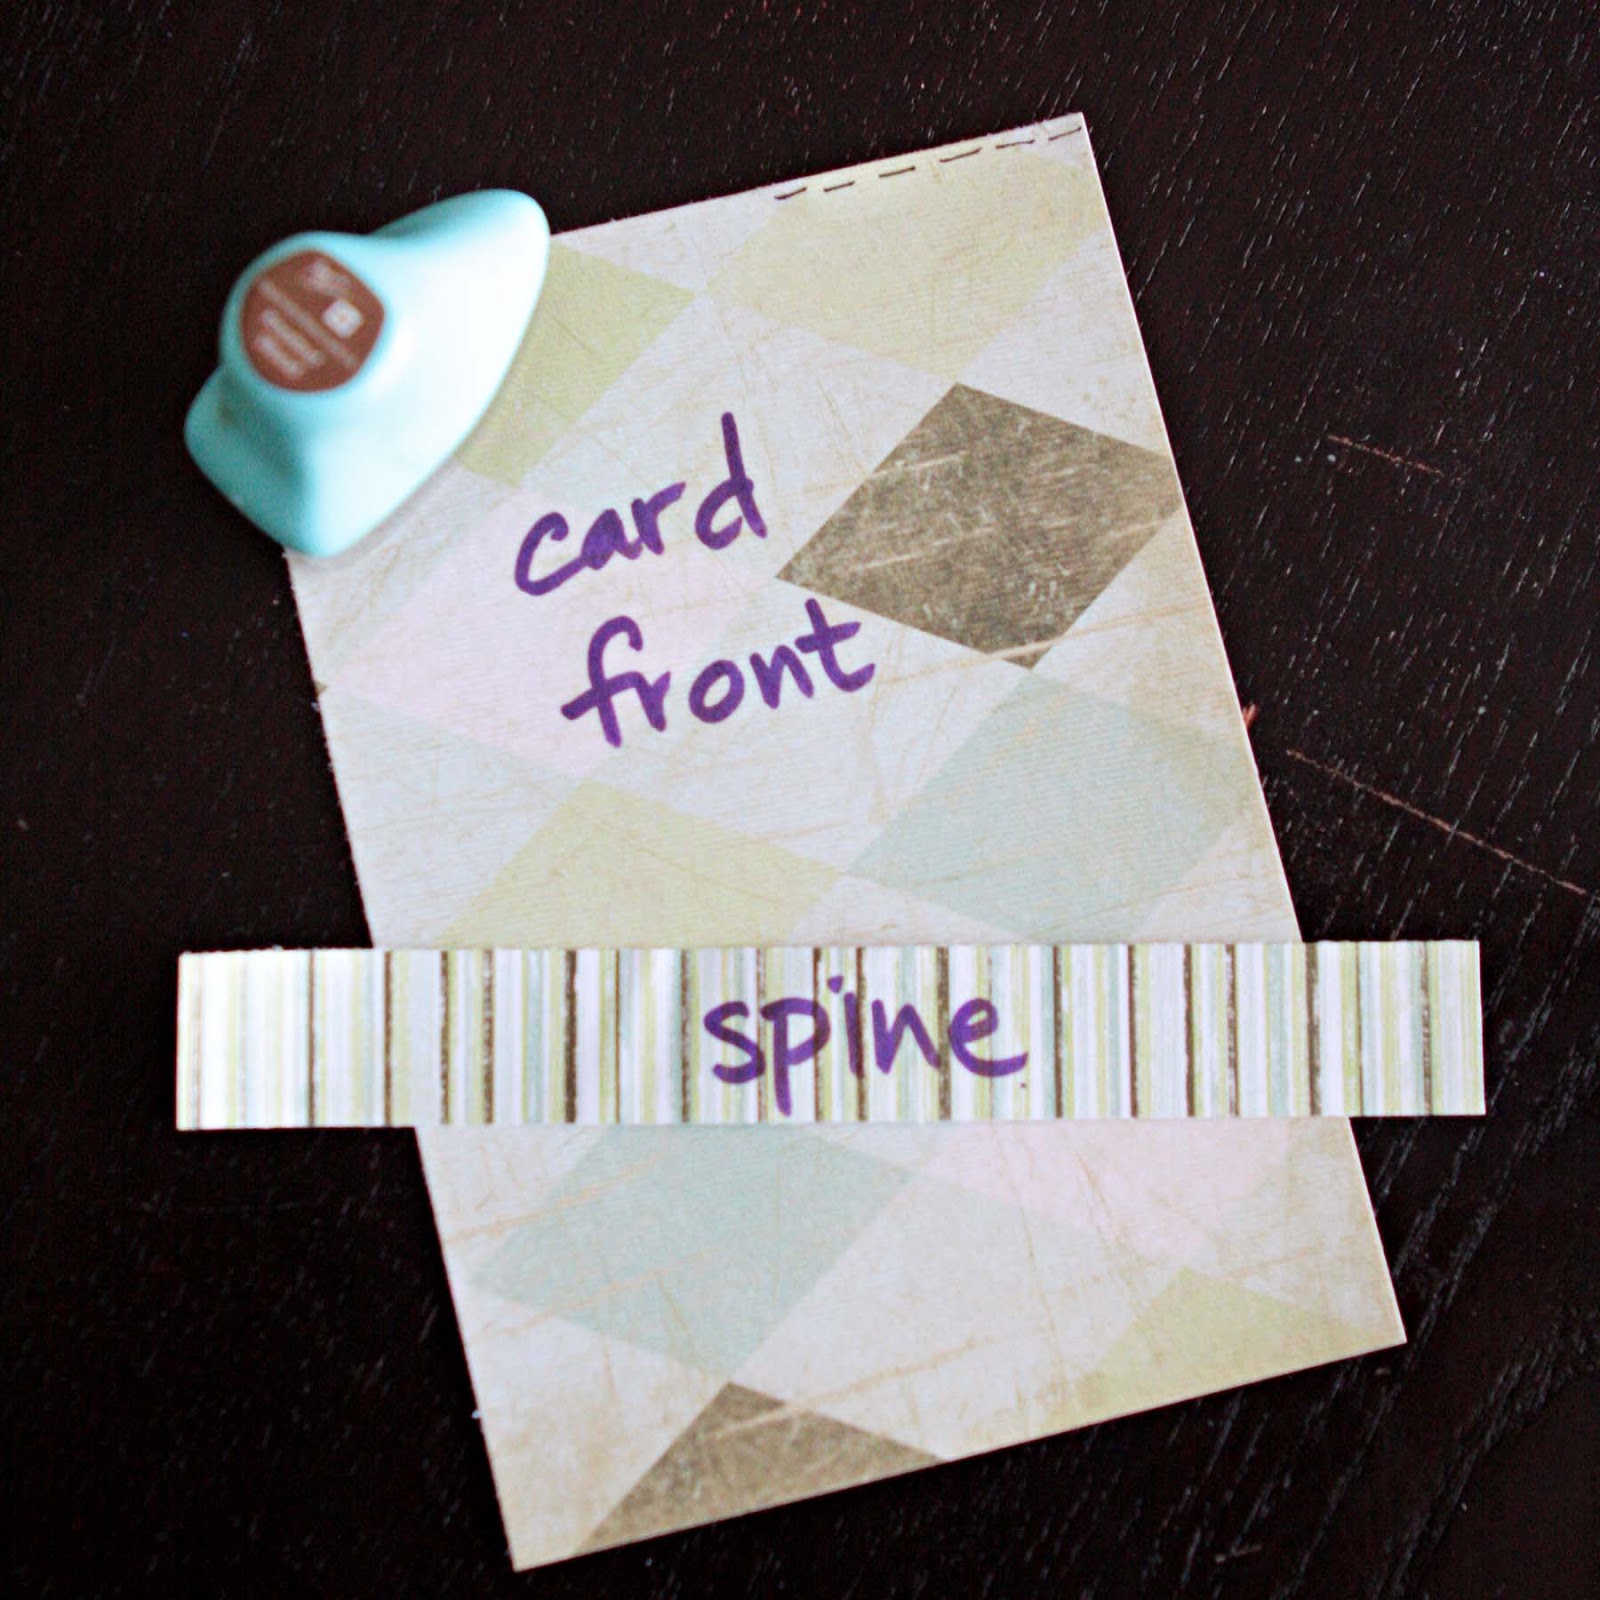
Score the cardstock at 4", 5" and 9" with your Scor-Pal or Scor-Buddy; this leaves a 3" overhang which folds over into a pocket to house your Christmas newsletter or a special note to the recipient. Refer to the image below.


Cut the matching pattern paper pieces:

Cut a 0.75" x 5.75" piece of pattern paper. Using a light hand, apply liquid chalk using the adorable Prima coloured liquid chalks and set aside.

Cut a 4"x6" coordinating piece of pattern paper for the card front. Using a light hand, apply liquid chalk using the Prima coloured liquid chalks and set aside.


Prepare the glittered image:

Next transfer the positive Elizabeth Craft Design sticker onto a sized piece of Sookwang tape. What works the best for me is to gently roll the entire sticker sheet until the positive edge of the sticker image pops up. Using a pair of tweezers, I slowly peel pack the positive sticker image. As I am right handed, the tweezer - positive sticker image combo is held in my right hand and my left index finger is "supporting" not holding the bottom of the sticker. I move the sticker over top of the Sookwang tape, gently remove my left supporting index finger and release my tweezers. The positive sticker image then flutters gently onto the tape - no bubbles, no wrinkles and for me, no tears!

As you can see from the image below, the positive images have been removed from the sticker sheet. On the Sookwang tape is the positive image of 2 snowmen.


Then apply the Glitter Ritz. This is glitter is micro ultra fine and is different from that of the ultra fine glitter offered by other manufacturers. It's properties allow you to colour the glitter with copics, stain it with Clearsnap Smooch and/or Ranger alcohol inks or draw on its surface with a Copics multi-liner pen.

Using your finger, burnish the glitter into the adhesive to (1) enhance and encourage the glitter sparkle and (2) reinforce the adhesive to the glitter. Then return the excess glitter to its container. A little goes a very long way. I did not even use 1/2 of a container after spending 2 days at the Carnival for the make and take and booth demonstrations!


Fussy cut the image and decorate as desired. I used the Clearsnap Smooch for the snowman's nose, coloured mitten with a Copics pen, coloured the broom fronds with a Copics Spica pen and covered the buttons and broomstick with Claudine Hellmuth acrylic paint. All items can be found in the Scrap Shotz store.

(There will be a subsequent tutorial detailing how to transfer the negative sticker image - yes, you can double the use of your stickers!)

Create the Christmas Trees:

Using Dee's Distinctively Dies, cut 2 sets of Christmas trees.

If desired, apply a very thin bead of glue (I used the Tsukineko Essential Glue Pad) along the bottom edge of the tree parts and dip into the Glitter Ritz to create the appearance of snow on the tree.

Assemble the tree parts from largest to smallest. In my sample, there are 2 different sized trees; this is done by using either less or more of the die cut tree pieces.

Using the Copics multi-liner pen, draw a dotted line around the tree pieces to create the illusion of stitching. The "stitching" adds a real charm to the images.

Set trees aside. Below is a close-up of the trees.


Die Cut the Sentiment:

Using the Whimsy stamp and matching die, stamp your sentiment onto a piece of coordinating cardstock. I used Memento ink because I am in serious love with the even ink on the image and the juiciness of the ink pad despite frequent use.

Then use the matching Whimsy die to cut the sentiment. Please note that the Whimsy Stamp and Die set has a unique and very accurate cutting system. This will be explained in a subsequent blog post/tutorial as the focus of this post is to recreate the Carnival Make and Take.


Set aside the stamped and now die cut sentiment.

Punch and Glitter the Background Clouds:

There is such versatility in the Sookwang adhesive and Glitter Ritz - here I layered white cardstock on top of the Sookwang tape. Then I used my Fiskars cloud punch and punched 2 cloud shapes.

Remove the tape backing, apply and burnish the Glitter Ritz to the cloud.

Similar to the die cut Christmas trees, use the Copics multi-liner pen to "stitch" around the cloud.


Set aside the glittered cloud shapes.

Die cut the photo frames:

Using 2 Spellbinders Labels17 dies, die cut 2 frames for the inserted photo. Please note that a subsequent blog post will be show how to die cut the frames using 2 or more dies to keep the focus on the creation of the Carnival Make and Take.

Set aside the 2 frames.

Assemble the Shadow Box Photo Card:

Adhere the cut and inked pattern pieces to the spine and front of the card.

Then glue the top and bottom edges of the 3" overhang to create a pocket.

Now adhere the trees, staggering one in front of the other. My sample has the smaller tree raised using pop dots.

Add the glittered and decorated snowman; again, I used pop dots on the snowman.

Adhere the die cut sentiment.

Adhere the glittered and "stitched" clouds.

Then layer the photo frames, with one frame pop dotted on top of the bottom frame.

Adhere 3 sides of the photo frame to the inside of the card. Trim and insert your photo.

Lastly, using the Claudine Hellmuth acrylic paint, add ornament (ie. balls) to the tree, buttons on the snowman and the broom stick. Let dry thoroughly; it takes between 10 and 15 minutes to dry.

Voila! You are finished!

Saturday, October 27, 2012

Premiere-ing Elizabeth Craft Designs at Scrap Shotz

The Elizabeth Craft Designs products, new to Scrap Shotz, literally flew off the tables, shelves and bins at the Carnival. Elizabeth (we're on first name basis ;-) ) has made beauty and elegance easy, quick and most importantly stunning!

Let me show you her products and how to use them. Here we have her foil stickers which come in a variety of colours, with silver and gold popular for Christmas themed projects, and black for the all-occassion. (All photos are courtesy of Rosie Neustaedter.)


Check out these beautiful items created by Carolyn Waldschmidt.  These snowman tags are so sweet.


And this cupcake card is a stunner! Yes, these snowmen and cupcake has been covered in micro ultra fine glitter; aren't the colours divine?


Watch for the Elizabeth Craft Design tutorial this week :-)


Wednesday, October 24, 2012

Debuted at the Carnival: Kaisercraft Advent Calendar

This stunning Kaisercraft Advent Calendar created by Rosie Neustaedter received lots and lots of oohs and aaahs at the Carnival.


Here are a few close-ups of the advent calendar. Look at all the special details Rosie added - absolutely beautiful! Rosie used the MME All is Bright paper line.


Thanks for sharing Rosie!

Monday, October 22, 2012

Carnival Happenings!

Thank you everyone for coming by the booth at the Carnival! We had a spectacular time and enjoyed everyone who stopped by for a chat. Here are a few photos of the weekend...(all photos are courtesy of Rosie Neustaedter - thank you Rosie!)

Here is a view of the booth - don't you love our pom poms??? :-)


Lots and lots of customers came by to learn how to use the Elizabeth Craft stickers and glitter...and copics...and Claudine Hellmut puff paints...and so on...Incidentally we sold out of the Elizabeth Craft stickers! Sandy is feverishly ordering more and bringing them in. (Later in the week will be a short tutorial on how to use and jazz up the stickers.)


A perennial favorite at the show are the advent calendars - can you see the Kaisercraft tree stunner that Rosie made? And our Simple Stories snap albums drew lots of attention too!


Customers streaming in for Scrap Shotz awesome-ness :-)


Stay tuned for some more photos this week!


Wednesday, October 10, 2012

Carnival Spoiler!!! ***New Product Alert***

I am SO darn excited to share this news with everyone! Scrap Shotz has been sleuthing the scrappy crafting world and you  how Sandy strives to have the latest and greatest in the store and available to you and me....well.....let me introduce you to some wonderful Elizabeth Craft Design products!


There is a real simplicity, elegance and beauty with these products. Soon we will even have a video for you! In the interim, check out these links and read more of my news below. (Do not be afraid of the steps - I have found a way to shorten the process significantly - LOL)

Let me just say that you can make STUNNING projects in minutes; you can use your copics to colour the glittered images as well as the Spica pens too! And don't let me forget, you can use the new Claudine Hellmutt paints, Clearsnap Smooch, Ranger Distress Inks and markers...and oh so much more!

http://www.youtube.com/watch?v=qSQSemwY45I
http://www.youtube.com/watch?v=W9jbDY12YYA


At the upcoming Carnival to be held on October 19 and 20th, I will be demo'ing these products and a few other new products. Join me in the booth for a 1-1 technique sharing and support a local charity by attending my Twoonie make n take - a Shadow Box Card. 

I hope to see you at the Carnival...and check the blog for upcoming posts on all the new products!

Tuesday, September 25, 2012

Scrapping with Scraps!

I have shared any "Scrapping with Scraps" inspiration in a bit and thought today would be the day to tackle some of those precious 3x3 scraps that I have been saving! Yes 'tis true, I save papers 3x3 and larger...and well, my offcuts bin is overflowing! Eeek!

Here is a super fast layout using some of those 3x3 scraps! Those clouds are punched from 3x3 scraps; the pattern paper blocks have been trimmed to fit and I carefully pieced together the title block of pattern paper. I am pretty happy I have slimmed up my offcuts bin!


Supplies: A previous monthly Scrap Shotz kit!


I'd love to see your ideas too!