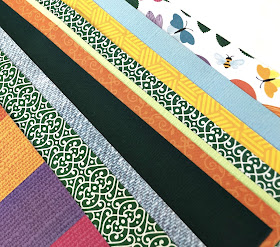
For this post I will show you how I made the actual album itself from the pattern and cardstock papers in the Kit - and in a few days, I will pop up another post to show you the finished album.
Step 1: Decide the size of your mini album. For this process, we are using 12x12 papers so you can go any size really - for a teeny weeny little 2x3 to a 6x12. I went with a 6x6 for a few reasons. I wanted it small but not too tiny, some of the embellishments and stickers are pretty big and I want to make sure I could use them all, this size only requires one cut, and you get 2 album pages (so technically 4 album layouts) from that one cut.
Step 2: Select your papers. I went through the Kit and chose all the papers that made me most happy and one of each coordinating card stock. The few papers I left behind will mat my photos in the album. Note, the more papers you pick the bigger the album / more pages the album will have. These are the A and B side of the papers I picked.
Step 3: Cut and score your papers. With a 6x6 album you want to cut the paper into 12x6 strips aka in half. For the pattern papers, pay attention to the pattern direction when you cut - some patterns only make sense one way (words, birds, flowers) so you need to cut so that when you fold the paper longways the pattern will make sense.
I used my trimmer to cut and score my papers. Cut: line up each paper to 6inches on your trimmer and slice - so you end up with a 6inches high and 12inches wide strip. Score: then turn the paper strip once and line it up to 6inches again on the board (so the very middle of the 12inches is dead centre on the cutting blade channel). Then use a ruler edge or scoring bone or if you trimmer has a score piece - score the paper.
Do this for every pattern you picked. Each 6inches x 12inches scored paper will make 4 layouts in your album.
Step 4: Assemble your album. Take all those papers you cut and scored and stack them and fold them in half like a book. Sometimes first folding each paper in half before you stack them and fold makes it a little easier - especially with card stock. The paper on the very bottom will become your front and back cover so pick that one with care, and the paper on the top will be a very pretty double layout at the centre of your book, so pick that one special too.
Flip through the book a few times to see if you like the order of patterns and colours - switching papers around as your heart desires. Once the album is in the order you want, bind the album.
If you have a long arm stapler you can staple the spine (unfold and flatten the book making sure your cover is on the top when you staple - so the pokey part of the staples are on the inside of the album). I don’t have a stapler, so I use an elastic around the middle where the score is or a few wraps of twine. The twine on the edge is a neat touch and looks pretty on the shelf.
Step 5 - OPTIONAL! Prep the pages with the theme you want for your album. Before adding photos or embellishments or anything, I like to bring a touch of a theme to my mini albums. For this mini, it’s a wee gift for my nephew about our pup. So I used a Peartree Cutfiles Stencil of little Doggy Paw Prints and various Tim Holtz, Distress Inks in a coordinating colour to bring a subtle tone on tone dog paw pattern to most of the album pages.
Next step is to make a whole bunch of mini-layouts to fill your album - the really fun part! I will share my process and the final album next blog post.


No comments:
Post a Comment