Thursday, December 27, 2018

Product Reveal 2

Hello crafty friends!

I'm happy to share with you my second product reveal posting.
I used Cool Yule die set, Stacked tags die set and Kaleidoscope 3-D embossing folder by Sizzix.

This is my first project.


Watercolouring is one of my favourite technique. 
For create these cards, I die cut the pieces and coloured with Kuretake watercolours using water brush. And added some ink splatters.


And adhere the pieces with glue pen. 


For the background, I embossed with Kaleidoscope 3-D embossing folder and blended the edges with Peacock feathers and picked raspberry Distress Oxide inks with mini blending tools.


Die cut the tags and blended the edges with dried marigold Distress ink using mini blending tool and added some ink splatters. 
I mounted all elements as shown a top-folded card using double-sided tape.


My second project is made in patchwork style card.


For create this card, I cut the background paper and die cut some shape papers and blended the edges with peacock feather distress oxide ink and dried marigold ink using mini blending tools.


I die cut the pieces with Cool Yule die set and blended the edges with evergreen bough, pumice stone, dried marigold and picked raspberry Distress inks with mini blending tools.


I assembled the pieces with glue pen and adhere on the shape papers using double-sided foam tape.


Thanks so much for stopping by and have a wonderful day!

Wednesday, December 26, 2018

All Bundled Up| Scrap Shotz December Kit


Hello!

Happy Boxing Day!

Rosie here to share my first project using the latest Scrap Shotz scrapbook kit. The kit features the lovely winter themed Carta Bella Let It Snow line.


I began this layout by inking the white card stock with MFT Snow Flurry stencil with Distress oxide inks in Salty Ocean and Chipped Sapphire. Various sizes of hexagons were die cut from  patterned papers, along with a couple of photos.


I also die cut one of the journal cards from the cut apart sheet. After arranging and adhering the die cuts pieces and photos, I cut the sticker border from the 12x12 sticker sheet and placed on the layout.

Then I added various stickers and chipboard, adhering some with foam adhesive to add dimension.

A few of the berry add-ons are tucked in behind the stickers and photo. For the final touch I glued the TH snowflake charms and embellished them with an enamel dot.

I will be back later this week with a closer look at the kit and more projects.

Thanks for stopping by! 


Friday, December 21, 2018

Product Reveal

Hello crafty friends!

Today, I am happy to share my project reveal posting. 
I used Cool Yule die set, Stacked tags die set and Kaleidoscope 3-D embossing folder by Sizzix.

First, I made a card using Cool Yule die set and Kaleidoscope 3-D embossing folder by Sizzix.


This die set is really awesome! Just die cut and adhere, you can make awesome embellishment to fit anything. 
I choose the cute Santa and die cut the pieces, blended the edges with dried marigld distress ink using mini blending tool and adhere with Zig glue pen.


I embossed with the embossing folder and grey card stock. And cut the paper with paper trimmer. I mounted all elements as shown navy color based top-folded card with double-sided tape and added blue gem stones. For Santa, I used double-sided foam tape.

Tag set is my second project.


For create this tag set, I die cut three tags with Stacked tags die set in different size. And blended the cut papers edges with evergreen bough and dried marigld distress inks using mini blending tool .


I die cut the pieces for deer, penguin and snowman and adhere with Zig glue pen.
And adhere on the tag with double-sided tape.


I added kraft ring rabel and trim.


Today's last project is 12x12 layout.


I decided to use the December Sketch from the Creative Scrapbooker Sketchy Challenge .
For this layout first, I blended the edges with evergreen bough distress ink uisng mini blending tool. I choose a Christmas photo and cut it 4x4 . 
I cut Christmas papers with paper trimmer and embossed with Kaleidoscope 3-D embossing folder. And adhere the papers on the layout.


I die cut all pieces with Cool Yule die set and various colored papers and adhere the pieces with glue pen. I adhere the handmade embellishments on the layout.


This is this month sketch.
I think it is so beautiful!. Please visit for detail.


Thanks so much for stopping by and have a wonderful day!


Thursday, December 13, 2018

Scrap Shotz Design Team Call


We are looking for 2-4 experienced and diverse designers to work with both our monthly scrapbook kit and store products. If you are a creative individual, able to work under tight deadlines and have a strong social media presence, then we want to meet you!

Design Team Responsibilities

1.    6 month term beginning January 15, 2019through to June 15, 2019
2.    Create a minimum of 3-5 projects with either monthly kit or store products as assigned by Scrap Shotz.
3.    Two blog posts must be created per month according to the scheduled due date. One post showcasing photos, tips and techniques. The second post, a step-by-step photo tutorial or process video illustrating the project.
4.    Actively promote Scrap Shotz through all social media including Facebook, Instagram and updated personal blog.

To Apply:

Please submit the following to scrapshotz.dtcalls@gmail.com

1.    Vitals: Name, address, phone number, email address
2.    Social Media ID: Blog URL, Facebook Name, Instagram Name, links to online galleries. Significant social media presence and following is a huge asset.
3.    Photos of 3-5 recently created projects that clearly showcase your style.
4.    Please share your past and current design teams as well as your current commitments.
5.    Tell us how you would promote our kit club and online store through social media.
6.    In the subject line, please include “YourNAME-Designer

Monthly Compensation (approx.$50-$75 retail value)

1.    One Scrap Shotz primary monthly kit plus selected kit add-ons OR equivalent store product.
2.    Online store discount on other purchases.

Applications due by midnight MST (Mountain Standard Time) December 30, 2018. Due to shipping and time constraints call is open to Canadian designers only.

DT invitations will be extended January 2, 2019 with acceptances due by January 5, 2019.

We appreciate the time and attention taken by all applicants in their submissions-best wishes to everyone!

Thursday, December 6, 2018

November Kit - A Layout & Card Gift Set

Hi friends! Karla here today with two more projects using the gorgeous Scrap Shotz November Kit Club featuring the Jen Hadfield Along The Way Collection. If you haven't already checked out the last two layouts I created with it, be sure to get the details, along with a process video HERE. This will be the third layout I put together and I love that the beautiful colours and designs can go with so many different themes!


I decided to use the December Sketch from the Creative Scrapbooker Sketchy Challenge and created a circular pattern with the shiny blue Kaisercraft Glitter Tape in the kit. I created a gathered effect by folding it back and forth and then using my sewing machine to stitch through it. 


There are so many pretty cards in the 3x4 cut apart sheet included with the patterned papers, and I decided to use an oval die to cut out the light teal card and fussy cut the house from another card (below). I also fussy cut the butterflies from the sheet of butterfly patterned paper and used lots of the diecut ephemera, buttons, stickers and enamel dots from the kit to create a wreath look on my layout.


The pretty gold foil on the framed Happy Day sticker coordinates wonderfully with the Gold Foil Puffy Letter Thickers and the foiled sentiment on the word sticker! I even used some square and circle stitched dies to diecut various black and white elements to tuck behind the glitter tape.


Next, I decided to make a 6 card set to give as a gift to one of my daughter's teachers at Christmas. I used the patterned paper sheet of sentiments and since I was on the wreath kick 😉 I decided to keep it going! I wanted to keep these fairly basic and they didn't take me long to do at all. I layered leftover bits of paper, even using the pretty branding strips, to create themed cards. I added some Zig Clean Color Real Brush Marker to the front of the sentiment wreaths, which I cut out with a stitched circle die, and softened some of them with my waterbrush. I even coordinated the inside of the card, which you can see beside each card front below, to match! I know the teacher is going to love having these handmade cards ready to give out to her own friends!


Even after creating three layouts and six cards I still have lots of product left over from this kit! Thanks so much for stopping by today. Be sure to check out the whole Kit Reveal post HERE for closeups and a video! You can find the kit at the Scrap Shotz store here, and pick up any fun Kit Add-Ons here. I hope you have as much fun playing with these goodies as I have!

Wednesday, December 5, 2018

New Scrap Shotz December Challenge

Hello Scrap Shotz Friends!
A new month is upon us which means a new sketch and mood board challenge for a chance to win a $15 gc to the Scrap Shotz store! Our fabulous DT member Laura has created another great sketch:


Along with this lovely Christmas season themed mood board:

Which will work wonderfully with the December Scrap Shotz kit featuring Let It Snow by Carta Bella. 

Rules are as follows:
*must be new and created for this challenge
*paper only
*cards, layouts and OTP projects welcomed
*must be uploaded to the blog post, facebook, or Instagram by midnight December 31 MST
*tag your project in IG with #scrapshotzchallenge

Here's my layout based on the sketch:


I've been looking forward to using the Photoplay O Canada Christmas and it worked perfectly with this photo and sketch.

The 3D snowflake is made using the Tim Holtz Sizzix Rosette Snowflake die. Die cut snowflakes are created with the Tim Holtz Snowflake thinlets dies and a Martha Stewart snowflake punch (gold and white snowflakes).
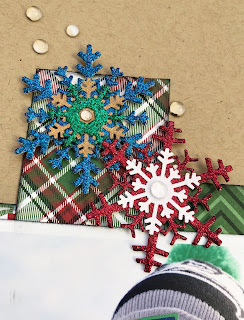
Snowflakes and layout are embellished with Studio Katia clear drops.

Looking forward to seeing your creations inspired by the sketch or the mood board!

Happy crafting!


Saturday, December 1, 2018

November Kit Reveal - Layouts and Video!

Hello friends! Karla back today with two layouts using the beautiful Scrap Shotz November Kit Club featuring the Jen Hadfield Along The Way Collection. I love that this kit can be used for photos throughout the year, and I decided to finally get my maternity pics scrapped! I really love the soft colours in this collection and felt they really made my photos shine.


Here's a look at the video where you can see how I put it all together!


And some closeups:

I'm using a sketch I found on Instagram and I love how the beautiful papers look layered together. I used a 3x4 card from the cut apart page to add a pretty sentiment and then popped up one of the adorable diecut ephemera. 


The wood buttons are so sweet and perfect to add detail and texture to the page. I tucked in a few sentiment stickers from the sticker pack filled with three sheets of phrases and words. The little diecut girl is just so cute!!


I added the gold foil puffy stickers from the kit in a circular pattern for my title and added a cute heart covered with the beautiful Kaisercraft sparkly tape in the kit. Be sure to check out the video to see how I do this!


For the second layout I used a sketch from Pagemaps. I love starting with a sketch and finding creative ways to layer. 


The pretty gold foil diecuts are perfect to add colour to if you want so I used my Zig Clean Color Real Brush Markers to colour in the flowers and leaves for a lovely effect.


I used a stitched circle diecut to cut a sentiment from one of the 12x12 patterned papers and then used my Zig Markers again to colour in the leaves. I added some black sparkly letters from my stash to the beautiful gold Thickers from the kit to complete my title.


I really love the little wooden framed stickers included with the kit! I layered one over the sweet girl diecut and added some sequins and a diecut star covered with the Kaisercraft sparkly blue tape from the kit. The tiny enamel dots in the sticker pack are just right for adding an extra touch to the page!


Thanks so much for stopping by! Be sure to check out the previous blog post HERE for a closeups and photos of the whole Kit Reveal! You can find the kit at the Scrap Shotz store here, and pick up any fun Kit Add-Ons here. Have an awesome, crafty weekend friends!